1. ആമുഖം
This manual provides essential information for the safe and efficient operation of your Crosley WR18 Mini Bubbler Jukebox. Please read these instructions thoroughly before using the unit and retain them for future reference.
The Crosley WR18 is a reproduction of a 1946-style jukebox, featuring percolating bubble tubes, neon lights, a front-loading compact disc player, FM radio, and stereo speakers. It is operated primarily via a 12-button remote control.
2. സുരക്ഷാ നിർദ്ദേശങ്ങൾ
- മഴയോ ഈർപ്പമോ യൂണിറ്റ് തുറന്നുകാട്ടരുത്.
- വെൻ്റിലേഷൻ ഓപ്പണിംഗുകളൊന്നും തടയരുത്.
- യൂണിറ്റ് സുസ്ഥിരവും നിരപ്പും ഉള്ള പ്രതലത്തിൽ സ്ഥാപിച്ചിട്ടുണ്ടെന്ന് ഉറപ്പാക്കുക.
- മിന്നൽ കൊടുങ്കാറ്റുകളുടെ സമയത്തോ ദീർഘകാലത്തേക്ക് ഉപയോഗിക്കാത്ത സമയത്തോ യൂണിറ്റ് അൺപ്ലഗ് ചെയ്യുക.
- എല്ലാ സേവനങ്ങളും യോഗ്യതയുള്ള സേവന ഉദ്യോഗസ്ഥർക്ക് റഫർ ചെയ്യുക.
3. സജ്ജീകരണം
3.1 അൺപാക്കിംഗും പ്ലേസ്മെന്റും
Carefully remove the jukebox from its packaging. Place the unit on a flat, stable surface away from direct sunlight, heat sources, and excessive dust or moisture. Ensure there is adequate space around the unit for ventilation.
3.2 പവർ കണക്ഷൻ
Connect the AC power cord to the power input on the back of the unit, then plug it into a standard wall outlet. The unit is designed for 120V AC, 60Hz power supply.
3.3 വിദൂര നിയന്ത്രണ സജ്ജീകരണം
Insert two AAA batteries (not included) into the remote control, observing the correct polarity. The remote control is essential for operating most functions of the jukebox.
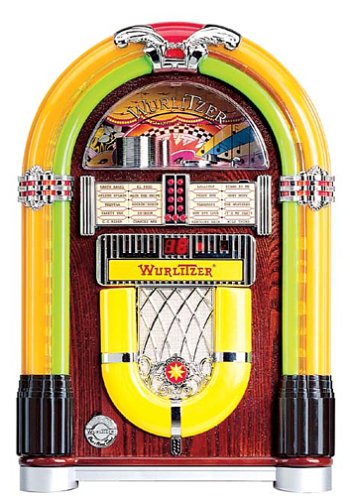
ചിത്രം 1: ഫ്രണ്ട് view of the Crosley WR18 Mini Bubbler Jukebox. This image shows the main unit with its distinctive bubble tubes, neon lights, and speaker grilles. The CD player slot is visible below the main display area.
4. പ്രവർത്തന നിർദ്ദേശങ്ങൾ
4.1 പവർ ഓൺ/ഓഫ്
അമർത്തുക പവർ യൂണിറ്റ് ഓണാക്കാനോ ഓഫാക്കാനോ റിമോട്ട് കൺട്രോളിലെ ബട്ടൺ.
4.2 സിഡി പ്ലെയർ പ്രവർത്തനം
- അമർത്തുക CD button on the remote to select CD mode.
- അമർത്തുക തുറക്കുക/അടയ്ക്കുക button on the remote to open the CD tray.
- Place a compact disc, label side up, into the tray.
- അമർത്തുക തുറക്കുക/അടയ്ക്കുക again to close the tray. The unit will begin reading the disc.
- ഉപയോഗിക്കുക പ്ലേ/താൽക്കാലികമായി നിർത്തുക പ്ലേബാക്ക് ആരംഭിക്കുന്നതിനോ താൽക്കാലികമായി നിർത്തുന്നതിനോ ഉള്ള ബട്ടൺ.
- ഉപയോഗിക്കുക ഫോർവേഡ് ഒഴിവാക്കുക (|>>) അല്ലെങ്കിൽ പിന്നോട്ട് പോകുക (<<|) buttons to navigate between tracks.
- ദി പ്രോഗ്രാം function allows you to create a custom playback order for tracks. Refer to the remote control diagram for specific programming steps.
- ദി ആവർത്തിക്കുക function allows you to repeat the current track or the entire disc.
4.3 എഫ്എം റേഡിയോ പ്രവർത്തനം
- അമർത്തുക FM button on the remote to select FM radio mode.
- Extend the external FM antenna located at the back of the unit for optimal reception. Adjust its position for clearer sound.
- ഉപയോഗിക്കുക ട്യൂൺ അപ്പ് (+) അല്ലെങ്കിൽ ട്യൂൺ ഡൗൺ ചെയ്യുക (-) buttons on the remote to manually tune to desired radio stations.
4.4 വോളിയം നിയന്ത്രണം
ഉപയോഗിച്ച് വോളിയം ക്രമീകരിക്കുക വോളിയം കൂട്ടുക (+) കൂടാതെ വോളിയം ഡൗൺ (-) buttons on the remote control. Note that all volume adjustments are made via the remote.
4.5 Neon Lights and Bubble Tubes
The genuine multicolored neon lights and percolating bubble tubes activate automatically when the unit is powered on, enhancing the retro aesthetic. There are no separate controls for these features.
5. പരിപാലനം
5.1 കാബിനറ്റ് വൃത്തിയാക്കൽ
Wipe the handcrafted hardwood cabinet with a soft, dry cloth. For stubborn marks, a slightly damp തുണി ഉപയോഗിക്കാം, തുടർന്ന് ഉടനടി ഉണക്കുക. ഉരച്ചിലുകൾ ഉണ്ടാക്കുന്ന ക്ലീനറുകളോ ലായകങ്ങളോ ഒഴിവാക്കുക.
5.2 സിഡി പ്ലെയർ കെയർ
To ensure optimal performance, keep the CD tray and lens clean. Use a specialized CD lens cleaner disc periodically. Avoid touching the CD lens directly.
5.3 Bubble Tubes and Neon Lights
The bubble tubes and neon lights are sealed units and require no user maintenance. If any issues arise with these components, contact customer support.
6. പ്രശ്നപരിഹാരം
| പ്രശ്നം | സാധ്യമായ കാരണം | പരിഹാരം |
|---|---|---|
| ശക്തിയില്ല | പവർ കോർഡ് ബന്ധിപ്പിച്ചിട്ടില്ല; ഔട്ട്ലെറ്റ് സജീവമല്ല | പവർ കോർഡ് സുരക്ഷിതമായി പ്ലഗ് ഇൻ ചെയ്തിട്ടുണ്ടെന്ന് ഉറപ്പാക്കുക; മറ്റൊരു ഉപകരണം ഉപയോഗിച്ച് ഔട്ട്ലെറ്റ് പരിശോധിക്കുക. |
| ശബ്ദമില്ല | Volume too low; incorrect mode selected | Increase volume using remote; ensure correct mode (CD/FM) is selected. |
| സിഡി പ്ലേ ചെയ്യുന്നില്ല | Disc inserted incorrectly; disc dirty/scratched; CD mode not selected | Reinsert disc correctly; clean disc; select CD mode. |
| മോശം എഫ്എം സ്വീകരണം | Antenna not extended/positioned correctly | Fully extend and adjust the external FM antenna. |
| റിമോട്ട് കൺട്രോൾ പ്രവർത്തിക്കുന്നില്ല | Batteries depleted; line of sight blocked; remote malfunction | Replace batteries; ensure no obstructions between remote and unit; if remote remains unresponsive, contact customer support as many functions are remote-only. |
7 സ്പെസിഫിക്കേഷനുകൾ
- മോഡൽ നമ്പർ: WR18
- ഉൽപ്പന്ന അളവുകൾ: 12 x 22 x 16 ഇഞ്ച് (വീതി x ഉയരം x ആഴം)
- ഇനത്തിൻ്റെ ഭാരം: 16.8 പൗണ്ട്
- നിർമ്മാതാവ്: ക്രോസ്ലി റേഡിയോ
- ഓഡിയോ സവിശേഷതകൾ: Stereo sound with two 4-inch speakers and built-in ampജീവപര്യന്തം
- മീഡിയ പ്ലേബാക്ക്: CD player with program and repeat functions, FM radio with external antenna
- സൗന്ദര്യാത്മക സവിശേഷതകൾ: Handcrafted hardwood cabinet, genuine multicolored neon lights, bubble tube accents
- നിയന്ത്രണം: 12-button mini jukebox remote control
8. വാറൻ്റിയും പിന്തുണയും
The Crosley WR18 Mini Bubbler Jukebox typically comes with a manufacturer's warranty. Based on user reports, the Crosley warranty period is 90 days. Please note that for warranty service, you may be responsible for shipping the unit back to the manufacturer and an additional fee for return shipping and handling after repair.
For technical support, warranty claims, or service inquiries, please contact Crosley Radio customer service directly. Refer to the contact information provided with your product packaging or visit the official Crosley webഏറ്റവും പുതിയ പിന്തുണ വിശദാംശങ്ങൾക്കായുള്ള സൈറ്റ്.