Laney A1
Laney A1 65-Watt Acoustic Ampലൈഫ്ഫയർ യൂസർ മാന്വൽ
മോഡൽ: A1
1. ആമുഖം
വാങ്ങിയതിന് നന്ദി.asing the Laney A1 65-Watt Acoustic Ampലൈഫയർ. ഈ amplifier is designed to provide clear, natural amplification for acoustic instruments and vocals, featuring versatile input options, digital effects, and a robust build. Please read this manual thoroughly to understand all features and ensure safe operation.

ചിത്രം 1: മുൻഭാഗം view of the Laney A1 Acoustic Ampലിഫയർ, ഷോക്asing its control panel and speaker grille.
2. പ്രധാന സുരക്ഷാ നിർദ്ദേശങ്ങൾ
- ഈ നിർദ്ദേശങ്ങൾ വായിക്കുക.
- ഈ നിർദ്ദേശങ്ങൾ സൂക്ഷിക്കുക.
- എല്ലാ മുന്നറിയിപ്പുകളും ശ്രദ്ധിക്കുക.
- എല്ലാ നിർദ്ദേശങ്ങളും പാലിക്കുക.
- വെള്ളത്തിനടുത്ത് ഈ ഉപകരണം ഉപയോഗിക്കരുത്.
- ഉണങ്ങിയ തുണി ഉപയോഗിച്ച് മാത്രം വൃത്തിയാക്കുക.
- വെന്റിലേഷൻ തുറസ്സുകളൊന്നും തടയരുത്. നിർമ്മാതാവിന്റെ നിർദ്ദേശങ്ങൾക്കനുസൃതമായി ഇൻസ്റ്റാൾ ചെയ്യുക.
- റേഡിയറുകൾ, ഹീറ്റ് രജിസ്റ്ററുകൾ, സ്റ്റൗകൾ, അല്ലെങ്കിൽ മറ്റ് ഉപകരണങ്ങൾ (ഉൾപ്പെടെ) പോലെയുള്ള താപ സ്രോതസ്സുകൾക്ക് സമീപം ഇൻസ്റ്റാൾ ചെയ്യരുത്. ampലൈഫയറുകൾ) ചൂട് ഉത്പാദിപ്പിക്കുന്നത്.
- പോളറൈസ്ഡ് അല്ലെങ്കിൽ ഗ്രൗണ്ടിംഗ്-ടൈപ്പ് പ്ലഗിൻ്റെ സുരക്ഷാ ഉദ്ദേശ്യത്തെ പരാജയപ്പെടുത്തരുത്. ധ്രുവീകരിക്കപ്പെട്ട പ്ലഗിന് രണ്ട് ബ്ലേഡുകൾ ഉണ്ട്, ഒന്ന് മറ്റൊന്നിനേക്കാൾ വീതിയുള്ളതാണ്. ഒരു ഗ്രൗണ്ടിംഗ് ടൈപ്പ് പ്ലഗിന് രണ്ട് ബ്ലേഡുകളും മൂന്നാമത്തെ ഗ്രൗണ്ടിംഗ് പ്രോംഗും ഉണ്ട്. നിങ്ങളുടെ സുരക്ഷയ്ക്കായി വിശാലമായ ബ്ലേഡ് അല്ലെങ്കിൽ മൂന്നാമത്തെ പ്രോംഗ് നൽകിയിരിക്കുന്നു. നൽകിയിരിക്കുന്ന പ്ലഗ് നിങ്ങളുടെ ഔട്ട്ലെറ്റിലേക്ക് യോജിക്കുന്നില്ലെങ്കിൽ, കാലഹരണപ്പെട്ട ഔട്ട്ലെറ്റ് മാറ്റിസ്ഥാപിക്കുന്നതിന് ഒരു ഇലക്ട്രീഷ്യനെ സമീപിക്കുക.
- പ്രത്യേകിച്ച് പ്ലഗുകൾ, കൺവീനിയൻസ് റിസപ്റ്റക്കിളുകൾ, ഉപകരണത്തിൽ നിന്ന് പുറത്തുകടക്കുന്ന പോയിൻ്റ് എന്നിവയിൽ നടക്കുകയോ പിഞ്ച് ചെയ്യുകയോ ചെയ്യുന്നതിൽ നിന്ന് പവർ കോർഡ് സംരക്ഷിക്കുക.
- നിർമ്മാതാവ് വ്യക്തമാക്കിയ അറ്റാച്ച്മെൻ്റുകൾ/ആക്സസറികൾ മാത്രം ഉപയോഗിക്കുക.
- നിർമ്മാതാവ് വ്യക്തമാക്കിയ കാർട്ട്, സ്റ്റാൻഡ്, ട്രൈപോഡ്, ബ്രാക്കറ്റ് അല്ലെങ്കിൽ ടേബിൾ എന്നിവയ്ക്കൊപ്പം മാത്രം ഉപയോഗിക്കുക, അല്ലെങ്കിൽ ഉപകരണം ഉപയോഗിച്ച് വിൽക്കുക. ഒരു കാർട്ട് ഉപയോഗിക്കുമ്പോൾ, ടിപ്പ്-ഓവറിൽ നിന്നുള്ള പരിക്ക് ഒഴിവാക്കാൻ വണ്ടി/ഉപകരണ കോമ്പിനേഷൻ നീക്കുമ്പോൾ ജാഗ്രത പാലിക്കുക.
- മിന്നൽ കൊടുങ്കാറ്റുകളുടെ സമയത്തോ ദീർഘനേരം ഉപയോഗിക്കാത്ത സമയത്തോ ഈ ഉപകരണം അൺപ്ലഗ് ചെയ്യുക.
- എല്ലാ സേവനങ്ങളും യോഗ്യതയുള്ള സേവന ഉദ്യോഗസ്ഥർക്ക് റഫർ ചെയ്യുക. പവർ സപ്ലൈ കോർഡ് അല്ലെങ്കിൽ പ്ലഗ് കേടാകുക, ദ്രാവകം ഒഴുകുകയോ ഉപകരണങ്ങൾ ഉപകരണത്തിലേക്ക് വീഴുകയോ ചെയ്യുക, ഉപകരണം മഴയോ ഈർപ്പമോ സമ്പർക്കം പുലർത്തുക, സാധാരണയായി പ്രവർത്തിക്കാത്തത് എന്നിങ്ങനെയുള്ള ഏതെങ്കിലും വിധത്തിൽ ഉപകരണത്തിന് കേടുപാടുകൾ സംഭവിക്കുമ്പോൾ സേവനം ആവശ്യമാണ്. , അല്ലെങ്കിൽ ഉപേക്ഷിച്ചു.
3. സജ്ജീകരണം
Follow these steps to set up your Laney A1 ampജീവപര്യന്തം:
- പ്ലേസ്മെൻ്റ്: സ്ഥാപിക്കുക amplifier on a stable, flat surface. The Laney A1 features a tilt-back design, allowing it to be angled upwards for better sound projection towards the performer. Ensure adequate ventilation around the unit.
- പവർ കണക്ഷൻ: ഉറപ്പാക്കുക amplifier's power switch is in the OFF position. Connect the supplied power cord to the AC inlet on the rear of the amplifier and then to a suitable grounded electrical outlet.
- ഉപകരണ കണക്ഷൻ:
- For acoustic instruments with a standard 1/4" output, connect your instrument to the Instrument Input (Jack).
- For microphones, connect an XLR cable from your microphone to the XLR Jack (Mic Channel).
- For high-impedance sources, connect to the HiZ Jack (Mic Channel).
- ബാഹ്യ ഉപകരണങ്ങൾ (ഓപ്ഷണൽ):
- To connect an external audio player (e.g., CD player, smartphone) for backing tracks, use the സിഡി ഇൻപുട്ട്.
- For connecting external effects pedals, use the FX ലൂപ്പ് അയയ്ക്കുക ഒപ്പം മടങ്ങുക ജാക്കുകൾ.
- For direct connection to a mixing console or PA system, use the DI Socket.
- ഹെഡ്ഫോണുകൾ: For silent practice, connect headphones to the ഹെഡ്ഫോൺ ഔട്ട്പുട്ട്. This will mute the main speaker.
- പവർ ഓൺ: Once all connections are made, switch the amplifier's power to the ON position.
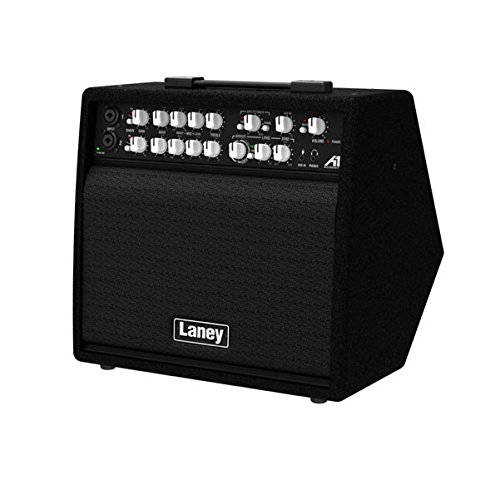
ചിത്രം 2: കോണാകൃതിയിലുള്ളത് view of the Laney A1, highlighting the input jacks and control knobs for various channels.
4. നിയന്ത്രണങ്ങളും പ്രവർത്തനങ്ങളും
The Laney A1 features a comprehensive control panel designed for intuitive operation:
4.1. Instrument Channel (Channel 1)
- ഉപകരണ ഇൻപുട്ട്: 1/4" jack for connecting acoustic guitars, violins, mandolins, etc.
- വോളിയം: Controls the overall output level of the instrument channel.
- ബാസ്: Adjusts the low-frequency response of the instrument channel.
- മധ്യഭാഗം: Adjusts the mid-frequency response of the instrument channel.
- ട്രെബിൾ: Adjusts the high-frequency response of the instrument channel.
4.2. Mic Channel (Channel 2)
- XLR ജാക്ക്: For connecting dynamic or condenser microphones.
- HiZ Jack: For connecting high-impedance sources, such as passive pickups or certain line-level devices.
- വോളിയം: Controls the overall output level of the microphone channel.
- ബാസ്: Adjusts the low-frequency response of the microphone channel.
- മധ്യഭാഗം: Adjusts the mid-frequency response of the microphone channel.
- ട്രെബിൾ: Adjusts the high-frequency response of the microphone channel.
4.3. Effects Section
- ഇഫക്റ്റ് തരം: Rotary switch to select one of the 16 custom digital effects.
- Effect Level: Controls the amount of the selected effect applied to the signal.
4.4. മാസ്റ്റർ വിഭാഗം
- മാസ്റ്റർ വോളിയം: യുടെ മൊത്തത്തിലുള്ള ഔട്ട്പുട്ട് വോളിയം നിയന്ത്രിക്കുന്നു ampജീവൻ.
- മ്യൂട്ട് സ്വിച്ച്: Mutes the main speaker output. Useful for silent tuning or switching instruments.
- DI Socket: XLR output for direct connection to a mixing console or recording interface. Provides a balanced signal.
- സിഡി ഇൻപുട്ട്: Stereo RCA input for connecting external audio sources like CD players or MP3 players.
- ഹെഡ്ഫോൺ ഔട്ട്പുട്ട്: 1/4" stereo jack for connecting headphones. Mutes the main speaker when in use.
- എഫ്എക്സ് ലൂപ്പ് (അയയ്ക്കുക/തിരിച്ചു നൽകുക): 1/4" jacks for integrating external effects processors into the signal chain.
- അയയ്ക്കുക: Outputs the signal to your external effect.
- മടക്കം: Receives the processed signal back from your external effect.
- വൈദ്യുതി സ്വിച്ച്: തിരിയുന്നു ampലൈഫയർ ഓൺ അല്ലെങ്കിൽ ഓഫ്.
5 പ്രധാന സവിശേഷതകൾ
- Tilt-Back Design: The cabinet is designed to be tilted back, allowing the sound to project upwards towards the performer, improving monitoring in live situations.
- മൂന്ന് ചാനലുകൾ: Dedicated channels for Instrument (1/4" Jack), XLR Microphone, and HiZ Microphone inputs provide versatile connectivity for various acoustic setups.
- 16 Custom Digital Effects: A range of high-quality digital effects are built-in, including reverbs, delays, chorus, and more, allowing you to enhance your sound without external pedals.
- സമഗ്രമായ കണക്റ്റിവിറ്റി: Includes a DI socket for direct output to a PA or recording device, a CD input for backing tracks, a headphone output for silent practice, and an FX loop for integrating external effects.
6. പരിപാലനം
- വൃത്തിയാക്കൽ: പുറംഭാഗം വൃത്തിയാക്കാൻ മൃദുവായതും ഉണങ്ങിയതുമായ തുണി ഉപയോഗിക്കുക amplifier. Do not use abrasive cleaners, solvents, or waxes. Ensure no liquids enter the ampജീവൻ.
- സംഭരണം: ഉപയോഗത്തിലില്ലാത്തപ്പോൾ, സംഭരിക്കുക ampനേരിട്ടുള്ള സൂര്യപ്രകാശത്തിൽ നിന്നും കടുത്ത താപനിലയിൽ നിന്നും മാറി വരണ്ടതും തണുത്തതുമായ സ്ഥലത്ത് ലിഫയർ വയ്ക്കുക.
- വെൻ്റിലേഷൻ: Always ensure the ventilation openings are clear and not obstructed to prevent overheating.
- ഗതാഗതം: കൊണ്ടുപോകുമ്പോൾ amplifier, ensure it is securely packed to prevent physical damage.
7. പ്രശ്നപരിഹാരം
| പ്രശ്നം | സാധ്യമായ കാരണം | പരിഹാരം |
|---|---|---|
| നിന്ന് ശബ്ദമില്ല ampജീവൻ. |
|
|
| വികലമായ അല്ലെങ്കിൽ മോശം ശബ്ദ നിലവാരം. |
|
|
| ഇഫക്റ്റുകൾ പ്രവർത്തിക്കുന്നില്ല. |
|
|
8 സ്പെസിഫിക്കേഷനുകൾ
| ഫീച്ചർ | വിശദാംശങ്ങൾ |
|---|---|
| മോഡൽ | A1 |
| ഔട്ട്പുട്ട് വാട്ട്tage | 65 വാട്ട്സ് |
| ചാനലുകൾ | 3 (Instrument Jack, XLR Mic, HiZ Mic) |
| ഇഫക്റ്റുകൾ | 16 Custom Digital Effects |
| കണക്റ്റിവിറ്റി | DI Socket, CD Input, Headphone Output, FX Loop |
| അളവുകൾ (LxWxH) | 38.7 x 36.4 x 39.6 സെൻ്റീമീറ്റർ |
| ഇനത്തിൻ്റെ ഭാരം | 13.5 കിലോഗ്രാം (29.76 പൗണ്ട്) |
| പവർ ഉറവിടം | കോർഡഡ് ഇലക്ട്രിക് |
| നിറം | കറുപ്പ് |
9. വാറൻ്റിയും പിന്തുണയും
The Laney A1 65-Watt Acoustic Ampലൈഫയർ ഒരു കൂടെ വരുന്നു 1 വർഷത്തെ വാറൻ്റി from the date of purchase. This warranty covers manufacturing defects and faulty components under normal use.
For warranty claims, technical support, or service inquiries, please contact your authorized Laney dealer or visit the official Laney website for contact information in your region. Please retain your proof of purchase for warranty validation.
Ask a question about this manual
Ask about setup, troubleshooting, compatibility, parts, safety, or missing instructions. Manuals+ will review the question and use this page’s manual context to help answer it.