
1. ഉൽപ്പന്നം കഴിഞ്ഞുview
The Gira 117600 is a universal dimmer insert designed for switching and dimming various light sources. This device integrates into your electrical system to provide flexible control over lighting levels.
പ്രധാന സവിശേഷതകൾ:
- Universal dimmer for various light sources.
- Push/Rotary switch operation for intuitive control.
- Soft start function for lamps, extending their lifespan.
- Electronic short-circuit protection.
- ഓട്ടോമാറ്റിക് അമിത ചൂടാക്കൽ സംരക്ഷണം.
- Expansion control possible with extension insert 1177 00.
- Equipped with spring terminals for secure wiring.
Compatible Light Sources:
- ജ്വലിക്കുന്ന എൽamps
- HV ഹാലൊജൻ എൽamps
- എൽവി ഹാലൊജൻ എൽamps with Gira Tronic transformers
- എൽവി ഹാലൊജൻ എൽampപരമ്പരാഗത ട്രാൻസ്ഫോർമറുകളുള്ള എസ്
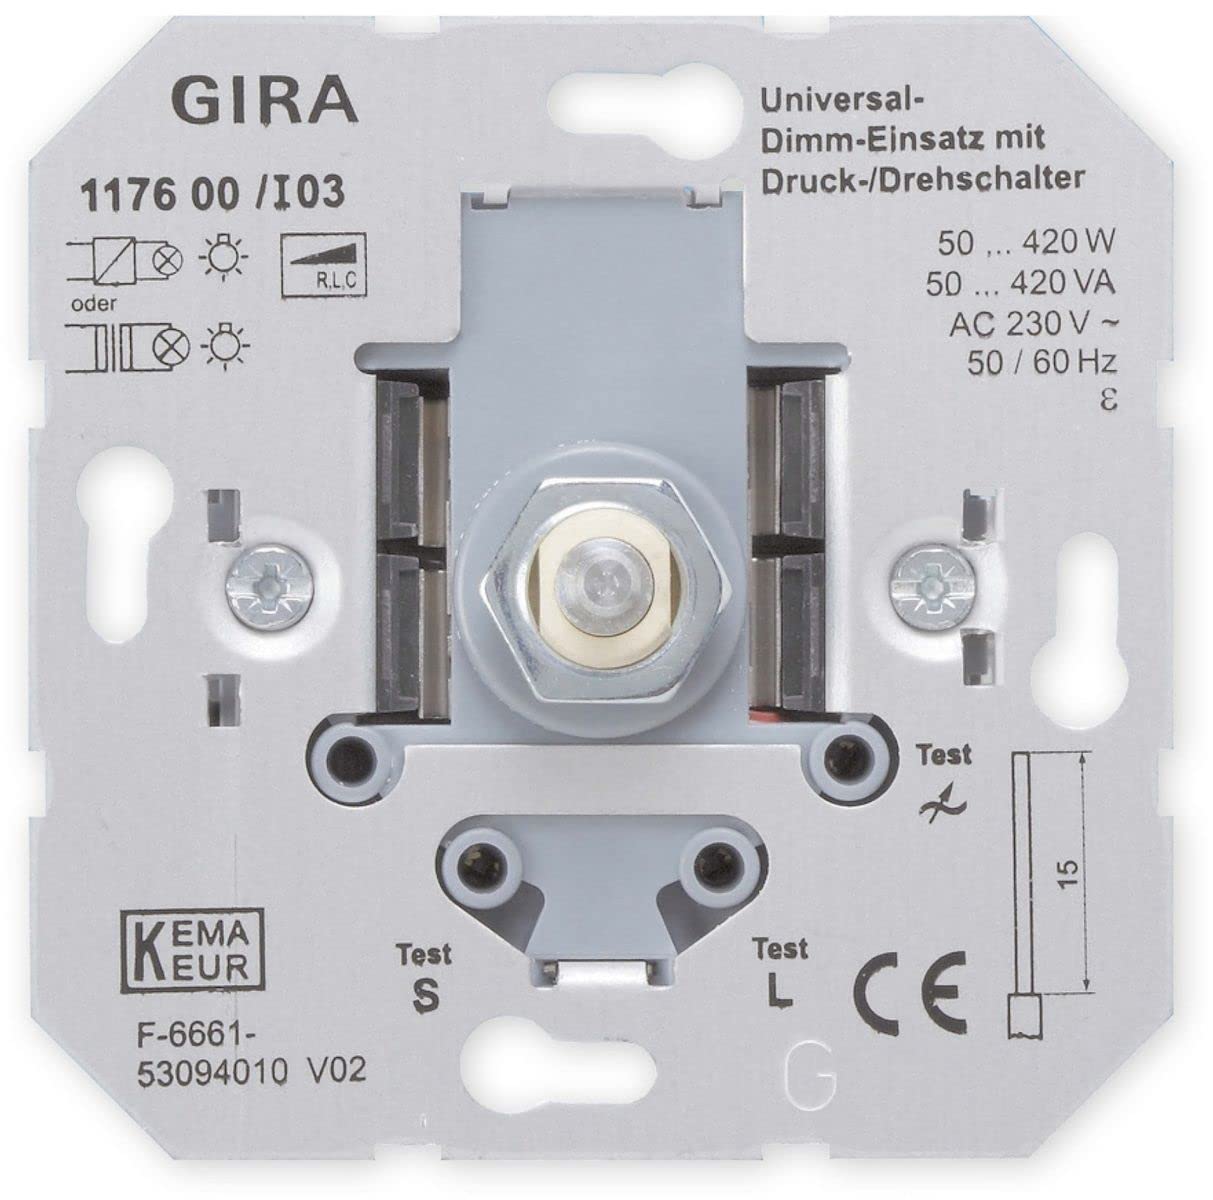
Image 1.1: The Gira 117600 Universal Dimmer Insert, a compact electrical component designed for integration into a wall switch system.
2. സജ്ജീകരണവും ഇൻസ്റ്റാളേഷനും
മുന്നറിയിപ്പ്: Installation of this device involves working with mains electricity. For your safety, installation should only be performed by a qualified electrician in accordance with local wiring regulations and standards. Always switch off the main power supply before beginning any installation work.
The Gira 117600 dimmer insert is designed for integration into a standard flush-mounted box. Follow the wiring diagram provided with the product packaging for correct connection.
ഇൻസ്റ്റലേഷൻ ഘട്ടങ്ങൾ (പൊതു മാർഗ്ഗനിർദ്ദേശം):
- പവർ വിച്ഛേദിക്കുക: Ensure the main power supply to the circuit is switched off at the consumer unit/fuse box. Verify with a voltagഇ ടെസ്റ്റർ.
- വയറിംഗ് തയ്യാറാക്കുക: Strip the ends of the electrical wires (phase, neutral, switched phase) according to the dimmer's terminal requirements.
- വയറുകൾ ബന്ധിപ്പിക്കുക: Use the spring terminals to securely connect the wires to the dimmer insert. Refer to the specific wiring diagram for your setup.
- മൗണ്ട് ഡിമ്മർ: Carefully place the dimmer insert into the flush-mounted box.
- കവർ പ്ലേറ്റ് ഇൻസ്റ്റാൾ ചെയ്യുക: Attach the appropriate Gira cover frame and operating element (push/rotary knob) to the dimmer insert.
- പവർ പുന ore സ്ഥാപിക്കുക: Switch the main power supply back on.
പ്രധാന പരിഗണനകൾ:
- Do not connect capacitive loads (e.g., Gira Tronic transformers) and inductive loads (e.g., conventional transformers) simultaneously to the universal dimmer insert.
- An extension control is possible by connecting up to 5 extension inserts (e.g., Gira 1177 00). The maximum cable length between the main dimmer and the last extension should not exceed 100 meters.
- Ensure the total connected load (W/VA) does not exceed the dimmer's maximum switching capacity.
3. പ്രവർത്തന നിർദ്ദേശങ്ങൾ
The Gira 117600 dimmer insert is operated via a compatible push/rotary control element (not included with the insert itself).
- ഓൺ/ഓഫ് ചെയ്യുന്നത്: Press the rotary knob briefly to switch the connected lights on or off.
- മങ്ങുന്നു: Rotate the knob clockwise to increase the light intensity and counter-clockwise to decrease it.
- സോഫ്റ്റ് തുടക്കം: When switched on, the dimmer features a soft start function, gradually increasing the light intensity to the last set level, which helps to prolong the life of the light sources.
4. പരിപാലനം
The Gira 117600 dimmer insert is designed for long-term, maintenance-free operation once correctly installed.
- വൃത്തിയാക്കൽ: To clean the visible operating element (rotary knob and frame), use a soft, damp തുണി. അബ്രാസീവ് ക്ലീനറുകൾ, ലായകങ്ങൾ, കഠിനമായ രാസവസ്തുക്കൾ എന്നിവ ഉപയോഗിക്കരുത്, കാരണം ഇവ ഉപരിതലത്തിന് കേടുവരുത്തും.
- ആന്തരിക ഘടകങ്ങൾ: Do not attempt to open or service the dimmer insert yourself. There are no user-serviceable parts inside.
5. പ്രശ്നപരിഹാരം
If you experience issues with your Gira 117600 dimmer, please review ഇനിപ്പറയുന്ന പൊതുവായ പ്രശ്നങ്ങളും പരിഹാരങ്ങളും:
- ലൈറ്റുകൾ ഓണാക്കുന്നില്ല:
- മെയിൻ പവർ സപ്ലൈ ഓണാണോ എന്ന് പരിശോധിക്കുക.
- Verify that the light bulb(s) are functional and correctly installed.
- Ensure the dimmer is correctly wired according to the installation instructions.
- The dimmer may have activated its electronic short-circuit protection. Disconnect the load, check for short circuits, and then reconnect.
- Lights do not dim or dim incorrectly:
- Confirm that the connected light sources are dimmable.
- മൊത്തം വാട്ട് ഉണ്ടോ എന്ന് പരിശോധിക്കുകtage/VA of the connected lights is within the dimmer's specified range (50-420 W/VA).
- Ensure that capacitive and inductive loads are not connected simultaneously.
- Dimmer feels hot:
- The dimmer has automatic overheating protection. If it becomes too hot, it will reduce power or switch off. This usually indicates an overload or insufficient ventilation.
- Reduce the connected load or ensure adequate air circulation around the dimmer.
If problems persist, consult a qualified electrician or contact Gira customer support.
6 സ്പെസിഫിക്കേഷനുകൾ
| പരാമീറ്റർ | മൂല്യം |
|---|---|
| ബ്രാൻഡ് | ഗിരാ |
| മോഡൽ നമ്പർ | 117600 |
| നാമമാത്ര വോളിയംtage | AC 230 V, 50/60 Hz |
| സ്വിച്ചിംഗ് കപ്പാസിറ്റി | 50 - 420 W/VA |
| വിപുലീകരണങ്ങളുടെ എണ്ണം | പരമാവധി. 5 |
| Max. Cable Length (Main to Branch) | 100 മീറ്റർ |
| പ്രത്യേക സവിശേഷതകൾ | Dimmable, Soft Start, Electronic Short-Circuit Protection, Automatic Overheating Protection |
| നിറം | ചാരനിറം |
7. വാറൻ്റിയും പിന്തുണയും
വാറൻ്റി വിവരങ്ങൾ: Specific warranty terms and conditions for the Gira 117600 Universal Dimmer Insert are typically provided by the manufacturer (Gira) or the retailer at the time of purchase. Please refer to your purchase documentation or the official Gira webവിശദമായ വാറന്റി വിവരങ്ങൾക്ക് സൈറ്റ്.
ഉപഭോക്തൃ പിന്തുണ: For technical assistance, installation queries, or troubleshooting beyond the scope of this manual, please contact Gira customer support or your authorized Gira dealer. Contact details can usually be found on the official Gira webസൈറ്റ് (www.gira.com) or through your retailer.