
ആമുഖം
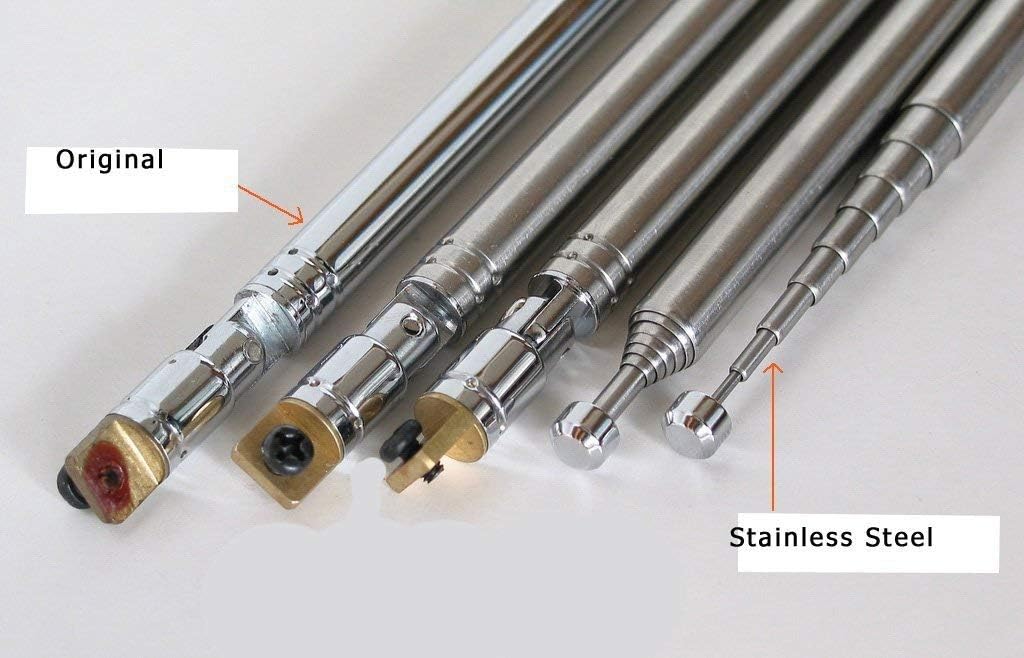
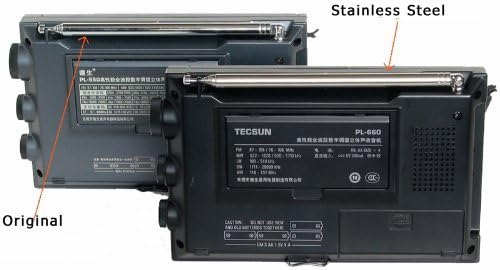
This manual provides instructions for the installation, operation, and maintenance of your Tecsun Stainless Steel Replacement Telescopic Antenna. This antenna is designed to enhance the reception capabilities and durability of compatible Tecsun PL series radios.
ഉൽപ്പന്ന സവിശേഷതകൾ
- Made of durable stainless steel for improved longevity and resistance to bending.
- Enhanced sensitivity for better radio reception across various bands.
- Extended length: Measures 39.5 inches (approximately 100.3 cm) when fully extended, providing a longer reach than many original antennas.
- Features 9 telescopic sections, offering flexibility and compact storage.
അനുയോജ്യത
This replacement antenna is specifically designed for the following Tecsun radio models:
- Tecsun PL880
- Tecsun PL660
- Tecsun PL600
- Tecsun PL550
- Tecsun PL390
- Tecsun PL398
- Tecsun PL398BT
While designed for these models, some users have reported successful installation on other radios with minor adjustments. Always verify fitment before permanent installation.
ഇൻസ്റ്റലേഷൻ നിർദ്ദേശങ്ങൾ
Step-by-Step Replacement Guide
Replacing your radio's original antenna with the new stainless steel telescopic antenna is a straightforward process. Please follow these steps carefully:
- തയ്യാറാക്കൽ: Ensure your radio is powered off. Gather a small Phillips head screwdriver.
- Locate the Original Antenna Base: Identify the screw that secures the base of the existing antenna to your radio.
- Remove the Original Antenna: Carefully unscrew and remove the single screw holding the original antenna. Gently detach the old antenna from the radio. Keep any small washers or spacers from the original antenna, as they may be needed for the new installation.
- Position the New Antenna: Align the base of the new stainless steel replacement antenna with the mounting point on your radio. Ensure any necessary pivot washers are correctly placed between the antenna base and the radio's housing.
- Secure the New Antenna: Insert the screw and tighten it firmly, but do not overtighten, to secure the new antenna in place. Test the swivel joint to ensure it moves freely but holds its position.
- പ്രവർത്തനക്ഷമത പരിശോധിക്കുക: Power on your radio and extend the new antenna to verify proper installation and improved reception.
Operating the Antenna
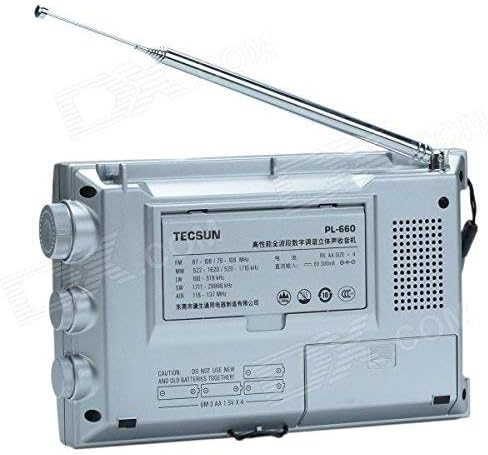
To achieve optimal reception, extend the antenna fully. For storage or when not in use, retract the antenna completely.
- വിപുലീകരിക്കുന്നു: Gently pull the tip of the antenna upwards until all sections are fully extended.
- പിൻവലിക്കുന്നു: Push the antenna tip downwards, guiding each section back into the previous one until it is fully collapsed. Always retract from the top down to prevent bending.
- ക്രമീകരിക്കുന്ന ആംഗിൾ: The antenna features a swivel joint at its base, allowing you to adjust its angle for best signal reception.
പരിപാലനവും പരിചരണവും
To ensure the longevity and performance of your stainless steel antenna, follow these care guidelines:
- വൃത്തിയാക്കൽ: Wipe the antenna with a soft, dry cloth to remove dust or dirt. Avoid abrasive cleaners or solvents, which can damage the finish.
- കൈകാര്യം ചെയ്യൽ: Always extend and retract the antenna gently. Avoid forcing the segments, as this can cause damage or bending.
- സംഭരണം: When not in use, retract the antenna fully to protect it from accidental damage and environmental exposure.
- പരിസ്ഥിതി എക്സ്പോഷർ: While stainless steel is durable, prolonged exposure to harsh weather conditions (e.g., saltwater spray, extreme humidity) may require more frequent cleaning to prevent potential corrosion or mineral buildup.
ട്രബിൾഷൂട്ടിംഗ്
പൊതുവായ പ്രശ്നങ്ങളും പരിഹാരങ്ങളും
- Poor Reception After Installation:
- Ensure the antenna is fully extended and positioned correctly. Check the connection screw at the base to ensure it is securely fastened to the radio.
- Antenna Feels Loose or Wobbly:
- Verify that the mounting screw at the base is tightened appropriately. If the swivel joint is excessively loose, it may indicate wear or improper installation of washers. Re-check the installation steps.
- Antenna Segments Stick or Don't Retract Smoothly:
- Ensure no dirt or debris is lodged between the segments. Gently clean the antenna with a dry cloth. Avoid applying lubricants, as they can attract dust and worsen the issue over time.
സ്പെസിഫിക്കേഷനുകൾ
| ഫീച്ചർ | വിശദാംശങ്ങൾ |
|---|---|
| മെറ്റീരിയൽ | സ്റ്റെയിൻലെസ്സ് സ്റ്റീൽ |
| വിപുലീകരിച്ച ദൈർഘ്യം | 39.5 ഇഞ്ച് (ഏകദേശം 100.3 സെ.മീ) |
| വിഭാഗങ്ങളുടെ എണ്ണം | 9 |
| പ്രതിരോധം | 50 ഓം |
| അനുയോജ്യമായ മോഡലുകൾ | Tecsun PL880, PL660, PL600, PL550, PL390, PL398, PL398BT |
വാറൻ്റിയും പിന്തുണയും
For warranty information or technical support regarding your Tecsun radio or this replacement antenna, please refer to the documentation provided with your original Tecsun radio or contact Tecsun customer service directly. Specific warranty details for this replacement part may vary by region and retailer.