
1. ആമുഖം
This manual provides instructions for the Vivitek D555 XGA DLP Portable Projector. The D555 is designed for clear and vivid image projection, featuring XGA resolution, 3000 lumens brightness, and 3D readiness via DLP Link. It incorporates DLP and Brilliant Color technologies for enhanced visual performance and offers various connectivity options including HDMI v1.4.
2 സുരക്ഷാ വിവരങ്ങൾ
- വായുസഞ്ചാര ദ്വാരങ്ങൾ തടയരുത്. ശരിയായ വായുസഞ്ചാരത്തിനായി പ്രൊജക്ടറിന് ചുറ്റും മതിയായ ഇടം ഉറപ്പാക്കുക.
- l ചെയ്യുമ്പോൾ പ്രൊജക്ടർ ലെൻസിലേക്ക് നേരിട്ട് നോക്കരുത്amp ഓണാണ്. തിളക്കമുള്ള വെളിച്ചം കണ്ണിന് കേടുപാടുകൾ വരുത്തിയേക്കാം.
- Avoid placing the projector in direct sunlight, near heat sources, or in environments with high humidity or dust.
- പ്രൊജക്ടറിനൊപ്പം നൽകിയിരിക്കുന്ന പവർ കോർഡ് മാത്രം ഉപയോഗിക്കുക.
- ഈ ഉൽപ്പന്നം സ്വയം സേവിക്കാൻ ശ്രമിക്കരുത്. യോഗ്യതയുള്ള സേവന ഉദ്യോഗസ്ഥർക്ക് എല്ലാ സേവനങ്ങളും റഫർ ചെയ്യുക.
- പ്രൊജക്ടർ വെള്ളത്തിൽ നിന്നോ മറ്റ് ദ്രാവകങ്ങളിൽ നിന്നോ അകറ്റി നിർത്തുക.
- Unplug the projector from the power outlet before cleaning or when not in use for extended periods.
3. പാക്കേജ് ഉള്ളടക്കം
താഴെ ലിസ്റ്റ് ചെയ്തിരിക്കുന്ന എല്ലാ ഇനങ്ങളും നിങ്ങളുടെ പാക്കേജിൽ ഉൾപ്പെടുത്തിയിട്ടുണ്ടെന്ന് ഉറപ്പാക്കുക:
- Vivitek D555 Projector
- എസി പവർ കോർഡ്
- വിജിഎ കേബിൾ
- റിമോട്ട് കൺട്രോൾ
- Batteries for Remote (AA x 2)
- User's Manual (on CD)
4. ഉൽപ്പന്നം കഴിഞ്ഞുview
4.1 മുന്നിലും മുകളിലും View
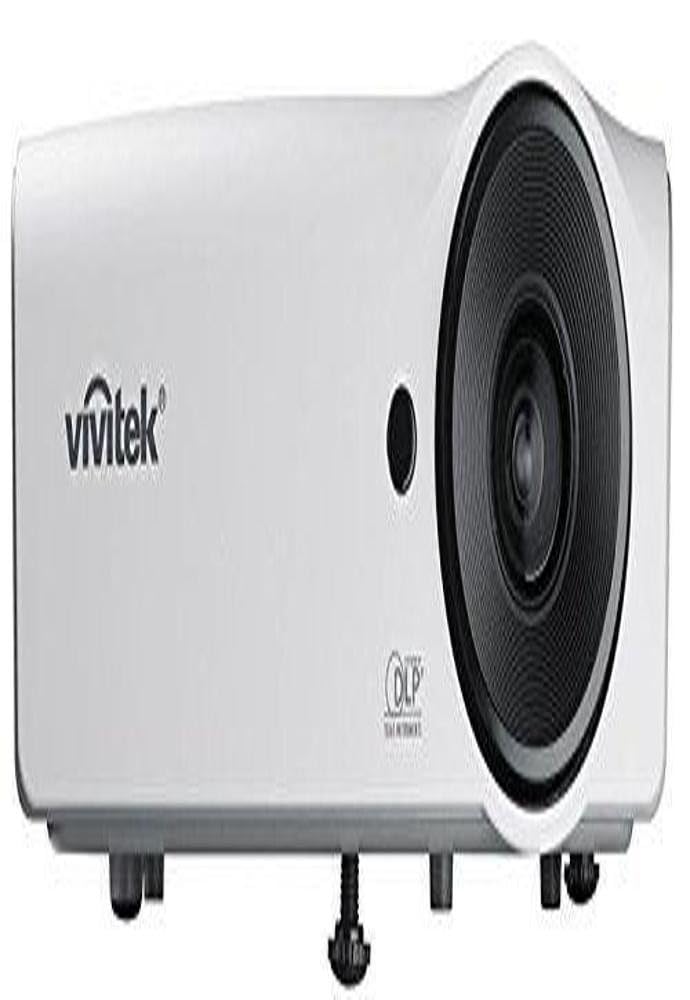
ചിത്രം 4.1: മുന്നിലും മുകളിലും view of the Vivitek D555 projector. This image shows the projector's lens, control panel on top, and the Vivitek logo.
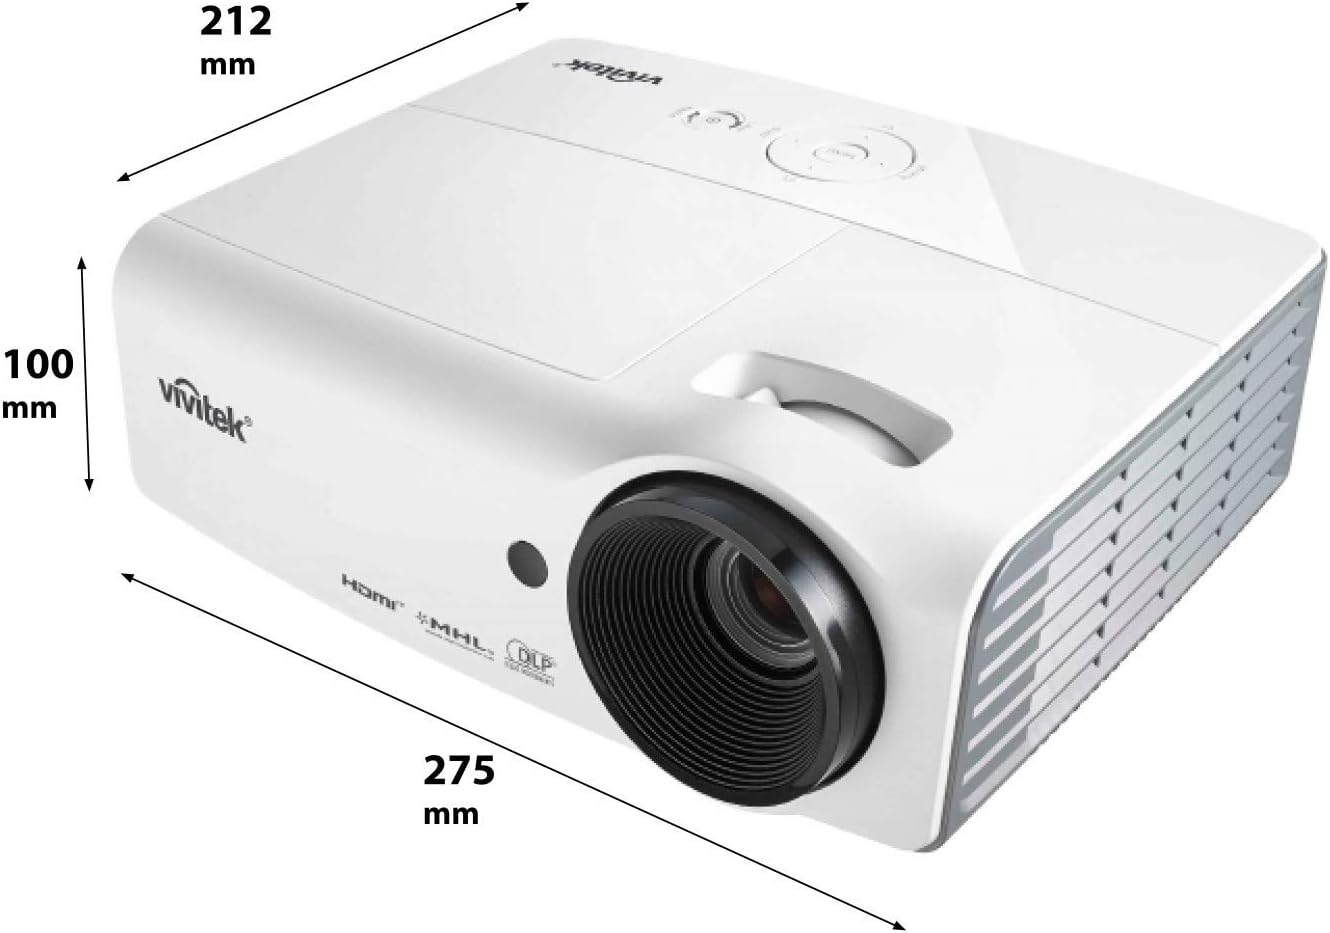
ചിത്രം 4.2: Dimensions of the Vivitek D555 projector. The image indicates a width of 275 mm, a depth of 212 mm, and a height of 100 mm.
The front of the projector features the projection lens. The top panel includes the control buttons for power, menu navigation, source selection, and focus/zoom adjustments. The Vivitek logo is prominently displayed.
4.2 പിൻ പാനൽ കണക്ഷനുകൾ

ചിത്രം 4.3: Rear panel of the Vivitek D555 projector showing various input and output ports. These include HDMI, dual VGA inputs, VGA output, S-Video, Composite Video, audio input/output, and a USB port.
The rear panel provides all necessary connection ports for video and audio sources. These include:
- എച്ച്ഡിഎംഐ v1.4: ഡിജിറ്റൽ വീഡിയോ, ഓഡിയോ ഇൻപുട്ടിനായി.
- Computer In 1 (VGA): D-Sub 15-pin input for computer connection.
- Computer In 2 (VGA): Second D-Sub 15-pin input for computer connection.
- Computer Out (VGA): D-Sub 15-pin output for monitor loop-through.
- എസ്-വീഡിയോ: എസ്-വീഡിയോ ഇൻപുട്ടിനായി.
- Video (Composite): RCA jack for composite video input.
- ഓഡിയോ ഇൻ: 3.5mm stereo mini-jack for audio input.
- ഓഡിയോ Outട്ട്: 3.5mm stereo mini-jack for audio output.
- USB (ടൈപ്പ് ബി): സേവന അല്ലെങ്കിൽ ഫേംവെയർ അപ്ഡേറ്റുകൾക്കായി.
- എസി പവർ ഇൻലെറ്റ്: പവർ കോർഡ് ബന്ധിപ്പിക്കുന്നതിന്.
5. സജ്ജീകരണം
5.1 പ്രൊജക്ടർ പ്ലേസ്മെന്റ്
Place the projector on a stable, flat surface or mount it securely. Ensure the projector is positioned at an appropriate distance from the screen to achieve the desired image size. The lens should be perpendicular to the screen for optimal image geometry.
5.2 ഒരു പവർ സ്രോതസ്സിലേക്ക് ബന്ധിപ്പിക്കുന്നു
- Connect the AC power cord to the projector's AC power inlet.
- പവർ കോർഡിന്റെ മറ്റേ അറ്റം ഗ്രൗണ്ടഡ് ഇലക്ട്രിക്കൽ ഔട്ട്ലെറ്റിലേക്ക് പ്ലഗ് ചെയ്യുക.
5.3 വീഡിയോ ഉറവിടങ്ങൾ ബന്ധിപ്പിക്കൽ
Choose the appropriate cable for your video source and connect it to the corresponding port on the projector's rear panel.
- എച്ച്ഡിഎംഐ: For high-definition digital sources like Blu-ray players, gaming consoles, or laptops.
- VGA (Computer In 1/2): For computers or other devices with VGA output.
- S-Video/Composite Video: For standard definition video sources like DVD players or VCRs.
For audio, connect an audio cable from your source to the projector's Audio In port, or use the HDMI connection which carries both video and audio.
6. പ്രൊജക്ടർ പ്രവർത്തിപ്പിക്കൽ
6.1 പവർ ഓൺ/ഓഫ്
- പവർ ഓണാക്കാൻ: Press the Power button on the projector's control panel or the remote control. The power indicator light will turn blue.
- പവർ ഓഫ് ചെയ്യാൻ: Press the Power button twice. The projector will enter a cooling down cycle, and the power indicator will flash. Do not unplug the projector until the cooling cycle is complete and the power indicator light stops flashing.
6.2 ചിത്രം ക്രമീകരിക്കൽ
- ഫോക്കസ്: ചിത്രം വ്യക്തവും വ്യക്തവുമാകുന്നതുവരെ പ്രൊജക്ടർ ലെൻസിലെ ഫോക്കസ് റിംഗ് തിരിക്കുക.
- സൂം: Rotate the zoom ring on the projector lens to adjust the image size.
- കീസ്റ്റോൺ തിരുത്തൽ: If the image appears trapezoidal, use the Keystone Correction function in the projector's OSD (On-Screen Display) menu to square the image.
6.3 Selecting an Input Source
Press the "Source" button on the projector or remote control to cycle through available input sources (HDMI, VGA1, VGA2, S-Video, Video).
6.4 3D പ്രവർത്തനം
The Vivitek D555 is 3D-ready via DLP Link. To view 3D ഉള്ളടക്കം:
- Connect a 3D-compatible source (e.g., 3D Blu-Ray player) to the projector via HDMI.
- Ensure your 3D content is playing.
- Wear active DLP Link 3D glasses (sold separately). The projector will automatically detect the 3D signal and enable 3D mode.
7. പരിപാലനം
7.1 പ്രൊജക്ടർ വൃത്തിയാക്കൽ
- പുറം: മൃദുവായ, ലിന്റ് രഹിത തുണി ഉപയോഗിക്കുകampened with a mild cleaning solution to wipe the projector's casing. അബ്രാസീവ് ക്ലീനറുകളോ ലായകങ്ങളോ ഉപയോഗിക്കരുത്.
- ലെൻസ്: Use a lens cleaning cloth and lens cleaning solution specifically designed for optical surfaces. Avoid touching the lens with your fingers.
- എയർ വെൻ്റുകൾ: Regularly check and clean the air vents to prevent dust buildup, which can affect cooling and performance. Use a soft brush or compressed air.
7.2 എൽamp മാറ്റിസ്ഥാപിക്കൽ
പ്രൊജക്ടർ എൽamp has a lifespan of up to 6,000 hours in Eco-mode. When the lamp reaches the end of its life, a warning message will appear, or the lamp indicator light will illuminate. Refer to the detailed instructions in the full user manual (on CD) for safe lamp replacement procedures. Always allow the projector to cool down completely before attempting lamp മാറ്റിസ്ഥാപിക്കൽ.
8. പ്രശ്നപരിഹാരം
| പ്രശ്നം | സാധ്യമായ കാരണം | പരിഹാരം |
|---|---|---|
| സ്ക്രീനിൽ ചിത്രമൊന്നുമില്ല |
|
|
| ചിത്രം മങ്ങിയതാണ് |
|
|
| ചിത്രം ട്രപസോയിഡൽ ആണ് |
|
|
| ഓഡിയോ ഇല്ല |
|
|
9 സ്പെസിഫിക്കേഷനുകൾ
| മോഡൽ നമ്പർ | DP535-264VVUP (D555) |
| ബ്രാൻഡ് | വിവിടെക് |
| ഡിസ്പ്ലേ ടെക്നോളജി | ഡി.എൽ.പി |
| നേറ്റീവ് റെസല്യൂഷൻ | XGA (1024 x 768) |
| പരമാവധി മിഴിവ് | WUXGA(1920x1200) |
| തെളിച്ചം | 3000 ല്യൂമെൻസ് |
| കോൺട്രാസ്റ്റ് റേഷ്യോ | 15000:1 |
| Lamp ജീവിതം | 6,000 മണിക്കൂർ വരെ (ഇക്കോ-മോഡ്) |
| കണക്റ്റിവിറ്റി | HDMI v1.4, Dual VGA In, VGA Out, S-Video, Composite Video, Audio In/Out, USB |
| പ്രത്യേക സവിശേഷതകൾ | 3D-Ready (DLP Link), Brilliant Color Technology |
| ഉൽപ്പന്ന അളവുകൾ | 10.8 x 8.35 x 3.66 ഇഞ്ച് (275 x 212 x 100 മിമി) |
| ഇനത്തിൻ്റെ ഭാരം | 5.1 പൗണ്ട് |
| നിർമ്മാതാവ് | Vivitek Corp. |
| ബാറ്ററികൾ (റിമോട്ടിന്) | 2 AA ബാറ്ററികൾ (ഉൾപ്പെട്ടിരിക്കുന്നു) |
10. വാറൻ്റിയും പിന്തുണയും
For warranty information and technical support, please refer to the official Vivitek website or the warranty card included with your product. Do not attempt to repair the projector yourself, as this may void your warranty. Contact Vivitek customer service for assistance with any issues not covered in the troubleshooting section.