
Orion Motor Tech 0001-00
Orion Motor Tech 8x6.5 Wheel Spacers Instruction Manual
മോഡൽ: 0001-00
ആമുഖം
This manual provides detailed instructions for the safe and proper installation and maintenance of your Orion Motor Tech 8x6.5 Wheel Spacers. These 2-inch wheel adapters are designed to improve vehicle stability and handling by widening the axle track. Please read all instructions carefully before beginning installation.

Image: A set of four Orion Motor Tech 8x6.5 wheel spacers, showcasinഅവയുടെ രൂപകൽപ്പനയും ഘടകങ്ങളും.
ഉൽപ്പന്ന സവിശേഷതകൾ
- സുരക്ഷിതവും സുരക്ഷിതവും: Improves cornering, stability, handling, and control by adding 4 inches to the axle track.
- പ്രീമിയം മെറ്റീരിയൽ: Made from solid blocks of T6 aircraft-grade aluminum for lightweight durability and strength.
- Dacromet-Coated Bolts: Features 32 zinc-coated 9/16"-18 bolts that are heat-treated for superior strength and resistance to wear and tear.
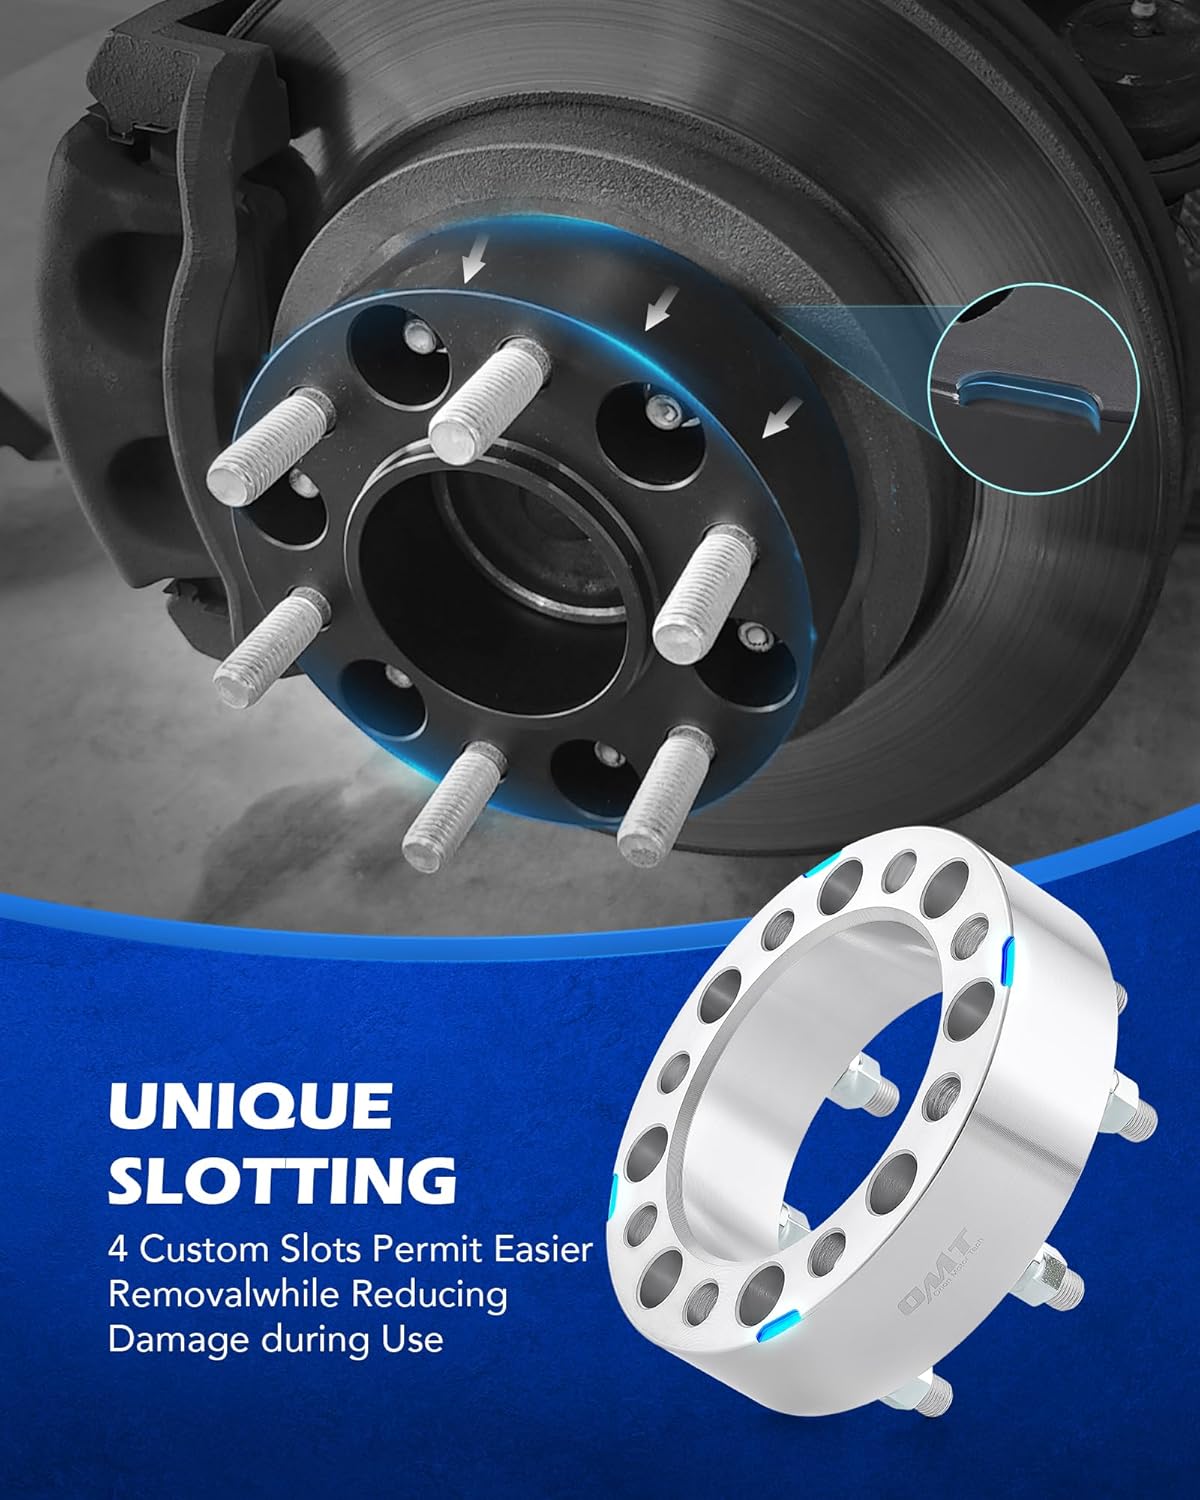
- Unique Slotting: Custom slots on the rear face allow for easier removal and reduce potential damage during use.
- Precision Machined: Spacers are precision machined with a 60-degree taper for exceptional safety and stability.
ചിത്രം: വിശദമായത് view of the wheel spacer's construction, emphasizing the anodic-oxide coating, dacromet-coated bolts, and 6061-T6 aluminum.

Image: Illustration of the unique slotting feature on the wheel spacer, designed for easy removal.
അനുയോജ്യത
This wheel adapter set is compatible with various 1988 to 2011 Ram and Ford vehicles. Please verify your vehicle's specifications against the following requirements:
- അനുയോജ്യമായ മോഡലുകൾ: 1994-2011 Dodge Ram 2500, 1994-2011 Dodge Ram 3500, 1988-1998 Ford F-250, 1988-1998 Ford F-350.
- ബോൾട്ട് പാറ്റേൺ: 8x6.5" (8x165.1mm)
- Hub Bore: 130 മി.മീ
- ത്രെഡ് വലുപ്പം: 9/16"-18
- കനം: 2 ഇഞ്ച്
Important Compatibility Checks:
- Your vehicle's central bore must be the same as (or smaller than) the spacer's bore.
- The bolt pattern of the spacers must match those on your vehicle & tires.
- Your vehicle's studs must be shorter than the spacer's thickness.
- Your existing fender clearance must be greater than the spacer's thickness.

Image: Visual guide illustrating critical compatibility checks for proper wheel spacer fitment.
സജ്ജീകരണവും ഇൻസ്റ്റാളേഷനും
Proper installation is crucial for safety and performance. If you are unsure about any step, please consult a qualified mechanic.
ആവശ്യമായ ഉപകരണങ്ങൾ (ഉൾപ്പെടുത്തിയിട്ടില്ല):
- ടോർക്ക് റെഞ്ച്
- Lug Wrench or Socket Set
- ജാക്കും ജാക്കും നിൽക്കുന്നു
- വീൽ ചോക്കുകൾ
- Wire Brush or Abrasive Pad (for cleaning hub surface)
- Threadlocker (medium strength, e.g., Loctite 242)
ഇൻസ്റ്റലേഷൻ ഘട്ടങ്ങൾ:
- വാഹനം തയ്യാറാക്കുക: Park the vehicle on a flat, level surface. Engage the parking brake and place wheel chocks on the wheels that will remain on the ground. Loosen the lug nuts on the wheel(s) you intend to work on.
- ലിഫ്റ്റ് വാഹനം: ഒരു ജാക്ക് ഉപയോഗിച്ച് വാഹനം സുരക്ഷിതമായി ഉയർത്തി ജാക്ക് സ്റ്റാൻഡുകൾ ഉപയോഗിച്ച് ഉറപ്പിക്കുക. ലഗ് നട്ടുകളും വീലും നീക്കം ചെയ്യുക.
- Clean Hub Surface: Thoroughly clean the vehicle's hub mounting surface using a wire brush or abrasive pad. Remove any rust, dirt, or debris to ensure a flat mating surface for the spacer.
- Install Spacer: Place the wheel spacer onto the vehicle's hub. Ensure it sits flush against the hub. Apply a small amount of medium-strength threadlocker to the vehicle's existing wheel studs.
- Secure Spacer: Install the provided spacer lug nuts onto the vehicle's studs, securing the spacer to the hub. Tighten these lug nuts in a star pattern to the manufacturer's specified torque (typically 90-100 ft-lbs for 9/16"-18 studs, but always refer to your vehicle's manual for exact specifications).
- Mount Wheel: Place your wheel onto the newly installed wheel spacer's studs. Install your original lug nuts onto the spacer's studs.
- Torque Wheel: Tighten your original lug nuts in a star pattern to your vehicle's manufacturer's specified torque.
- താഴ്ന്ന വാഹനം: Carefully lower the vehicle and remove the jack stands and wheel chocks.
- ആവർത്തിക്കുക: Repeat the process for all remaining wheels.

ചിത്രം: പൊട്ടിത്തെറിച്ചു view diagram showing the components and their assembly order during wheel spacer installation.

Image: Visual comparison demonstrating the effect of installed wheel spacers on a vehicle's stance.
ഇൻസ്റ്റാളേഷൻ വീഡിയോ:
Video: An official installation guide for Orion Motor Tech Wheel Spacers, demonstrating the steps for proper and safe mounting.
പ്രവർത്തനവും പരിപാലനവും
After installation, it is important to perform regular checks to ensure the continued safety and performance of your wheel spacers.
പോസ്റ്റ്-ഇൻസ്റ്റലേഷൻ പരിശോധനകൾ:
- After the first 50-100 miles of driving, re-torque all lug nuts (both spacer-to-hub and wheel-to-spacer) to the specified values.
- Periodically check lug nut torque at regular service intervals (e.g., every oil change or tire rotation).
- Listen for any unusual noises or vibrations, which could indicate loose components.
പൊതു പരിപാലനം:
- Keep the wheel spacers clean and free from excessive dirt or corrosive materials.
- Inspect the spacers for any signs of damage, cracks, or corrosion during tire rotations or other vehicle maintenance.
- Ensure proper tire pressure is maintained as per your vehicle's recommendations.
ട്രബിൾഷൂട്ടിംഗ്
| പ്രശ്നം | സാധ്യമായ കാരണം | പരിഹാരം |
|---|---|---|
| Vibration after installation | Loose lug nuts, improper seating of spacer/wheel, unbalanced tires, hub surface not clean. | Re-torque all lug nuts. Re-install spacers ensuring clean, flush mounting. Check tire balance. |
| Studs not long enough for wheel | Incorrect spacer thickness for vehicle's existing studs. | Ensure vehicle's studs are shorter than spacer thickness. If not, longer studs may be required or a different spacer thickness. |
| Wheel rubbing fender | Insufficient fender clearance for the added track width. | Verify fender clearance before installation. Rolling fenders or a lift kit may be necessary if rubbing occurs. |
സ്പെസിഫിക്കേഷനുകൾ
| ബ്രാൻഡ് | Orion Motor Tech |
| മോഡൽ നമ്പർ | 0001-00 |
| ഇനത്തിൻ്റെ ഭാരം | 24.7 പൗണ്ട് (സെറ്റിന്) |
| ഉൽപ്പന്ന അളവുകൾ | 17.72 x 6.4 x 10.4 ഇഞ്ച് |
| ബോൾട്ട് പാറ്റേൺ | 8x6.5 inches (8x165.1 mm) |
| ഹബ് ബോർ | 130 മി.മീ |
| ത്രെഡ് വലുപ്പം | 9/16"-18 |
| കനം | 2 ഇഞ്ച് |
| മെറ്റീരിയൽ | T6 Aircraft-Grade Aluminum |
| പ്രത്യേക സവിശേഷതകൾ | Durable, Easy Installation, Lightweight, Safe, Solid |
വാറൻ്റിയും പിന്തുണയും
For information regarding product warranty or technical support, please refer to the official Orion Motor Tech webസൈറ്റിൽ ബന്ധപ്പെടുകയോ അവരുടെ ഉപഭോക്തൃ സേവനവുമായി നേരിട്ട് ബന്ധപ്പെടുകയോ ചെയ്യുക. ഈ മാനുവലിൽ നിർദ്ദിഷ്ട വാറന്റി വിശദാംശങ്ങൾ നൽകിയിട്ടില്ല.
Ask a question about this manual
Ask about setup, troubleshooting, compatibility, parts, safety, or missing instructions. Manuals+ will review the question and use this page’s manual context to help answer it.