1. ആമുഖം
The SYMA X22W Mini Drone is a compact quadcopter designed for beginners and enthusiasts. It features a built-in camera for live video streaming, altitude hold for stable flight, and various control modes for an engaging flying experience. This manual provides essential information for safe operation and maintenance of your drone.
2. പാക്കേജ് ഉള്ളടക്കം
നിങ്ങളുടെ പാക്കേജിൽ എല്ലാ ഇനങ്ങളും ഉണ്ടെന്ന് ഉറപ്പാക്കുക:
- SYMA X22W Mini Drone
- റിമോട്ട് കൺട്രോളർ
- Rechargeable LiPo Battery (2 included)
- യുഎസ്ബി ചാർജിംഗ് കേബിൾ
- സ്പെയർ പ്രൊപ്പല്ലറുകൾ (4 കഷണങ്ങൾ)
- സ്ക്രൂഡ്രൈവർ
- ഉപയോക്തൃ മാനുവൽ
3. സജ്ജീകരണ ഗൈഡ്
3.1. ഡ്രോൺ ബാറ്ററി ചാർജ് ചെയ്യുന്നു
The drone is powered by a rechargeable LiPo battery. Before first use, fully charge the battery.
- USB ചാർജിംഗ് കേബിൾ ബാറ്ററിയിലേക്ക് ബന്ധിപ്പിക്കുക.
- Plug the USB end into a compatible USB power source (e.g., computer USB port, USB wall adapter).
- The indicator light on the charging cable will show the charging status. Refer to the charging cable's specific instructions for light indications (usually red for charging, off or green for fully charged).
- ചാർജ് ചെയ്യാൻ സാധാരണയായി ഏകദേശം 90 മിനിറ്റ് എടുക്കും. അമിതമായി ചാർജ് ചെയ്യരുത്.
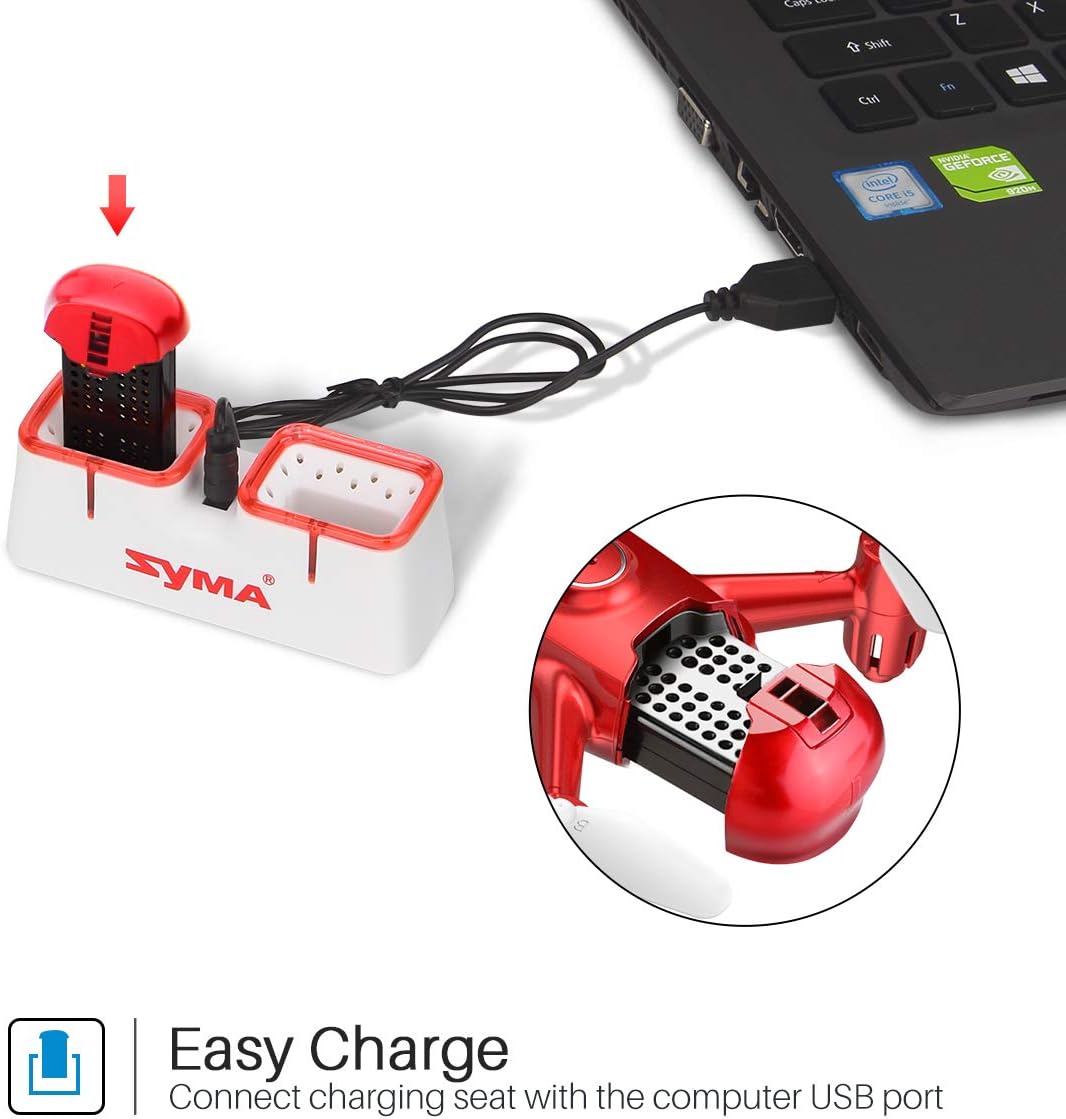
Figure 1: Drone battery charging via USB.
3.2. ഡ്രോൺ ബാറ്ററി ഇൻസ്റ്റാൾ ചെയ്യുന്നു
Once charged, install the battery into the drone.
- ഡ്രോണിലെ ബാറ്ററി കമ്പാർട്ട്മെന്റ് കണ്ടെത്തുക.
- Carefully insert the charged battery into the compartment.
- ബാറ്ററി കമ്പാർട്ട്മെന്റ് കവർ സുരക്ഷിതമാക്കുക.

Figure 2: Drone battery installation. The drone comes with two batteries for extended flight time.
3.3. റിമോട്ട് കൺട്രോളർ സജ്ജീകരണം
The remote controller requires 4 AA batteries (not included).
- റിമോട്ട് കൺട്രോളറിന്റെ പിൻഭാഗത്തുള്ള ബാറ്ററി കമ്പാർട്ട്മെന്റ് തുറക്കുക.
- ശരിയായ ധ്രുവത്വം ഉറപ്പാക്കിക്കൊണ്ട് 4 AA ബാറ്ററികൾ ചേർക്കുക.
- ബാറ്ററി കമ്പാർട്ട്മെൻ്റ് അടയ്ക്കുക.
3.4. പ്രൊപ്പല്ലർ ഇൻസ്റ്റാളേഷൻ/മാറ്റിസ്ഥാപിക്കൽ
If propellers need to be replaced, ensure they are installed correctly.
- Each propeller is marked with 'A' or 'B'. Match the propeller type to the corresponding motor shaft on the drone.
- മോട്ടോർ ഷാഫ്റ്റിൽ ഉറപ്പിക്കുന്നത് വരെ പ്രൊപ്പല്ലർ സൌമ്യമായി അമർത്തുക.
4. പ്രവർത്തന നിർദ്ദേശങ്ങൾ
4.1. ഡ്രോണും റിമോട്ട് കൺട്രോളറും ജോടിയാക്കൽ
- ഡ്രോൺ പരന്നതും ലെവൽ ഉപരിതലത്തിൽ വയ്ക്കുക.
- ഡ്രോണിന്റെ പവർ സ്വിച്ച് ഓണാക്കുക. ഡ്രോണിന്റെ ഇൻഡിക്കേറ്റർ ലൈറ്റുകൾ മിന്നിമറയും.
- റിമോട്ട് കൺട്രോളർ ഓണാക്കുക.
- Push the left joystick (throttle) all the way up, then all the way down. The drone's lights will stop flashing and remain solid, indicating successful pairing.
4.2. One-Key Take-off and Landing
This feature allows for simplified take-off and landing.
- After pairing, press the One-Key Take-off button on the remote controller. The drone will automatically ascend to a stable hovering height.
- To land, press the One-Key Landing button. The drone will slowly descend and land automatically.

Figure 3: One-Key Take-off/Landing functionality.
4.3. Altitude Hold Function
The Altitude Hold feature allows the drone to maintain a consistent altitude, making it easier to control and capture stable photos/videos.
- Once the drone is airborne, release the throttle joystick. The drone will automatically hold its current altitude.
- Use the throttle joystick to adjust the altitude as needed.

Figure 4: Altitude Hold for stable flight and photography.
4.4. ഹെഡ്ലെസ് മോഡ്
Headless Mode simplifies flying by eliminating the need to distinguish the drone's front from its rear. The drone's orientation will be relative to the pilot.
- Before taking off, ensure the drone is facing forward relative to the pilot.
- Press the Headless Mode button on the remote controller. The drone's lights will flash to confirm activation.
- In Headless Mode, pushing the right joystick forward will always make the drone fly away from the pilot, regardless of the drone's actual orientation.
- Press the Headless Mode button again to exit this mode.

Figure 5: Headless Mode for easier drone control.
4.5. 3D Flips
Perform exciting aerial stunts with the 3D Flip function.
- Fly the drone to a height of at least 3 meters (10 feet).
- Press the 3D Flip button on the remote controller.
- Immediately push the right joystick in any direction (forward, backward, left, or right). The drone will perform a 360-degree flip in that direction.
4.6. App Control and FPV Live Video
Download the SYMA GO app to your smartphone for advanced control and live video streaming.
- Download and install the SYMA GO app from your smartphone's app store.
- Turn on the drone and connect your smartphone to the drone's Wi-Fi network (usually named 'SYMA-X22W-XXXX').
- Open the SYMA GO app. You should see the live video feed from the drone's camera.
- The app allows for touch control, gravity control, and flight-track drawing.
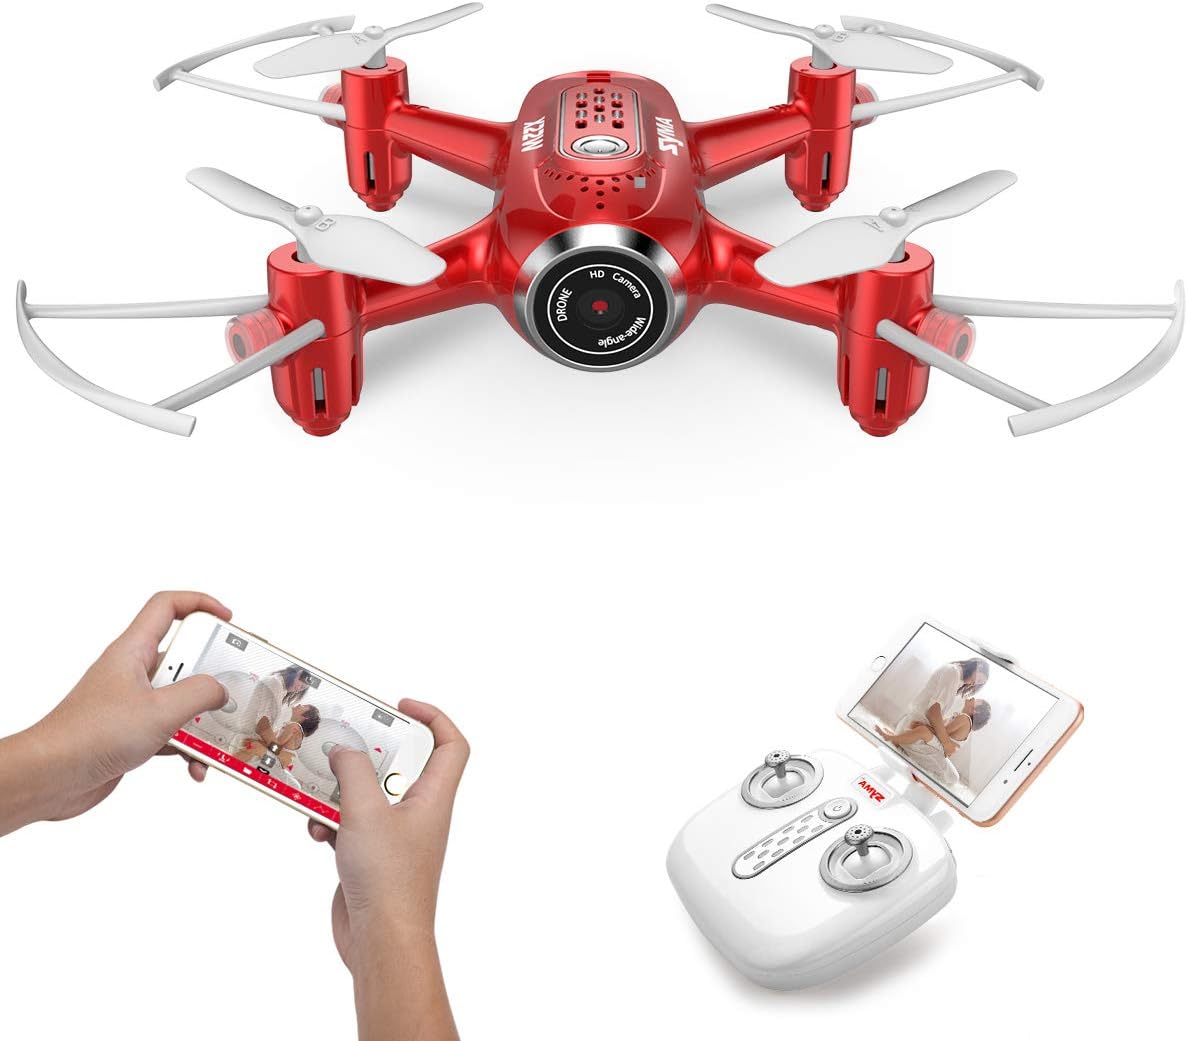
Figure 6: App control and FPV live video functionality.

Figure 7: Drone with finger flight path control via app.
4.7. HD ക്യാമറ
The drone is equipped with a 720p HD camera for capturing photos and videos directly to your smartphone via the SYMA GO app.

Figure 8: Drone's HD camera.
5. പരിപാലനം
- വൃത്തിയാക്കൽ: Use a soft, dry cloth to clean the drone. Do not use solvents or harsh chemicals.
- പ്രൊപ്പല്ലറുകൾ: Regularly check propellers for damage. Replace any bent or broken propellers immediately.
- ബാറ്ററി കെയർ: Store batteries in a cool, dry place. Do not expose to extreme temperatures. Fully charge before storage and periodically during long storage periods.
- സംഭരണം: When not in use, store the drone and remote controller in a safe, dry environment away from direct sunlight.
6. പ്രശ്നപരിഹാരം
| പ്രശ്നം | സാധ്യമായ കാരണം | പരിഹാരം |
|---|---|---|
| ഡ്രോൺ റിമോട്ടിനോട് പ്രതികരിക്കുന്നില്ല. | ജോടിയാക്കിയിട്ടില്ല; ബാറ്ററി കുറവാണ് (ഡ്രോൺ/റിമോട്ട്). | Re-pair the drone and remote. Charge/replace batteries. |
| പറക്കലിനിടെ ഡ്രോൺ തെന്നിമാറി. | Not calibrated; uneven surface during startup. | Ensure drone is on a flat surface during pairing. Perform gyroscope calibration (refer to app/manual for specific steps). |
| Poor video quality/no live feed. | Weak Wi-Fi signal; app not connected. | Ensure strong Wi-Fi connection to drone. Reconnect app. Fly closer to the drone. |
| ചെറിയ ഫ്ലൈറ്റ് സമയം. | ബാറ്ററി പൂർണ്ണമായും ചാർജ് ചെയ്തിട്ടില്ല; പഴയ ബാറ്ററി. | Fully charge battery. Consider replacing old batteries. |
7 സ്പെസിഫിക്കേഷനുകൾ
| ഫീച്ചർ | വിശദാംശങ്ങൾ |
|---|---|
| ബ്രാൻഡ് | SYMA |
| മോഡലിൻ്റെ പേര് | X22W |
| നിറം | ചുവപ്പ് |
| വീഡിയോ ക്യാപ്ചർ റെസല്യൂഷൻ | 720p |
| കണക്റ്റിവിറ്റി ടെക്നോളജി | വൈഫൈ |
| നൈപുണ്യ നില | തുടക്കക്കാരൻ |
| ഇനത്തിൻ്റെ ഭാരം | 7 ഔൺസ് |
| ബാറ്ററി ശേഷി | 3000 മില്ലിamp Hours (total for both batteries, assuming 1500mAh each or similar) |
| നിയന്ത്രണ തരം | അപ്ലിക്കേഷൻ നിയന്ത്രണം |
| മെറ്റീരിയൽ | എബിഎസ് പ്ലാസ്റ്റിക് |
| ഉൽപ്പന്ന അളവുകൾ | 12.6 x 7.48 x 2.76 ഇഞ്ച് |
| ശുപാർശ ചെയ്യുന്ന പ്രായം | 14 വർഷവും അതിൽ കൂടുതലും |
8. വാറൻ്റിയും പിന്തുണയും
For warranty information and technical support, please refer to the official SYMA webസൈറ്റിൽ ബന്ധപ്പെടുക അല്ലെങ്കിൽ നിങ്ങളുടെ റീട്ടെയിലറെ ബന്ധപ്പെടുക. വാങ്ങിയതിന്റെ തെളിവായി നിങ്ങളുടെ വാങ്ങൽ രസീത് സൂക്ഷിക്കുക.