
1. ആമുഖം
This manual provides essential information for the safe and efficient use of your Alienware AW3418DW 34.1-inch Curved Gaming Monitor. This monitor features a WQHD (3440x1440) resolution, a 120Hz refresh rate (overclocked), and NVIDIA G-SYNC technology for an immersive gaming experience. Please read this manual thoroughly before operating the device.
2 സുരക്ഷാ വിവരങ്ങൾ
- Always disconnect the power cable from the wall outlet before cleaning the monitor.
- തീപിടുത്തമോ ഷോക്കോ മൂലമുള്ള അപകടങ്ങൾ ഒഴിവാക്കാൻ മോണിറ്ററിനെ മഴയിലോ ഈർപ്പത്തിലോ തുറന്നുവെക്കരുത്.
- മോണിറ്റർ തുറക്കരുത് casing. ഉള്ളിൽ ഉപയോക്തൃ-സേവനയോഗ്യമായ ഭാഗങ്ങളൊന്നുമില്ല. എല്ലാ സേവനങ്ങളും യോഗ്യതയുള്ള സേവന ഉദ്യോഗസ്ഥരെ ഏൽപ്പിക്കുക.
- വീഴാതിരിക്കാൻ മോണിറ്റർ ഒരു സ്ഥിരതയുള്ളതും പരന്നതുമായ പ്രതലത്തിൽ വയ്ക്കുക.
- മോണിറ്ററിന് ചുറ്റും ശരിയായ വായുസഞ്ചാരം ഉറപ്പാക്കുക. വായുസഞ്ചാര ദ്വാരങ്ങൾ അടയ്ക്കരുത്.
- മോണിറ്ററിനൊപ്പം നൽകിയിരിക്കുന്ന പവർ അഡാപ്റ്ററും കേബിളുകളും മാത്രം ഉപയോഗിക്കുക.
3. പാക്കേജ് ഉള്ളടക്കം
പാക്കേജിൽ എല്ലാ ഘടകങ്ങളും ഉണ്ടെന്ന് ഉറപ്പാക്കുക:
- Alienware AW3418DW Monitor
- മോണിറ്റർ സ്റ്റാൻഡ് (ബേസും റൈസറും)
- പവർ കേബിൾ
- ഡിസ്പ്ലേ പോർട്ട് കേബിൾ
- HDMI കേബിൾ
- USB 3.0 അപ്സ്ട്രീം കേബിൾ
- Documentation (Quick Setup Guide, Safety Information)
4. സജ്ജീകരണം
4.1 ഭൗതിക സജ്ജീകരണം
Carefully remove the monitor and its components from the packaging. Place the monitor face down on a soft cloth or cushion to prevent scratches.
സ്റ്റാൻഡ് അറ്റാച്ചുചെയ്യുന്നു
- Attach the stand riser to the monitor panel until it clicks into place.
- Attach the stand base to the stand riser and tighten the captive screw.

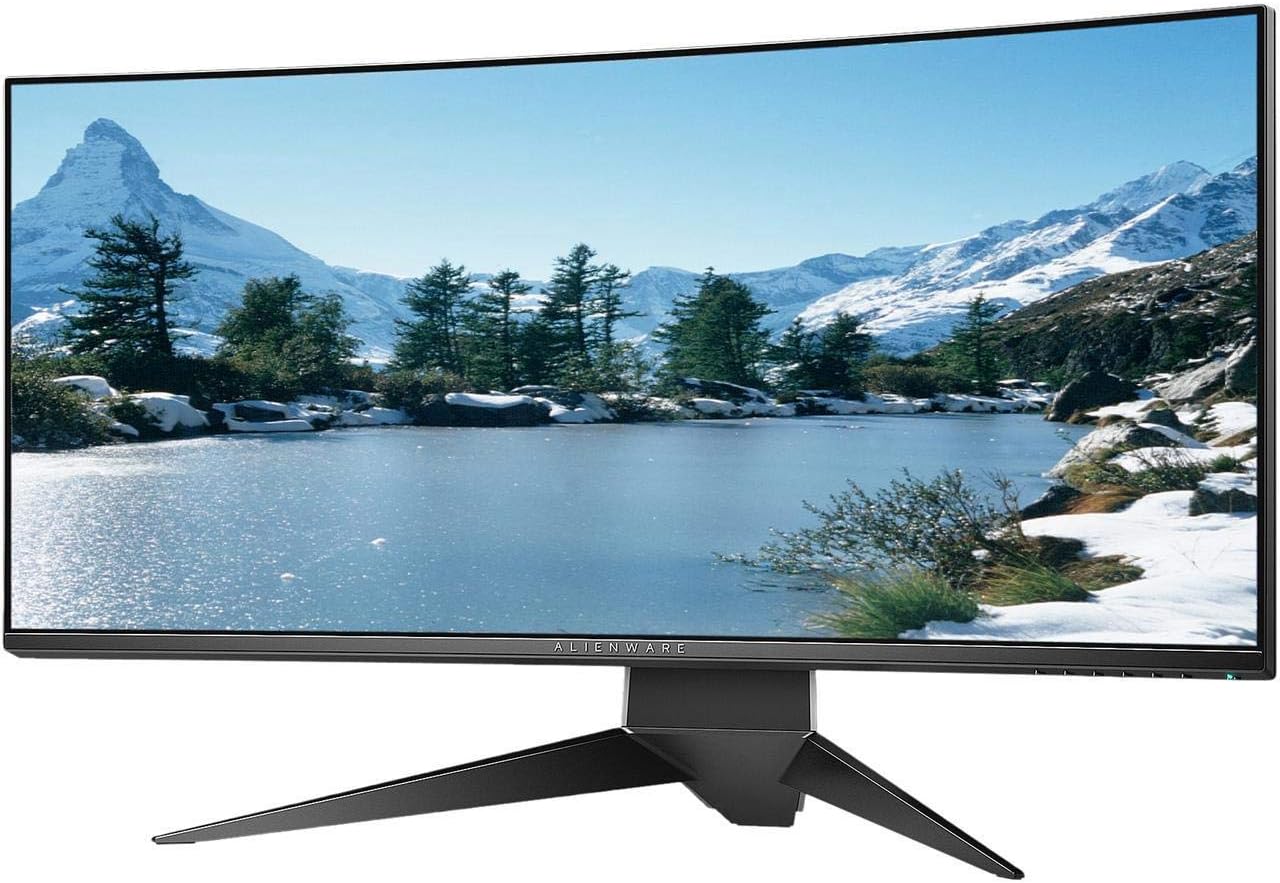
ചിത്രം 4.1: മുൻഭാഗം view of the Alienware AW3418DW monitor with its stand attached.

ചിത്രം 4.2: വശം view of the Alienware AW3418DW monitor with its stand.
ചിത്രം 4.3: പിൻഭാഗം view of the Alienware AW3418DW monitor showing the stand and AlienFX lighting.
വെസ മൗണ്ടിംഗ്
The monitor supports VESA mounting (100 x 100 mm). Remove the stand riser by pressing the release button and then attach the VESA-compatible mount to the monitor using appropriate screws. Ensure the mount can support the monitor's weight of 26.1 pounds (without stand).

Figure 4.4: Monitor dimensions for VESA mount compatibility.
4.2 ബന്ധിപ്പിക്കുന്ന കേബിളുകൾ
Connect the necessary cables to your monitor and computer.
- പവർ കേബിൾ: പവർ കേബിൾ മോണിറ്ററിന്റെ പവർ പോർട്ടിലേക്കും തുടർന്ന് ഒരു വാൾ ഔട്ട്ലെറ്റിലേക്കും ബന്ധിപ്പിക്കുക.
- വീഡിയോ കേബിൾ: Connect either the DisplayPort cable or the HDMI cable from your computer's graphics card to the corresponding port on the monitor. For optimal performance, especially for 120Hz refresh rate and G-SYNC, use the DisplayPort connection.
- യുഎസ്ബി അപ്സ്ട്രീം കേബിൾ: Connect the USB 3.0 upstream cable from your computer to the monitor's upstream USB port to enable the monitor's USB hub functionality.
- USB ഡൗൺസ്ട്രീം പോർട്ടുകൾ: Connect your USB devices (e.g., keyboard, mouse, webcam) to the four USB 3.0 downstream ports on the monitor.
5. പ്രവർത്തന നിർദ്ദേശങ്ങൾ
5.1 പവർ ഓൺ/ഓഫ്
Press the power button located on the monitor to turn it on or off. The power LED will indicate the monitor's status.
5.2 ഓൺ-സ്ക്രീൻ ഡിസ്പ്ലേ (OSD) നാവിഗേഷൻ
The On-Screen Display (OSD) menu allows you to adjust various monitor settings. Use the control buttons, typically located on the bottom right or rear of the monitor, to navigate the OSD.
- OSD മെനു സജീവമാക്കാൻ ഒരു നിയന്ത്രണ ബട്ടൺ അമർത്തുക.
- Use the navigation buttons (up/down/left/right) to move through menu options.
- ഒരു തിരഞ്ഞെടുപ്പ് സ്ഥിരീകരിക്കാൻ തിരഞ്ഞെടുക്കുക ബട്ടൺ അമർത്തുക അല്ലെങ്കിൽ ഒരു ഉപ-മെനു നൽകുക.
- Use the back/exit button to return to the previous menu or exit the OSD.
5.3 ഡിസ്പ്ലേ ക്രമീകരണങ്ങൾ
ഒപ്റ്റിമലിനായി ഡിസ്പ്ലേ ക്രമീകരണങ്ങൾ ക്രമീകരിക്കുക viewing and gaming performance.
- റെസലൂഷൻ: Set your computer's display resolution to 3440x1440 for the native WQHD experience.
- പുതുക്കൽ നിരക്ക്: The monitor supports up to 120Hz refresh rate (overclocked). Ensure your graphics card drivers are updated and the refresh rate is set in your operating system's display settings or graphics control panel.
- NVIDIA G-SynC: For tear-free and smooth gameplay, enable G-SYNC in your NVIDIA Control Panel. This feature synchronizes the monitor's refresh rate with your GPU's frame rate.
- തെളിച്ചം/തീവ്രത: Adjust these settings in the OSD menu to suit your environment and preference.
5.4 ഏലിയൻഎഫ്എക്സ് ലൈറ്റിംഗ്
Customize the AlienFX lighting zones on your monitor through the OSD menu or Alienware Command Center software (if installed on your PC). You can select colors, effects, and synchronize lighting with other Alienware devices.
5.5 യുഎസ്ബി ഹബ് ഉപയോഗം
The monitor acts as a USB 3.0 hub, providing convenient access to four downstream USB ports for connecting peripherals. Ensure the USB upstream cable is connected to your computer for this feature to function.
6. പരിപാലനം
6.1 മോണിറ്റർ വൃത്തിയാക്കുന്നു
- Always unplug the monitor from the electrical outlet before cleaning.
- നനവില്ലാത്തതും ലിനില്ലാത്തതുമായ തുണി ചെറുതായി ഉപയോഗിക്കുകampവെള്ളം അല്ലെങ്കിൽ ഉരച്ചിലുകളില്ലാത്ത സ്ക്രീൻ ക്ലീനർ ഉപയോഗിച്ച് നനയ്ക്കുക.
- ക്ലീനർ നേരിട്ട് സ്ക്രീനിൽ സ്പ്രേ ചെയ്യരുത്.
- പൊടിയും പാടുകളും നീക്കം ചെയ്യാൻ സ്ക്രീൻ സൌമ്യമായി തുടയ്ക്കുക.
- പുറംഭാഗം വൃത്തിയാക്കുക casinമൃദുവായതും ഉണങ്ങിയതുമായ തുണി ഉപയോഗിച്ച് ഗ്രാം.
6.2 സംഭരണം
If storing the monitor for an extended period, disconnect all cables, carefully disassemble the stand (if applicable), and store it in its original packaging in a cool, dry place.
7. പ്രശ്നപരിഹാരം
നിങ്ങളുടെ മോണിറ്ററിൽ പ്രശ്നങ്ങൾ നേരിടുകയാണെങ്കിൽ, ഇനിപ്പറയുന്ന പൊതുവായ ട്രബിൾഷൂട്ടിംഗ് ഘട്ടങ്ങൾ പരിശോധിക്കുക:
- ഡിസ്പ്ലേ ഇല്ല: Ensure all power and video cables are securely connected. Check if the monitor is powered on and the correct input source is selected in the OSD.
- Flickering/Stuttering: Verify that your graphics drivers are up to date. Ensure G-SYNC is properly configured in the NVIDIA Control Panel. Check for interference from other electronic devices.
- തെറ്റായ റെസല്യൂഷൻ/പുതുക്കൽ നിരക്ക്: Adjust the display settings in your operating system or graphics control panel to the native resolution (3440x1440) and desired refresh rate (up to 120Hz).
- ഡെഡ് പിക്സലുകൾ: The Alienware AW3418DW comes with a Premium Panel Guarantee. Refer to the warranty information for details on pixel policy.
- USB പോർട്ടുകൾ പ്രവർത്തിക്കുന്നില്ല: Ensure the USB 3.0 upstream cable is connected from the monitor to your computer.
8 സ്പെസിഫിക്കേഷനുകൾ
| ഫീച്ചർ | സ്പെസിഫിക്കേഷൻ |
|---|---|
| ബ്രാൻഡ് | ഏലിയൻവെയർ |
| മോഡൽ നമ്പർ | AW3418DW |
| സ്ക്രീൻ വലിപ്പം | 34.1 ഇഞ്ച് |
| റെസലൂഷൻ | WQHD (3440 x 1440 Pixels) |
| വീക്ഷണാനുപാതം | 21:9 |
| പുതുക്കിയ നിരക്ക് | 120 ഹെർട്സ് (ഓവർക്ലോക്ക് ചെയ്തത്) |
| പ്രതികരണ സമയം | 4 മില്ലിസെക്കൻഡ് |
| അഡാപ്റ്റീവ് സിൻക് ടെക്നോളജി | എൻവിഡിയ ജി-സിഎൻസി |
| ഡിസ്പ്ലേ തരം | LED IPS |
| വക്രത | 1900R |
| തെളിച്ചം | 300 cd/m² |
| കോൺട്രാസ്റ്റ് റേഷ്യോ | 1000:1 |
| Viewing ആംഗിൾ | 178 ഡിഗ്രി |
| കണക്റ്റിവിറ്റി | 1x DisplayPort (1.2), 1x HDMI (1.4), 4x USB 3.0 Downstream, 1x USB 3.0 Upstream |
| ഇനത്തിൻ്റെ ഭാരം | 26.1 പൗണ്ട് (സ്റ്റാൻഡ് ഇല്ലാതെ) |
| മൗണ്ടിംഗ് തരം | VESA Compatible (100 x 100 mm) |
9. വാറൻ്റിയും പിന്തുണയും
Your Alienware AW3418DW monitor is covered by a 3 Years Limited Hardware Warranty ഒപ്പം 3 Years Advance Exchange Service, ഉൾപ്പെടെ Premium Panel Guarantee. The Premium Panel Guarantee ensures a free panel replacement during the limited hardware warranty period even if only one bright pixel is found.
For technical support, warranty claims, or additional information, please visit the official Alienware or Dell support website. You may also find updated drivers and firmware there.
ഓൺലൈൻ പിന്തുണ: www.dell.com/support