
1. ഉൽപ്പന്നം കഴിഞ്ഞുview
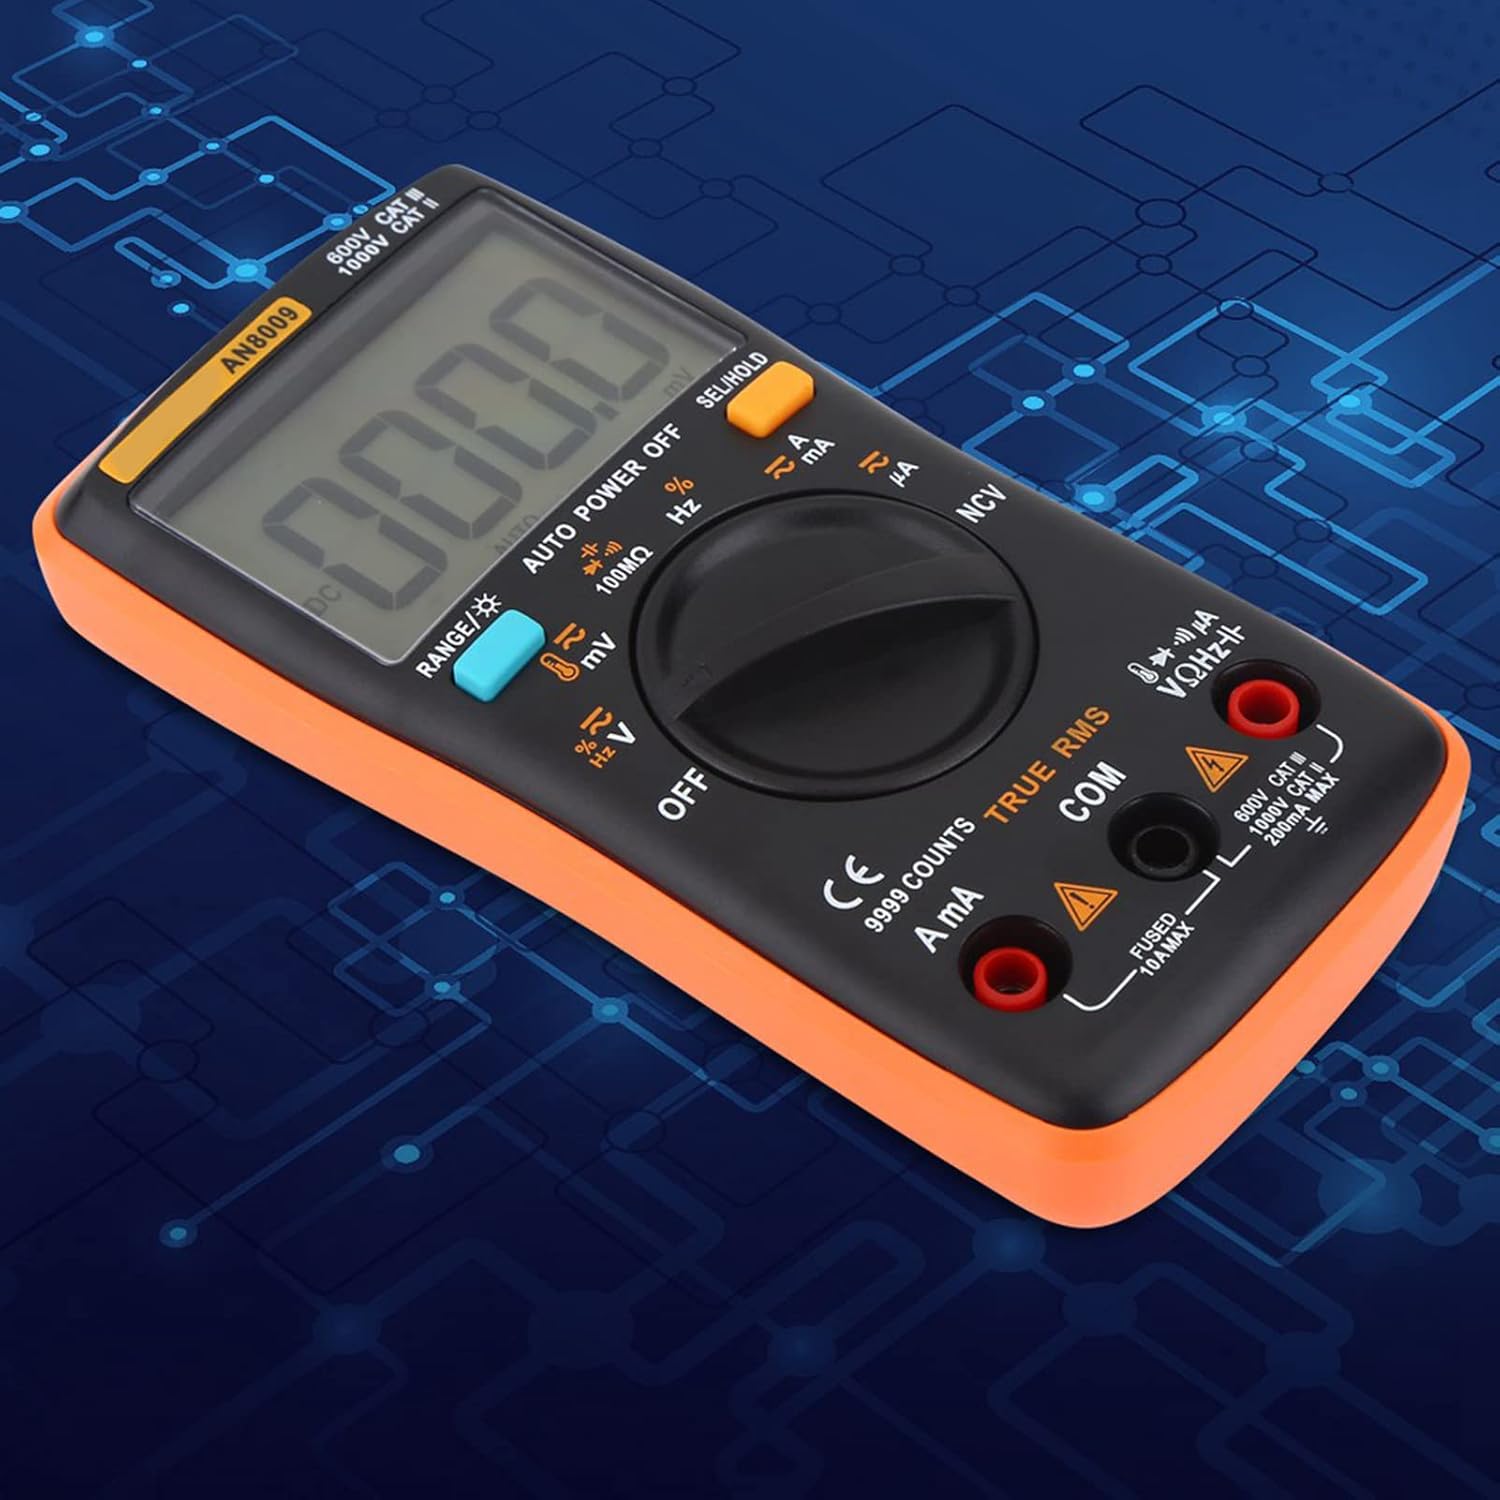
The Walfront AN8009 Autoranging Digital Multimeter is a high-precision, 9999-count, auto-range instrument designed for various electrical measurements. Its compact and ergonomic design makes it highly portable, suitable for both professional and hobbyist use. The large, backlit LCD ensures clear visibility of readings in diverse lighting conditions.
- ബാക്ക്ലിറ്റ് എൽസിഡി: Large overview backlit LCD, digits show clearly and backlight supported.
- പോർട്ടബിൾ: Compact ergonomic design and portable. Multimeter size: 130 x 65 x 30mm / 5.12 x 2.56 x 1.18inch.
- മൾട്ടിമീറ്റർ കിറ്റ്: AN8009 is one of the first 9999 count, auto-range digital multimeters. It can measure AC / DC voltage, DC Current, Resistance, Continuity, Diodes, Transistor hFE and so on.

2. പാക്കേജ് ഉള്ളടക്കം
Upon opening your AN8009 Digital Multimeter kit, please verify that all the following components are included:
- AN8009 Digital Multimeter
- 16-in-1 Multifunctional Test Line Set
- Temperature Sensor (Thermocouple)
- ഉപയോക്തൃ മാനുവൽ
- സ്റ്റോറേജ് ബാഗ്

വീഡിയോ 2.1: ഒരു ഓവർview of the AN8009 Digital Multimeter kit contents, demonstrating the various accessories included for comprehensive testing.
3. സജ്ജീകരണം
Before using your AN8009 Digital Multimeter, follow these steps for initial setup:
- ബാറ്ററി ഇൻസ്റ്റാളേഷൻ: The multimeter is powered by 2 x 1.5V AAA batteries (Not Included). Locate the battery compartment on the back of the unit, open it, insert the batteries according to the polarity markings, and close the compartment securely.
- ടെസ്റ്റ് ലീഡുകൾ ബന്ധിപ്പിക്കുന്നു: Insert the red test lead into the 'VΩHz' or 'A/mA' input jack (depending on the measurement function) and the black test lead into the 'COM' (common) input jack. Ensure a firm connection.
- ആക്സസറികൾ അറ്റാച്ചുചെയ്യുന്നു: For specific measurements, attach the appropriate accessories (e.g., temperature sensor, alligator clips) to the test leads as required.
4. പ്രവർത്തന നിർദ്ദേശങ്ങൾ
The AN8009 Multimeter offers a wide range of measurement functions. Always ensure the correct function is selected and test leads are connected to the appropriate input jacks before taking any measurements.
4.1 അടിസ്ഥാന പ്രവർത്തനം
- പവർ ഓൺ/ഓഫ്: Rotate the central dial to any measurement function to turn the multimeter on. Rotate to 'OFF' to power it off.
- ഫംഗ്ഷൻ തിരഞ്ഞെടുക്കൽ: Use the central rotary dial to select the desired measurement function (e.g., V~ for AC Voltage, V- ഫോർ DC വോള്യങ്ങൾtage, Ω for Resistance).
- ശ്രേണി തിരഞ്ഞെടുക്കൽ: The multimeter is auto-ranging, meaning it automatically selects the appropriate measurement range. For manual range selection, press the 'RANGE' button.
- ബാക്ക്ലൈറ്റ്: Press the backlight button (often indicated by a light bulb icon) to illuminate the LCD.
4.2 Common Measurements
Refer to the specific sections below for detailed instructions on common measurement types:
- എസി/ഡിസി വോളിയംtagഇ അളവ്: അനുയോജ്യമായ വോളിയം തിരഞ്ഞെടുക്കുകtage range (V~ for AC, V- for DC). Connect the test leads in parallel to the circuit or component being measured.
- DC നിലവിലെ അളവ്: Select the appropriate current range (A, mA, or µA). Connect the multimeter in series with the circuit. Ensure the correct input jack is used for the expected current level (10A MAX or 200mA MAX).
- പ്രതിരോധം അളക്കൽ: Select the Ω function. Connect the test leads across the component. Ensure the circuit is de-energized before measuring resistance.
- തുടർച്ച പരിശോധന: Select the continuity function (often indicated by a speaker icon). The multimeter will beep if there is a continuous path (low resistance).
- ഡയോഡ് ടെസ്റ്റ്: ഡയോഡ് ഫംഗ്ഷൻ തിരഞ്ഞെടുക്കുക. ചുവന്ന ലെഡ് ആനോഡിലേക്കും കറുത്ത ലെഡ് ഡയോഡിന്റെ കാഥോഡിലേക്കും ബന്ധിപ്പിക്കുക. ഡിസ്പ്ലേ ഫോർവേഡ് വോള്യം കാണിക്കും.tagഇ ഡ്രോപ്പ്.
- Transistor hFE Test: Use the dedicated hFE socket on the multimeter for testing transistor gain.


5. പരിപാലനം
Proper maintenance ensures the longevity and accuracy of your AN8009 Digital Multimeter.
- വൃത്തിയാക്കൽ: ഉണങ്ങിയ മൃദുവായ തുണി ഉപയോഗിച്ച് മൾട്ടിമീറ്റർ തുടയ്ക്കുക. അബ്രാസീവ് ക്ലീനറുകളോ ലായകങ്ങളോ ഉപയോഗിക്കരുത്.
- സംഭരണം: Store the multimeter in its provided storage bag in a cool, dry place away from direct sunlight and extreme temperatures. Remove batteries if storing for extended periods to prevent leakage.
- ബാറ്ററി മാറ്റിസ്ഥാപിക്കൽ: When the low battery indicator appears on the display, replace the 2 x 1.5V AAA batteries promptly to maintain accurate readings.
- Auto-Power-Off Feature: The multimeter has an auto-power-off feature to conserve battery life. To temporarily disable this feature, hold down the 'SEL/HOLD' button while powering on the meter. Note that this setting is not permanent and must be re-applied each time the meter is turned on.
6. പ്രശ്നപരിഹാരം
If you encounter issues with your AN8009 Digital Multimeter, consider the following common troubleshooting steps:
- ഡിസ്പ്ലേ ഇല്ല/മങ്ങിയ ഡിസ്പ്ലേ: Check battery installation and replace batteries if necessary. Ensure the multimeter is turned on.
- കൃത്യമല്ലാത്ത വായനകൾ: Verify that the correct measurement function is selected and test leads are connected to the appropriate input jacks. Ensure good contact between probes and the circuit. If issues persist, consider professional calibration.
- Continuity Test Issues: If the continuity test is inconsistent or unreliable, inspect the test leads for damage. Poor quality or damaged leads can lead to erratic readings. Consider replacing the test leads if they are worn or faulty.
- പ്രതികരണം ഇല്ല: If the multimeter does not respond to inputs, try turning it off and on again. If the problem persists, remove and reinsert the batteries.
7 സ്പെസിഫിക്കേഷനുകൾ
| സ്പെസിഫിക്കേഷൻ | മൂല്യം |
|---|---|
| മോഡൽ നമ്പർ | എഎൻ8009 |
| ബ്രാൻഡ് | വാൾഫ്രണ്ട് |
| പ്രദർശന എണ്ണം | 9999 എണ്ണം |
| അളവുകൾ (L x W x H) | 130 x 65 x 30mm / 5.12 x 2.56 x 1.18 ഇഞ്ച് |
| ഇനത്തിൻ്റെ ഭാരം | 0.35 കിലോഗ്രാം |
| പവർ ഉറവിടം | 2 x 1.5V AAA ബാറ്ററികൾ (ഉൾപ്പെടുത്തിയിട്ടില്ല) |
| നിറം | ഓറഞ്ച് |
| മാതൃരാജ്യം | ചൈന |

8. വാറൻ്റിയും പിന്തുണയും
For warranty information and technical support, please refer to the documentation provided with your purchase or contact Walfront customer service directly. Additional protection plans may be available for extended coverage:
- 3-വർഷ സംരക്ഷണ പദ്ധതി
- 4-വർഷ സംരക്ഷണ പദ്ധതി
- കംപ്ലീറ്റ് പ്രൊട്ടക്റ്റ് (യോഗ്യമായ മുൻകാല, ഭാവി വാങ്ങലുകൾ ഉൾക്കൊള്ളുന്ന പ്രതിമാസ പ്ലാൻ)
For specific inquiries or assistance, please reach out to the seller, Luoyuu, through the Amazon platform.