
1. ആമുഖം
Thank you for choosing the Technical Pro H12X500UBT 6-Zone Home Theater Bluetooth Receiver and HC85 In-Ceiling Speakers system. This manual provides essential information for the proper installation, operation, and maintenance of your new audio system. Please read this manual thoroughly before use and retain it for future reference.
2 സുരക്ഷാ വിവരങ്ങൾ
സുരക്ഷിതമായ പ്രവർത്തനം ഉറപ്പാക്കുന്നതിനും കേടുപാടുകൾ തടയുന്നതിനും, ദയവായി ഇനിപ്പറയുന്ന സുരക്ഷാ മുൻകരുതലുകൾ പാലിക്കുക:
- ഊർജ്ജ സ്രോതസ്സ്: Connect the receiver only to a 110/220V AC power outlet as specified.
- വെൻ്റിലേഷൻ: Ensure adequate ventilation around the receiver. Do not block ventilation openings. Avoid placing the unit in an enclosed space or on soft surfaces that may obstruct airflow. The built-in cooling fan must not be obstructed.
- ജലവും ഈർപ്പവും: യൂണിറ്റിൽ മഴ, ഈർപ്പം, അമിതമായ ഈർപ്പം എന്നിവ ഏൽക്കരുത്. പാത്രങ്ങൾ പോലുള്ള ദ്രാവകങ്ങൾ നിറച്ച വസ്തുക്കൾ യൂണിറ്റിൽ വയ്ക്കരുത്.
- ചൂട്: റേഡിയേറ്ററുകൾ, ഹീറ്റ് രജിസ്റ്ററുകൾ, സ്റ്റൗകൾ അല്ലെങ്കിൽ മറ്റ് ചൂട് ഉൽപ്പാദിപ്പിക്കുന്ന ഉപകരണങ്ങൾ പോലുള്ള താപ സ്രോതസ്സുകളിൽ നിന്ന് യൂണിറ്റ് അകറ്റി നിർത്തുക.
- പ്ലേസ്മെൻ്റ്: Place the unit on a stable, level surface. Avoid placing it in direct sunlight or near strong magnetic fields.
- സേവനം: ഈ ഉൽപ്പന്നം സ്വയം സർവീസ് ചെയ്യാൻ ശ്രമിക്കരുത്. എല്ലാ സർവീസിംഗും യോഗ്യതയുള്ള സർവീസ് ഉദ്യോഗസ്ഥർക്ക് റഫർ ചെയ്യുക. സി തുറക്കുന്നുasing നിങ്ങളെ അപകടകരമായ വോള്യത്തിലേക്ക് നയിച്ചേക്കാംtagഇ അല്ലെങ്കിൽ മറ്റ് അപകടങ്ങൾ.
- വൃത്തിയാക്കൽ: വൃത്തിയാക്കുന്നതിന് മുമ്പ് പവർ ഔട്ട്ലെറ്റിൽ നിന്ന് യൂണിറ്റ് പ്ലഗ് അൺപ്ലഗ് ചെയ്യുക. മൃദുവായതും ഉണങ്ങിയതുമായ തുണി ഉപയോഗിക്കുക. ലിക്വിഡ് ക്ലീനറുകളോ എയറോസോൾ ക്ലീനറുകളോ ഉപയോഗിക്കരുത്.
3. പാക്കേജ് ഉള്ളടക്കം
പാക്കേജിൽ എല്ലാ ഇനങ്ങളും ഉണ്ടെന്ന് ഉറപ്പാക്കുക:
- 1 x Technical Pro H12X500UBT 6-Zone Home Theater Bluetooth Receiver
- 12 x Rockville HC85 8-inch In-Ceiling Speakers (6 pairs)
- 1 x റിമോട്ട് കൺട്രോൾ
- 1 x പവർ കേബിൾ
- 1 x AM ആന്റിന
- 1 x FM ആന്റിന

Figure 3.1: Complete system package including the receiver, remote, and twelve in-ceiling speakers.
4. ഉൽപ്പന്നം കഴിഞ്ഞുview
4.1. H12X500UBT Receiver Front Panel

Figure 4.1: Front panel of the H12X500UBT receiver and included remote control.

ചിത്രം 4.2: വിശദമായി view of the front panel inputs including USB, SD card slot, MP3 input, and two microphone inputs.
- പവർ ബട്ടൺ: യൂണിറ്റ് ഓണാക്കുകയോ ഓഫാക്കുകയോ ചെയ്യുന്നു.
- MP3 Input (3.5mm): ബാഹ്യ ഓഡിയോ ഉപകരണങ്ങൾ ബന്ധിപ്പിക്കുക.
- MIC1/MIC2 Inputs (1/4"): മൈക്രോഫോണുകൾ ബന്ധിപ്പിക്കുക.
- USB പോർട്ട്: For playing MP3, WAV, WMA fileയുഎസ്ബി ഡ്രൈവുകളിൽ നിന്നുള്ള എസ്.
- SD കാർഡ് സ്ലോട്ട്: For playing MP3, WAV, WMA fileSD കാർഡുകളിൽ നിന്നുള്ള ങ്ങൾ.
- Input/Function Selector: Cycles through audio sources (RCA, USB, SD, MP3, Bluetooth, AM/FM).
- Digital FL Readout: Displays current status and spectrum.
- ബ്ലൂടൂത്ത് സൂചകം: ബ്ലൂടൂത്ത് സജീവമാകുമ്പോൾ പ്രകാശിക്കുന്നു.
- മാസ്റ്റർ വോളിയം: മൊത്തത്തിലുള്ള ഔട്ട്പുട്ട് വോളിയം ക്രമീകരിക്കുന്നു.
- Sub Out / Pre Out: Output controls.
- Mic Volume, Bass, Treble, Echo: Controls for microphone inputs.
- Speaker Zone Selectors (1-6): Activates or deactivates speaker zones.
4.2. H12X500UBT Receiver Rear Panel

Figure 4.3: Rear panel of the H12X500UBT receiver, detailing speaker outputs, audio inputs, and antenna connections.
- Speaker Outputs (Banana Binding Post): Connect speakers for each of the 6 zones.
- Stereo Inputs (RCA): Connect external audio sources like CD players, DVD players, etc.
- Source Output (RCA): Audio output for recording or connecting to another ampജീവൻ.
- Sub Output (RCA): ഒരു പവർഡ് സബ് വൂഫറിലേക്ക് കണക്റ്റുചെയ്യുക.
- ആന്റിന ടെർമിനലുകൾ: Connect AM and FM antennas for radio reception.
- കൂളിംഗ് ഫാൻ: Ensures proper heat dissipation. Do not obstruct.
- പവർ ഇൻപുട്ട്: എസി പവർ കേബിൾ ബന്ധിപ്പിക്കുക.
4.3. HC85 In-Ceiling Speakers
The HC85 speakers are 8-inch 2-way in-ceiling speakers designed for flush mounting. They feature a polypropylene cone, rubber surround, and a Mylar dome tweeter. The tweeter is aim-able/swivel for directional sound. The grills are paintable to match your decor.
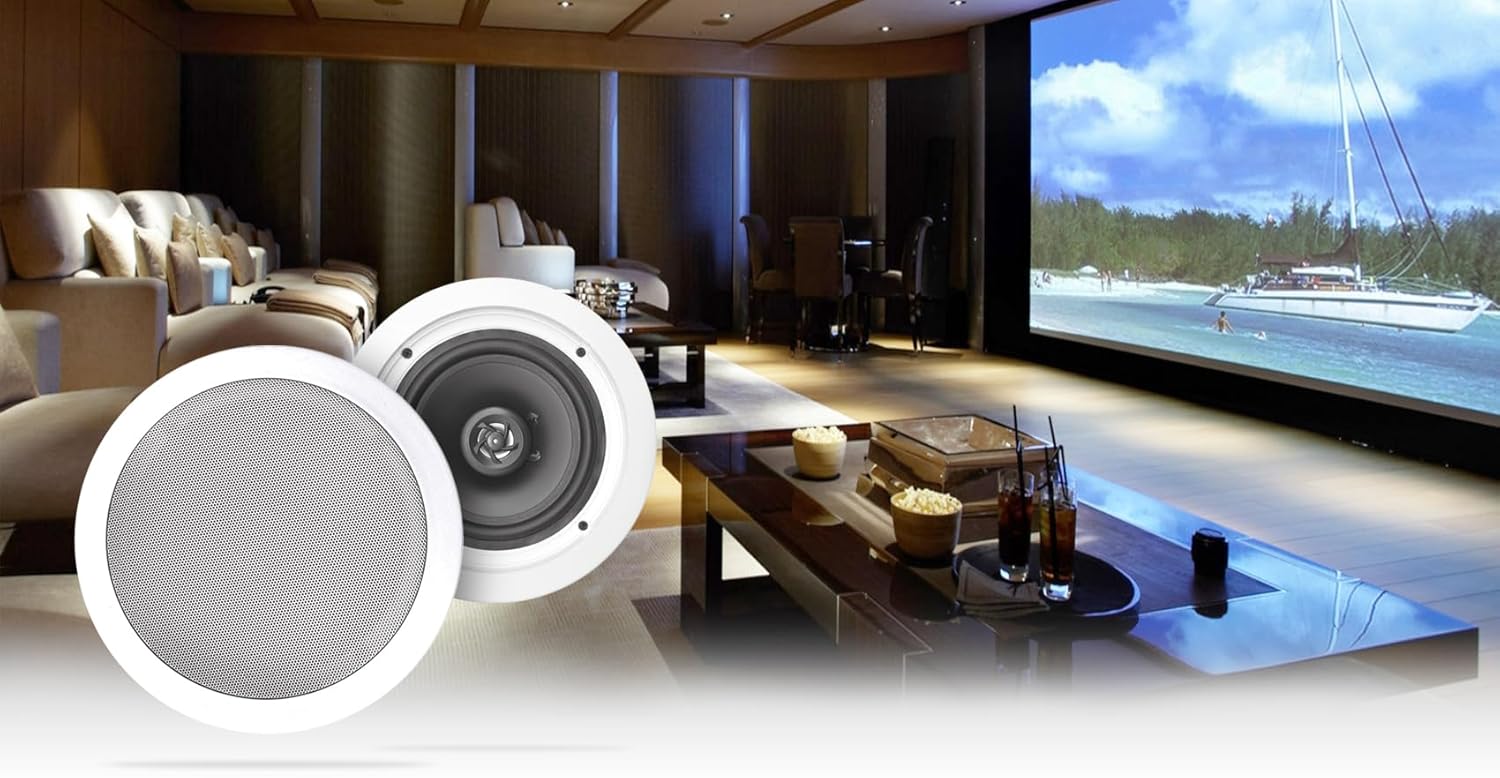
ചിത്രം 4.4: ഉദാample of in-ceiling speakers integrated into a home theater environment.
5. സജ്ജീകരണം
5.1. റിസീവർ പ്ലേസ്മെന്റ്
Place the H12X500UBT receiver on a flat, stable surface. Ensure there is sufficient space around the unit for proper ventilation, especially around the side vents and rear cooling fan. Avoid placing it inside a closed cabinet without adequate airflow.

Figure 5.1: Receiver showing side ventilation for proper airflow.
5.2 സ്പീക്കർ ഇൻസ്റ്റാളേഷൻ
The HC85 speakers are designed for in-ceiling installation. Consult a professional installer if you are unsure about the installation process. The cut-out diameter required is 9.3 inches, and the mounting depth is 3.03 inches.
- തുറക്കൽ തയ്യാറാക്കുക: Carefully cut a circular hole in the ceiling at the desired location, ensuring no electrical wires or pipes are present.
- വയർ കണക്ഷൻ: Connect speaker wires from the receiver to the spring-loaded push terminals on the back of each speaker. Ensure correct polarity (+ to + and - to -).
- മൗണ്ട് സ്പീക്കർ: Insert the speaker into the opening. The mounting clips will secure the speaker in place.
- ഗ്രിൽ അറ്റാച്ചുചെയ്യുക: Place the paintable flush mount grille onto the speaker.
5.3. Connecting Speakers to Receiver
The H12X500UBT receiver supports up to 6 zones, each with left and right speaker outputs. Use high-quality speaker wire to connect your HC85 speakers to the corresponding banana binding post terminals on the receiver's rear panel. Ensure correct polarity for all connections.
- Connect the positive (+) terminal of each speaker to the positive (+) terminal of the corresponding speaker output on the receiver.
- Connect the negative (-) terminal of each speaker to the negative (-) terminal of the corresponding speaker output on the receiver.
5.4. ഓഡിയോ ഉറവിടങ്ങൾ ബന്ധിപ്പിക്കുന്നു
- RCA ഇൻപുട്ടുകൾ: Use RCA cables to connect external audio devices (e.g., CD player, DVD player, TV) to the STEREO INPUT (CD, DVD, PRE-AMP) jacks on the rear panel.
- MP3 ഇൻപുട്ട്: Connect portable audio devices using a 3.5mm audio cable to the MP3 input on the front panel.
- USB/SD കാർഡ്: Insert a USB drive or SD card into the respective slots on the front panel.
- മൈക്രോഫോണുകൾ: Connect 1/4" microphones to the MIC1 or MIC2 inputs on the front panel.
5.5. ആന്റിന കണക്ഷൻ
Connect the included AM and FM antennas to their respective terminals on the rear panel for radio reception.
5.6. പവർ കണക്ഷൻ
After all other connections are made, connect the power cable to the receiver's power input and then to a suitable 110/220V AC power outlet.
6. പ്രവർത്തന നിർദ്ദേശങ്ങൾ
6.1. പവർ ഓൺ/ഓഫ്
അമർത്തുക പവർ റിസീവർ ഓണാക്കാനോ ഓഫാക്കാനോ മുൻ പാനലിലെ ബട്ടണോ റിമോട്ട് കൺട്രോളോ അമർത്തുക.
6.2. ഉറവിടം തിരഞ്ഞെടുക്കൽ
അമർത്തുക INPUT/FUNCTION button on the front panel or the corresponding source buttons on the remote control (e.g., CD, DVD, USB, SD, Bluetooth, AM/FM) to select your desired audio source.
6.3. വോളിയം നിയന്ത്രണം
തിരിക്കുക മാസ്റ്റർ വോളിയം മുൻ പാനലിലെ നോബ് അല്ലെങ്കിൽ ഉപയോഗിക്കുക VOL + / VOL- buttons on the remote control to adjust the overall system volume.
6.4. ബ്ലൂടൂത്ത് ജോടിയാക്കൽ
- തിരഞ്ഞെടുക്കുക ബ്ലൂടൂത്ത് as the input source using the Input/Function button. The Bluetooth indicator on the display will flash.
- നിങ്ങളുടെ മൊബൈൽ ഉപകരണത്തിൽ, ബ്ലൂടൂത്ത് പ്രവർത്തനക്ഷമമാക്കി ലഭ്യമായ ഉപകരണങ്ങൾക്കായി തിരയുക.
- Select "H12X500UBT" from the list of devices.
- Once paired, the Bluetooth indicator on the receiver will stop flashing and remain solid. You can now play audio from your device.
6.5. യുഎസ്ബി/എസ്ഡി പ്ലേബാക്ക്
Insert a USB drive or SD card containing MP3, WAV, or WMA files into the respective front panel slot. The receiver will automatically switch to the USB/SD source and begin playback. Use the playback controls (Play/Pause, Next, Previous, Repeat, Random) on the front panel or remote.
6.6. AM/FM ട്യൂണർ
തിരഞ്ഞെടുക്കുക AM or FM as the input source. Use the tuning buttons on the remote or front panel to scan for radio stations. The digital FL readout will display the frequency.
6.7. Microphone Inputs
Connect microphones to the MIC1 or MIC2 inputs. Use the എംഐസി വോൾ, MIC BASS, MIC ട്രെബിൾ, ഒപ്പം MIC എക്കോ knobs on the front panel to adjust microphone levels and effects.
6.8. ടോൺ നിയന്ത്രണങ്ങൾ
ക്രമീകരിക്കുക ബാസ്സ്, ട്രെബിൾ, ഒപ്പം ബാലൻസ് controls on the front panel or remote to customize the audio output to your preference.
6.9. Speaker Zone Control
Use the speaker zone selector buttons (1-6) on the front panel to activate or deactivate individual speaker zones as needed.
7. പരിപാലനം
7.1. വൃത്തിയാക്കൽ
Unplug the receiver from the power outlet before cleaning. Use a soft, dry cloth to wipe the exterior surfaces. Do not use abrasive cleaners, waxes, or solvents as they may damage the finish.
7.2. വെൻ്റിലേഷൻ
Regularly check that the ventilation openings on the receiver are clear of dust and debris. Ensure the cooling fan on the rear panel is not obstructed to prevent overheating.
8. പ്രശ്നപരിഹാരം
| പ്രശ്നം | സാധ്യമായ കാരണം | പരിഹാരം |
|---|---|---|
| ശക്തിയില്ല | Power cable not connected; Power outlet not active; Unit is off. | Ensure power cable is securely connected. Check power outlet. Press the POWER button. |
| ശബ്ദമില്ല | Incorrect input source selected; Volume too low; Speakers not connected or faulty; Speaker zones deactivated. | Select the correct input source. Increase master volume. Check speaker connections and polarity. Activate desired speaker zones. |
| ബ്ലൂടൂത്ത് കണക്റ്റ് ചെയ്യുന്നില്ല | Receiver not in Bluetooth mode; Device not in pairing mode; Device too far. | Select Bluetooth input. Ensure device Bluetooth is on and searching. Move device closer to receiver (within 30 feet). |
| Audio cuts out or unit runs hot | Insufficient ventilation; Overload. | Ensure adequate space around the receiver for airflow. Check that the cooling fan is not obstructed. Reduce volume or number of active speakers if consistently overheating. |
| USB/SD പ്ലേബാക്ക് പ്രശ്നങ്ങൾ | പിന്തുണയ്ക്കുന്നില്ല file ഫോർമാറ്റ്; കേടായത് files; USB/SD card not properly inserted. | ഉറപ്പാക്കുക files are MP3, WAV, or WMA. Try a different USB/SD card. Reinsert the card/drive. |
9 സ്പെസിഫിക്കേഷനുകൾ
H12X500UBT Receiver
- പീക്ക് പവർ കൈകാര്യം ചെയ്യൽ: 6000 വാട്ട്സ്
- RMS പവർ: 650 Watts (Both Channels Driven @ 1.0% THD @ 8 Ohms)
- ഇൻപുട്ടുകൾ: (2) RCA, USB, SD Card, MP3 (3.5mm)
- ഔട്ട്പുട്ടുകൾ: Banana Binding Post (4 Speakers), Push Button (Surround Sound Speakers), RCA (Source Out, Sub Out)
- File പ്ലേബാക്ക്: MP3, WAV, WMA (from USB & SD)
- ബ്ലൂടൂത്ത്: 2.4 GHz Technology, A2DP Stereo, 30 Feet Range
- ട്യൂണർ: AM/FM Digital
- നിയന്ത്രണങ്ങൾ: Bass, Treble, Balance, Dual 1/4'' Mic Inputs with Volume, Echo, Bass, Treble
- ഡിസ്പ്ലേ: Digital FL Readout With Spectrum Display
- തണുപ്പിക്കൽ: Built-In Cooling Speed Fan
- വാല്യംtage: 110/220V
- ഉൽപ്പന്ന അളവുകൾ (L x W x H): 17" x 4.5" x 13" ഇഞ്ച്
- ഇനത്തിൻ്റെ ഭാരം: 23 Lbs (Receiver only)
HC85 In-Ceiling Speakers (per speaker)
- പീക്ക് പവർ കൈകാര്യം ചെയ്യൽ: 350 വാട്ട്സ്
- RMS പവർ കൈകാര്യം ചെയ്യൽ: 120 വാട്ട്സ്
- വൂഫർ: 8" Polypropylene Cone with Rubber Surround
- വോയ്സ് കോയിൽ: 1" Aluminum
- ട്വീറ്റർ: Mylar Dome, Aim-able/Swivel
- കാന്തം: 20 oz. Ferrite
- ഫ്രീക്വൻസി പ്രതികരണം: 40Hz - 20KHz
- സംവേദനക്ഷമത: 89dB @ 1w / 1m
- പ്രതിരോധം: 8 ഓം
- മൗണ്ടിംഗ് ഡെപ്ത്: 3.03 ഇഞ്ച്
- കട്ട് out ട്ട് വ്യാസം: 9.3 ഇഞ്ച്
- നിറം: വെള്ള (പെയിന്റബിൾ)

Figure 9.1: Dimensions of the H12X500UBT receiver.
10. വാറൻ്റിയും പിന്തുണയും
This Technical Pro product is covered by a Limited Warranty. For specific details regarding warranty coverage, terms, and conditions, please refer to the warranty card included with your purchase or contact Technical Pro customer support. For technical assistance or service inquiries, please visit the official Technical Pro webസൈറ്റ് അല്ലെങ്കിൽ അവരുടെ ഉപഭോക്തൃ സേവന വിഭാഗവുമായി ബന്ധപ്പെടുക.