
1. ആമുഖം
This manual provides detailed instructions for the installation, operation, and maintenance of your EBTOOLS 12V/24V 50A Solar Charge Controller. This intelligent regulator is designed to manage power flow from your solar panel to your battery and load, ensuring efficient and safe charging. It features dual USB ports, PWM/MPPT auto-parameter adjustment, and an LCD display for monitoring system status.
2 സുരക്ഷാ വിവരങ്ങൾ
Please read all instructions carefully before installation and operation. Failure to follow these instructions may result in damage to the controller, battery, or other components, and may cause personal injury.
- പവർ പ്രയോഗിക്കുന്നതിന് മുമ്പ് എല്ലാ കണക്ഷനുകളും ശരിയാണെന്നും സുരക്ഷിതമാണെന്നും ഉറപ്പാക്കുക.
- Connect the battery first, then the solar panel, and finally the load. Disconnect in the reverse order.
- Do not connect the solar panel to the AC power supply.
- The controller is designed for indoor use. Avoid exposure to direct sunlight, high temperatures, and moisture.
- Ensure adequate ventilation around the controller.
- Use appropriate wire gauges for all connections to prevent overheating.
- ഈ ഉപകരണം ഒരു കളിപ്പാട്ടമല്ല. കുട്ടികളിൽനിന്നും നിന്നും ദൂരെ വയ്ക്കുക.
3. ഉൽപ്പന്നം കഴിഞ്ഞുview
The EBTOOLS Solar Charge Controller integrates advanced charging technology to optimize battery life and system performance. Key components include the LCD display, control buttons, connection terminals, and USB output ports.
3.1 ഫ്രണ്ട് പാനൽ
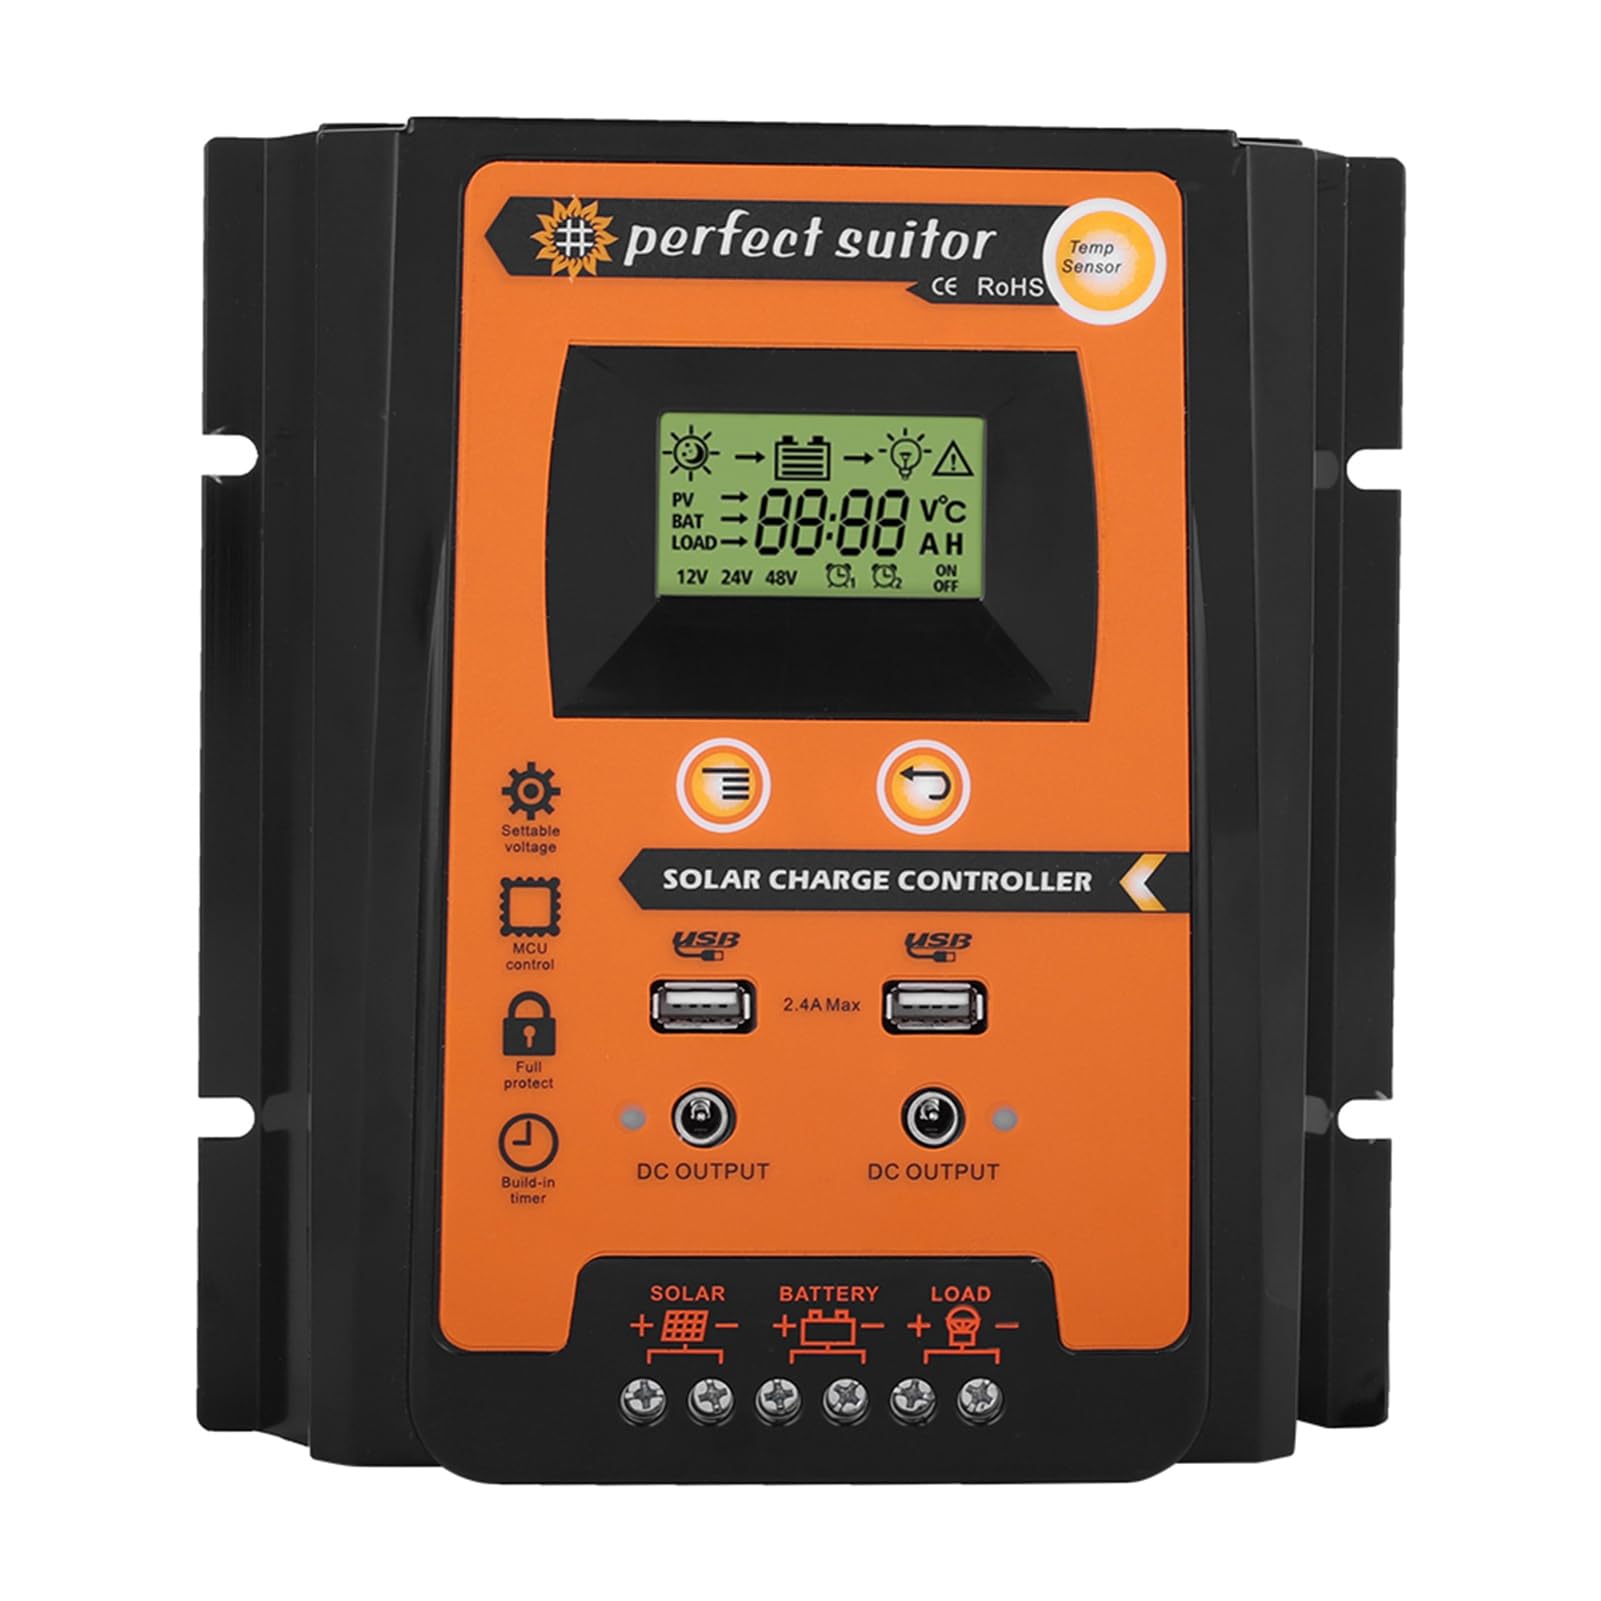
ചിത്രം 3.1: മുൻഭാഗം view of the EBTOOLS Solar Charge Controller. This image displays the LCD screen, control buttons, dual USB output ports, and indicators for solar, battery, and load connections.
3.2 പിൻ പാനൽ

ചിത്രം 3.2: പിൻഭാഗം view of the EBTOOLS Solar Charge Controller. The rear panel features heat sink fins for efficient heat dissipation.
3.3 അളവുകൾ

Figure 3.3: Dimensions of the EBTOOLS Solar Charge Controller. The unit measures approximately 21cm (8.3 inches) in length, 19.2cm (7.6 inches) in width, and 5.5cm (2.2 inches) in height.
4. സജ്ജീകരണവും ഇൻസ്റ്റാളേഷനും
Follow these steps for proper installation of the solar charge controller. Ensure all power sources are disconnected before making any connections.
4.1 Connection Sequence
- ബാറ്ററി ബന്ധിപ്പിക്കുക: Connect the battery to the controller's battery terminals (+ and -). The LCD display will light up.
- സോളാർ പാനൽ ബന്ധിപ്പിക്കുക: Connect the solar panel to the controller's solar panel terminals (+ and -).
- ലോഡ് ബന്ധിപ്പിക്കുക: Connect the load to the controller's load terminals (+ and -).
പ്രധാനപ്പെട്ടത്: Always connect the battery first, then the solar panel, and finally the load. Disconnect in the reverse order: load, then solar panel, then battery.

Figure 4.1: Controller Connection Method. This diagram illustrates the correct wiring sequence from the solar panel to the controller, then to the battery, and finally to the load.
4.2 മൗണ്ടിംഗ്
Mount the controller on a vertical surface in a well-ventilated area, away from direct sunlight, high temperatures, and moisture. Ensure there is sufficient space around the controller for air circulation.
5. പ്രവർത്തന നിർദ്ദേശങ്ങൾ
The controller automatically detects 12V or 24V system voltage. The LCD display provides real-time information about your solar system.
5.1 എൽസിഡി ഡിസ്പ്ലേ
The LCD displays various parameters including battery voltagഇ, സോളാർ പാനൽ വോള്യംtage, load current, battery charge status, and error codes.
5.2 നിയന്ത്രണ ബട്ടണുകൾ
- മെനു ബട്ടൺ: Press to cycle through display modes and enter setting menus.
- അപ്പ്/ഡൗൺ ബട്ടണുകൾ: Used to adjust parameters within the setting menus.
- ബട്ടൺ നൽകുക: തിരഞ്ഞെടുപ്പുകൾ സ്ഥിരീകരിക്കുകയും ക്രമീകരണങ്ങൾ സംരക്ഷിക്കുകയും ചെയ്യുന്നു.
5.3 USB ഔട്ട്പുട്ട്
The dual USB ports provide a 5V/2.4A output for charging mobile devices. These ports are active when the controller is powered.
6. പരിപാലനം
നിങ്ങളുടെ സോളാർ ചാർജ് കൺട്രോളറിന്റെ മികച്ച പ്രകടനവും ദീർഘായുസ്സും പതിവ് അറ്റകുറ്റപ്പണികൾ ഉറപ്പാക്കുന്നു.
- കണക്ഷനുകൾ പരിശോധിക്കുക: എല്ലാ വയറിംഗ് കണക്ഷനുകളുടെയും ഇറുകിയതയ്ക്കും നാശത്തിനും ഇടയ്ക്കിടെ പരിശോധിക്കുക.
- ക്ലീൻ കൺട്രോളർ: കൺട്രോളർ വൃത്തിയായും പൊടിയും അവശിഷ്ടങ്ങളും ഇല്ലാതെയും സൂക്ഷിക്കുക. വൃത്തിയാക്കാൻ ഉണങ്ങിയ തുണി ഉപയോഗിക്കുക.
- വെൻ്റിലേഷൻ: വെന്റിലേഷൻ തുറസ്സുകൾ അടഞ്ഞിട്ടില്ലെന്ന് ഉറപ്പാക്കുക.
- ബാറ്ററി പരിശോധന: Regularly check the battery terminals for corrosion and ensure the battery is in good condition.
7. പ്രശ്നപരിഹാരം
നിങ്ങളുടെ സോളാർ ചാർജ് കൺട്രോളറിൽ നിങ്ങൾ നേരിട്ടേക്കാവുന്ന സാധാരണ പ്രശ്നങ്ങളെ ഈ വിഭാഗം അഭിസംബോധന ചെയ്യുന്നു.
| പ്രശ്നം | സാധ്യമായ കാരണം | പരിഹാരം |
|---|---|---|
| LCD ഡിസ്പ്ലേ ഓഫാണ് | ബാറ്ററി കണക്റ്റുചെയ്തിട്ടില്ല അല്ലെങ്കിൽ കുറഞ്ഞ വോളിയംtage | Check battery connections; charge battery if voltagഇ വളരെ കുറവാണ്. |
| ബാറ്ററി ചാർജ് ചെയ്യുന്നില്ല | Solar panel not connected, insufficient sunlight, or faulty panel/wiring | Check solar panel connections; ensure adequate sunlight; test solar panel output. |
| ലോഡ് പ്രവർത്തിക്കുന്നില്ല. | Load not connected, overload, or battery low voltagഇ സംരക്ഷണം | Check load connections; reduce load; charge battery. |
| ഓവർ-വോളിയംtagഇ സംരക്ഷണം | ബാറ്ററി വോളിയംtagഇ വളരെ ഉയർന്നതാണ് | Controller will automatically stop charging. Check battery health. |
8 സ്പെസിഫിക്കേഷനുകൾ
Technical specifications for the EBTOOLS 12V/24V 50A Solar Charge Controller.
| ഫീച്ചർ | വിശദാംശങ്ങൾ |
|---|---|
| മോഡൽ | PVSC50A |
| സിസ്റ്റം വോളിയംtage | 12V/24V ഓട്ടോ സെൻസിംഗ് |
| റേറ്റുചെയ്ത ചാർജ് കറൻ്റ് | 50എ |
| റേറ്റുചെയ്ത ഡിസ്ചാർജ് കറന്റ് | 50എ |
| പരമാവധി സോളാർ ഇൻപുട്ട് | 50V-യിൽ കുറവ് |
| USB ഔട്ട്പുട്ട് | Dual USB 5V/2.4A (Max) |
| മെറ്റീരിയൽ | പ്ലാസ്റ്റിക് |
| ഉൽപ്പന്ന അളവുകൾ | 6.89 x 5.51 x 1.57 ഇഞ്ച് (17.5 x 14 x 4 സെ.മീ) |
| ഇനത്തിൻ്റെ ഭാരം | 1.06 പൗണ്ട് (0.48 കി.ഗ്രാം) |
9. വാറൻ്റിയും പിന്തുണയും
EBTOOLS products are designed for reliability and performance. For warranty information or technical support, please refer to the documentation provided with your purchase or contact your retailer. Keep your purchase receipt for warranty claims.