ആമുഖം
This manual provides instructions for the setup, operation, maintenance, and troubleshooting of your new replacement remote control for Optoma projectors. This remote is designed to be compatible with a wide range of Optoma projector models, offering a convenient and reliable control solution.
Compatible Optoma Projector Models:
- HD26, X412, HD26B, HD26BR, UHD300X
- GT1080, GT1080E, GT1080DARBEE, GT1070X, VDGTGZBZ, GT1070Xe
- HD141X, HD143X, H181X, DH1008, DH1009
- HD37, UHD60, HDF536, HDF537ST, HD200D
- HD39DARBEE, VDHDNBDSE, UHD65, HD27, HD27E, HD27HDR, HD29DARBEE
- EH200ST, EH412ST, GT5600, VDHDNL, HD142X, HD144X, HD152X
- UHD550X, HD28HDR, HD28DSE, UHD40, UHD50, UHZ65, VDUHDLZ, ZH403, HD39HDR, UHD35
Please verify that your original remote control is identical to this replacement model for full functionality. If your original remote differs, some functions may not be fully compatible.
സജ്ജമാക്കുക
ബാറ്ററി ഇൻസ്റ്റാളേഷൻ
The remote control requires two (2) AA batteries for operation. Batteries are not included with the remote control.
- റിമോട്ട് കൺട്രോളിന്റെ പിൻഭാഗത്ത് ബാറ്ററി കമ്പാർട്ട്മെന്റ് കണ്ടെത്തുക.
- ബാറ്ററി കമ്പാർട്ട്മെന്റ് കവർ താഴേക്ക് സ്ലൈഡ് ചെയ്യുക അല്ലെങ്കിൽ ലാച്ച് അമർത്തി ലിഫ്റ്റ് ഉപയോഗിച്ച് തുറക്കുക.
- കമ്പാർട്ടുമെന്റിനുള്ളിലെ അടയാളപ്പെടുത്തലുകളുമായി പോസിറ്റീവ് (+), നെഗറ്റീവ് (-) ടെർമിനലുകൾ ശരിയായി വിന്യസിക്കുന്നുണ്ടെന്ന് ഉറപ്പാക്കിക്കൊണ്ട് രണ്ട് AA ബാറ്ററികൾ ഇടുക.
- സുരക്ഷിതമായി ക്ലിക്ക് ചെയ്യുന്നതുവരെ ബാറ്ററി കമ്പാർട്ട്മെന്റ് കവർ തിരികെ സ്ഥലത്തേക്ക് സ്ലൈഡുചെയ്ത് മാറ്റിസ്ഥാപിക്കുക.

The remote control's rear panel, with the battery cover removed, revealing the battery compartment and regulatory markings.

The remote control's front, highlighting the requirement for two AA batteries for operation.
ഓപ്പറേഷൻ
അടിസ്ഥാന പ്രവർത്തനങ്ങൾ
Point the remote control directly at the infrared receiver on your Optoma projector. The maximum effective range is approximately 10 meters (33 feet).
ഒരു വ്യക്തമായ view of the remote control's front face, displaying all functional buttons including power, menu, volume, and source selection.
- ഓൺ/ഓഫ്: Press the 'ON' button to power on the projector. Press the 'OFF' button to power off the projector.
- മെനു: Access the projector's on-screen display (OSD) menu.
- നാവിഗേഷൻ ബട്ടണുകൾ (മുകളിലേക്ക്, താഴേക്ക്, ഇടത്തേക്ക്, വലത്തേക്ക്, നൽകുക): Use these buttons to navigate through menu options and confirm selections.
- വോളിയം +/-: ഓഡിയോ ഔട്ട്പുട്ട് ലെവൽ ക്രമീകരിക്കുക.
- ഉറവിടം: Cycle through available input sources (e.g., HDMI1, HDMI2, VGA1, VGA2, Video, YPbPr).
- നിശബ്ദമാക്കുക: ഓഡിയോ മ്യൂട്ട് ചെയ്യുക അല്ലെങ്കിൽ അൺമ്യൂട്ട് ചെയ്യുക.
- തെളിച്ചം: Adjust the projector's brightness setting.
- ദൃശ്യതീവ്രത: Adjust the projector's contrast setting.
- കീസ്റ്റോൺ: Access keystone correction settings to adjust image geometry.
- വീക്ഷണ അനുപാതം: Change the image aspect ratio.
- മോഡ്: Select different display modes.
- 3 ഡി: Activate or deactivate 3D mode (if supported by projector).
- സ്ലീപ്പ് ടൈമർ: Set a timer for the projector to automatically power off.
- Re-sync: Re-synchronize the input signal.
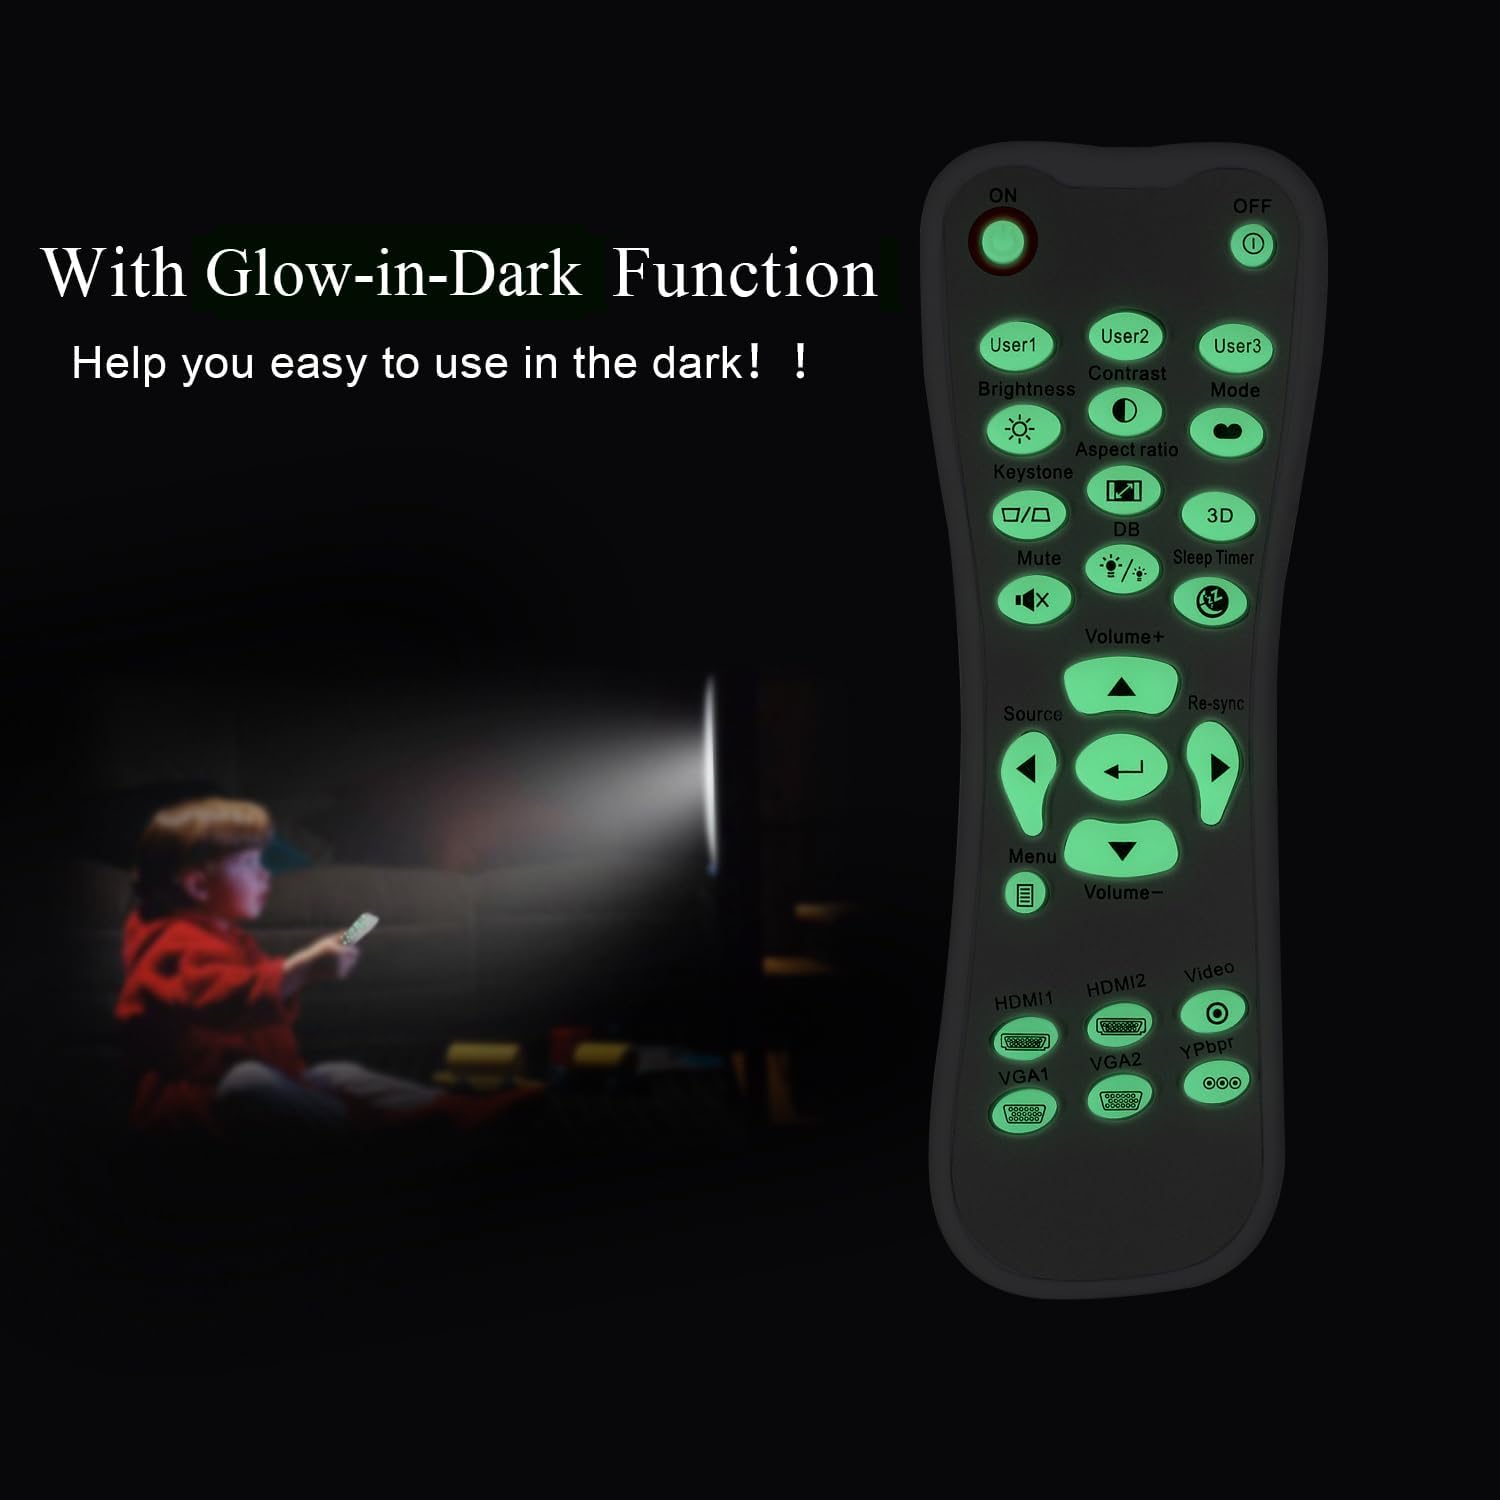
Glow-in-Dark Function
Certain buttons on this remote control are designed to glow in the dark, enhancing visibility and ease of use in low-light conditions. For optimal luminous effect, expose the remote control to bright light for a period before use in the dark.

The remote control features glow-in-the-dark buttons, making it visible and easy to use in low-light environments, such as a darkened room during projector use.
പ്രവർത്തന ശ്രേണി
The remote control operates using infrared (IR) technology. Ensure a clear line of sight between the remote control and the projector's IR receiver. The effective operating distance is up to 10 meters (approximately 33 feet).
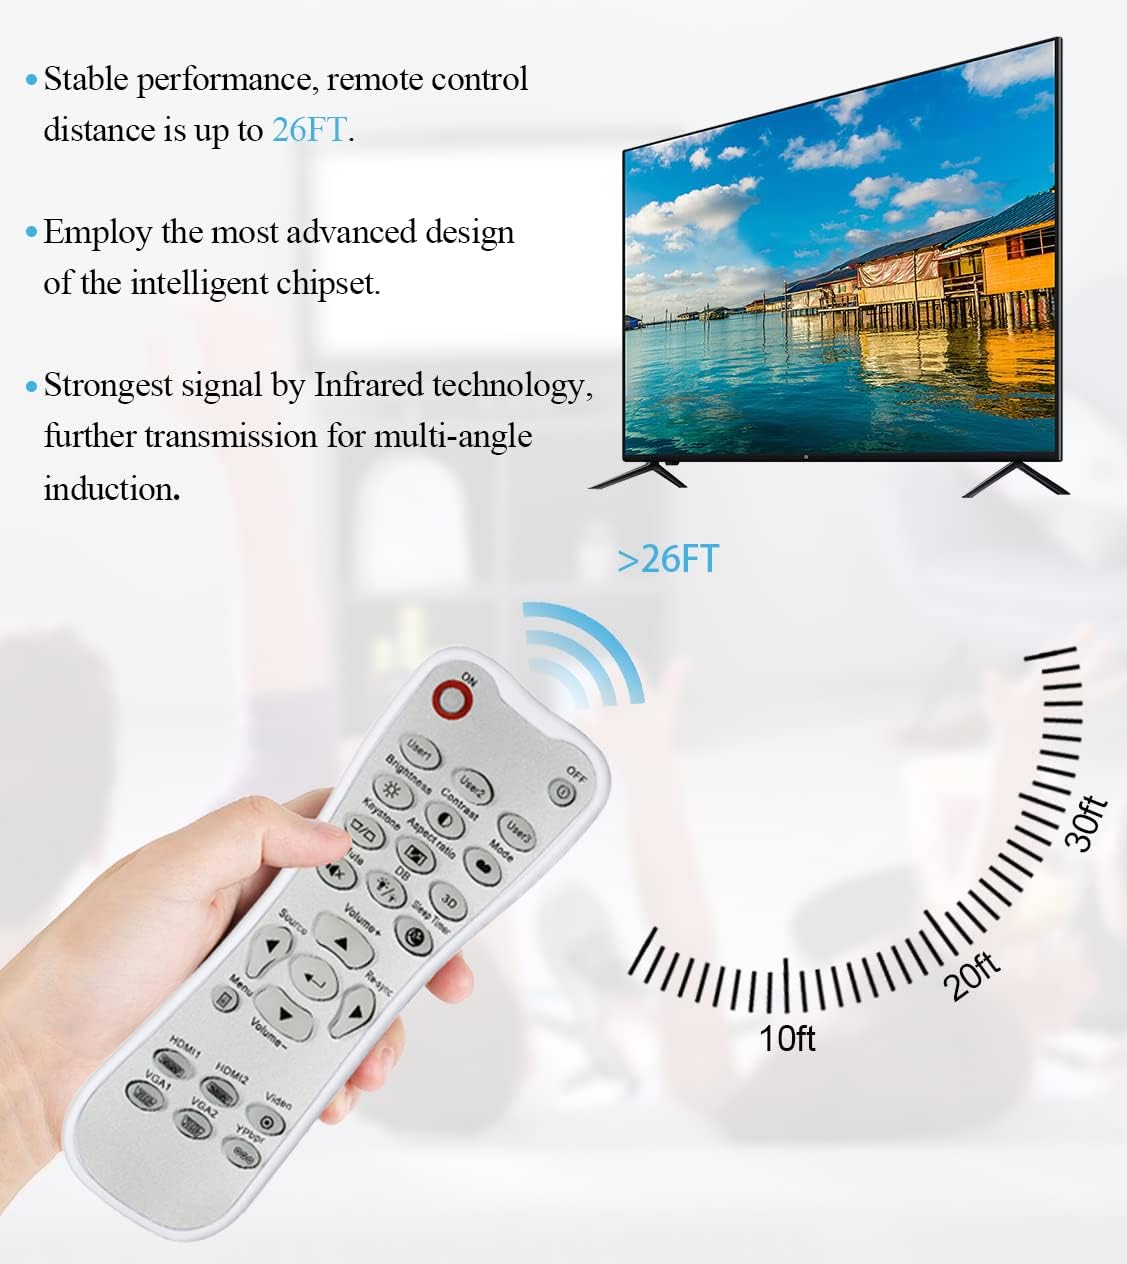
The remote control utilizes infrared technology for signal transmission, offering a reliable operating range of up to 26 feet (approximately 8 meters) for controlling your projector.
മെയിൻ്റനൻസ്
വൃത്തിയാക്കൽ
To clean the remote control, use a soft, dry cloth. Do not use liquid cleaners, abrasive pads, or chemical solvents, as these may damage the surface or internal components.
ബാറ്ററി മാറ്റിസ്ഥാപിക്കൽ
Replace batteries when the remote control's response becomes sluggish or stops working. Always replace both batteries at the same time with new AA batteries. Do not mix old and new batteries, or different types of batteries.
സംഭരണം
നേരിട്ടുള്ള സൂര്യപ്രകാശത്തിൽ നിന്നും കടുത്ത താപനിലയിൽ നിന്നും അകന്ന് തണുത്തതും വരണ്ടതുമായ സ്ഥലത്ത് റിമോട്ട് കൺട്രോൾ സൂക്ഷിക്കുക. റിമോട്ട് കൂടുതൽ നേരം ഉപയോഗിക്കുന്നില്ലെങ്കിൽ, ചോർച്ച തടയാൻ ബാറ്ററികൾ നീക്കം ചെയ്യാൻ ശുപാർശ ചെയ്യുന്നു.
ട്രബിൾഷൂട്ടിംഗ്
- റിമോട്ട് പ്രതികരിക്കുന്നില്ല:
- ശരിയായ പോളാരിറ്റിയോടെ ബാറ്ററികൾ ശരിയായി ഇൻസ്റ്റാൾ ചെയ്തിട്ടുണ്ടെന്ന് ഉറപ്പാക്കുക.
- പഴയ ബാറ്ററികൾ പുതിയവ ഉപയോഗിച്ച് മാറ്റിസ്ഥാപിക്കുക.
- Check for any obstructions between the remote control and the projector's IR receiver.
- Ensure you are within the effective operating range (up to 10 meters).
- Buttons are stiff or unresponsive:
- Ensure the remote control is clean and free from debris that might impede button movement.
- If buttons are consistently stiff, this may indicate a manufacturing issue.
- Glow-in-dark function is weak:
- Expose the remote control to bright light for a longer duration to charge the luminous material.
സ്പെസിഫിക്കേഷനുകൾ
| ഫീച്ചർ | സ്പെസിഫിക്കേഷൻ |
|---|---|
| മോഡലിൻ്റെ പേര് | L-27-5KEY |
| ബ്രാൻഡ് അനുയോജ്യത | ഒപ്റ്റോമ പ്രൊജക്ടറുകൾ |
| പ്രത്യേക ഫീച്ചർ | Universal Replacement, Glow-in-Dark Buttons |
| നിറം | വെള്ള |
| കണക്റ്റിവിറ്റി ടെക്നോളജി | ഇൻഫ്രാറെഡ് (IR) |
| ബട്ടൺ അളവ് | 5 (referring to the main function keys, though more buttons are present) |
| കൺട്രോളർ തരം | ബട്ടൺ നിയന്ത്രണം |
| പരമാവധി പരിധി | 10 മീറ്റർ (ഏകദേശം 33 അടി) |
| ബാറ്ററി തരം | 2 x AA ബാറ്ററികൾ (ഉൾപ്പെടുത്തിയിട്ടില്ല) |
| മെറ്റീരിയൽ | പ്ലാസ്റ്റിക് |
| ഇനത്തിന്റെ അളവുകൾ (L x W x H) | 14.9 സെ.മീ (5.9 ഇഞ്ച്) x 5.3 സെ.മീ (2.1 ഇഞ്ച്) x 2.5 സെ.മീ (1 ഇഞ്ച്) |

A dimensional diagram illustrating the compact size of the remote control, measuring approximately 14.9 cm (5.9 inches) in length, 5.3 cm (2.1 inches) in width, and 2.5 cm (1 inch) in thickness.
വാറൻ്റിയും പിന്തുണയും
For any issues not covered in this manual, or for warranty inquiries, please contact the seller or manufacturer directly through your purchase platform. Keep your purchase receipt as proof of purchase.