
1. ആമുഖം
Thank you for choosing the X-Sense Wireless Weather Station. This device provides accurate indoor and outdoor temperature and humidity readings, along with a weather forecast, all displayed on a large, backlit LCD screen. It features an atomic clock for precise timekeeping and supports up to three remote sensors for comprehensive monitoring. Please read this manual thoroughly before use to ensure proper setup and operation.
2. പാക്കേജ് ഉള്ളടക്കം
പാക്കേജ് തുറക്കുമ്പോൾ എല്ലാ ഘടകങ്ങളും നിലവിലുണ്ടെന്നും നല്ല നിലയിലാണെന്നും ഉറപ്പാക്കുക.
- Main Display Unit (LCD Screen)
- Wireless Remote Sensor (Transmitter)
- AA Batteries (2 for main unit, 2 for sensor)
- Mounting Hardware (Screws, wall anchors)
- ഉപയോക്തൃ മാനുവൽ

ചിത്രം 2.1: Package contents of the X-Sense Wireless Weather Station.
3. ഉൽപ്പന്നം കഴിഞ്ഞുview
3.1 പ്രധാന ഡിസ്പ്ലേ യൂണിറ്റ്
The main display unit features a large, backlit LCD screen that shows indoor and outdoor temperature and humidity, time, date, and weather forecast icons. It can be placed on a tabletop using its integrated stand or mounted on a wall.

ചിത്രം 3.1: Main Display Unit with active screen.

ചിത്രം 3.2: Large Backlit LCD for easy readability.
3.2 വയർലെസ് റിമോട്ട് സെൻസർ
The wireless remote sensor measures outdoor temperature and humidity and transmits data to the main unit. It is designed to operate in ultra-low temperatures and has an IPX5 waterproof rating, making it suitable for outdoor placement. The sensor has a wireless range of up to 500 feet (150 meters) in open areas.
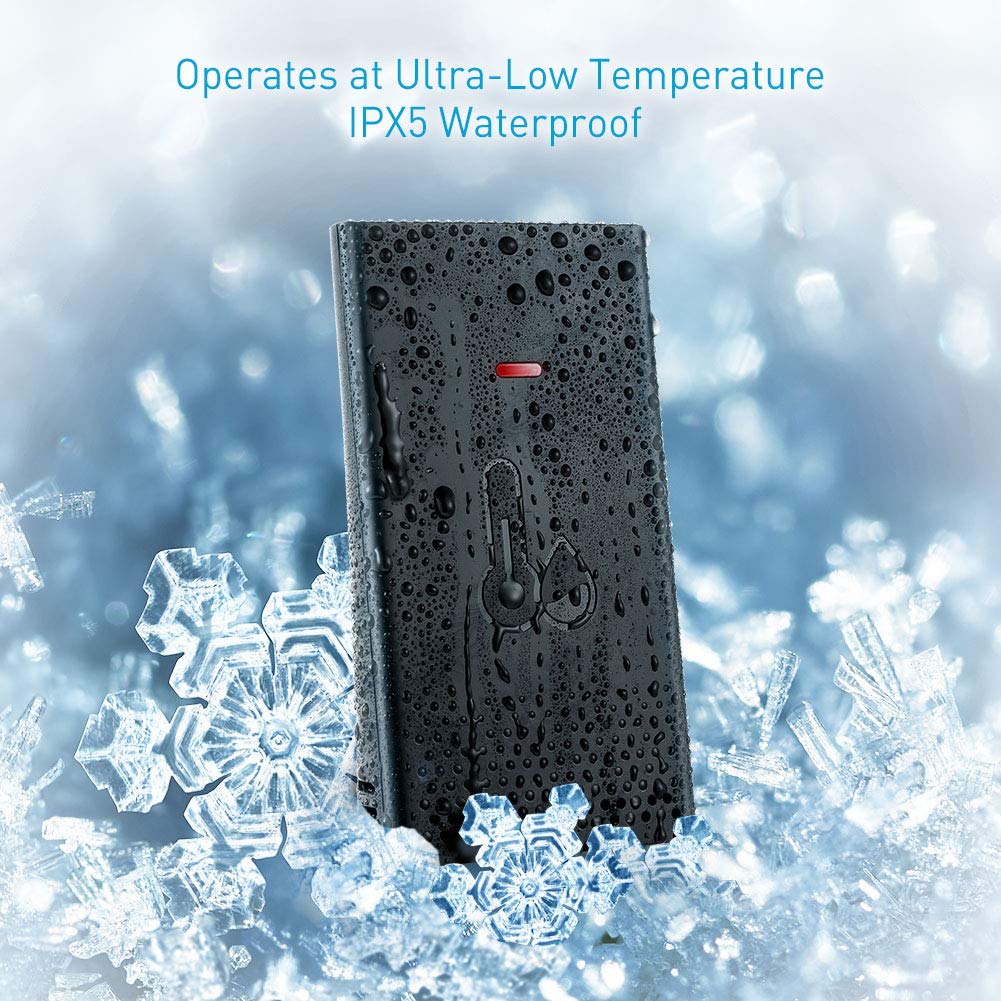
ചിത്രം 3.3: Wireless Remote Sensor with IPX5 waterproof rating.

ചിത്രം 3.4: Wireless range and multiple sensor placement options.
4. സജ്ജീകരണം
4.1 ബാറ്ററി ഇൻസ്റ്റാളേഷൻ
- പ്രധാന പ്രദർശന യൂണിറ്റ്: പ്രധാന യൂണിറ്റിന്റെ പിൻഭാഗത്തുള്ള ബാറ്ററി കമ്പാർട്ട്മെന്റ് തുറക്കുക. ശരിയായ പോളാരിറ്റി (+/-) ഉറപ്പാക്കിക്കൊണ്ട് 2 AA ബാറ്ററികൾ ഇടുക. കമ്പാർട്ട്മെന്റ് അടയ്ക്കുക.
- വയർലെസ് റിമോട്ട് സെൻസർ: Open the battery compartment on the back of the remote sensor. Insert 2 AA batteries, ensuring correct polarity (+/-). Close the compartment.
The main unit will power on and begin searching for the remote sensor. The sensor's LED indicator may flash during transmission.
4.2 സെൻസർ പ്ലേസ്മെന്റ്
For accurate readings and optimal wireless transmission, consider the following:
- Place the remote sensor in a shaded area, away from direct sunlight and heat sources, to prevent inaccurate temperature readings.
- Ensure the sensor is protected from heavy rain or snow, despite its IPX5 rating, to prolong its lifespan.
- Mount the sensor vertically using the provided screws and wall anchors, or place it on a stable surface.
- Keep the sensor within the 500 ft (150 m) wireless range of the main unit. Obstacles like thick walls, metal structures, or electronic devices can reduce the effective range.
4.3 Pairing the Sensor
The main unit should automatically connect to the remote sensor after battery installation. If the outdoor readings are not displayed or appear incorrect:
- Bring the remote sensor close to the main unit.
- Press and hold the "CHANNEL" button on the main unit for a few seconds to initiate a new search for the sensor.
- Press the "TX" button inside the remote sensor's battery compartment to manually send a signal.
- The main unit should display the outdoor temperature and humidity within a few minutes.
5. പ്രവർത്തന നിർദ്ദേശങ്ങൾ
5.1 സമയവും തീയതിയും ക്രമീകരണം (ആറ്റോമിക് ക്ലോക്ക്)
The X-Sense Weather Station features an atomic clock that automatically synchronizes with the WWVB radio signal for precise timekeeping. This process may take several hours, especially during initial setup or after battery replacement. Ensure the main unit is placed near a window for better signal reception.
- Manual Time Zone Setting: If the atomic clock signal is not received or you are outside the standard reception area, you may need to manually set the time zone. Refer to the detailed instructions in the full user manual for specific button presses to adjust the time zone offset.
- ഡേലൈറ്റ് സേവിംഗ് ടൈം (DST): The unit typically adjusts for DST automatically once the atomic clock signal is received.

ചിത്രം 5.1: High accuracy and radio-controlled clock feature.
5.2 താപനിലയും ഈർപ്പവും പ്രദർശിപ്പിക്കുന്നു
- The main unit displays both indoor temperature and humidity (labeled "IN") and outdoor temperature and humidity (labeled "OUT" or with a sensor icon).
- സ്വിച്ചിംഗ് താപനില യൂണിറ്റുകൾ: Press the "°C/°F" button (usually located on the back or side) to toggle between Celsius and Fahrenheit.
- ഒന്നിലധികം സെൻസറുകൾ: If you have additional remote sensors (sold separately), press the "CHANNEL" button to cycle through the readings from each connected sensor.
5.3 കാലാവസ്ഥാ പ്രവചനം
The weather station provides a forecast for the next 12-24 hours based on changes in atmospheric pressure. The forecast is represented by graphical icons such as sunny, partly cloudy, cloudy, rainy, or snowy. This is a prediction and may not always match actual weather conditions.
5.4 ബാക്ക്ലൈറ്റ് പ്രവർത്തനം
The main unit features a backlight for improved visibility in low-light conditions. Press the designated backlight button (often located on the back or top of the unit) to activate it. The backlight typically stays on for a few seconds before turning off automatically to conserve battery power.
6. പരിപാലനം
- വൃത്തിയാക്കൽ: ഡിസ്പ്ലേ യൂണിറ്റും സെൻസറും ഒരു സോഫ്റ്റ്, ഡി ക്ലീനർ ഉപയോഗിച്ച് തുടയ്ക്കുക.amp തുണി. ഉരച്ചിലുകളുള്ള ക്ലീനറുകളോ ലായകങ്ങളോ ഉപയോഗിക്കരുത്.
- ബാറ്ററി മാറ്റിസ്ഥാപിക്കൽ: Replace batteries in both the main unit and remote sensor when the low battery indicator appears on the display. Always replace all batteries at the same time with new ones of the same type.
- സംഭരണം: യൂണിറ്റ് ദീർഘനേരം സൂക്ഷിക്കുകയാണെങ്കിൽ, ചോർച്ച തടയാൻ എല്ലാ ബാറ്ററികളും നീക്കം ചെയ്യുക.
7. പ്രശ്നപരിഹാരം
| പ്രശ്നം | സാധ്യമായ കാരണം | പരിഹാരം |
|---|---|---|
| പുറത്തെ താപനില/ഈർപ്പം അളക്കുന്നില്ല. | Sensor not paired, out of range, or low battery. | Ensure batteries are fresh in the sensor. Bring sensor closer to the main unit. Re-pair the sensor (see Section 4.3). |
| പുറത്തെ വായനകളിൽ കൃത്യതയില്ല. | നേരിട്ടുള്ള സൂര്യപ്രകാശം, താപ സ്രോതസ്സുകൾ അല്ലെങ്കിൽ ഈർപ്പം എന്നിവയിൽ സെൻസർ തുറന്നിരിക്കുന്നു. | Relocate the sensor to a shaded, protected area. Allow time for readings to stabilize. |
| Atomic clock not setting automatically. | Weak WWVB signal, interference, or incorrect time zone. | Place the main unit near a window. Avoid electronic interference. Manually set the time zone if necessary. Allow up to 24 hours for signal acquisition. |
| ഡിസ്പ്ലേ മങ്ങിയതോ ശൂന്യമോ ആണ്. | Low batteries in the main unit. | പ്രധാന ഡിസ്പ്ലേ യൂണിറ്റിലെ ബാറ്ററികൾ മാറ്റിസ്ഥാപിക്കുക. |
| Backlight difficult to activate. | Button placement on the back. | Familiarize yourself with the button location. This is a design characteristic. |
8 സ്പെസിഫിക്കേഷനുകൾ
- ബ്രാൻഡ്: എക്സ്-സെൻസ്
- മോഡൽ: B07PDMC1TF
- ഊർജ്ജ സ്രോതസ്സ്: Battery Powered (2 AA for main unit, 2 AA for sensor)
- കണക്റ്റിവിറ്റി ടെക്നോളജി: വയർലെസ്
- വയർലെസ് ശ്രേണി: Up to 500 ft (150 m) in open air
- പ്രത്യേക സവിശേഷതകൾ: Adjustable Brightness, Humidity Monitor, Atomic Clock
- സെൻസർ ടെക്നോളജി: അൾട്രാസോണിക്
- ഡിസ്പ്ലേ തരം: എൽസിഡി
- നിറം: കറുപ്പ്
- ഉൽപ്പന്ന അളവുകൾ: 5.4 x 5.24 x 1.09 ഇഞ്ച് (മെയിൻ യൂണിറ്റ്)
- ഇനത്തിൻ്റെ ഭാരം: 1.13 പൗണ്ട്
- Waterproof Rating (Sensor): IPX5
- ആദ്യം ലഭ്യമായ തീയതി: ഫെബ്രുവരി 19, 2019
9. വാറൻ്റിയും പിന്തുണയും
For warranty information or technical support, please refer to the contact details provided on the X-Sense official webനിങ്ങളുടെ ഉൽപ്പന്നത്തിന്റെ സൈറ്റ് അല്ലെങ്കിൽ വാറന്റി കാർഡ് എന്നിവ വാങ്ങുന്നതിനുള്ള തെളിവായി നിങ്ങളുടെ വാങ്ങൽ രസീത് സൂക്ഷിക്കുക.