
1. ആമുഖം
This manual provides comprehensive instructions for the setup, operation, and maintenance of your TechniSat TECHNISTAR S5 HD+ digital satellite receiver. Please read this manual thoroughly before using the device to ensure proper functionality and to maximize your viewing experience. The TECHNISTAR S5 HD+ is designed for receiving digital satellite television in HDTV quality, offering features such as integrated HD+ decryption, PVRReady for recording, and Timeshift functionality.
2 സുരക്ഷാ വിവരങ്ങൾ
മുന്നറിയിപ്പ്: To reduce the risk of electric shock, do not open the device casing. എല്ലാ സേവനങ്ങളും യോഗ്യതയുള്ള സേവന ഉദ്യോഗസ്ഥരെ ഏൽപ്പിക്കുക.
- ഉപകരണം ഒരു സ്ഥിരതയുള്ള, നിരപ്പായ പ്രതലത്തിൽ സ്ഥാപിച്ചിട്ടുണ്ടെന്ന് ഉറപ്പാക്കുക.
- മഴയോ ഈർപ്പമോ ഉപകരണത്തെ തുറന്നുകാട്ടരുത്.
- റേഡിയേറ്ററുകൾ, ഹീറ്റ് രജിസ്റ്ററുകൾ, സ്റ്റൗകൾ അല്ലെങ്കിൽ മറ്റ് ഉപകരണങ്ങൾ (ഉൾപ്പെടെ) പോലുള്ള താപ സ്രോതസ്സുകൾക്ക് സമീപം ഉപകരണം വയ്ക്കുന്നത് ഒഴിവാക്കുക. ampലൈഫയറുകൾ) ചൂട് ഉത്പാദിപ്പിക്കുന്നത്.
- നിർമ്മാതാവ് വ്യക്തമാക്കിയ അറ്റാച്ച്മെൻ്റുകൾ/ആക്സസറികൾ മാത്രം ഉപയോഗിക്കുക.
- ഇടിമിന്നലുള്ള സമയത്തോ ദീർഘനേരം ഉപയോഗിക്കാത്ത സമയത്തോ ഉപകരണം അൺപ്ലഗ് ചെയ്യുക.
- അമിതമായി ചൂടാകുന്നത് തടയാൻ വെൻ്റിലേഷൻ ഓപ്പണിംഗുകൾ വ്യക്തമായി സൂക്ഷിക്കുക.
3. പാക്കേജ് ഉള്ളടക്കം
പാക്കേജിൽ എല്ലാ ഇനങ്ങളും ഉണ്ടെന്ന് ഉറപ്പാക്കുക:
- 1 x TechniSat TECHNISTAR S5 HD+ Receiver
- 1 x റിമോട്ട് കൺട്രോൾ
- 1 x പവർ സപ്ലൈ യൂണിറ്റ്
- 1 x ഉപയോക്തൃ മാനുവൽ (ഈ പ്രമാണം)
- 2 x AAA ബാറ്ററികൾ (റിമോട്ട് കൺട്രോളിനായി)
4. ഉൽപ്പന്നം കഴിഞ്ഞുview
4.1 ഫ്രണ്ട് പാനൽ
The front panel of the TECHNISTAR S5 HD+ features essential controls and indicators.

ചിത്രം 4.1: ഫ്രണ്ട് view of the TechniSat TECHNISTAR S5 HD+ satellite receiver. It shows the display, power button, channel up/down buttons, and the HD+ logo.
- ഡിസ്പ്ലേ: ചാനൽ നമ്പറോ സമയമോ കാണിക്കുന്നു.
- പവർ ബട്ടൺ: ഉപകരണം ഓൺ/ഓഫ് അല്ലെങ്കിൽ സ്റ്റാൻഡ്ബൈയിലേക്ക് മാറ്റുന്നു.
- Channel Buttons (V / ^): Navigates through channels.
- HD+ Logo: Indicates HD+ compatibility.
4.2 പിൻ പാനലും കണക്ഷനുകളും
The rear panel provides all necessary ports for connecting the receiver to your television, satellite dish, and other devices.

ചിത്രം 4.2: പിൻഭാഗം view of the TechniSat TECHNISTAR S5 HD+ satellite receiver, illustrating the various connection ports. These include Smartcard (Conax), CI+ slot, Ethernet, LNB (Sat-Eingang), USB, HDMI Out, A/V Out, S/PDIF Out, and Power input.
- Smartcard (Conax): Slot for Conax smartcards.
- CI+ സ്ലോട്ട്: Common Interface Plus slot for CI+ modules (e.g., for HD+ or Sky).
- ഇഥർനെറ്റ്: For network connection and UPnP streaming.
- LNB (Sat-Eingang): Input for the satellite dish cable (F-connector).
- USB: For connecting external storage devices (USB stick or hard drive) for PVRReady and Timeshift functions.
- HDMI Outട്ട്: High-Definition Multimedia Interface output for connecting to your TV.
- എ/വി ഔട്ട്: Analog audio/video output (requires specific TechniSat adapter, optional).
- S/PDIF Out: Digital audio output (electrical).
- ശക്തി: Input for the external power supply unit.
5. സജ്ജീകരണം
5.1 റിസീവറിനെ ബന്ധിപ്പിക്കുന്നു
- ഉപഗ്രഹ കണക്ഷൻ: Connect your satellite dish cable to the "LNB (Sat-Eingang)" port on the rear panel.
- ടിവി കണക്ഷൻ: Connect the receiver to your TV using an HDMI cable. Insert one end into the "HDMI Out" port on the receiver and the other into an available HDMI input on your TV.
- പവർ കണക്ഷൻ: Connect the power supply unit to the "Power" input on the receiver, then plug the power adapter into a wall outlet.
- ഓപ്ഷണൽ കണക്ഷനുകൾ:
- USB സംഭരണം: For recording and Timeshift, connect a USB stick or external hard drive to the "USB" port.
- നെറ്റ്വർക്ക്: For UPnP and other network features, connect an Ethernet cable to the "Ethernet" port.
- CI+ Module: If you have a CI+ module (e.g., for HD+ or Sky), insert it into the "CI+ Slot".
5.2 First Installation (AutoInstall)
Upon first power-on, the receiver will guide you through an automatic installation process. This "AutoInstall" feature simplifies the initial setup, including channel search and basic settings.
- നിങ്ങളുടെ ടിവി ഓണാക്കി ശരിയായ HDMI ഇൻപുട്ട് തിരഞ്ഞെടുക്കുക.
- Power on the TECHNISTAR S5 HD+.
- Follow the on-screen instructions to select your language, country, and perform a channel scan. The receiver will automatically search for available satellite channels.
- The ISIPRO feature will assist with automatic station search and updates.

ചിത്രം 5.2: TechniSat Comfort Services, highlighting features like SFI (Electronic Program Guide), ISIPRO (Program List Manager), AutoInstall (Easy First Installation), Password-protected User Profiles, and ISI Mode (Simplified Menus with Large Font).
6. റിസീവർ പ്രവർത്തിപ്പിക്കൽ
6.1 അടിസ്ഥാന പ്രവർത്തനങ്ങൾ
Use the provided remote control to navigate menus and control the receiver.
ചിത്രം 6.1: The TechniSat remote control alongside a smartphone displaying the TechniSat Connect app interface, demonstrating both traditional and modern control methods.
- ചാനൽ തിരഞ്ഞെടുക്കൽ: Use the number buttons or the CH+/CH- buttons to change channels.
- വോളിയം നിയന്ത്രണം: Use the VOL+/VOL- buttons.
- മെനു നാവിഗേഷൻ: Use the directional arrows and OK button to navigate through the on-screen menus.
- SFI (Service Information): Access the electronic program guide (EPG) to view പ്രോഗ്രാം ഷെഡ്യൂളുകളും വിവരങ്ങളും.
- ISIPRO: This feature automatically manages and updates your channel list, ensuring you always have the latest channel lineup.
- ISI Mode: A simplified menu mode with larger fonts, useful for users who prefer a less complex interface or as a child safety feature.
6.2 Recording (PVRReady) and Timeshift
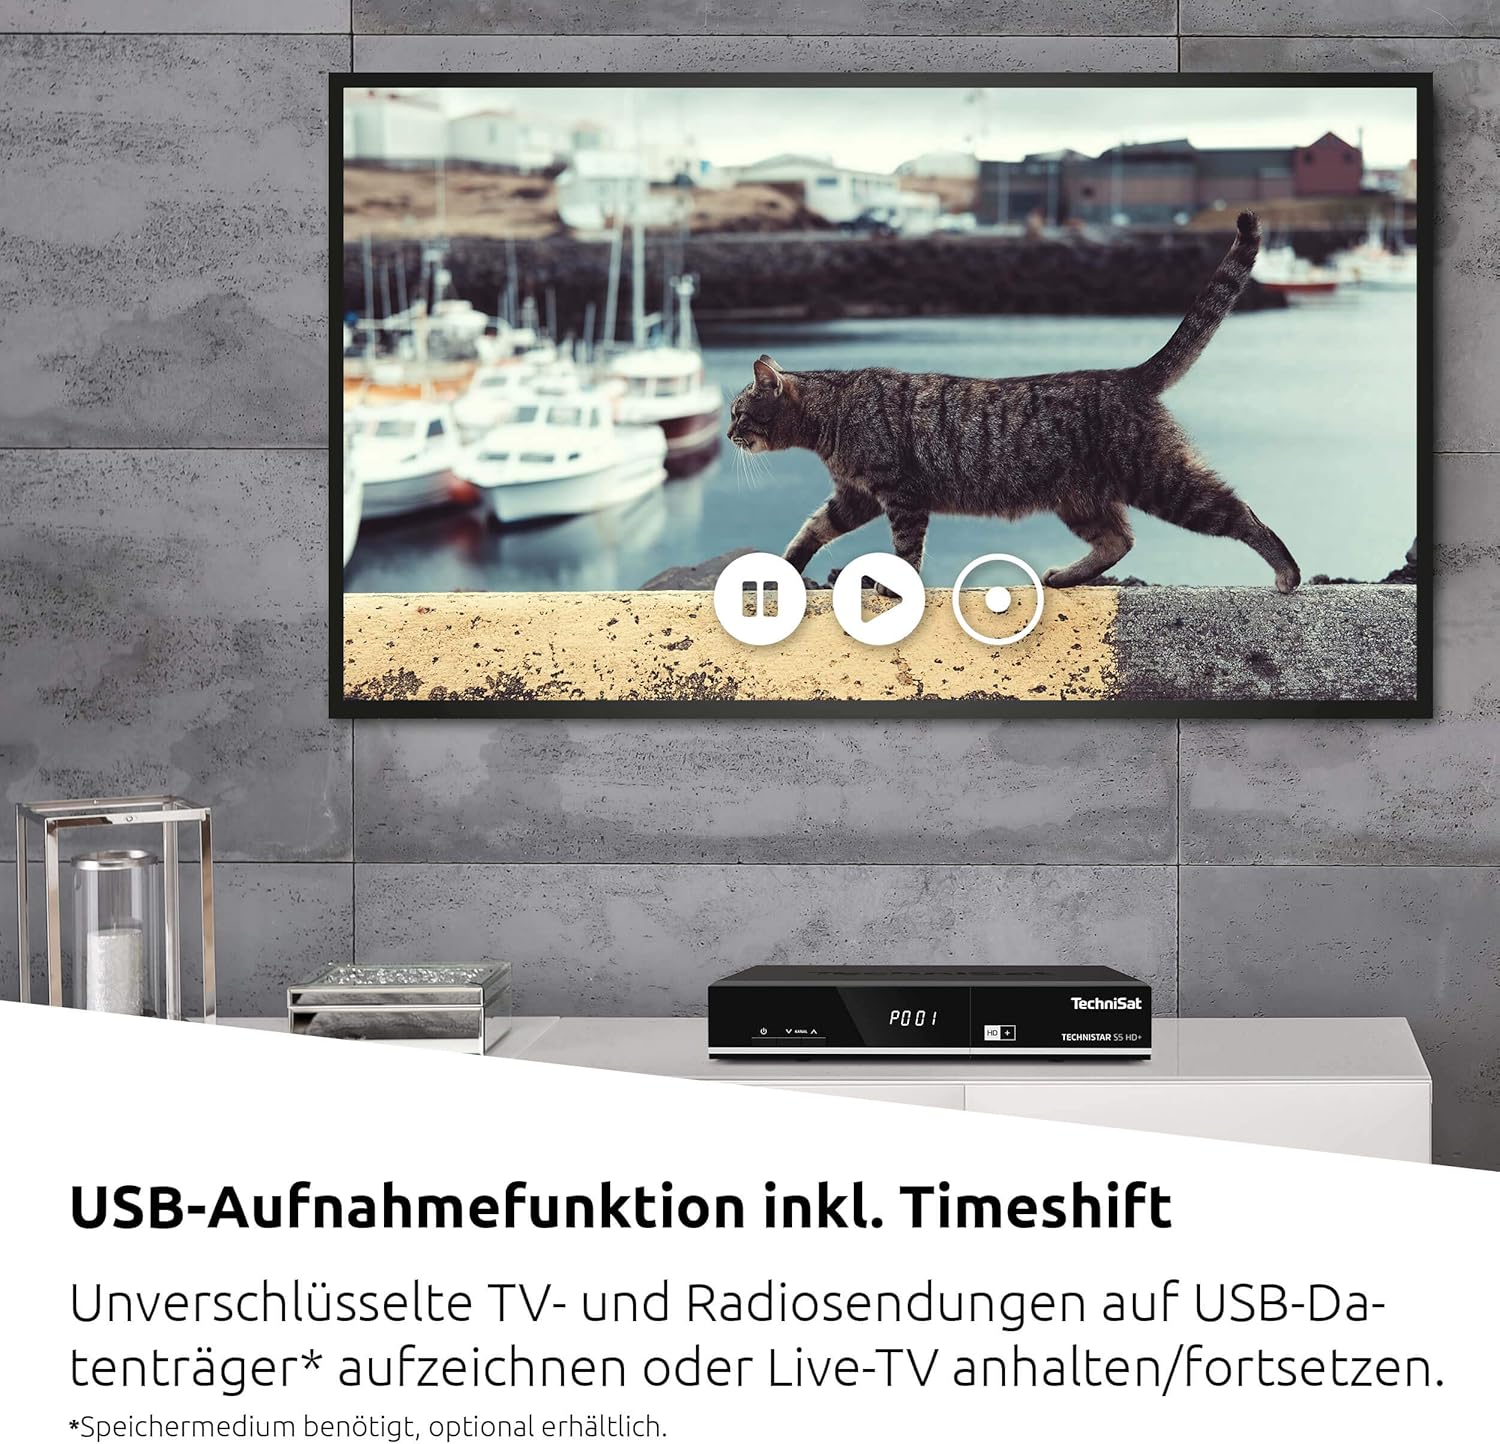
The TECHNISTAR S5 HD+ supports recording of unencrypted digital TV and radio programs to an external USB storage device (PVRReady). It also features Timeshift, allowing you to pause and resume live television.

ചിത്രം 6.2: A television screen displaying a paused live broadcast, demonstrating the Timeshift function. The on-screen controls for play, pause, and rewind are visible.
- രേഖപ്പെടുത്തുന്നതിന്: Connect a USB storage device (formatted as FAT32 or NTFS). While watching a program, press the "Record" button on your remote control.
- ടൈംഷിഫ്റ്റ്: Press the "Pause" button during live TV to temporarily pause the broadcast. Press "Play" to resume from where you left off.
- പ്ലേബാക്ക്: Access recorded programs through the receiver's menu.
6.3 HD+ Features
The TECHNISTAR S5 HD+ includes an integrated decryption system for HD+.
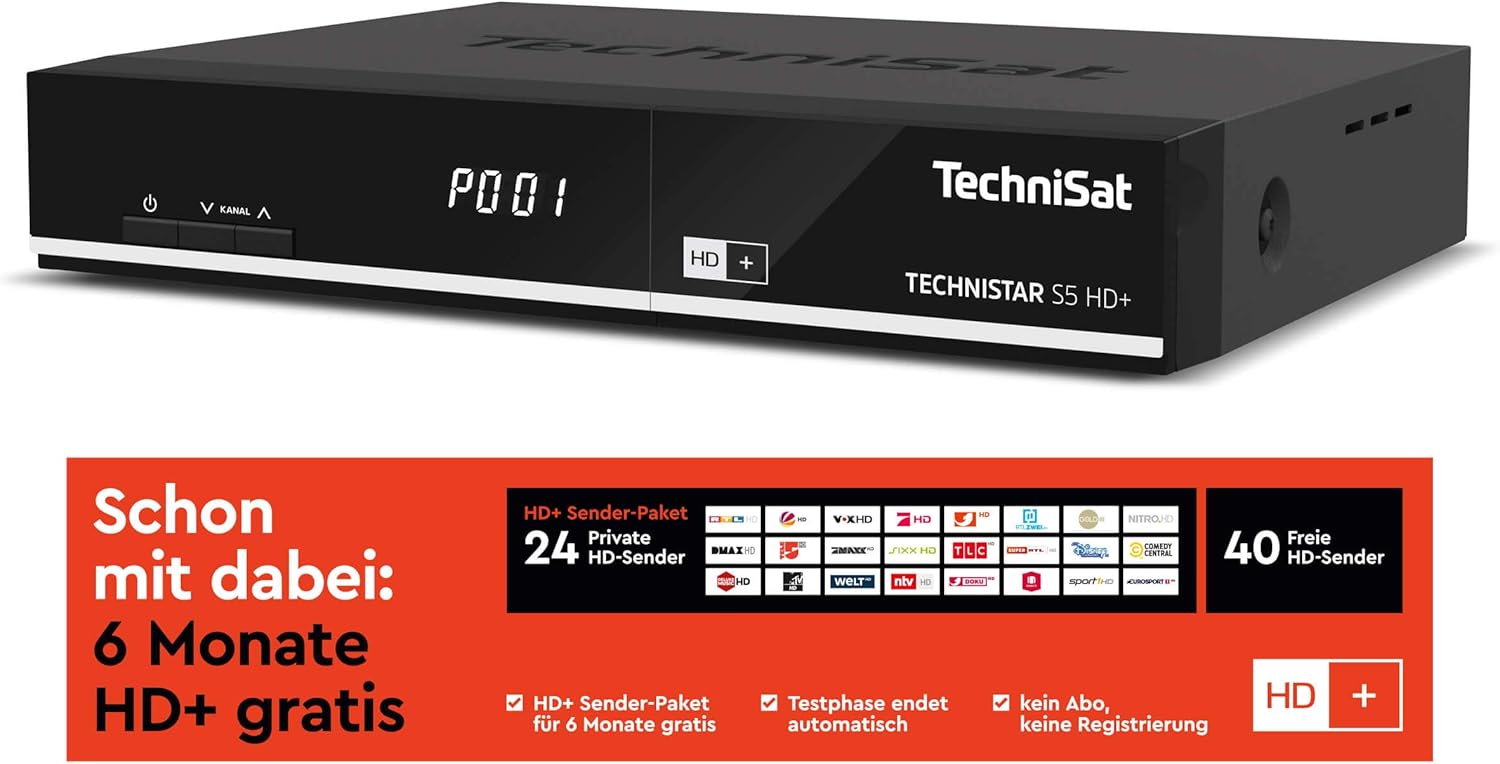
ചിത്രം 6.3: Information regarding the HD+ channel package, indicating 6 months of free HD+ access, 24 private HD channels, and 40 free HD channels. It also states that the test phase ends automatically with no registration required.
- The device comes with 6 months of free HD+ access for 23 HD quality channels.
- Additional pay-TV offers, such as Sky, can be accessed via the CI+ interface with a compatible CI+ module and subscription.
6.4 TechniSat Connect App
The TechniSat Connect app can be used as a universal remote control for your receiver, offering convenient control from your smartphone or tablet.
- Download the TechniSat Connect app from your device's app store.
- Ensure your smartphone/tablet and the receiver are connected to the same local network.
- Follow the app's instructions to pair it with your TECHNISTAR S5 HD+.
7. പരിപാലനം
- വൃത്തിയാക്കൽ: Disconnect the power before cleaning. Use a soft, dry cloth to clean the exterior of the receiver. Do not use liquid or aerosol cleaners.
- വെൻ്റിലേഷൻ: Ensure that the ventilation slots on the device are not blocked to prevent overheating.
- സോഫ്റ്റ്വെയർ അപ്ഡേറ്റുകൾ: Periodically check the TechniSat website or the receiver's menu for available software updates to ensure optimal performance and access to new features.
8. പ്രശ്നപരിഹാരം
If you encounter issues with your TECHNISTAR S5 HD+, refer to the following common solutions:
- ചിത്രം/ശബ്ദം ഇല്ല:
- Check all cable connections (HDMI, LNB, power).
- നിങ്ങളുടെ ടിവി ശരിയായ HDMI ഇൻപുട്ടിലേക്ക് സജ്ജീകരിച്ചിട്ടുണ്ടെന്ന് ഉറപ്പാക്കുക.
- Verify the receiver is powered on and not in standby mode.
- ഉപഗ്രഹ സിഗ്നൽ ഇല്ല:
- Check the LNB cable connection.
- Ensure your satellite dish is correctly aligned.
- Perform a new channel scan via the receiver's menu.
- റിമോട്ട് കൺട്രോൾ പ്രവർത്തിക്കുന്നില്ല:
- Check and replace the batteries (2x AAA).
- റിമോട്ടിനും റിസീവറിനും ഇടയിൽ തടസ്സങ്ങളൊന്നുമില്ലെന്ന് ഉറപ്പാക്കുക.
- റെക്കോർഡിംഗ് പ്രശ്നങ്ങൾ:
- Ensure the USB storage device is properly connected and has sufficient free space.
- Verify the USB device is formatted correctly (FAT32 or NTFS).
- Note that only unencrypted programs can be recorded.
For more detailed troubleshooting or persistent issues, please consult the full online manual on the TechniSat webസൈറ്റ് അല്ലെങ്കിൽ ഉപഭോക്തൃ പിന്തുണയുമായി ബന്ധപ്പെടുക.
9 സ്പെസിഫിക്കേഷനുകൾ
| ബ്രാൻഡ് | ടെക്നിസാറ്റ് |
| മോഡൽ നമ്പർ | 0000/4716 |
| നിറം | ന്യൂട്രൽ (കറുപ്പ്) |
| കണക്റ്റിവിറ്റി ടെക്നോളജി | ഇഥർനെറ്റ്, HDMI, USB |
| മൊത്തം USB പോർട്ടുകൾ | 1 |
| ആകെ HDMI പോർട്ടുകൾ | 1 |
| ഓഡിയോ put ട്ട്പുട്ട് മോഡ് | ചുറ്റുക |
| വാല്യംtage | 5 വോൾട്ട് |
| ഫ്രീക്വൻസി റേഞ്ച് | 950 മെഗാഹെട്സ് - 2150 മെഗാഹെട്സ് |
| ഇനത്തിൻ്റെ ഭാരം | 600 ഗ്രാം |
| ഉൾപ്പെടുത്തിയ ഘടകങ്ങൾ | റിമോട്ട് കൺട്രോൾ |
| ബാറ്ററികൾ | 2 AAA (ഉൾപ്പെടുത്തിയിരിക്കുന്നു) |
| സോഫ്റ്റ്വെയർ അപ്ഡേറ്റുകൾ ലഭിക്കുന്നതുവരെ ഉറപ്പ് | വിവരങ്ങൾ ലഭ്യമല്ല |
| സ്പെയർ പാർട്സ് ലഭ്യത | വിവരങ്ങൾ ലഭ്യമല്ല |
10. വാറൻ്റിയും പിന്തുണയും
For detailed information regarding warranty terms, software updates, and spare parts availability, please refer to the official TechniSat website or contact TechniSat customer support directly. Keep your proof of purchase for warranty claims.
TechniSat Official Webസൈറ്റ്: www.technisat.com