
Easythreed NANO
ഈസിത്രെഡ് നാനോ പ്ലസ് 3D പ്രിന്റർ യൂസർ മാനുവൽ
മോഡൽ: നാനോ
ആമുഖം
The Easythreed Nano Plus is a compact and user-friendly 3D printer designed for beginners and children. Its lightweight and portable design, combined with simple one-key operation, makes 3D printing accessible. This manual provides essential information for setting up, operating, maintaining, and troubleshooting your Easythreed Nano Plus 3D printer.

Image: The Easythreed Nano Plus 3D Printer, a compact white unit with a black print head and an external filament spool holder.

Image: A diagram showing the compact dimensions of the Easythreed Nano Plus 3D Printer: 188mm width, 188mm depth, and 198mm height, highlighting its small and portable nature.
സജ്ജമാക്കുക
1. അൺബോക്സിംഗും ഘടകങ്ങളും
Carefully unpack all components from the box. Verify that all items are present:
- Easythreed Nano Plus 3D Printer
- Filament spool (typically 250g PLA)
- പവർ അഡാപ്റ്റർ
- USB കേബിൾ
- Micro SD card and adapter
- സ്ക്രൂഡ്രൈവർ
- Spatula/scraper tool
- Filament spool holder brackets (2)

Image: The Easythreed Nano Plus 3D Printer displayed with its included accessories: power adapter, filament spool, USB cable, screwdriver, filament holder brackets, and a scraper tool.
2. അസംബ്ലി
The Easythreed Nano Plus comes largely pre-assembled. The primary assembly required is attaching the two brackets for the PLA material tray (filament spool holder).
- Locate the two filament spool holder brackets.
- Attach them securely to the designated slots on the printer.
- Place the filament spool onto the assembled holder.
3. Initial Power On and Software
- Connect the power adapter to the printer and a power outlet.
- Insert the provided Micro SD card into the printer's SD card slot. Ensure contacts are facing up. The slot is located at the back of the machine.
- It is recommended to copy the software from the SD card to your computer before first use. The SD card contains the necessary slicing software and electronic instructions.
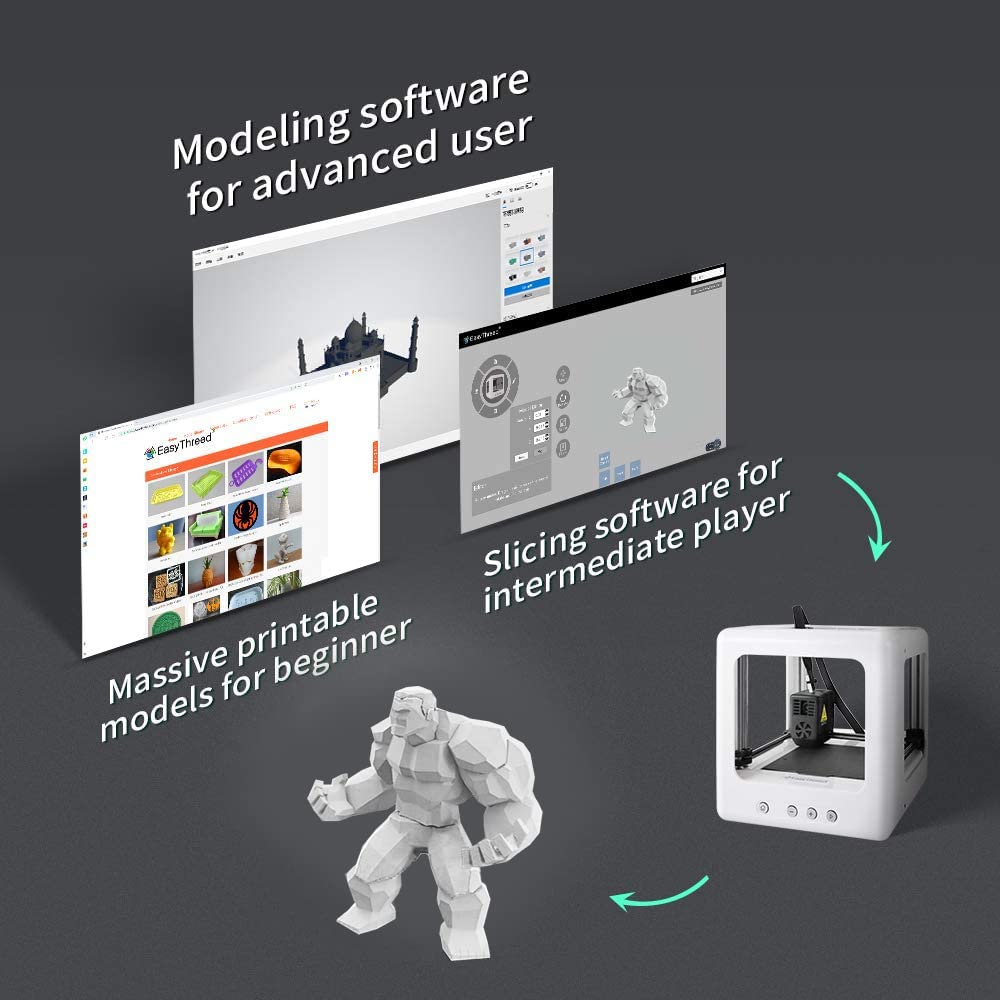
Image: A visual representation of the Easythreed software, showing interfaces for modeling, slicing, and a library of printable models, catering to different user levels.
4. ബെഡ് ലെവലിംഗ്
Accurate bed leveling is crucial for successful prints. Refer to the electronic instructions on the SD card for detailed steps. A general guideline is:
- Use a piece of paper to set the initial height between the nozzle and the print bed. The paper should have slight resistance when pulled.
- After setting the height with paper, slightly back off the leveling screws (approximately 1/8th to 1/4th of a turn) to raise the bed slightly. This ensures the first layer adheres well, preventing "PLA spaghetti" due to insufficient adhesion. Experiment to find the optimal setting for your printer.
ഓപ്പറേഷൻ
1. One-Key Printing
The Easythreed Nano Plus features a simplified one-key printing function, making it very user-friendly.
- Ensure the printer is powered on and the bed is leveled.
- Load the PLA filament into the printer.
- Insert the SD card containing your desired print model (G-code file).
- Press the "Print" button (often indicated by a play symbol) on the printer's control panel. The printer will automatically begin the printing process.

ചിത്രം: വിശദമായ ഒരു ചിത്രം view of the Easythreed Nano Plus, highlighting key features such as the filament sensor, nozzle heating to 180°C in 2 minutes, the magnetic removable plate, and the one-key printing button.
2. Slicing Software Usage
For more control over your prints, use the Easythreed slicing software provided on the SD card. This software allows you to prepare 3D models for printing.
- Shell Thickness: This setting controls the number of perimeters. Use multiples of 0.2mm, as the nozzle is 0.4mm.
- Fill Density: Adjust the infill percentage. Lower density reduces print time and filament usage but results in weaker models. 100% is solid.
- Support Distance X/Y: If supports are needed, adjust this distance. A value of 1.2mm or more is often recommended to make supports easier to remove.
- നോസൽ താപനില: The default temperature works for the included filament. Other filaments may require adjustments. If prints show poor adhesion or are stringy, adjust the temperature.
- ഓറിയൻ്റേഷൻ: Experiment with model orientation (e.g., printing upside down) to optimize filament usage and print quality.
3. Filament Handling
The printer uses external consumables, allowing easy observation of the remaining filament. When changing filament, you may need to pull firmly on the old filament to remove it. Ensure you brace the print head during this process to prevent damage.
മെയിൻ്റനൻസ്
1. Cleaning the Print Bed
The independent and detachable hot bed printing platform is convenient for cleaning. Over time, the print bed material can become clogged, affecting print adhesion and quality. Regular cleaning is essential.
- Remove the magnetic print bed from the printer.
- Use a suitable cleaning agent (e.g., isopropyl alcohol) and a soft cloth to clean any residue.
- For stubborn residue, a razor blade scraper can be used carefully to remove material without damaging the bed.
- The bed material is replaceable if it becomes too worn or damaged.
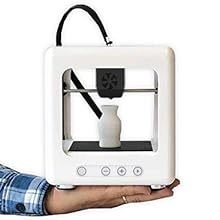
Image: A hand demonstrating the removal of the magnetic, flexible print bed from the Easythreed Nano Plus 3D printer, facilitating easy cleaning and print removal.
2. നോസൽ പരിപാലനം
Nozzle clogging can occur. If the nozzle becomes clogged, cleaning or replacement may be necessary. Replacement extruder units are available, though sourcing may require direct contact with the manufacturer.
ട്രബിൾഷൂട്ടിംഗ്
| പ്രശ്നം | സാധ്യമായ കാരണം | പരിഹാരം |
|---|---|---|
| Filament not sticking to bed (PLA spaghetti) | Improper bed leveling, dirty print bed, incorrect nozzle temperature. | Re-level the print bed, ensuring slight "smoosh" on the first layer. Clean the print bed thoroughly. Adjust nozzle temperature if necessary. |
| Stringing between printed parts | Incorrect retraction settings, nozzle temperature too high. | Adjust retraction settings in slicing software. Consider lowering nozzle temperature slightly. An additional layer cooler fan may help. |
| നോസിൽ അടഞ്ഞു | Filament debris, heat creep. | Attempt to clear the clog by heating the nozzle and manually pushing filament through. If persistent, the nozzle or extruder unit may need replacement. |
| Prints are weak or hollow | Low infill density. | Increase the "Fill Density" setting in your slicing software. |
| പ്രിന്റർ ശബ്ദമുണ്ടാക്കുന്നു | Normal operation noise, especially during fast movements. | The Easythreed Nano Plus is designed for low noise (<55dB), but some operational noise is expected. Consider placing it in a less frequented area if noise is a concern during long prints. |

Image: The Easythreed Nano Plus 3D Printer shown in a bedroom setting with a sleeping child, illustrating its low noise operation (below 55dB) which is comparable to quiet environments.
സ്പെസിഫിക്കേഷനുകൾ
| ഫീച്ചർ | വിശദാംശങ്ങൾ |
|---|---|
| മോഡൽ | നാനോ |
| നിർമ്മാതാവ് | ഈസി ത്രെഡ് |
| ഉൽപ്പന്ന അളവുകൾ | 18.8 x 18.8 x 19.8 സെ.മീ |
| ഇനത്തിൻ്റെ ഭാരം | 2 കി.ഗ്രാം |
| Build Volume (Approx.) | 90mm (side to side) x 110mm (front to back) x 100-110mm (height) |
| മെറ്റീരിയൽ | Plastic (main body) |
| നിറം | വെള്ള |
| ശബ്ദ നില | 55dB-യിൽ കുറവ് |
| പ്രിന്റ് ബെഡ് | Magnetic, removable |
| നോസൽ വ്യാസം | 0.4mm (fixed) |
വാറൻ്റിയും പിന്തുണയും
Easythreed provides comprehensive support for the Nano Plus 3D Printer:
- വാറൻ്റി സേവനം: A one-year warranty service is provided. Any quality problem can be returned.
- സാങ്കേതിക സഹായം: ആജീവനാന്ത സാങ്കേതിക പിന്തുണ ലഭ്യമാണ്.
- കസ്റ്റമർ സർവീസ്: 24-hour professional customer service is offered to assist with any inquiries or issues.
For further assistance or to explore other products, visit the official Easythreed store:
Ask a question about this manual
Ask about setup, troubleshooting, compatibility, parts, safety, or missing instructions. Manuals+ will review the question and use this page’s manual context to help answer it.