
1. ആമുഖം
This manual provides essential information for the safe and efficient operation, maintenance, and troubleshooting of your Juki HZL-8370AT Home Electronic Sewing Machine. Please read this manual thoroughly before using the machine and keep it for future reference.
2. സുരക്ഷാ നിർദ്ദേശങ്ങൾ
- മെഷീൻ ഉപയോഗിച്ചതിന് ശേഷം, വൃത്തിയാക്കുന്നതിന് മുമ്പ്, അല്ലെങ്കിൽ ഏതെങ്കിലും ഉപയോക്തൃ സർവീസിംഗ് ക്രമീകരണങ്ങൾ നടത്തുമ്പോൾ എല്ലായ്പ്പോഴും ഇലക്ട്രിക്കൽ ഔട്ട്ലെറ്റിൽ നിന്ന് മെഷീൻ അൺപ്ലഗ് ചെയ്യുക.
- Do not operate the machine with a damaged cord or plug. If the machine is not working properly, has been dropped, damaged, or dropped into water, return it to the nearest authorized service dealer for examination, repair, electrical or mechanical adjustment.
- ചലിക്കുന്ന എല്ലാ ഭാഗങ്ങളിൽ നിന്നും വിരലുകൾ അകറ്റി നിർത്തുക. തയ്യൽ മെഷീൻ സൂചിക്ക് ചുറ്റും പ്രത്യേക ശ്രദ്ധ ആവശ്യമാണ്.
- എല്ലായ്പ്പോഴും ശരിയായ സൂചി പ്ലേറ്റ് ഉപയോഗിക്കുക. തെറ്റായ പ്ലേറ്റ് സൂചി തകരാൻ കാരണമാകും.
- തുന്നുമ്പോൾ തുണി വലിക്കുകയോ തള്ളുകയോ ചെയ്യരുത്. ഇത് സൂചി വഴിതിരിച്ചുവിട്ട് പൊട്ടാൻ ഇടയാക്കും.
- ഈ മാനുവലിൽ അടങ്ങിയിരിക്കുന്നതുപോലെ നിർമ്മാതാവ് ശുപാർശ ചെയ്യുന്ന ആക്സസറികൾ മാത്രം ഉപയോഗിക്കുക.
- ഈ ഉപകരണം, അവരുടെ സുരക്ഷയ്ക്ക് ഉത്തരവാദിയായ ഒരു വ്യക്തി ഉപകരണത്തിൻ്റെ ഉപയോഗത്തെ സംബന്ധിച്ച മേൽനോട്ടമോ നിർദ്ദേശമോ നൽകിയിട്ടില്ലെങ്കിൽ, ശാരീരികമോ ഇന്ദ്രിയപരമോ മാനസികമോ ആയ കഴിവുകൾ കുറഞ്ഞതോ അനുഭവത്തിൻ്റെയും അറിവിൻ്റെയും അഭാവം ഉള്ള വ്യക്തികൾക്ക് (കുട്ടികൾ ഉൾപ്പെടെ) ഉപയോഗിക്കാൻ ഉദ്ദേശിച്ചുള്ളതല്ല.
3. ഉൽപ്പന്നം കഴിഞ്ഞുview
The Juki HZL-8370AT is a versatile home electronic sewing machine designed for various sewing projects. It features 19 stitch types and a robust one-piece metal frame for stability.
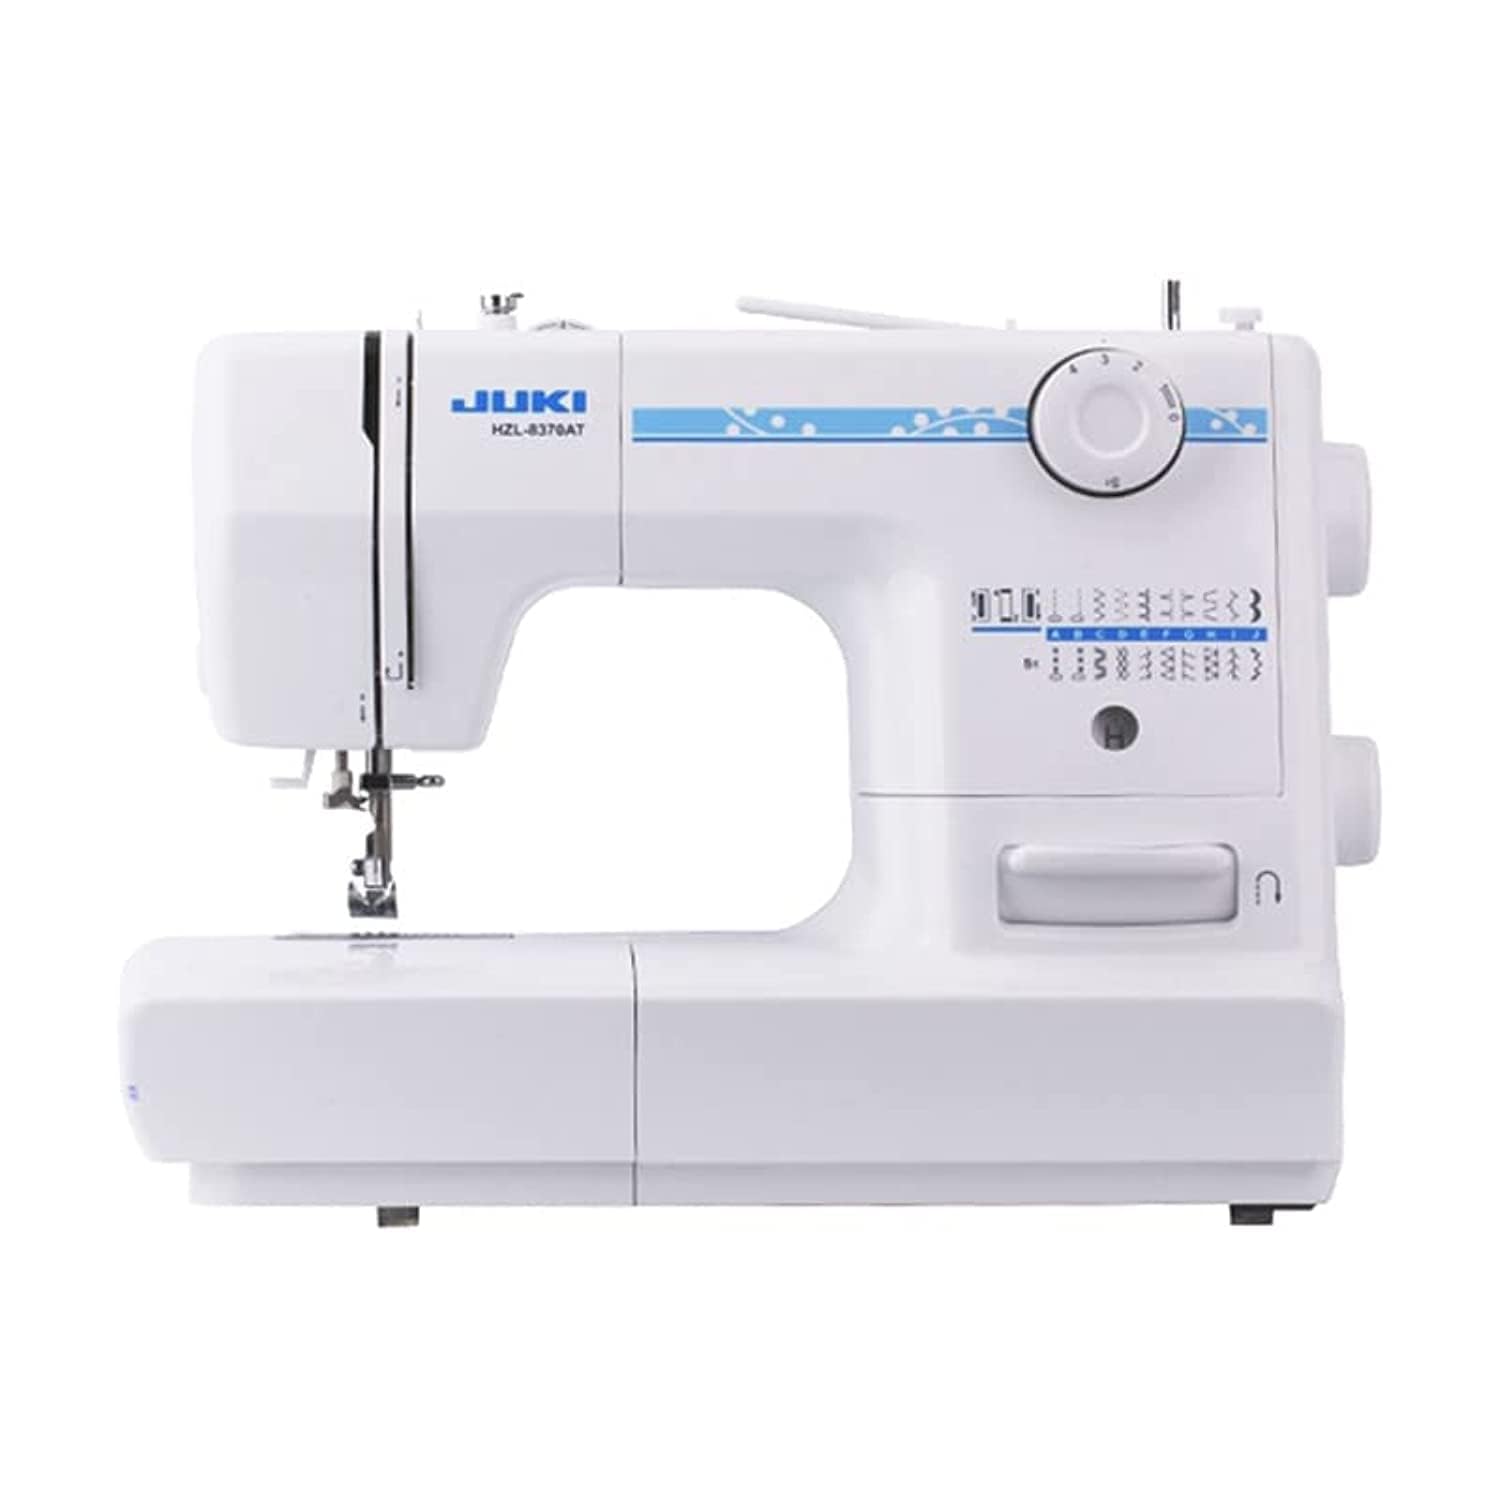
ചിത്രം 1: മുൻഭാഗം view of the Juki HZL-8370AT Home Electronic Sewing Machine. This image shows the main body of the machine, including the needle area, stitch selection dial, and various controls.
പ്രധാന ഘടകങ്ങൾ:
- സ്റ്റിച്ച് സെലക്ഷൻ ഡയൽ: Used to choose from the 19 available stitch patterns.
- ത്രെഡ് ടെൻഷൻ ഡയൽ: മുകളിലെ നൂലിന്റെ പിരിമുറുക്കം ക്രമീകരിക്കുന്നു.
- Needle Bar and Presser Foot: Holds the needle and applies pressure to the fabric.
- ബോബിൻ വിൻഡർ: ബോബിനിൽ നൂൽ വളയ്ക്കുന്നതിന്.
- ഹാൻഡ്വീൽ: സൂചി സ്വമേധയാ ഉയർത്തുകയും താഴ്ത്തുകയും ചെയ്യുന്നു.
- കാൽ പെഡൽ കണക്റ്റർ: For connecting the foot pedal to control sewing speed.
4. സജ്ജീകരണം
4.1 അൺപാക്കിംഗും പ്ലേസ്മെന്റും
- മെഷീൻ അതിന്റെ പാക്കേജിംഗിൽ നിന്ന് ശ്രദ്ധാപൂർവ്വം നീക്കം ചെയ്യുക.
- Place the machine on a stable, flat surface. Ensure there is adequate space around the machine for comfortable operation.
- Connect the foot pedal and power cord to the machine and then to a suitable electrical outlet.
4.2 Installing the Needle
- Turn the handwheel towards you to raise the needle to its highest position.
- സൂചി cl അഴിക്കുകamp സ്ക്രൂ.
- മെഷീനിന്റെ പിൻഭാഗത്തേക്ക് അഭിമുഖമായി പരന്ന വശം വരുന്ന തരത്തിൽ ഒരു പുതിയ സൂചി തിരുകുക, അത് കഴിയുന്നിടത്തോളം മുകളിലേക്ക് തള്ളുക.
- സൂചി മുറുക്കുക clamp സുരക്ഷിതമായി സ്ക്രൂ ചെയ്യുക.
4.3 ബോബിൻ വൈൻഡിംഗ്
- സ്പൂൾ പിന്നിൽ ഒരു സ്പൂൾ ത്രെഡ് വയ്ക്കുക.
- ബോബിൻ വൈൻഡിംഗ് ടെൻഷൻ ഡിസ്കിലൂടെ ത്രെഡ് ഗൈഡ് ചെയ്യുക.
- ബോബിൻ വൈൻഡർ സ്പിൻഡിൽ ഒരു ഒഴിഞ്ഞ ബോബിൻ വയ്ക്കുക.
- ബോബിന് ചുറ്റും നൂൽ കുറച്ച് തവണ പൊതിയുക, തുടർന്ന് ബോബിൻ വൈൻഡർ സ്പിൻഡിൽ വലതുവശത്തേക്ക് തള്ളുക.
- Press the foot pedal gently to start winding. Stop when the bobbin is full.
- നൂൽ മുറിച്ച് ബോബിൻ വൈൻഡർ സ്പിൻഡിൽ ഇടതുവശത്തേക്ക് തിരികെ വയ്ക്കുക.
4.4 മെഷീനിൽ ത്രെഡിംഗ്
- പ്രഷർ ഫൂട്ടും സൂചിയും ഏറ്റവും ഉയർന്ന സ്ഥാനത്തേക്ക് ഉയർത്തുക.
- സ്പൂൾ പിന്നിൽ നൂലിന്റെ സ്പൂൾ വയ്ക്കുക.
- മെഷീനിൽ സൂചിപ്പിച്ചിരിക്കുന്ന നമ്പർ നൽകിയ ത്രെഡിംഗ് പാത്ത് പിന്തുടരുക, ത്രെഡ് എല്ലാ ഗൈഡുകളിലൂടെയും ടേക്ക്-അപ്പ് ലിവറിലൂടെയും കടന്നുപോകുന്നുണ്ടെന്ന് ഉറപ്പാക്കുക.
- സൂചി മുന്നിൽ നിന്ന് പിന്നിലേക്ക് ത്രെഡ് ചെയ്യുക.
- Insert the wound bobbin into the bobbin case under the needle plate, ensuring the thread feeds correctly.
- Hold the upper thread, turn the handwheel to lower and raise the needle, catching the bobbin thread. Pull both threads under the presser foot and towards the back.
5. പ്രവർത്തന നിർദ്ദേശങ്ങൾ
5.1 Selecting a Stitch
Turn the Stitch Selection Dial to choose one of the 19 available stitch patterns. Refer to the stitch chart on the machine for visual guidance.

Figure 2: Close-up of the stitch selection dial and various stitch patterns available on the Juki HZL-8370AT. This shows the range of stitches from basic to decorative.
5.2 തുന്നലിന്റെ നീളവും വീതിയും ക്രമീകരിക്കൽ
- The maximum stitch length is 5 mm. Adjust the stitch length dial according to your fabric and desired stitch appearance.
- The maximum stitch width is 7 mm. Adjust the stitch width dial for zigzag or decorative stitches.
5.3 തയ്യൽ ആരംഭിക്കൽ
- പ്രഷർ പാദത്തിനടിയിൽ തുണി വയ്ക്കുക.
- പ്രസ്സർ ഫുട്ട് ലിവർ താഴ്ത്തുക.
- Gently press the foot pedal to start sewing. The sewing speed is up to 800 stitches per minute.
- തുണി സൌമ്യമായി നയിക്കുക, വലിക്കുകയോ തള്ളുകയോ ചെയ്യരുത്.
5.4 റിവേഴ്സ് തയ്യൽ
To reinforce a seam, press and hold the reverse lever/button while sewing. Release it to continue sewing forward.
6. പരിപാലനം
6.1 മെഷീൻ വൃത്തിയാക്കൽ
- വൃത്തിയാക്കുന്നതിന് മുമ്പ് എല്ലായ്പ്പോഴും മെഷീൻ അൺപ്ലഗ് ചെയ്യുക.
- സൂചി പ്ലേറ്റും ബോബിൻ കേസും നീക്കം ചെയ്യുക.
- ഫീഡ് ഡോഗുകളുടെയും ബോബിൻ ഭാഗത്തിന്റെയും ലിനനും പൊടിയും നീക്കം ചെയ്യാൻ ഒരു ചെറിയ ബ്രഷ് ഉപയോഗിക്കുക.
- മൃദുവായതും ഉണങ്ങിയതുമായ തുണി ഉപയോഗിച്ച് മെഷീനിന്റെ പുറംഭാഗം തുടയ്ക്കുക. കഠിനമായ രാസവസ്തുക്കൾ ഉപയോഗിക്കരുത്.
6.2 Changing Needles
Change the needle regularly, especially if it becomes bent, dull, or if you notice skipped stitches. Refer to section 4.2 for needle installation instructions.
7. പ്രശ്നപരിഹാരം
പൊതുവായ പ്രശ്നങ്ങളും പരിഹാരങ്ങളും:
- ഒഴിവാക്കിയ തുന്നലുകൾ: Ensure the needle is inserted correctly and is not bent or dull. Use the correct needle type for your fabric.
- ത്രെഡ് ബ്രേക്കിംഗ്: Check if the machine is threaded correctly, the thread tension is appropriate, and the needle is not damaged. Ensure the thread is not tangled.
- മെഷീൻ ജാമിംഗ്: Remove any tangled threads from the bobbin area. Ensure the bobbin is wound and inserted correctly.
- അസമമായ തുന്നലുകൾ: Adjust the thread tension. Ensure the fabric is fed evenly without pulling.
ഈ പരിഹാരങ്ങൾ പരീക്ഷിച്ചതിന് ശേഷവും പ്രശ്നങ്ങൾ നിലനിൽക്കുകയാണെങ്കിൽ, ദയവായി ഉപഭോക്തൃ പിന്തുണയുമായി ബന്ധപ്പെടുക.
8 സ്പെസിഫിക്കേഷനുകൾ
| ഫീച്ചർ | സ്പെസിഫിക്കേഷൻ |
|---|---|
| മോഡൽ | HZL-8370AT |
| ടൈപ്പ് ചെയ്യുക | Home Electronic Sewing Machine |
| തുന്നലുകളുടെ എണ്ണം | 19 |
| പരമാവധി തുന്നൽ നീളം | 5 മി.മീ |
| പരമാവധി തുന്നൽ വീതി | 7 മി.മീ |
| തയ്യൽ വേഗത | മിനിറ്റിൽ 800 തുന്നലുകൾ |
| ശക്തി | 70 വാട്ട്സ് |
| ഫ്രെയിം മെറ്റീരിയൽ | Metal (one-piece) |
| നിറം | വെള്ള |
| ഇനത്തിൻ്റെ ഭാരം | 6.93 കിലോഗ്രാം |
| ഷിപ്പിംഗ് അളവുകൾ | 42.5 x 35 x 22.5 സെ.മീ |
| ശുപാർശ ചെയ്യുന്ന ഉപയോഗങ്ങൾ | Home sewing, clothing repair, craft projects, textile manufacturing |
| ജിടിഐഎൻ (യുപിസി) | 06936986883709 |
9. വാറൻ്റിയും പിന്തുണയും
For warranty information and customer support, please refer to the documentation included with your purchase or visit the official Juki webസൈറ്റ്. വാറന്റി ക്ലെയിമുകൾക്കായി നിങ്ങളുടെ വാങ്ങലിന്റെ തെളിവ് സൂക്ഷിക്കുക.