ആമുഖം
This manual provides detailed instructions for replacing the battery in your iPhone 12 or iPhone 12 Pro using the iFixit Battery Repair Kit. This kit is designed to help restore your device's battery performance, addressing issues such as poor charge retention, unexpected shutdowns, or a "service battery" warning.
The iFixit repair kit includes a replacement battery and all necessary tools and adhesive for a successful repair. Please read all instructions carefully before beginning the repair process.
സുരക്ഷാ വിവരങ്ങൾ
WARNING: Lithium-ion batteries can be dangerous if mishandled. Potential for fire or burning. Do not disassemble, puncture, crush, heat, or burn the battery. Always follow safety precautions.
- Ensure your device is powered off and disconnected from any power source before starting the repair.
- Work in a well-lit, clean, and static-free environment.
- ഉചിതമായ നേത്ര സംരക്ഷണം ധരിക്കുക.
- Handle the battery carefully. Avoid bending or puncturing it.
- If the battery appears swollen, damaged, or leaks, exercise extreme caution. Do not attempt to install it.
- Properly dispose of the old battery according to local regulations. Do not throw it in household trash.
പാക്കേജ് ഉള്ളടക്കം
Your iFixit Battery Repair Kit for iPhone 12 and 12 Pro includes the following items:
- Replacement Lithium-ion Battery (10.78 Wh, 3.83 V)
- Complete Tool Set for iPhone Repair
- Pre-cut Adhesive Strips for Battery and Display
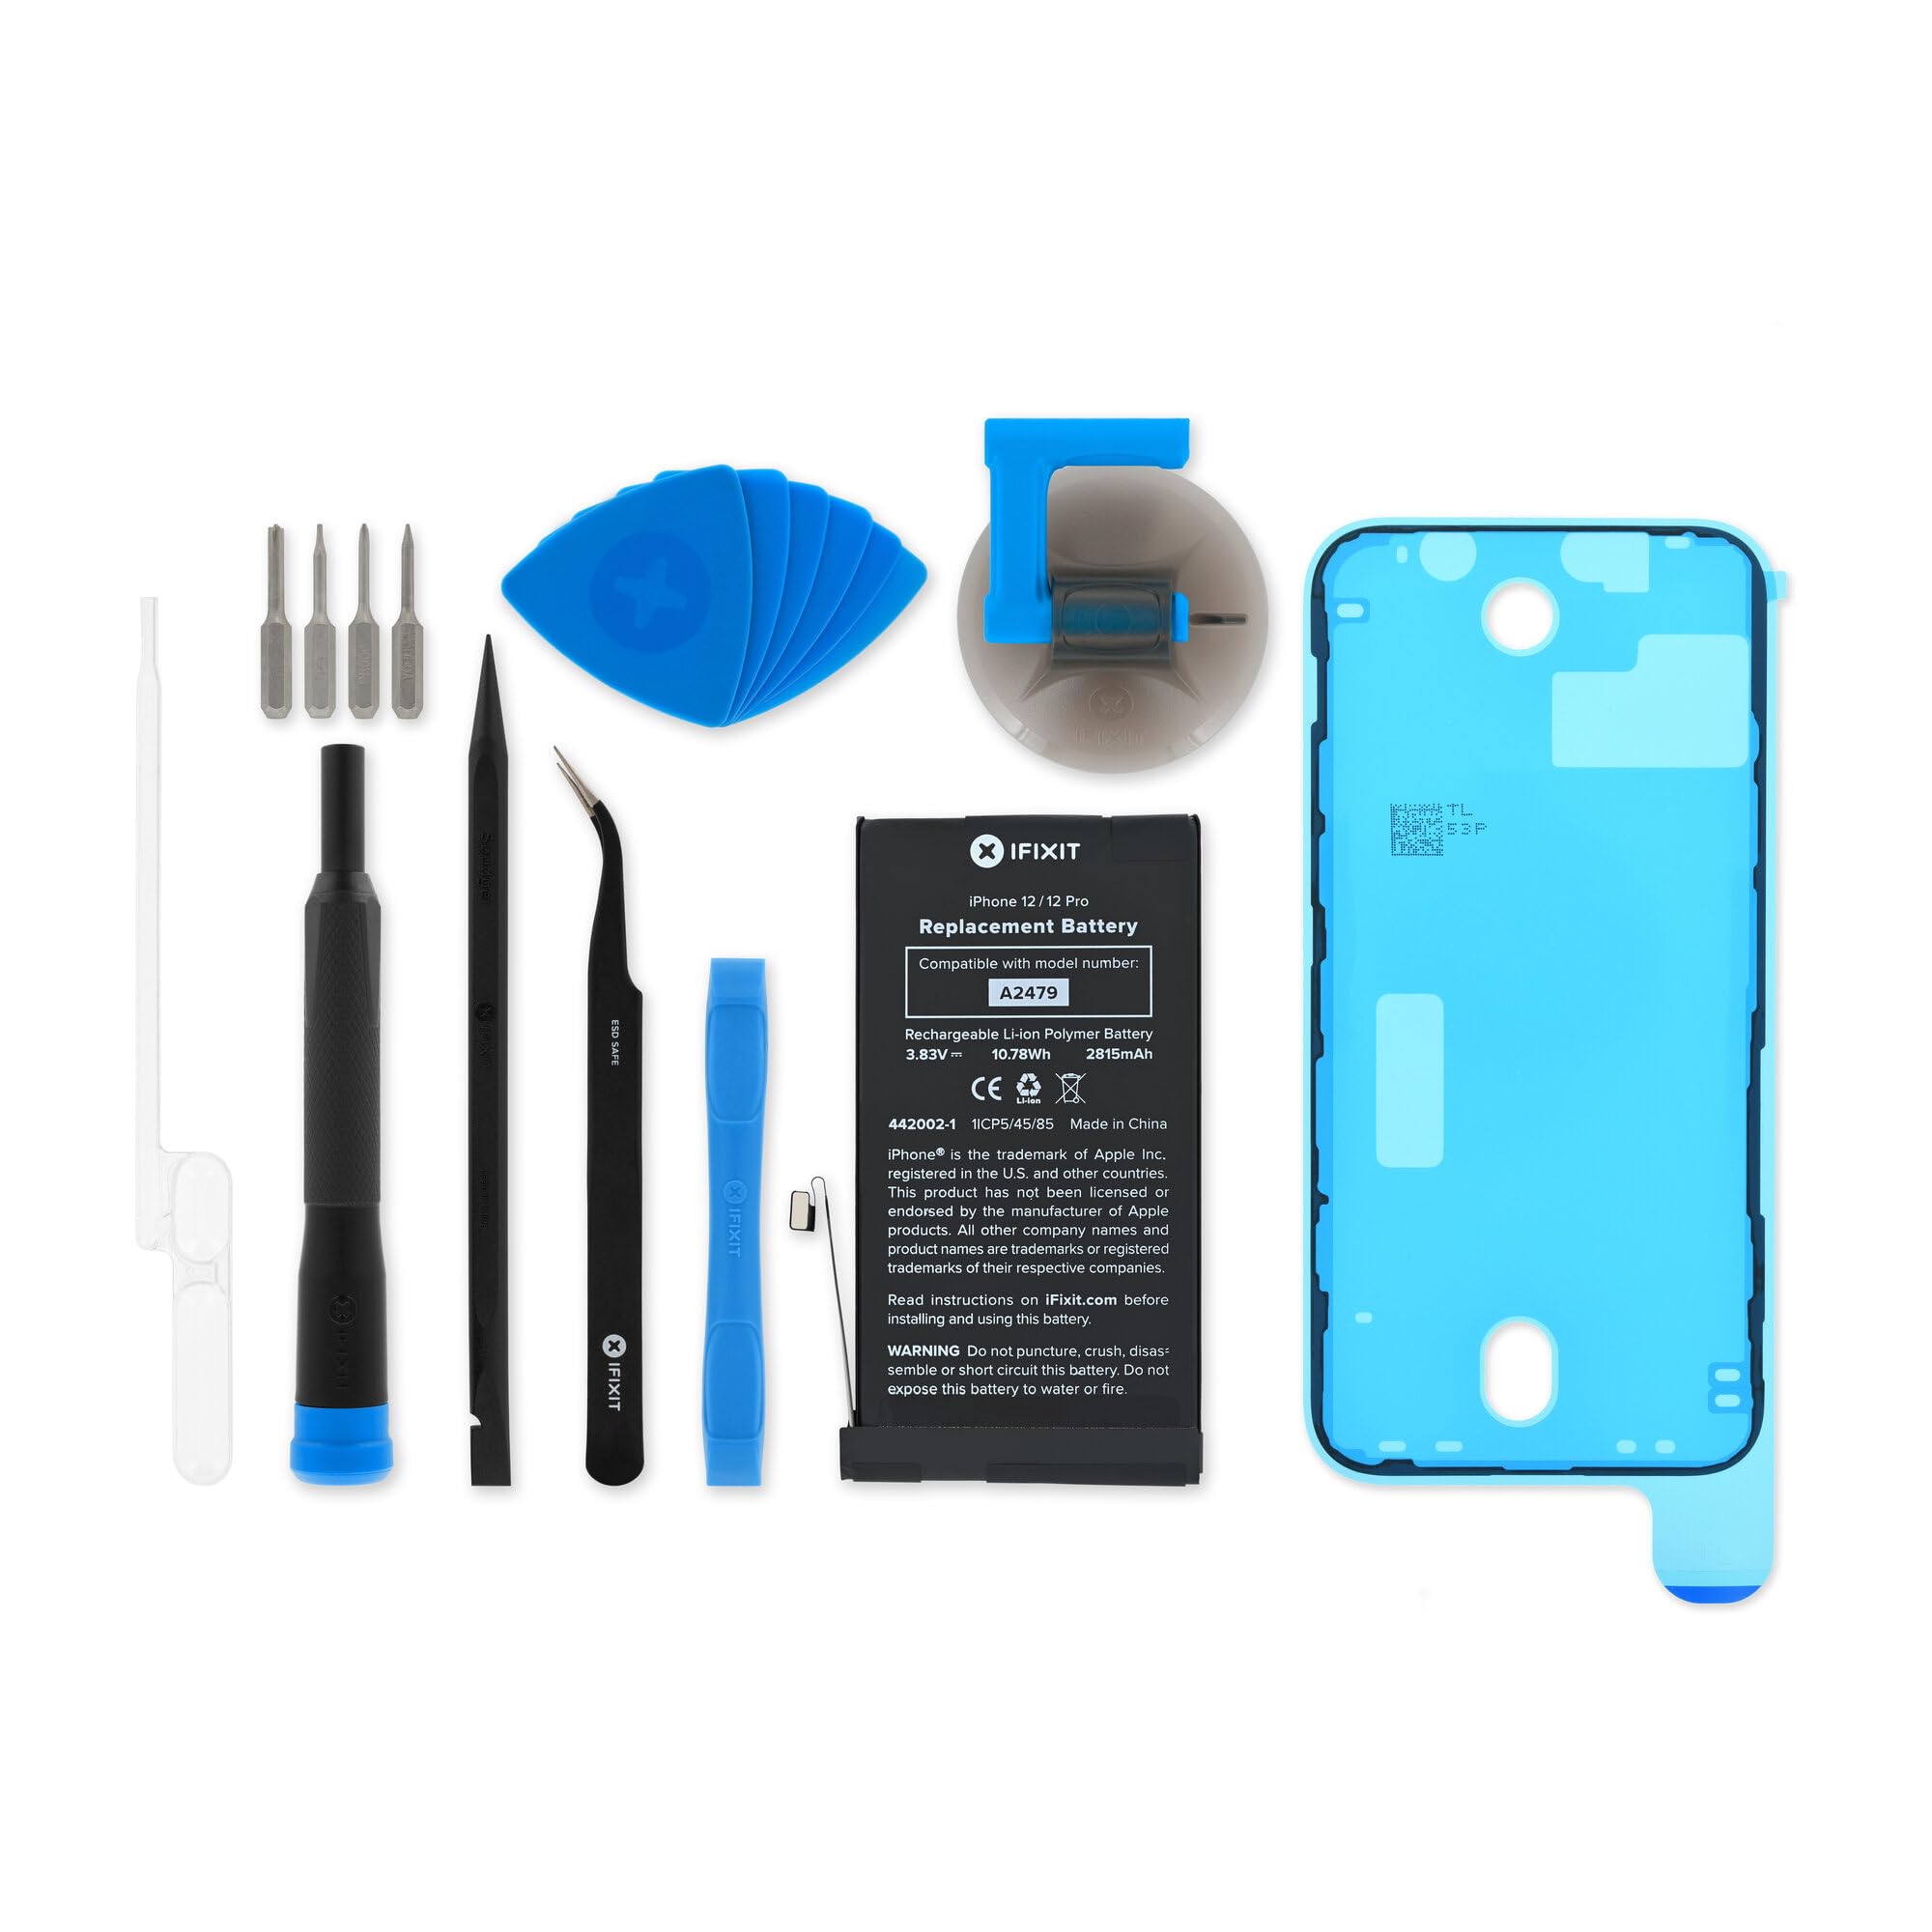
ചിത്രം: മുൻഭാഗം view of the iFixit replacement battery for iPhone 12 and 12 Pro.

Image: Contents of the iFixit Battery Repair Kit, including the battery, tools, and adhesive.
സജ്ജീകരണവും ഇൻസ്റ്റാളേഷനും
This section outlines the general steps for replacing your iPhone 12 or 12 Pro battery. For detailed, step-by-step visual guides, please refer to the official iFixit repair guides available online. This process requires patience and precision.
Required Tools (Included in Kit):
- പെന്റലോബ് സ്ക്രൂഡ്രൈവർ
- ഫിലിപ്സ് സ്ക്രൂഡ്രൈവർ
- Tri-point screwdriver
- സ്പഡ്ഗർ
- Opening picks
- സക്ഷൻ കപ്പ്
- ട്വീസറുകൾ
- Adhesive remover (if applicable)
- New adhesive strips

ചിത്രം: ഉദാample of an iFixit toolkit containing various precision tools for electronics repair.
പൊതു ഇൻസ്റ്റാളേഷൻ ഘട്ടങ്ങൾ:
- ഉപകരണം ഓഫാക്കുക: Completely power down your iPhone and disconnect it from any charging cables.
- പെന്റലോബ് സ്ക്രൂകൾ നീക്കം ചെയ്യുക: Use the pentalobe screwdriver to remove the two screws located on either side of the charging port.
- Heat the Edges (Optional but Recommended): Gently heat the edges of the iPhone's display to soften the adhesive. An iOpener or hairdryer on a low setting can be used.
- ഡിസ്പ്ലേ തുറക്കുക: Attach the suction cup to the bottom edge of the display, near the home button (if applicable) or charging port. Gently pull up on the suction cup while inserting an opening pick into the seam between the display and the frame. Carefully work the pick around the edges to separate the adhesive.
- Disconnect Display Cables: Once the display is open, carefully prop it up. Use a spudger to disconnect the various display and sensor cables from the logic board. Be gentle to avoid damaging the connectors.
- Remove Battery Adhesive: Locate the battery. There will be adhesive strips underneath it. Carefully pull these strips out from under the battery. If they break, you may need to gently pry the battery out with a spudger, being extremely careful not to puncture it.
- പഴയ ബാറ്ററി വിച്ഛേദിക്കുക: Use a spudger to disconnect the old battery's flex cable from the logic board.
- പഴയ ബാറ്ററി നീക്കം ചെയ്യുക: Carefully remove the old battery from the device.
- പുതിയ ബാറ്ററി സ്ഥാപിക്കുക: Apply the new adhesive strips to the back of the new iFixit battery. Connect the new battery's flex cable to the logic board.
- ടെസ്റ്റ് പ്രവർത്തനം: Before sealing the device, briefly power on the iPhone to ensure the new battery is recognized and the display functions correctly. Power off the device again.
- ഉപകരണം വീണ്ടും കൂട്ടിച്ചേർക്കുക: Reconnect all display and sensor cables. Carefully align the display and press it firmly back into place, ensuring the new adhesive seals properly. Reinstall the pentalobe screws.
Note: This is a general guide. Specific screw locations and cable configurations may vary slightly between iPhone 12 and 12 Pro models. Always consult the most current iFixit repair guide for your specific model.
പ്രവർത്തിക്കുന്നു (ഇൻസ്റ്റാളേഷന് ശേഷം)
After successful battery replacement, follow these steps for optimal performance:
- പ്രാരംഭ ചാർജ്: Fully charge your iPhone to 100% without interruption.
- Battery Calibration (Recommended): For the first few charge cycles, allow the battery to drain completely until the phone shuts off, then charge it fully to 100%. This helps calibrate the battery's charge indicator.
- പ്രകടനം നിരീക്ഷിക്കുക: Observe the battery life and charging behavior over the next few days to ensure everything is functioning as expected.
മെയിൻ്റനൻസ്
To maximize the lifespan and performance of your new iFixit battery:
- തീവ്രമായ താപനില ഒഴിവാക്കുക: Do not expose your iPhone to very hot or very cold environments, as this can degrade battery health.
- Optimal Charging Habits: While full discharge/charge cycles are good for calibration, for daily use, try to keep the battery charge between 20% and 80%. Avoid leaving it at 0% or 100% for extended periods.
- Use Quality Chargers: Always use MFi-certified or original Apple charging accessories.
- സോഫ്റ്റ്വെയർ അപ്ഡേറ്റുകൾ: Keep your iOS software updated, as updates often include battery optimization improvements.
ട്രബിൾഷൂട്ടിംഗ്
If you encounter issues after replacing your battery, consider the following:
- "Service Battery" Warning: This warning may appear even with a new battery if the iPhone's software cannot verify the battery as an "authentic Apple part." This is a software notification and does not typically affect battery performance.
- ഫോൺ ഓണാക്കുന്നില്ല: Double-check all internal cable connections, especially the battery and display cables. Ensure they are securely seated.
- ദ്രുത ബാറ്ററി ഡ്രെയിൻ: Perform a hard reset (force restart) of your iPhone. If the issue persists, ensure all internal connections are secure. Check for any background apps consuming excessive power.
- ചാർജ് ചെയ്യുമ്പോൾ അമിതമായി ചൂടാകുന്നത്: Discontinue charging immediately. This could indicate a faulty battery or a short circuit. Re-open the device and inspect the battery and connections for any damage or improper installation.
- ഡിസ്പ്ലേ പ്രശ്നങ്ങൾ: If the screen is not responding or showing artifacts, ensure the display cables are correctly and securely connected.
For further assistance, refer to the iFixit support resources or community forums.
സ്പെസിഫിക്കേഷനുകൾ
| ഫീച്ചർ | വിശദാംശങ്ങൾ |
|---|---|
| ബാറ്ററി തരം | റീചാർജ് ചെയ്യാവുന്ന ലിഥിയം-അയോൺ |
| വാട്ട് മണിക്കൂർ (Wh) | 10.78 Wh |
| വാല്യംtagഇ (വി) | 3.83 വി |
| അനുയോജ്യത | iPhone 12, iPhone 12 Pro |
| മോഡൽ നമ്പർ | 1ICP5/45/85 |
| പാക്കേജ് അളവുകൾ | 3 x 2 x 0.5 ഇഞ്ച് |
| ഇനത്തിൻ്റെ ഭാരം | 1.09 പൗണ്ട് |
| നിർമ്മാതാവ് | ഐഫിക്സിറ്റ് |
വാറൻ്റിയും പിന്തുണയും
iFixit stands behind the quality of its products. This repair kit and its components are backed by iFixit's commitment to quality.
iFixit tools are Backed for Life. If any tool included in your kit breaks, iFixit will replace it for as long as you own it. For specific warranty details on the battery component, please refer to the official iFixit webസൈറ്റ് അല്ലെങ്കിൽ ഉപഭോക്തൃ പിന്തുണയുമായി ബന്ധപ്പെടുക.

Image: iFixit "Backed for Life" emblem, signifying lifetime warranty on tools.
For comprehensive repair guides, troubleshooting tips, and customer support, visit the official iFixit webസൈറ്റ്: www.ifixit.com
നിരാകരണം
Attempting repairs on electronic devices carries inherent risks, including potential damage to the device or personal injury. Proceed with caution and at your own risk. iFixit provides tools and guides to empower users to perform repairs, but cannot guarantee specific outcomes or assume liability for damages incurred during the repair process. Professional repair is recommended if you are uncomfortable performing the repair yourself.