
ആമുഖം
The Vikeri 1520P 20MP Trail Camera is designed for wildlife monitoring, hunting, and property surveillance. It features high-resolution video and photo capabilities, a fast trigger speed, and a durable, waterproof design. This manual provides detailed instructions for setting up, operating, and maintaining your trail camera to ensure optimal performance.

Figure 1: Vikeri 1520P 20MP Trail Camera package contents.
സജ്ജമാക്കുക
1. അൺബോക്സിംഗും ഘടകങ്ങളും
സജ്ജീകരണം ആരംഭിക്കുന്നതിന് മുമ്പ്, എല്ലാ ഘടകങ്ങളും ഉണ്ടെന്ന് ഉറപ്പാക്കുക:
- Vikeri 1520P 20MP Trail Camera (2 units)
- മൗണ്ടിംഗ് സ്ട്രാപ്പ്
- 32GB Micro SD Card (2 units)
- AA Batteries (8 units)
- USB കേബിൾ
- ഉപയോക്തൃ മാനുവൽ (ഈ പ്രമാണം)
2. ബാറ്ററി ഇൻസ്റ്റാളേഷൻ
- ക്യാമറയുടെ പിൻഭാഗത്ത് ബാറ്ററി കമ്പാർട്ട്മെന്റ് കണ്ടെത്തുക.
- Open the two latches on the side of the camera to access the interior.
- Insert 4 AA batteries into the designated slots, ensuring correct polarity (+/-).
- ബാറ്ററി കമ്പാർട്ട്മെൻ്റ് സുരക്ഷിതമായി അടയ്ക്കുക.
3. SD കാർഡ് ചേർക്കൽ
- Locate the micro SD card slot inside the camera, typically near the battery compartment.
- Insert the provided 32GB micro SD card into the slot until it clicks into place. Ensure the card is inserted in the correct orientation.
- ആദ്യ ഉപയോഗത്തിന് മുമ്പ് ക്യാമറയുടെ മെനുവിലൂടെ SD കാർഡ് ഫോർമാറ്റ് ചെയ്യാൻ ശുപാർശ ചെയ്യുന്നു.
4. ക്യാമറ ഘടിപ്പിക്കുന്നു
The camera can be mounted to a tree or post using the included strap:
- ക്യാമറയുടെ പിൻഭാഗത്തുള്ള സ്ലോട്ടുകളിലൂടെ മൗണ്ടിംഗ് സ്ട്രാപ്പ് ത്രെഡ് ചെയ്യുക.
- Secure the camera to a tree or post at a height of 1-2 meters (approximately 3-6 feet).
- Ensure the camera is aligned parallel to the ground in the desired direction for optimal detection.
- Tighten the strap firmly to prevent movement.

Figure 2: Camera mounted on a tree, demonstrating its IP66 waterproof rating.
ക്യാമറ പ്രവർത്തിപ്പിക്കുന്നത്
1. പവർ ഓൺ/ഓഫ്
- To power on the camera, slide the mode switch to the 'ON' position.
- പവർ ഓഫ് ചെയ്യാൻ, സ്വിച്ച് 'ഓഫ്' സ്ഥാനത്തേക്ക് സ്ലൈഡ് ചെയ്യുക.
2. മെനു നാവിഗേറ്റ് ചെയ്യുന്നു
The camera features a built-in 2.4-inch LCD color screen and control buttons for easy navigation and settings adjustment.
- മെനു ഓപ്ഷനുകളിലൂടെ നാവിഗേറ്റ് ചെയ്യാൻ ദിശാസൂചന ബട്ടണുകൾ (മുകളിലേക്ക്, താഴേക്ക്, ഇടത്, വലത്) ഉപയോഗിക്കുക.
- Press the 'OK' button to confirm selections.
- Press the 'MENU' button to access the main settings menu.
3. Photo and Video Settings
Adjust the camera settings to suit your monitoring needs:
- റെസലൂഷൻ: The camera supports up to 1520P video and 20MP photos, providing clear and vibrant images.
- ട്രിഗർ വേഗത: With a lightning-fast 0.2-second trigger speed, the camera captures movements quickly, minimizing missed events.
- കണ്ടെത്തൽ ആംഗിൾ: The 120° wide-angle PIR (Passive Infrared) detection provides a broad field of view, capturing more activity.
- രാത്രി കാഴ്ച: Equipped with 48pcs 940nm no-glow infrared LEDs, the camera provides clear night vision up to 65 feet without disturbing wildlife.
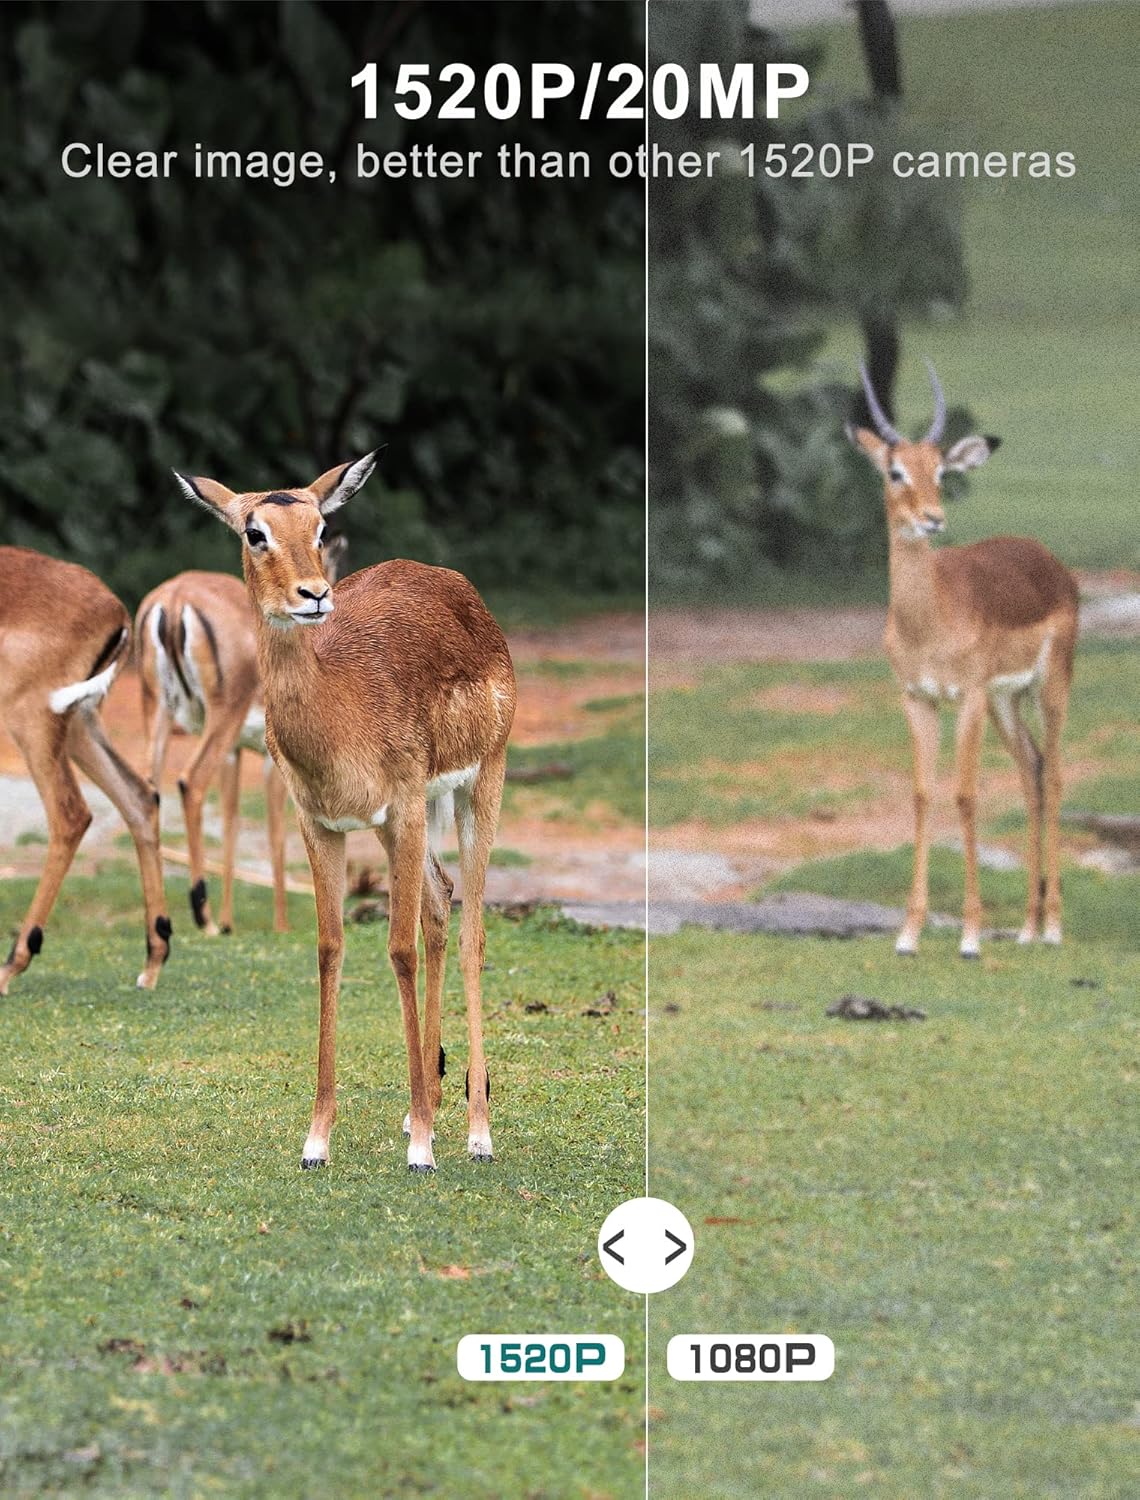
Figure 3: Image quality comparison between 1520P and 1080P resolutions.

Figure 4: Demonstration of the 0.2s trigger speed capturing fast-moving subjects.

Figure 5: The 120° wide-angle detection captures a broader area.

Figure 6: Night vision capability with 940nm no-glow IR LEDs.
4. Viewക്യാപ്ചർ ചെയ്ത മീഡിയയിൽ
നിങ്ങൾക്ക് കഴിയും view photos and videos directly on the camera's LCD screen:
- Switch the camera to 'PLAYBACK' mode using the mode switch.
- Use the directional buttons to browse through captured images and videos.
- Press 'OK' to view തിരഞ്ഞെടുത്തത് file.
- കൈമാറാൻ files to a computer, remove the micro SD card and insert it into a card reader, or connect the camera directly via the USB cable.
മെയിൻ്റനൻസ്
- വൃത്തിയാക്കൽ: Regularly clean the camera lens and PIR sensors with a soft, dry cloth to ensure clear images and accurate detection. Avoid abrasive materials.
- ബാറ്ററി പരിശോധന: Monitor battery levels through the LCD screen. Replace all batteries when low to prevent interruption of recording.
- SD കാർഡ് മാനേജുമെന്റ്: Periodically format the SD card to maintain optimal performance and prevent data corruption. Back up important fileഫോർമാറ്റ് ചെയ്യുന്നതിന് മുമ്പ് എസ്.
- വാട്ടർപ്രൂഫ് സീൽ: Ensure the latches are securely closed and the rubber seal around the camera housing is free from debris to maintain its IP66 waterproof rating.
- സംഭരണം: ദീർഘനേരം ഉപയോഗിക്കാത്തപ്പോൾ, ബാറ്ററികൾ നീക്കം ചെയ്ത് തണുത്തതും വരണ്ടതുമായ സ്ഥലത്ത് ക്യാമറ സൂക്ഷിക്കുക.
ട്രബിൾഷൂട്ടിംഗ്
| പ്രശ്നം | സാധ്യമായ കാരണം | പരിഹാരം |
|---|---|---|
| ക്യാമറ പവർ ഓൺ ചെയ്യുന്നില്ല. | Low or dead batteries; Incorrect battery insertion | Replace all batteries with new ones; Ensure correct polarity (+/-) |
| മോശം ഇമേജ്/വീഡിയോ നിലവാരം | Dirty lens; Incorrect resolution settings; Insufficient lighting | Clean the lens; Adjust resolution settings in the menu; Ensure adequate light for non-night vision modes |
| മോഷൻ സെൻസർ പ്രവർത്തിക്കുന്നില്ല | PIR sensor obstructed; Sensitivity set too low; Subject out of range | Clear any obstructions from the sensor; Increase PIR sensitivity in settings; Ensure subject is within detection range (up to 65-80ft) |
| SD card error message | SD card not formatted; Corrupted SD card; Incompatible SD card | Format the SD card via the camera menu; Try a different, high-quality micro SD card (up to 32GB) |
| ചെറിയ ബാറ്ററി ലൈഫ് | Frequent triggers; Extreme temperatures; Low-quality batteries | Reduce trigger frequency if possible; Use high-quality alkaline or lithium batteries; Avoid extreme temperature exposure |
സാങ്കേതിക സവിശേഷതകൾ
| ഫീച്ചർ | സ്പെസിഫിക്കേഷൻ |
|---|---|
| വീഡിയോ ക്യാപ്ചർ റെസല്യൂഷൻ | 1520P |
| ഫലപ്രദമായ സ്റ്റിൽ റെസല്യൂഷൻ | 20 എം.പി |
| ട്രിഗർ വേഗത | 0.2 സെക്കൻഡ് |
| Viewing ആംഗിൾ | 120 ഡിഗ്രി |
| നൈറ്റ് വിഷൻ റേഞ്ച് | 65 അടി |
| ഐആർ എൽഇഡികളുടെ എണ്ണം | 48 (940nm No Glow) |
| അന്താരാഷ്ട്ര സംരക്ഷണ റേറ്റിംഗ് | IP66 (ജലപ്രൂഫ്) |
| പവർ ഉറവിടം | ബാറ്ററി പവർ (4 AA ബാറ്ററികൾ ആവശ്യമാണ്) |
| കണക്റ്റിവിറ്റി ടെക്നോളജി | Wireless (USB for data transfer) |
| പ്രദർശിപ്പിക്കുക | 2.4" LCD കളർ സ്ക്രീൻ |
| മെറ്റീരിയൽ | അക്രിലോണിട്രൈൽ ബ്യൂട്ടാഡീൻ സ്റ്റൈറൈൻ (എബിഎസ്) |
| ഉൽപ്പന്ന അളവുകൾ | 5.39 x 3.42 x 2.36 ഇഞ്ച് |
| ഇനത്തിൻ്റെ ഭാരം | 2.79 pounds (for 2 cameras) |
വാറൻ്റിയും പിന്തുണയും
For information regarding product warranty, returns, or technical support, please refer to the official Vikeri brand store or contact Vikeri customer service directly.
Official Vikeri Brand Store: Visit the Vikeri Store on Amazon
ഏതെങ്കിലും വാറന്റി ക്ലെയിമുകൾക്കായി നിങ്ങളുടെ വാങ്ങൽ രസീത് സൂക്ഷിക്കുക.