
1. ആമുഖം
This manual provides instructions for the installation, operation, and maintenance of the ShockFlo S1 Level 2 EV Charger. This device is designed to provide efficient electric vehicle charging for home use. Please read this manual thoroughly before using the product to ensure proper function and safety.
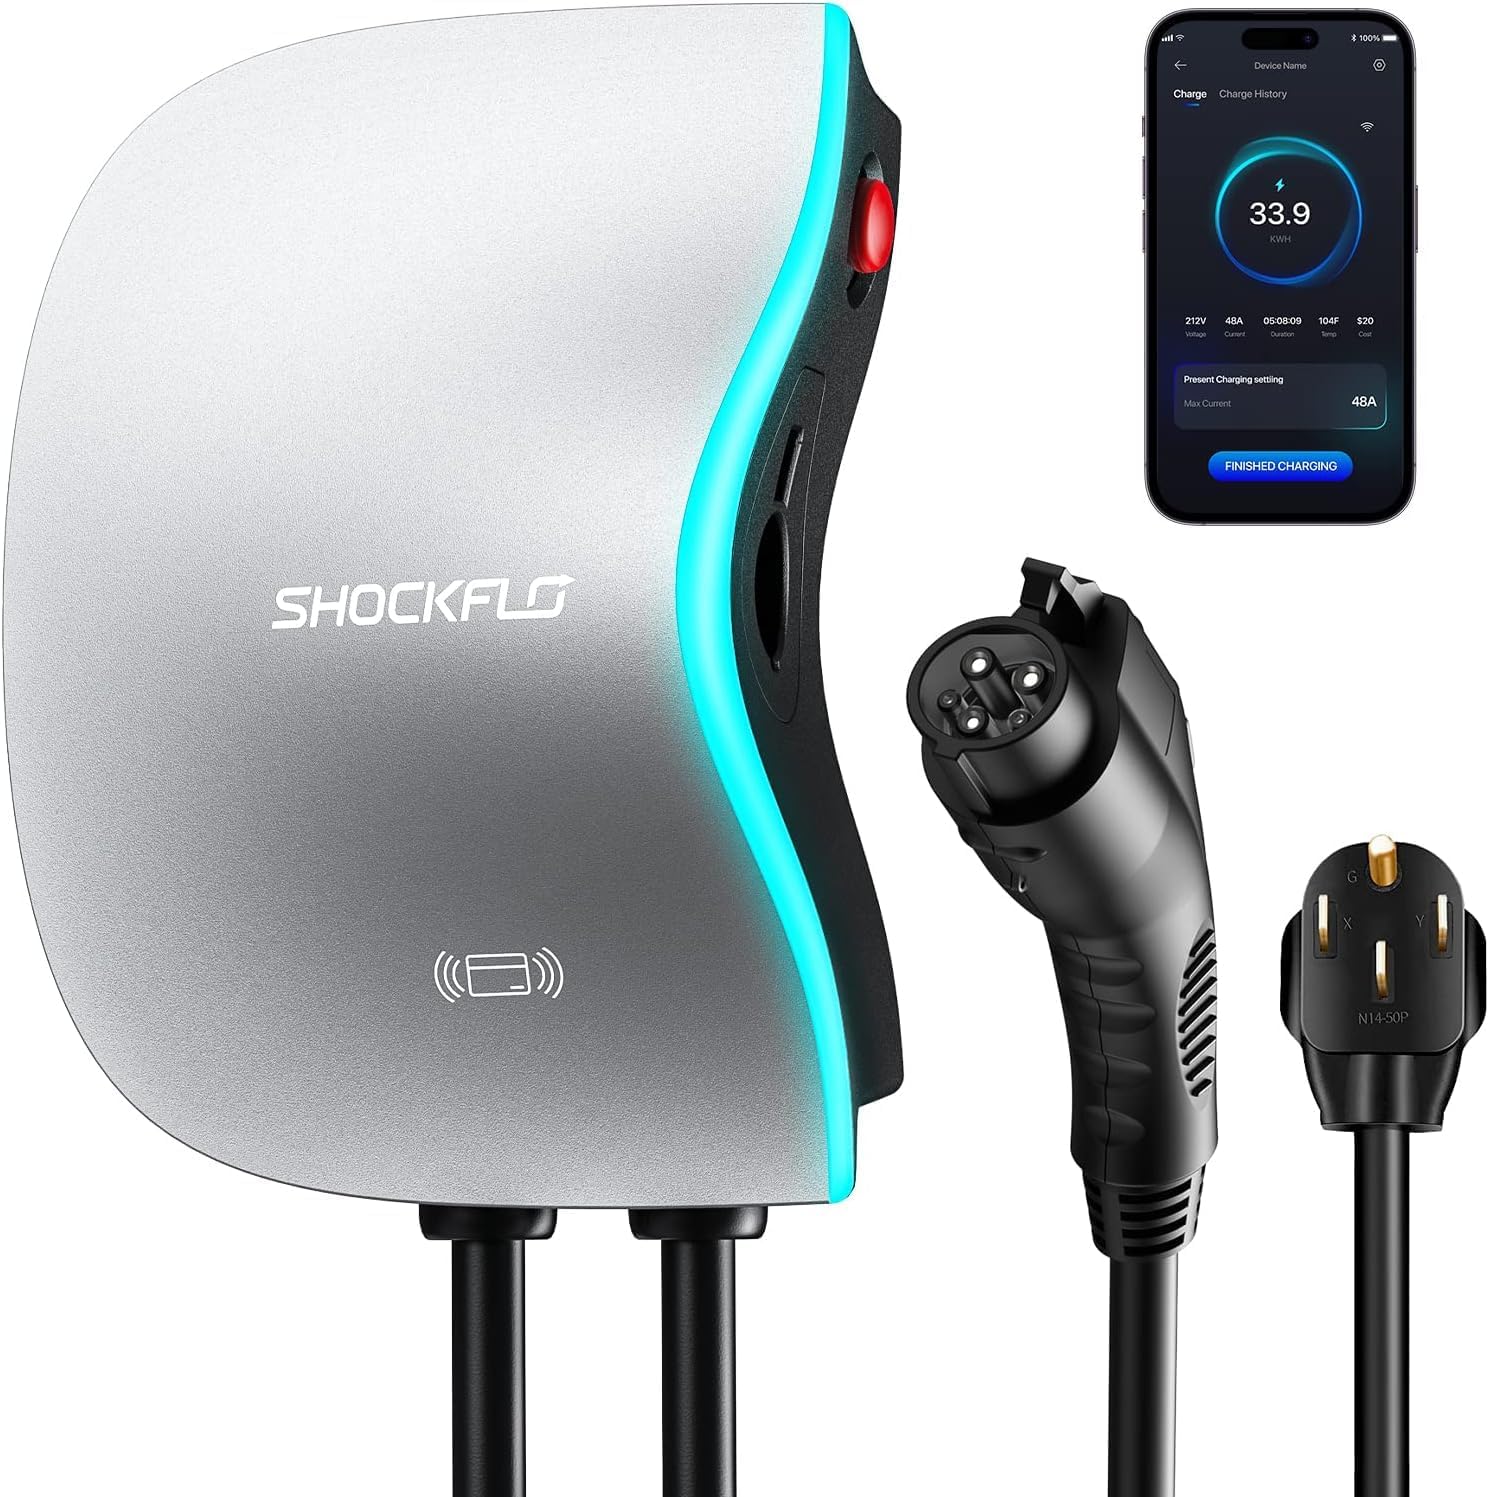
Figure 1: ShockFlo S1 Level 2 EV Charger overview.
2 സുരക്ഷാ വിവരങ്ങൾ
The ShockFlo S1 EV Charger is designed with safety features and is UL certified. Adherence to the following safety guidelines is crucial for preventing injury and damage:
- എല്ലാ പ്രാദേശിക, ദേശീയ ഇലക്ട്രിക്കൽ കോഡുകൾക്കും അനുസൃതമായി യോഗ്യതയുള്ള ഒരു ഇലക്ട്രീഷ്യനാണ് ഇൻസ്റ്റാളേഷൻ നടത്തേണ്ടത്.
- ചാർജർ തുറക്കാനോ, ഡിസ്അസംബ്ലിംഗ് ചെയ്യാനോ, പരിഷ്ക്കരിക്കാനോ ശ്രമിക്കരുത്.
- Ensure the charging cable is not damaged before each use. Do not use if the cable or connector is frayed, broken, or exposed.
- Keep children and pets away from the charging area during operation.
- The charger is rated IP65 for water and dust resistance, suitable for indoor or outdoor use. However, avoid submerging the unit in water.
- The charger incorporates multiple protection mechanisms including lightning, current leakage, grounding, low-voltagഇ, ഓവർ-വോളിയംtage, over-charge, over-heat, and over-current protection.

Figure 2: Integrated safety protection features.
3. പാക്കേജ് ഉള്ളടക്കം
പാക്കേജിൽ എല്ലാ ഇനങ്ങളും ഉണ്ടെന്ന് ഉറപ്പാക്കുക:
- ShockFlo S1 Level 2 EV Charger Unit (40A)
- മൌണ്ടിംഗ് ബ്രാക്കറ്റ്
- മൗണ്ടിംഗ് സ്ക്രൂകളും ആങ്കറുകളും
- NEMA 14-50 Plug (pre-attached or separate, depending on model)
- RFID Cards (2x)
- ഉപയോക്തൃ മാനുവൽ
- ദ്രുത ഇൻസ്റ്റലേഷൻ ഗൈഡ്

Figure 3: Package contents and certifications.
4. സജ്ജീകരണവും ഇൻസ്റ്റാളേഷനും
The ShockFlo S1 EV Charger offers two installation options: NEMA 14-50 plug or hardwired. Professional installation by a certified electrician is recommended for both options to ensure compliance with electrical codes and safety standards.
4.1 ചാർജർ മൌണ്ട് ചെയ്യുന്നു
- ലൊക്കേഷൻ തിരഞ്ഞെടുക്കുക: Choose a suitable indoor or outdoor location near your parking area, ensuring the 17ft charging cable can reach your vehicle's charging port.
- മൗണ്ടിംഗ് ബ്രാക്കറ്റ് ഘടിപ്പിക്കുക: Securely attach the mounting bracket to a sturdy wall surface using the provided screws and anchors. For drywall, appropriate anchors (not included) may be required.
- Mount Charger Unit: Carefully align and mount the EV charger unit onto the installed bracket.

Figure 4: Installation steps for the EV charger.
4.2 ഇലക്ട്രിക്കൽ കണക്ഷൻ
NEMA 14-50 Plug Option:
- Ensure a dedicated 240V NEMA 14-50 outlet is available and properly installed on a circuit rated for at least 50A.
- Plug the charger's NEMA 14-50 connector into the wall outlet.
Hardwired Installation Option:
- For hardwired installation, consult a qualified electrician. The charger must be connected to a dedicated 240V circuit with appropriate overcurrent protection.
- Follow the wiring diagrams provided in the full PDF user manual for correct hardwiring procedures.
5. ഓപ്പറേഷൻ
5.1 ചാർജിംഗ് മോഡുകൾ
The ShockFlo S1 EV Charger supports three primary charging modes:
- ആപ്പ് റിമോട്ട് കൺട്രോൾ: Use the ShockFlo mobile application to manage charging sessions.
- RFID Card Charging: Tap an authorized RFID card to start or stop charging.
- പ്ലഗ് & ചാർജ്: Simply plug the connector into your EV to initiate charging (this setting can be enabled/disabled in the app).
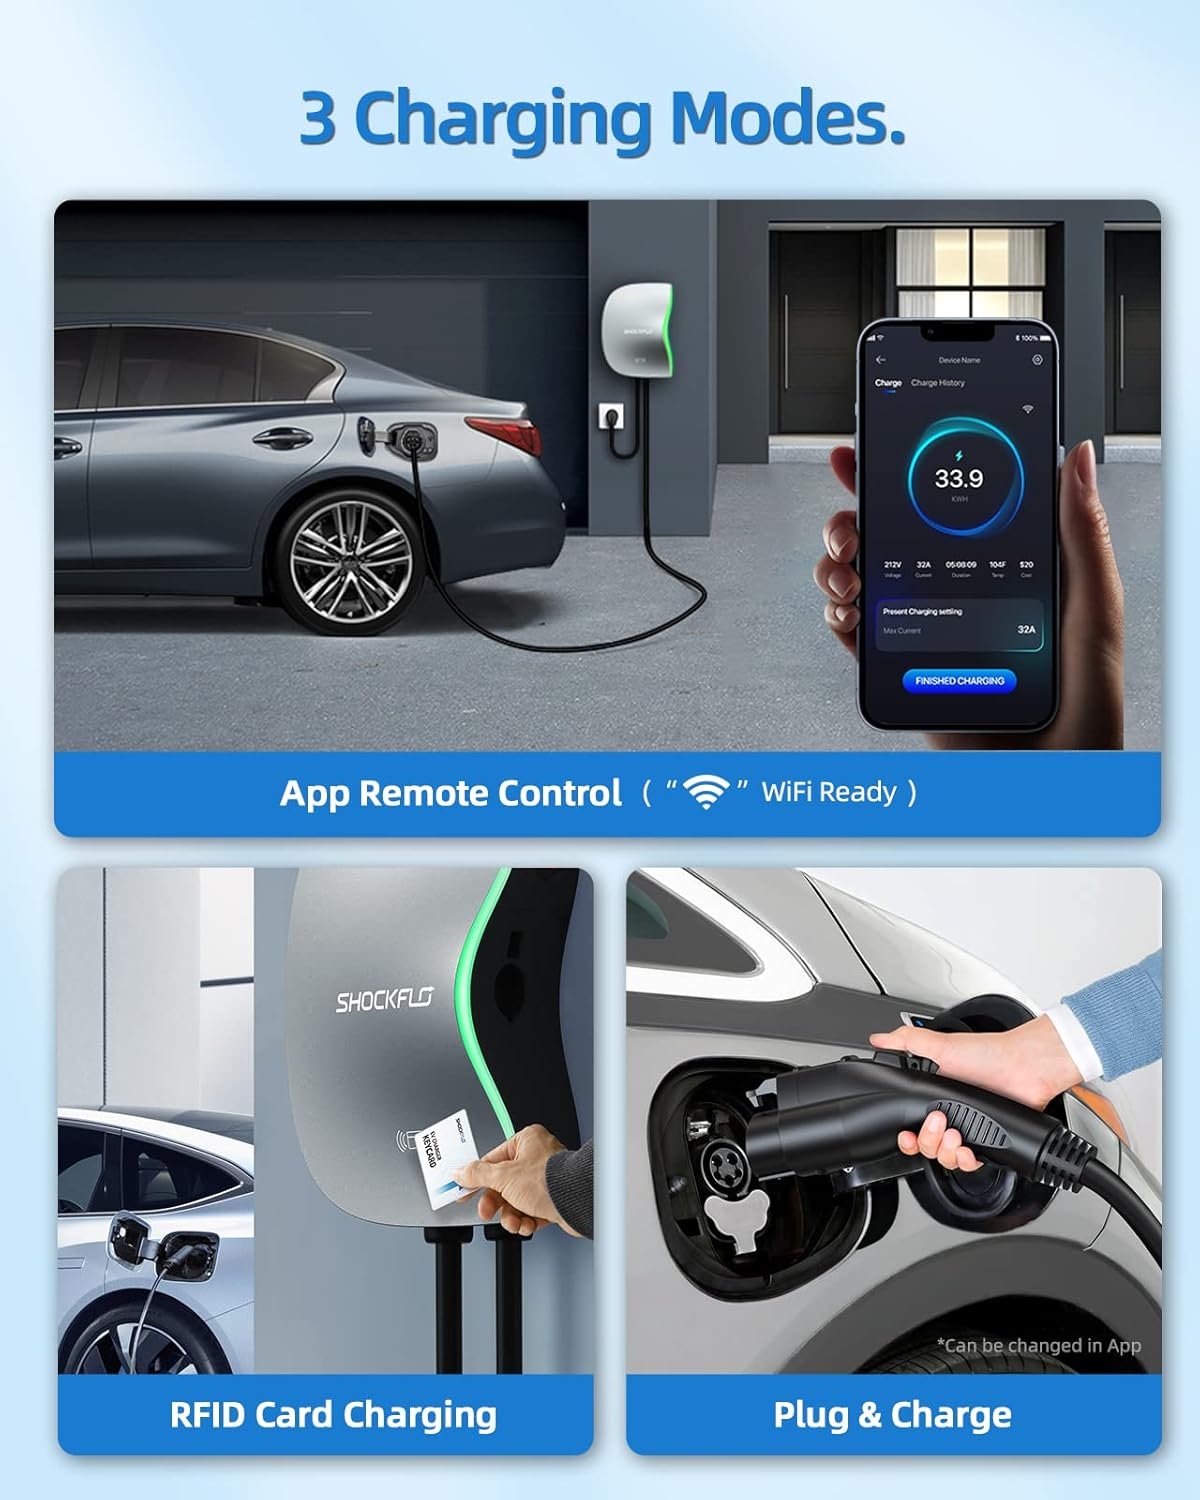
ചിത്രം 5: ലഭ്യമായ ചാർജിംഗ് മോഡുകൾ.
5.2 Using the ShockFlo App
The ShockFlo app provides advanced control and monitoring features:
- റിമോട്ട് കൺട്രോൾ: Start and stop charging sessions from your smartphone.
- നിലവിലെ ക്രമീകരണം: Adjust the charging current (e.g., 16A, 32A, 40A) to suit your vehicle's needs or household electrical capacity.
- ഷെഡ്യൂൾ ചാർജിംഗ്: Set specific times for charging, useful for utilizing off-peak electricity rates.
- മോണിറ്റർ ചാർജിംഗ്: View real-time charging status, energy consumption, and charging history.
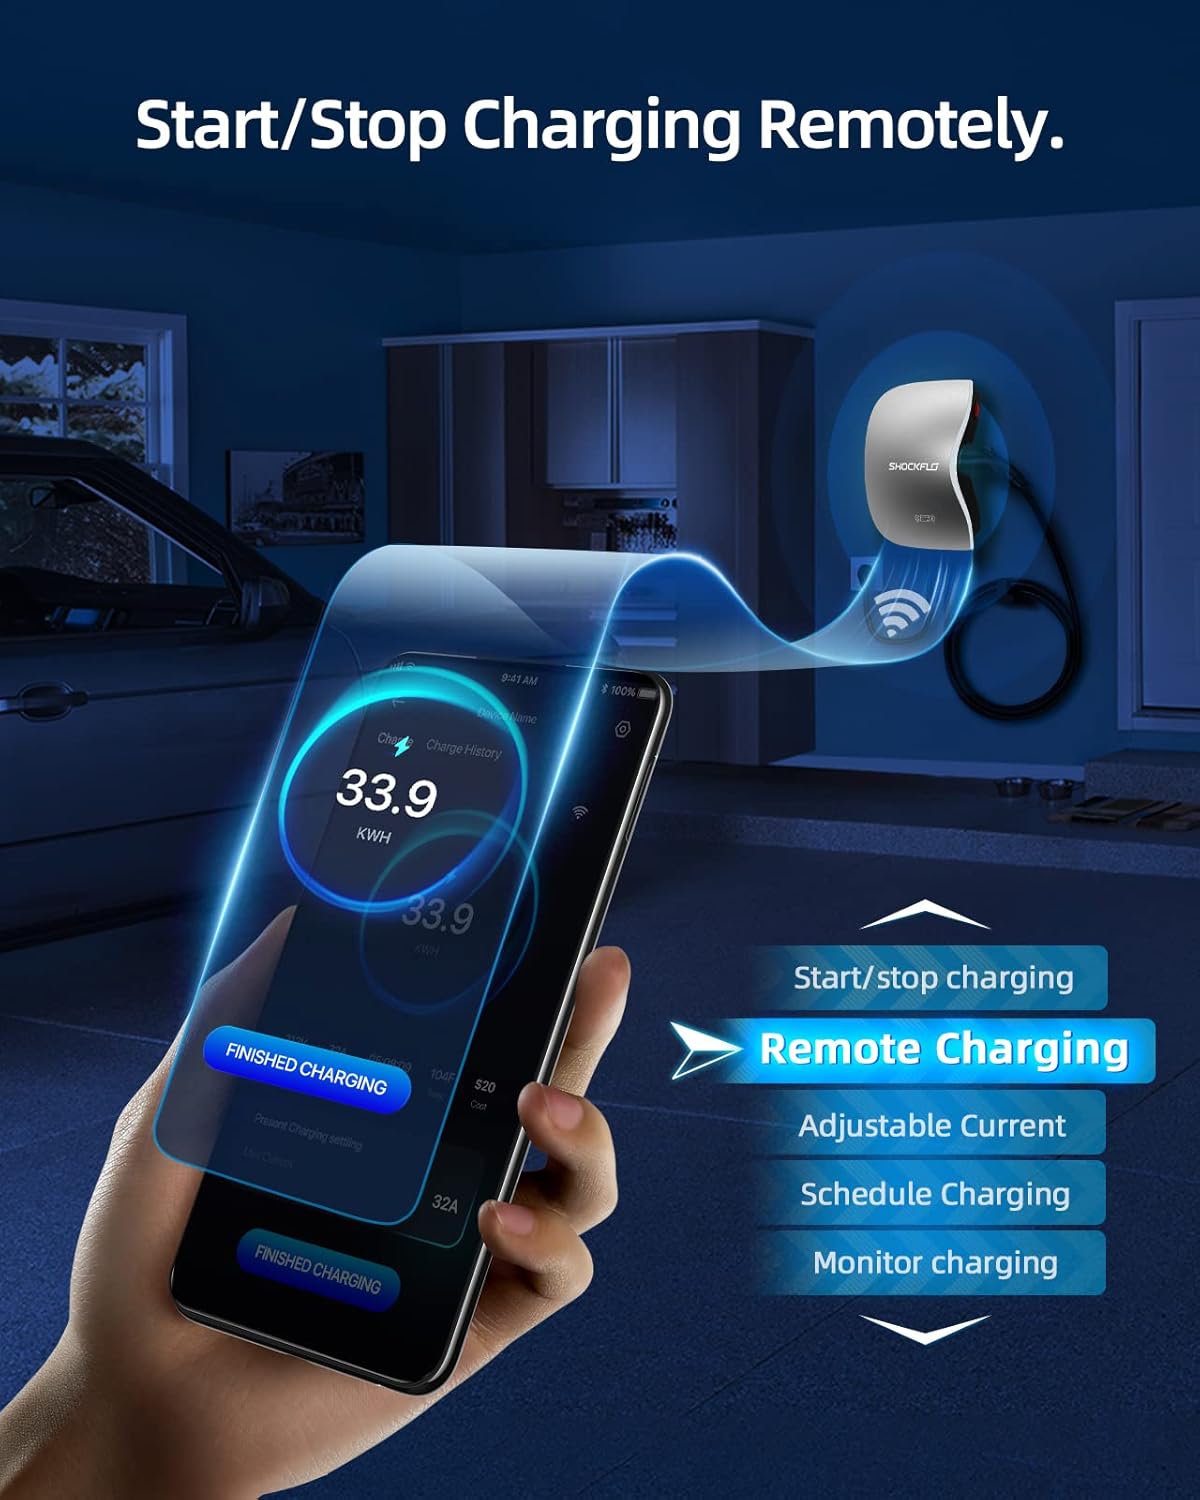
Figure 6: ShockFlo app features for remote control and scheduling.

Figure 7: Scheduling charging for off-peak hours via the app.
5.3 നിങ്ങളുടെ EV-യുമായി ബന്ധിപ്പിക്കുന്നു
The charger uses an SAE J1772 connector, compatible with most electric vehicles in North America. For Tesla vehicles, an adapter (sold separately) is required.
- ചാർജർ ഓണാക്കിയിട്ടുണ്ടെന്ന് ഉറപ്പാക്കുക.
- നിങ്ങളുടെ EV യുടെ ചാർജിംഗ് പോർട്ട് തുറക്കുക.
- Firmly insert the SAE J1772 connector into your EV's charging port until it clicks into place.
- Charging will begin according to your selected mode (App, RFID, or Plug & Charge).
- To stop charging, use the app, tap the RFID card, or unlock your vehicle's charging port and press the release button on the connector before pulling it out.

Figure 8: Correct method for inserting the charging connector.
5.4 LED ഇൻഡിക്കേറ്റർ സ്റ്റാറ്റസ്
The LED light on the charger indicates its current status:
- Blue (Solid): No connector inserted.
- നീല (പൾസിംഗ്): Connector inserted, awaiting app connection.
- Green (Pulsing): ചാർജിംഗ് പുരോഗമിക്കുന്നു.
- പച്ച (ഖര): ഫുൾ ചാർജായി.
- ചുവപ്പ് (ഖര): Fault detected.
- Yellow (Pulsing): OTA (Over-The-Air) update in progress.

ചിത്രം 9: LED ഇൻഡിക്കേറ്റർ സ്റ്റാറ്റസ് ഗൈഡ്.
6. പരിപാലനം
The ShockFlo S1 EV Charger requires minimal maintenance. Follow these guidelines to ensure longevity and optimal performance:
- വൃത്തിയാക്കൽ: Wipe the charger's exterior with a soft, damp തുണി. അബ്രാസീവ് ക്ലീനറുകളോ ലായകങ്ങളോ ഉപയോഗിക്കരുത്. വൃത്തിയാക്കുന്നതിന് മുമ്പ് യൂണിറ്റ് ഓഫ് ചെയ്തിട്ടുണ്ടെന്ന് ഉറപ്പാക്കുക.
- കേബിൾ പരിശോധന: Regularly inspect the charging cable and connector for any signs of wear, damage, or corrosion. Replace if damage is found.
- സംഭരണം: When not in use, ensure the charging cable is neatly coiled and the connector is stored in its designated holder (if applicable) to prevent damage.
- സോഫ്റ്റ്വെയർ അപ്ഡേറ്റുകൾ: Keep the ShockFlo app updated to the latest version to ensure access to new features and performance improvements. The charger may also receive OTA updates.
7. പ്രശ്നപരിഹാരം
If you encounter issues with your ShockFlo S1 EV Charger, refer to the following common problems and solutions:
| പ്രശ്നം | സാധ്യമായ കാരണം | പരിഹാരം |
|---|---|---|
| ചാർജർ ഓണാകുന്നില്ല. | No power from outlet/circuit breaker tripped. | Check the circuit breaker. Ensure the NEMA 14-50 plug is fully inserted or hardwired connection is secure. |
| ചാർജിംഗ് ആരംഭിക്കുന്നില്ല. | Connector not fully inserted; vehicle not ready to charge; app/RFID issue; charger fault. | Ensure the connector is firmly inserted. Check your EV's dashboard for charging status. Try using the app or RFID card. Check LED indicator for fault codes. |
| ചുവന്ന LED സൂചകം. | ആന്തരിക തകരാർ കണ്ടെത്തി. | Unplug the charger (or turn off circuit breaker), wait 5 minutes, then reconnect. If the fault persists, contact customer support. |
| App not connecting to charger. | Bluetooth/Wi-Fi issues; app outdated. | Ensure Bluetooth and Wi-Fi are enabled on your phone. Restart the app and charger. Check for app updates. Ensure charger is within Wi-Fi range. |
For further assistance, refer to the full user manual or contact ShockFlo customer support.
8 സ്പെസിഫിക്കേഷനുകൾ
| ഫീച്ചർ | വിശദാംശങ്ങൾ |
|---|---|
| മോഡൽ നമ്പർ | CS01 |
| ചാർജിംഗ് ലെവൽ | ലെവൽ 2 |
| പരമാവധി കറൻ്റ് | 40എ |
| ഔട്ട്പുട്ട് പവർ | 9.6 kW |
| ഇൻപുട്ട് വോളിയംtage | 240 വോൾട്ട് എസി |
| കണക്റ്റർ തരം | SAE J1772 |
| കേബിൾ നീളം | 17 അടി |
| കണക്റ്റിവിറ്റി | Wi-Fi, Bluetooth, RFID |
| ഇൻസ്റ്റലേഷൻ ഓപ്ഷനുകൾ | NEMA 14-50 Plug or Hardwired |
| പരിസ്ഥിതി റേറ്റിംഗ് | IP65 (Indoor/Outdoor Use) |
| സർട്ടിഫിക്കേഷനുകൾ | UL, FCC, Energy Star |
| ഉൽപ്പന്ന അളവുകൾ (D x W x H) | 3.35" x 9.25" x 15.7" |
| ഇനത്തിൻ്റെ ഭാരം | 18.5 പൗണ്ട് |

ചിത്രം 10: ഉൽപ്പന്ന അളവുകൾ.

Figure 11: Environmental and durability testing.
9. വാറണ്ടിയും പിന്തുണയും
ShockFlo provides a 3 വർഷത്തെ വാറൻ്റി for the S1 Level 2 EV Charger, covering defects in materials and workmanship under normal use. For warranty claims or technical assistance, please contact ShockFlo customer support.
ഉപഭോക്തൃ പിന്തുണ: 24/7 customer support is available to assist with any questions or issues you may encounter. Refer to the contact information provided in your product packaging or on the official ShockFlo webസൈറ്റ്.