
1. ആമുഖം
This instruction manual provides essential information for the safe and effective use of your XRIDONSEN Amber White Emergency Strobe Light Bar. This 2-in-1 system includes both a dash-mounted unit and a roof-mounted light bar, designed to enhance visibility and safety for various vehicles.
- ഉയർന്ന ദൃശ്യപരത: Features 32 high-brightness LEDs for the dash unit and 104 LEDs for the roof bar, ensuring clear signaling day and night.
- നീണ്ടുനിൽക്കുന്ന നിർമ്മാണം: Built with sturdy and durable aluminum waterproof housing, offering a lifespan of up to 50,000 hours and an IP67 waterproof rating.
- അവബോധജന്യമായ നിയന്ത്രണം: A digital display controller allows for easy selection from 26 flashing patterns, 3 quick directional selections, and a custom pattern saving feature.
- എളുപ്പമുള്ള ഇൻസ്റ്റാളേഷൻ: Equipped with strong magnetic mounts and rubber suction cups for secure, non-damaging attachment to metallic vehicle roofs. Includes a 16.4FT power cord for flexible placement.
- ബഹുമുഖ ആപ്ലിക്കേഷൻ: Ideal for emergency vehicles, law enforcement, mail services, construction equipment, tow trucks, and other vehicles requiring enhanced warning signals.
2. ഉൽപ്പന്നം കഴിഞ്ഞുview & ഘടകങ്ങൾ

Figure 1: The XRIDONSEN Strobe Light Bar system includes both a dash-mounted unit and a roof-mounted light bar, along with a control panel and mounting accessories.
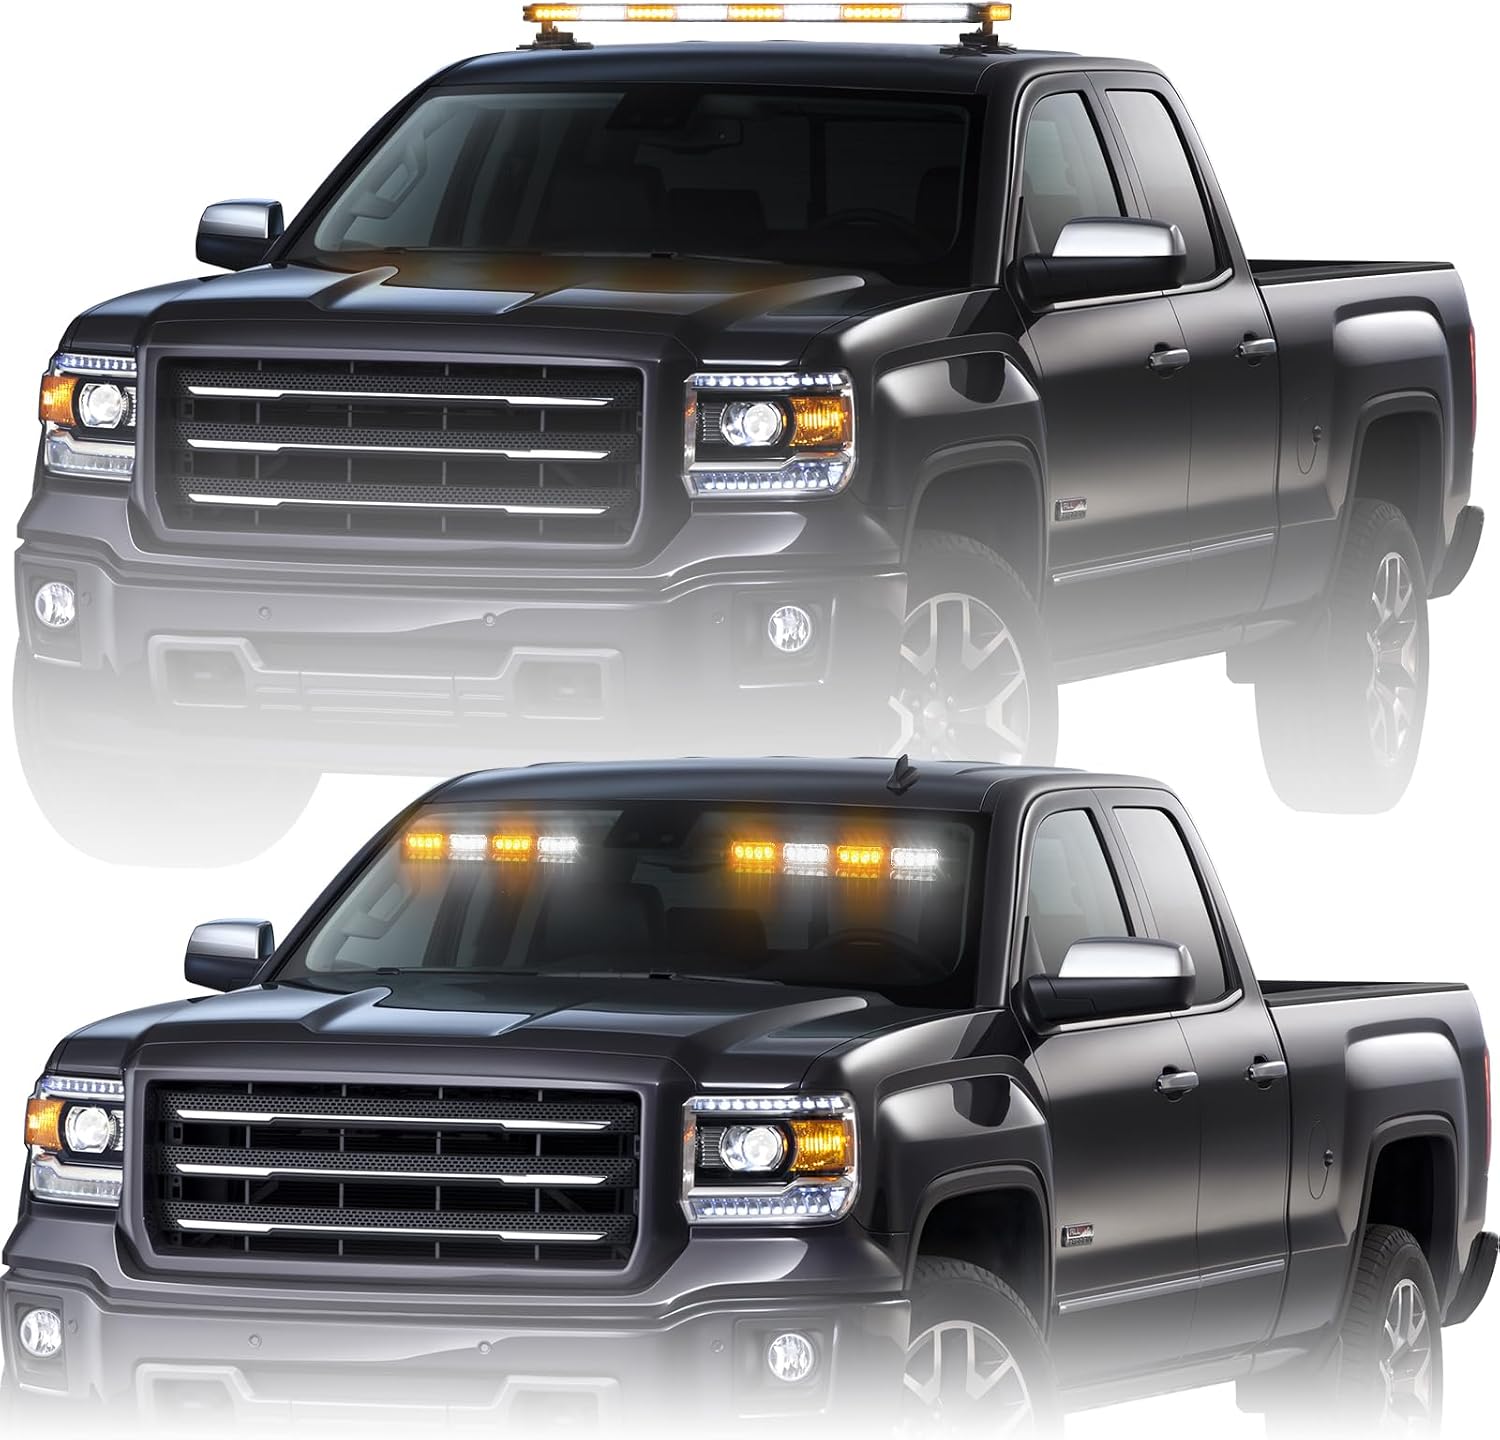
Figure 2: The roof-mounted strobe light bar provides high visibility for various vehicle types, enhancing safety during operations.

Figure 3: The dash strobe lights offer additional front-facing warning signals, easily installed on the vehicle's interior.
3. സജ്ജീകരണവും ഇൻസ്റ്റാളേഷനും
3.1 ലൈറ്റ് ബാർ മൌണ്ട് ചെയ്യുന്നു
The light bar utilizes strong magnetic mounts with rubber suction cups for secure attachment to metallic vehicle roofs. Ensure the mounting surface is clean and dry before installation. For non-metallic surfaces, hardwiring options are available (consult a professional if unsure).

Figure 4: Detail of the magnetic mounting brackets with protective rubber pads.
3.2 വയറിംഗും പവർ കണക്ഷനും
Connect the light bar to your vehicle's 12V power outlet using the provided cigarette lighter adapter. The adapter includes an on/off switch for convenience. For permanent installation, the adapter can be removed for hardwiring; professional installation is recommended for this method.

ചിത്രം 5: ഉദാample installation of dash lights and controller within a vehicle's interior.
4. പ്രവർത്തന നിർദ്ദേശങ്ങൾ
4.1 Digital Display Controller
The digital display controller provides full command over the light bar's functions. It features a digital screen to indicate the current pattern number and illuminated buttons for various controls.
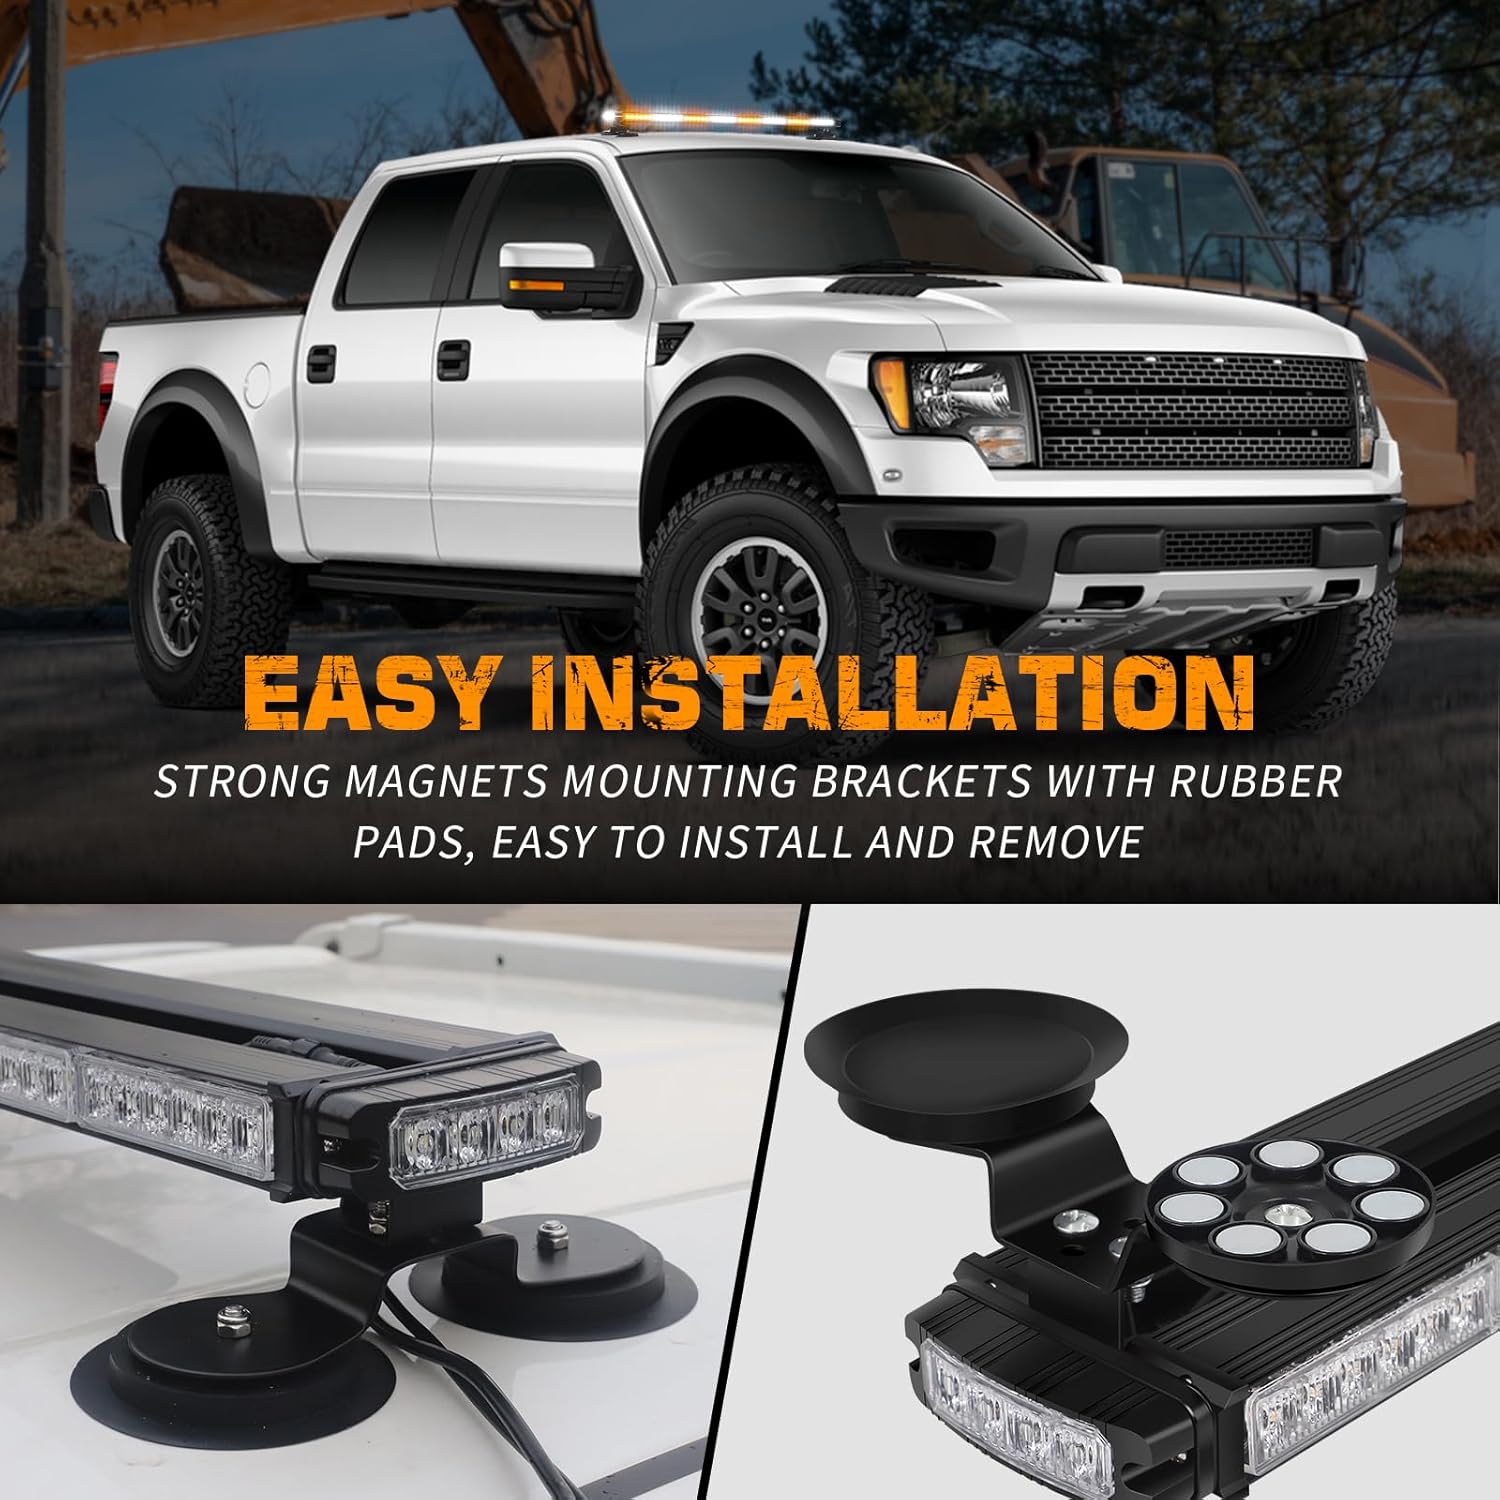
Figure 6: The digital display controller with buttons for power, pattern selection, and directional control.
- പവർ ബട്ടൺ: Press to turn the light bar system ON or OFF.
- പാറ്റേൺ ബട്ടൺ: Cycle through the 26 available flashing patterns. The digital display will show the current pattern number (1-26).
- ദിശാസൂചന ബട്ടണുകൾ: Use the left, right, and custom buttons to activate specific traffic advisor patterns, directing traffic flow.
- ഇഷ്ടാനുസൃത ബട്ടൺ: Press and hold to save your preferred flashing pattern for quick access.
5. പരിപാലനം
To ensure the longevity and optimal performance of your strobe light bar, follow these maintenance guidelines:
- വൃത്തിയാക്കൽ: Regularly clean the light bar and its mounting surfaces with a soft cloth and mild detergent. Avoid abrasive cleaners that could damage the housing or lenses.
- വാട്ടർപ്രൂഫിംഗ്: The light bar has an IP67 waterproof rating, making it resistant to various weather conditions. However, avoid high-pressure washing directly onto the light bar.
- പരിശോധന: Periodically inspect the wiring, connections, and mounting hardware for any signs of wear, corrosion, or looseness. Tighten any loose components as needed.
6. പ്രശ്നപരിഹാരം
If you encounter issues with your XRIDONSEN Strobe Light Bar, refer to the following common troubleshooting steps:
- Light Bar Not Powering On:
- Check the cigarette lighter adapter connection to ensure it is fully inserted and the vehicle's 12V outlet is receiving power.
- Verify the on/off switch on the cigarette lighter adapter is in the 'ON' position.
- If hardwired, inspect the wiring connections for proper installation and ensure no fuses are blown in the vehicle's electrical system.
- Patterns Not Changing:
- Ensure the digital display controller is properly connected to the light bar system.
- Press the 'PATTERN' button firmly to cycle through modes. If unresponsive, check for any damage to the controller cable.
- Lights Appear Dim:
- Ensure the light bar lenses are clean and free from dirt or debris.
- Verify the vehicle's battery is providing adequate voltagഇ (12V).
7 സ്പെസിഫിക്കേഷനുകൾ
| ഫീച്ചർ | സ്പെസിഫിക്കേഷൻ |
|---|---|
| ബ്രാൻഡ് | XRIDONSEN |
| മോഡൽ | B0C9X9PLFM |
| മെറ്റീരിയൽ | അലുമിനിയം, റബ്ബർ |
| പ്രകാശ സ്രോതസ്സ് തരം | എൽഇഡി |
| വാല്യംtage | 12 വോൾട്ട് |
| പ്രകാശ സ്രോതസ്സുകളുടെ എണ്ണം | 104 (Roof Bar) |
| മൗണ്ടിംഗ് തരം | Magnetic Mount, Suction Cup Mount |
| പ്രത്യേക സവിശേഷതകൾ | വാട്ടർപ്രൂഫ് (IP67) |
| ജീവിതകാലയളവ് | 50,000 മണിക്കൂർ വരെ |
8. വാറണ്ടിയും പിന്തുണയും
For warranty information, technical assistance, or to inquire about replacement parts, please contact XRIDONSEN customer service directly. You can find contact details on the official XRIDONSEN webസൈറ്റ് അല്ലെങ്കിൽ നിങ്ങളുടെ വാങ്ങൽ പ്ലാറ്റ്ഫോം വഴി.