Acekool PAC-M09
Acekool 9000 BTU Portable Air Conditioner
ഉപയോക്തൃ മാനുവൽ
1 സുരക്ഷാ വിവരങ്ങൾ
Please read this manual carefully before operating your Acekool Portable Air Conditioner. Keep it for future reference. Failure to follow these instructions may result in electric shock, fire, or serious injury.
പൊതു സുരക്ഷാ മുൻകരുതലുകൾ
- ഈ ഉപകരണം ഇൻഡോർ ഉപയോഗത്തിന് മാത്രമുള്ളതാണ്.
- കേടായ ചരടോ പ്ലഗോ ഉപയോഗിച്ച് യൂണിറ്റ് പ്രവർത്തിപ്പിക്കരുത്.
- വൈദ്യുതി വിതരണം വോള്യവുമായി പൊരുത്തപ്പെടുന്നുണ്ടെന്ന് ഉറപ്പാക്കുകtagയൂണിറ്റിന്റെ റേറ്റിംഗ് ലേബലിൽ e വ്യക്തമാക്കിയിട്ടുണ്ട്.
- എയർ ഇൻലെറ്റുകളോ ഔട്ട്ലെറ്റുകളോ തടയരുത്. ചുവരുകളിൽ നിന്നും മറ്റ് വസ്തുക്കളിൽ നിന്നും കുറഞ്ഞത് 20 സെന്റീമീറ്റർ അകലം പാലിക്കുക.
- എയർ ഔട്ട്ലെറ്റിൽ വിരലുകളോ വസ്തുക്കളോ തിരുകരുത്.
- വൃത്തിയാക്കുന്നതിനോ സർവീസ് ചെയ്യുന്നതിനോ മുമ്പായി എപ്പോഴും യൂണിറ്റ് അൺപ്ലഗ് ചെയ്യുക.
- യൂണിറ്റ് വൃത്തിയാക്കാൻ രാസ ലായകങ്ങൾ (ഉദാ: ബെൻസീൻ, ആൽക്കഹോൾ, ഗ്യാസോലിൻ) ഉപയോഗിക്കരുത്.
- യൂണിറ്റ് ചൂട് സ്രോതസ്സുകളിൽ നിന്നും നേരിട്ട് സൂര്യപ്രകാശത്തിൽ നിന്നും അകറ്റി നിർത്തുക.
- ഭാരമുള്ള വസ്തുക്കൾ യൂണിറ്റിന് മുകളിൽ വയ്ക്കരുത്.
- ഈ ഉപകരണം, അവരുടെ സുരക്ഷയ്ക്ക് ഉത്തരവാദിയായ ഒരു വ്യക്തി ഉപകരണത്തിൻ്റെ ഉപയോഗത്തെ സംബന്ധിച്ച മേൽനോട്ടമോ നിർദ്ദേശമോ നൽകിയിട്ടില്ലെങ്കിൽ, ശാരീരികമോ ഇന്ദ്രിയപരമോ മാനസികമോ ആയ കഴിവുകൾ കുറഞ്ഞതോ അനുഭവത്തിൻ്റെയും അറിവിൻ്റെയും അഭാവം ഉള്ള വ്യക്തികൾക്ക് (കുട്ടികൾ ഉൾപ്പെടെ) ഉപയോഗിക്കാൻ ഉദ്ദേശിച്ചുള്ളതല്ല.
2. ഉൽപ്പന്നം കഴിഞ്ഞുview
The Acekool 9000 BTU Portable Air Conditioner is a versatile 3-in-1 unit designed to provide cooling, fan, and dehumidification functions for your home or office. Its compact design and mobility make it ideal for various room sizes.

Image: Acekool 9000 BTU Portable Air Conditioner with its remote control, showing cool air flowing from the unit.
പാക്കേജ് ഉള്ളടക്കം
പാക്കേജിൽ എല്ലാ ഇനങ്ങളും ഉണ്ടെന്ന് ഉറപ്പാക്കുക:
- Portable Air Conditioner × 1
- വിദൂര നിയന്ത്രണം × 1
- ഉപയോക്തൃ മാനുവൽ × 1
- Exhaust Hose × 1
- Window Sealing Plate Kit × 1
- ഹോസ് കണക്റ്റർ × 1
- ഡ്രെയിൻ ഹോസ് × 1

Image: All components included in the Acekool Portable Air Conditioner package, laid out next to the main unit.
നിയന്ത്രണ പാനൽ ഡിസ്പ്ലേ

Image: Close-up of the control panel on top of the Acekool portable air conditioner, showing buttons for Timer, Speed, Swing, Sleep, Mode, and Power, along with indicator lights.
- ടൈമർ ബട്ടൺ: Sets the auto-on/off time.
- സ്പീഡ് ബട്ടൺ: ഫാൻ വേഗത ക്രമീകരിക്കുന്നു (കുറഞ്ഞത്/ഉയർന്നത്).
- സ്വിംഗ് ബട്ടൺ: Activates/deactivates automatic louver swing.
- മുകളിലേക്കും താഴേക്കും ഉള്ള അമ്പടയാളങ്ങൾ: Adjusts temperature or timer settings.
- സ്ലീപ്പ് ബട്ടൺ: Activates sleep mode for quiet operation.
- മോഡ് ബട്ടൺ: Selects operation mode (Cool, Fan, Dry).
- പവർ ബട്ടൺ: യൂണിറ്റ് ഓണാക്കുകയോ ഓഫാക്കുകയോ ചെയ്യുന്നു.
3. സജ്ജീകരണം
Proper installation is crucial for the efficient operation of your portable air conditioner. Follow these steps to set up the unit.
എക്സ്ഹോസ്റ്റ് ഹോസ് ഇൻസ്റ്റാളേഷൻ
- എക്സ്ഹോസ്റ്റ് ഹോസിന്റെ ഒരറ്റത്ത് ഹോസ് കണക്റ്റർ അറ്റാച്ചുചെയ്യുക.
- എക്സ്ഹോസ്റ്റ് ഹോസിന്റെ മറ്റേ അറ്റത്ത് വിൻഡോ കിറ്റ് അഡാപ്റ്റർ ഘടിപ്പിക്കുക.
- എയർ കണ്ടീഷണർ യൂണിറ്റിന്റെ പിൻഭാഗത്തുള്ള എക്സ്ഹോസ്റ്റ് ഔട്ട്ലെറ്റിലേക്ക് ഹോസ് കണക്റ്റർ തിരുകുക.
- നിങ്ങളുടെ വിൻഡോ ഓപ്പണിംഗിന് അനുയോജ്യമായ രീതിയിൽ വിൻഡോ സീലിംഗ് പ്ലേറ്റ് കിറ്റ് ക്രമീകരിക്കുക.
- Connect the window kit adapter to the opening in the window sealing plate.
- വായു ചോർച്ച തടയാൻ എല്ലാ കണക്ഷനുകളും സുരക്ഷിതമാണെന്ന് ഉറപ്പാക്കുക.

Image: Visual guide showing the dimensions of the unit and the five steps for installing the exhaust hose and window kit.
പ്ലേസ്മെൻ്റ്
- പരന്നതും സ്ഥിരതയുള്ളതുമായ ഉപരിതലത്തിൽ യൂണിറ്റ് സ്ഥാപിക്കുക.
- Ensure there is sufficient space around the unit for proper airflow (at least 20 cm from walls).
- Position the unit near a window or opening for the exhaust hose.
4. പ്രവർത്തന നിർദ്ദേശങ്ങൾ
Your Acekool Portable Air Conditioner offers multiple modes and settings for optimal comfort. You can operate the unit using the control panel on top or the included remote control.

Image: Split image showing the remote control being used with the unit on the left, and the unit operating with swing mode on the right.
ഓൺ/ഓഫ് ചെയ്യുന്നു
- അമർത്തുക പവർ യൂണിറ്റ് ഓണാക്കാനോ ഓഫാക്കാനോ കൺട്രോൾ പാനലിലോ റിമോട്ട് കൺട്രോളിലോ ഉള്ള ബട്ടൺ.
മോഡ് തിരഞ്ഞെടുക്കൽ
അമർത്തുക മോഡ് ലഭ്യമായ മോഡുകളിലൂടെ സൈക്കിൾ ചെയ്യാൻ ബട്ടൺ ആവർത്തിച്ച് അമർത്തുക:
- കൂളിംഗ് മോഡ്: For powerful cooling. Adjust temperature using the UP/DOWN arrows (16-31°C).
- ഫാൻ മോഡ്: തണുപ്പിക്കാതെ വായു സഞ്ചാരം നൽകുന്നു. കുറഞ്ഞതോ ഉയർന്നതോ ആയ ഫാൻ വേഗത തിരഞ്ഞെടുക്കുക.
- ഈർപ്പം കുറയ്ക്കൽ മോഡ്: Removes excess moisture from the air (up to 42L/day).

Image: Three panels illustrating the cooling mode (lowest 16°C), dehumidifying mode (42L/day), and fan mode (2 speeds).
ഫാൻ സ്പീഡ് അഡ്ജസ്റ്റ്മെന്റ്
- കൂളിംഗ് അല്ലെങ്കിൽ ഫാൻ മോഡിൽ, അമർത്തുക വേഗത button to select Low or High fan speed.
ടൈമർ പ്രവർത്തനം
- അമർത്തുക ടൈമർ button to set the desired auto-on or auto-off time (up to 24 hours). Use the UP/DOWN arrows to adjust the time.
സ്ലീപ്പ് മോഡ്
- അമർത്തുക ഉറങ്ങുക button to activate sleep mode, which provides quieter operation and gradually adjusts the temperature for comfortable sleep.

Image: An illustration showing a child sleeping peacefully, with icons indicating Automatic Shut-off, Sleep Mode, 24H Smart Timer, and Ultra Quiet operation, along with a noise level comparison chart.
5. പരിപാലനം
പതിവ് അറ്റകുറ്റപ്പണികൾ നിങ്ങളുടെ പോർട്ടബിൾ എയർകണ്ടീഷണറിന്റെ ദീർഘായുസ്സും കാര്യക്ഷമതയും ഉറപ്പാക്കുന്നു.
എയർ ഫിൽട്ടർ വൃത്തിയാക്കുന്നു
The unit has a removable and reusable air filter that should be cleaned regularly (every two weeks or more often depending on usage) to maintain optimal performance and air quality.
- പവർ ഔട്ട്ലെറ്റിൽ നിന്ന് എയർ കണ്ടീഷണർ ഊരിമാറ്റുക.
- Locate the air filter panel, usually on the side or back of the unit.
- എയർ ഫിൽറ്റർ പതുക്കെ പുറത്തെടുക്കുക.
- Clean the filter with a vacuum cleaner to remove dust and debris. For heavy dirt, wash it with lukewarm water and a mild detergent.
- ഫിൽറ്റർ വീണ്ടും ഇടുന്നതിനുമുമ്പ് പൂർണ്ണമായും വായുവിൽ ഉണങ്ങാൻ അനുവദിക്കുക. നേരിട്ട് സൂര്യപ്രകാശം ഏൽക്കരുത്.
- Slide the dry filter back into its slot until it clicks into place.

Image: A hand demonstrating the removal of the washable air filter from the side of the air conditioner unit.
വറ്റിക്കുന്ന വെള്ളം
This air conditioner features an advanced auto-evaporation technology, which automatically evaporates condensed water through the condenser and discharges it outdoors, significantly reducing the need for manual drainage. However, in very humid conditions, the water tank may fill up. When the 'FULL' indicator light illuminates, the unit will stop operating, and you will need to drain the water manually.
- യൂണിറ്റ് ഓഫ് ചെയ്ത് പവർ സ്രോതസ്സിൽ നിന്ന് അത് അൺപ്ലഗ് ചെയ്യുക.
- Place a shallow pan or container under the drain port at the bottom rear of the unit.
- ഡ്രെയിൻ പ്ലഗ് നീക്കം ചെയ്യുക. വെള്ളം പുറത്തേക്ക് ഒഴുകാൻ തുടങ്ങും.
- വെള്ളം മുഴുവൻ വറ്റിക്കഴിഞ്ഞാൽ, ഡ്രെയിൻ പ്ലഗ് സുരക്ഷിതമായി മാറ്റിസ്ഥാപിക്കുക.
സംഭരണം
യൂണിറ്റ് ദീർഘനേരം ഉപയോഗിക്കുന്നില്ലെങ്കിൽ:
- യൂണിറ്റിൽ നിന്ന് എല്ലാ ബാഷ്പീകരിച്ച വെള്ളവും ഊറ്റി കളയുക.
- എയർ ഫിൽട്ടർ വൃത്തിയാക്കുക.
- പവർ കോർഡ് ഊരി വൃത്തിയായി ചുരുട്ടുക.
- നേരിട്ടുള്ള സൂര്യപ്രകാശത്തിൽ നിന്നും തീവ്രമായ താപനിലയിൽ നിന്നും അകന്ന്, തണുത്തതും വരണ്ടതുമായ സ്ഥലത്ത് യൂണിറ്റ് സൂക്ഷിക്കുക.
6. പ്രശ്നപരിഹാരം
ഉപഭോക്തൃ പിന്തുണയുമായി ബന്ധപ്പെടുന്നതിന് മുമ്പ്, ഇനിപ്പറയുന്ന പൊതുവായ പ്രശ്നങ്ങളും പരിഹാരങ്ങളും പരിശോധിക്കുക.
| പ്രശ്നം | സാധ്യമായ കാരണം | പരിഹാരം |
|---|---|---|
| യൂണിറ്റ് ഓണാക്കുന്നില്ല | വൈദ്യുതി വിതരണം ഇല്ല പവർ കോർഡ് പ്ലഗിൻ ചെയ്തിട്ടില്ല വാട്ടർ ടാങ്ക് നിറഞ്ഞു | പവർ ഔട്ട്ലെറ്റ് പരിശോധിക്കുക പ്ലഗ് സുരക്ഷിതമായി ചേർത്തിട്ടുണ്ടെന്ന് ഉറപ്പാക്കുക വെള്ളം കളയാനുള്ള ടാങ്ക് |
| യൂണിറ്റ് ഫലപ്രദമായി തണുക്കുന്നില്ല. | എയർ ഫിൽട്ടർ അടഞ്ഞുപോയി എക്സ്ഹോസ്റ്റ് ഹോസ് ശരിയായി ഇൻസ്റ്റാൾ ചെയ്തിട്ടില്ല മുറി വളരെ വലുതാണ് തുറന്നിരിക്കുന്ന വാതിലുകൾ/ജനലുകൾ താപനില ക്രമീകരണം വളരെ ഉയർന്നതാണ് | ശുദ്ധമായ എയർ ഫിൽട്ടർ Check exhaust hose connection and window kit മുറിയുടെ വലുപ്പത്തിന് യൂണിറ്റ് അനുയോജ്യമാണെന്ന് ഉറപ്പാക്കുക. എല്ലാ വാതിലുകളും ജനലുകളും അടയ്ക്കുക സെറ്റ് താപനില കുറയ്ക്കുക |
| യൂണിറ്റ് ശബ്ദമയമാണ് | യൂണിറ്റ് പരന്ന പ്രതലത്തിലല്ല. എയർ ഫിൽട്ടർ അടഞ്ഞുപോയി ആന്തരിക ഘടകങ്ങൾ വൈബ്രേറ്റ് ചെയ്യുന്നു | യൂണിറ്റ് ഒരു പരന്നതും സ്ഥിരതയുള്ളതുമായ പ്രതലത്തിൽ സ്ഥാപിക്കുക ശുദ്ധമായ എയർ ഫിൽട്ടർ This unit operates at 55 dB, which is normal. If noise is excessive, contact support. |
| വെള്ളം ചോർച്ച | ഡ്രെയിൻ പ്ലഗ് അഴിച്ചു യൂണിറ്റ് ടിൽറ്റ് ചെയ്തു ഡ്രെയിൻ ഹോസ് തടഞ്ഞു | ഡ്രെയിൻ പ്ലഗ് സുരക്ഷിതമാണെന്ന് ഉറപ്പാക്കുക ഒരു ലെവൽ പ്രതലത്തിൽ യൂണിറ്റ് സ്ഥാപിക്കുക Check drain hose for blockages |
7 സ്പെസിഫിക്കേഷനുകൾ
| ഫീച്ചർ | സ്പെസിഫിക്കേഷൻ |
|---|---|
| ബ്രാൻഡ് | അസെക്കൂൾ |
| മോഡൽ നമ്പർ | PAC-M09 |
| തണുപ്പിക്കൽ ശേഷി | 9000 ബി.ടി.യു |
| നിർജ്ജലീകരണ ശേഷി | 42 ലിറ്റർ/ദിവസം |
| താപനില നിയന്ത്രണ പരിധി | 16-31 °C |
| വാല്യംtage | 220 വോൾട്ട് |
| ശബ്ദ നില | 55 ഡി.ബി |
| റഫ്രിജറൻ്റ് | R290 (പരിസ്ഥിതി സൗഹൃദം) |
| ഉൽപ്പന്ന അളവുകൾ (L x W x H) | 36 x 39 x 89 സെ.മീ |
| ഭാരം | 26 കി.ഗ്രാം |
| പ്രത്യേക ഫീച്ചർ | ദ്രുത തണുപ്പിക്കൽ |
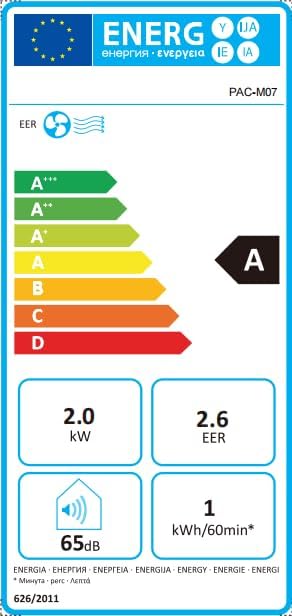
Image: Energy efficiency label showing an 'A' rating for cooling, 2.0 kW power, 2.6 EER, 65dB noise, and 1 kWh/60min energy consumption.
8. വാറൻ്റിയും പിന്തുണയും
For information regarding warranty and returns, please refer to the purchase platform's policies. If you have received a defective or damaged product, consult the specific help page on the platform where you made the purchase.
For technical support or further assistance, please contact Acekool customer service through the contact information provided on your purchase receipt or the official Acekool webസൈറ്റ്.
Ask a question about this manual
Ask about setup, troubleshooting, compatibility, parts, safety, or missing instructions. Manuals+ will review the question and use this page’s manual context to help answer it.