
1. ആമുഖം
This manual provides detailed instructions for the installation, operation, and maintenance of your IHSENO Mini WiFi Smart Switch. This device allows you to convert traditional lighting or appliance switches into smart, app-controlled, and voice-activated systems. Please read this manual thoroughly before installation and use.

Image: The IHSENO Mini WiFi Smart Switch, showing the compact design of the two included modules and their retail packaging.
2 സുരക്ഷാ വിവരങ്ങൾ
WARNING: Risk of Electric Shock. Installation should only be performed by a qualified electrician or a person with a thorough understanding of electrical wiring.
- ഇൻസ്റ്റാളേഷൻ അല്ലെങ്കിൽ അറ്റകുറ്റപ്പണികൾക്ക് മുമ്പ് സർക്യൂട്ട് ബ്രേക്കറിൽ വൈദ്യുതി വിച്ഛേദിച്ചിട്ടുണ്ടെന്ന് ഉറപ്പാക്കുക.
- ഉൽപ്പന്ന സ്പെസിഫിക്കേഷനുകളിൽ വ്യക്തമാക്കിയിട്ടുള്ള പരമാവധി ലോഡ് റേറ്റിംഗുകൾ കവിയരുത്.
- വരണ്ട സ്ഥലങ്ങളിൽ വീടിനുള്ളിൽ മാത്രം ഉപയോഗിക്കുക.
- കുട്ടികൾക്ക് ലഭ്യമാകാതെ സൂക്ഷിക്കുക.
- ഉപകരണം നന്നാക്കാനോ പരിഷ്ക്കരിക്കാനോ ശ്രമിക്കരുത്. സഹായത്തിനായി ഉപഭോക്തൃ പിന്തുണയുമായി ബന്ധപ്പെടുക.

Image: Safety and Certification details, highlighting fireproof material and compliance with FCC, CE, and RoHS standards.
3. ഉൽപ്പന്നം കഴിഞ്ഞുview
The IHSENO Mini WiFi Smart Switch is a compact module designed to integrate into existing electrical systems, enabling smart control of lights and other appliances. It operates on 2.4GHz WiFi and is compatible with the Tuya Smart Life App, as well as voice assistants like Amazon Alexa and Google Home.
പ്രധാന സവിശേഷതകൾ:
- Miniature size for easy installation behind switches or in junction boxes.
- 2.4GHz WiFi connectivity.
- Compatible with Tuya Smart Life App for remote control and automation.
- Voice control via Amazon Alexa and Google Assistant.
- Supports 1-way and 2-way switch configurations.
- Timing, cycling, and countdown functions.
- Device sharing with family members.
4 സ്പെസിഫിക്കേഷനുകൾ
| ഫീച്ചർ | വിശദാംശങ്ങൾ |
|---|---|
| ബ്രാൻഡ് | IHSENO |
| മോഡൽ | B0CF1DWZVN |
| വയർലെസ് തരം | വൈഫൈ 2.4 ജി |
| ഇൻപുട്ട് | AC 100-240V 50/60Hz 16A പരമാവധി |
| ഔട്ട്പുട്ട് | AC 100-240V 50/60Hz 16A പരമാവധി |
| മെറ്റീരിയൽ | PC V0 (Fireproof) |
| വലിപ്പം | 41x20x41 മിമി (ഏകദേശം 1.6 x 0.8 x 1.6 ഇഞ്ച്) |
| അപ്ലിക്കേഷൻ അനുയോജ്യത | Smart Life (Support iOS & Android) |
| സ്വിച്ച് തരം | 1-way, supports 2-way control |
| മൗണ്ടിംഗ് തരം | Wall Mount (behind existing switch) |

Image: Product specifications table, detailing technical parameters of the smart switch.
5. ഇൻസ്റ്റാളേഷൻ ഗൈഡ്
Before you begin, ensure the power supply to the circuit is turned OFF at the circuit breaker to prevent electric shock.
വയറിംഗ് നിർദ്ദേശങ്ങൾ:
The IHSENO Mini WiFi Smart Switch requires both Live (L) and Neutral (N) wires for operation. Ensure your electrical box has both available. The input and output connections cannot be reversed.
5.1. Basic 1-Way Wiring (No Physical Switch)
This method connects the smart switch directly to the load (e.g., lamp) and mains power, allowing control solely through the app or voice commands. No traditional wall switch is used in this configuration.

Image: Wiring diagram for direct connection to a lamp and mains power, bypassing a physical switch.
- Connect the Live (L) wire from the mains to the "L-in" terminal on the smart switch.
- Connect the Neutral (N) wire from the mains to the "N-in" terminal on the smart switch.
- Connect the Live (L) wire to the lamp from the "L-out" terminal on the smart switch.
- Connect the Neutral (N) wire to the lamp from the "N-out" terminal on the smart switch.
5.2. 1-Way Wiring with Physical Switch
This method integrates the smart switch with an existing 1-way physical wall switch, allowing both smart control and manual control from the wall switch.

Image: Wiring diagram for integrating the smart switch with a standard 1-way wall switch.
- Connect the Live (L) wire from the mains to the "L-in" terminal on the smart switch.
- Connect the Neutral (N) wire from the mains to the "N-in" terminal on the smart switch.
- Connect the Live (L) wire to the lamp from the "L-out" terminal on the smart switch.
- Connect the Neutral (N) wire to the lamp from the "N-out" terminal on the smart switch.
- Connect one wire from the 1-way physical switch to the "S1" terminal on the smart switch.
- Connect the other wire from the 1-way physical switch to the "L-in" terminal (or a common Live connection point).
5.3. 2-Way Wiring with Physical Switches
This method allows the smart switch to work with two existing physical 2-way switches (also known as 3-way switching in North America), providing smart control while retaining functionality from both wall switches.

Image: Wiring diagram for integrating the smart switch with two 2-way wall switches.
- Connect the Live (L) wire from the mains to the "L-in" terminal on the smart switch.
- Connect the Neutral (N) wire from the mains to the "N-in" terminal on the smart switch.
- Connect the Live (L) wire to the lamp from the "L-out" terminal on the smart switch.
- Connect the Neutral (N) wire to the lamp from the "N-out" terminal on the smart switch.
- Connect the common wire from the first 2-way physical switch to the "S1" terminal on the smart switch.
- Connect the common wire from the second 2-way physical switch to the "S2" terminal on the smart switch.
- Ensure the traveler wires between the two 2-way switches are correctly connected according to standard 2-way wiring practices, and that the Live feed to the switches is properly established.
Note: The controller is only connected to line N and L, not directly to the switch. This smart DIY switch can be used for your old 2-way control switch. You can still control the old switch manually after installation.

Image: Illustration of 2-way control setup, demonstrating how the smart switch integrates with existing parallel or series switches.
6. ഓപ്പറേഷൻ ഗൈഡ്
6.1. App Control (Tuya Smart Life)
- അപ്ലിക്കേഷൻ ഡൗൺലോഡുചെയ്യുക: Download the "Tuya Smart" or "Smart Life" app from the App Store (iOS) or Google Play Store (Android).
- രജിസ്റ്റർ ചെയ്യുക/ലോഗിൻ ചെയ്യുക: ഒരു അക്കൗണ്ട് സൃഷ്ടിക്കുക അല്ലെങ്കിൽ നിങ്ങളുടെ നിലവിലുള്ള അക്കൗണ്ടിലേക്ക് ലോഗിൻ ചെയ്യുക.
- ഉപകരണം ചേർക്കുക:
- നിങ്ങളുടെ സ്മാർട്ട്ഫോൺ 2.4GHz വൈഫൈ നെറ്റ്വർക്കിലേക്ക് കണക്റ്റ് ചെയ്തിട്ടുണ്ടെന്ന് ഉറപ്പാക്കുക.
- Power on the smart switch. The indicator light should blink rapidly (pairing mode). If not, refer to the troubleshooting section for reset instructions.
- In the app, tap "+" or "Add Device".
- Select "Electrical" -> "Switch (Wi-Fi)" or "Mini Switch".
- നിങ്ങളുടെ വൈഫൈ നെറ്റ്വർക്കിലേക്ക് ഉപകരണം കണക്റ്റ് ചെയ്യുന്നതിന് ഓൺ-സ്ക്രീൻ നിർദ്ദേശങ്ങൾ പാലിക്കുക.
- നിയന്ത്രണം: Once added, you can control the switch from anywhere via the app, set schedules, create scenes, and link with other smart devices.

Image: App remote control in action, showing a user controlling a lamp via the Smart Life app on a smartphone.

Image: WiFi remote control diagram, demonstrating how the smart switch can be controlled globally via the internet and a smartphone.
6.2. ശബ്ദ നിയന്ത്രണം (അലക്സാ & ഗൂഗിൾ ഹോം)
- അക്കൗണ്ട് ലിങ്ക് ചെയ്യുക: In your Alexa or Google Home app, enable the "Tuya Smart" or "Smart Life" skill/action and link your account.
- ഉപകരണങ്ങൾ കണ്ടെത്തുക: Ask your voice assistant to "Discover devices" or manually initiate discovery in the app.
- വോയ്സ് കമാൻഡുകൾ: Once discovered, you can use commands such as:
- "Alexa, turn on [device name]"
- "Hey Google, turn off [device name]"
- "Alexa, set [device name] to 50%" (if dimming is supported by the connected load)
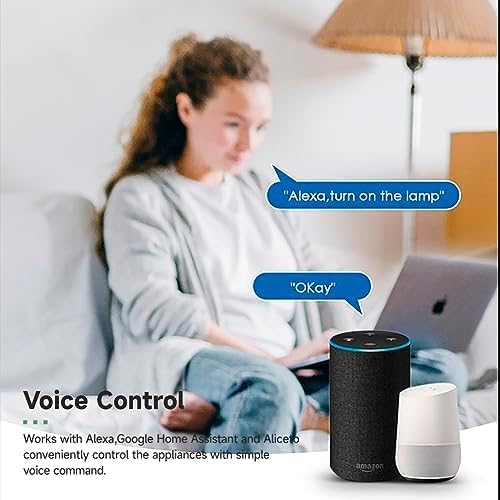
Image: Voice control demonstration, showing interaction with Amazon Alexa and Google Home devices to operate the smart switch.
6.3. Intelligent Timing and Scenes
The Tuya Smart Life app allows for advanced automation:
- സമയം: Set specific times for the switch to turn on or off daily.
- സൈക്ലിംഗ്: Program the switch to cycle on/off at regular intervals.
- കൗണ്ട്ഡൗൺ: Set a timer for the switch to turn off after a specified duration.
- രംഗങ്ങൾ: Create custom scenes that trigger the switch based on various conditions (e.g., "Good Morning" scene turns on lights, "Movie Night" scene dims lights).
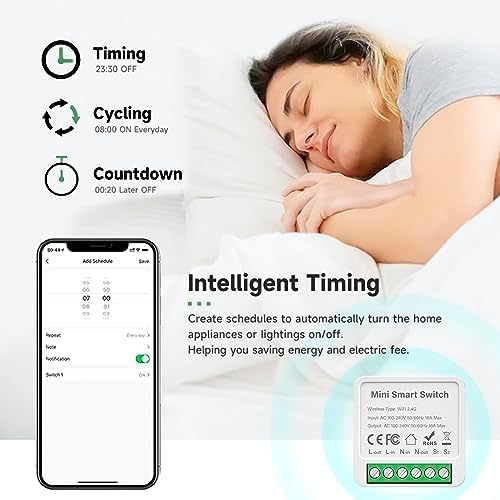
Image: Intelligent timing features, including scheduling, cycling, and countdown functions available in the app.
6.4. പങ്കിടൽ പ്രവർത്തനം
You can share control of your smart switch with family members through the Tuya Smart Life app. This allows multiple users to manage the device from their own smartphones.

Image: Sharing function diagram, showing how device control can be shared among family members or multiple devices can be controlled from one phone.
7. പരിപാലനം
- ഉപകരണം വൃത്തിയുള്ളതും ഉണങ്ങിയതുമായി സൂക്ഷിക്കുക.
- കഠിനമായ രാസവസ്തുക്കളോ ഉരച്ചിലുകൾ ഉപയോഗിക്കരുത്.
- Periodically check for firmware updates in the Tuya Smart Life app to ensure optimal performance and security.
- Ensure proper ventilation if installed in an enclosed space, though its low power consumption typically prevents overheating.
8. പ്രശ്നപരിഹാരം
| പ്രശ്നം | സാധ്യമായ പരിഹാരം |
|---|---|
| ഉപകരണം ആപ്പിലേക്ക് കണക്റ്റ് ചെയ്യുന്നില്ല |
|
| ശബ്ദ നിയന്ത്രണം പ്രവർത്തിക്കുന്നില്ല |
|
| Physical switch not responding |
|
| Device frequently disconnects |
|
9. ഉപഭോക്തൃ സേവനവും വാറന്റിയും
IHSENO provides customer support for its products. If you encounter any issues or have questions regarding your Mini WiFi Smart Switch, please contact our customer service team.
ബന്ധപ്പെടാനുള്ള വിവരങ്ങൾ:
- For product inquiries or technical assistance, please refer to the contact details provided with your purchase or on the official IHSENO webസൈറ്റ്.
- ഞങ്ങളുടെ ഉപഭോക്തൃ സേവന ടീം 24 മണിക്കൂറിനുള്ളിൽ മറുപടി നൽകാൻ ലക്ഷ്യമിടുന്നു.
This product comes with a standard manufacturer's warranty. Please refer to your purchase documentation for specific warranty terms and conditions.