
1. പ്രധാന സുരക്ഷാ നിർദ്ദേശങ്ങൾ
Read all instructions carefully before using the appliance. Keep this manual for future reference. Always follow basic safety precautions to reduce the risk of fire, electric shock, or injury.
- Ensure the washing machine is connected to a properly grounded electrical outlet.
- പവർ കോർഡിനോ പ്ലഗ്ഗിനോ കേടുപാടുകൾ സംഭവിച്ചാൽ മെഷീൻ പ്രവർത്തിപ്പിക്കരുത്.
- പ്രവർത്തന സമയത്ത് കുട്ടികളെയും വളർത്തുമൃഗങ്ങളെയും ഉപകരണത്തിൽ നിന്ന് അകറ്റി നിർത്തുക.
- കത്തുന്ന വസ്തുക്കളാൽ മലിനമായ വസ്തുക്കൾ കഴുകരുത്.
- വൃത്തിയാക്കുന്നതിനോ അറ്റകുറ്റപ്പണികൾ നടത്തുന്നതിനോ മുമ്പ് മെഷീൻ അൺപ്ലഗ് ചെയ്യുക.
- Do not immerse the electrical parts in water.
- ചോർച്ച തടയാൻ വാട്ടർ ഇൻലെറ്റും ഡ്രെയിൻ ഹോസുകളും സുരക്ഷിതമായി ബന്ധിപ്പിച്ചിട്ടുണ്ടെന്ന് ഉറപ്പാക്കുക.
2. ഉൽപ്പന്നം കഴിഞ്ഞുview
The Kelvinator KWS-C700BK is a 7.0 Kg Top Load Semi-Automatic Washing Machine designed for efficient laundry care. It features separate wash and spin tubs, allowing for flexible washing cycles.

ചിത്രം 2.1: മുൻഭാഗം view of the Kelvinator KWS-C700BK washing machine.
പ്രധാന ഘടകങ്ങൾ:
- വാഷ് ടബ്: For washing and rinsing clothes.
- സ്പിൻ ടബ്: For drying clothes by spinning.
- നിയന്ത്രണ പാനൽ: Includes Wash Timer, Wash Selector, and Spin Timer knobs.
- വാട്ടർ ഇൻലെറ്റ്: ജലവിതരണ ഹോസിനുള്ള കണക്ഷൻ പോയിന്റ്.
- ഡ്രെയിൻ ഹോസ്: For discharging water.
- ലിൻ്റ് ഫിൽട്ടർ: കഴുകൽ ചക്രത്തിൽ ലിന്റ് ശേഖരിക്കുന്നു.
3. സജ്ജീകരണവും ഇൻസ്റ്റാളേഷനും
3.1 അൺപാക്കിംഗ്
- വാഷിംഗ് മെഷീൻ അതിന്റെ പാക്കേജിംഗിൽ നിന്ന് ശ്രദ്ധാപൂർവ്വം നീക്കം ചെയ്യുക.
- അടിസ്ഥാന പാക്കേജിംഗ് ഉൾപ്പെടെ എല്ലാ പാക്കിംഗ് വസ്തുക്കളും നീക്കം ചെയ്യുക.
- ഗതാഗത സമയത്ത് മെഷീനിന് എന്തെങ്കിലും കേടുപാടുകൾ സംഭവിച്ചിട്ടുണ്ടോ എന്ന് പരിശോധിക്കുക. കേടുപാടുകൾ കണ്ടെത്തിയാൽ ഉടൻ തന്നെ നിങ്ങളുടെ ഡീലറെ ബന്ധപ്പെടുക.
3.2 പ്ലേസ്മെൻ്റ്
Place the washing machine on a firm, level surface to minimize vibration and noise during operation. Ensure there is adequate space around the machine for ventilation and access.
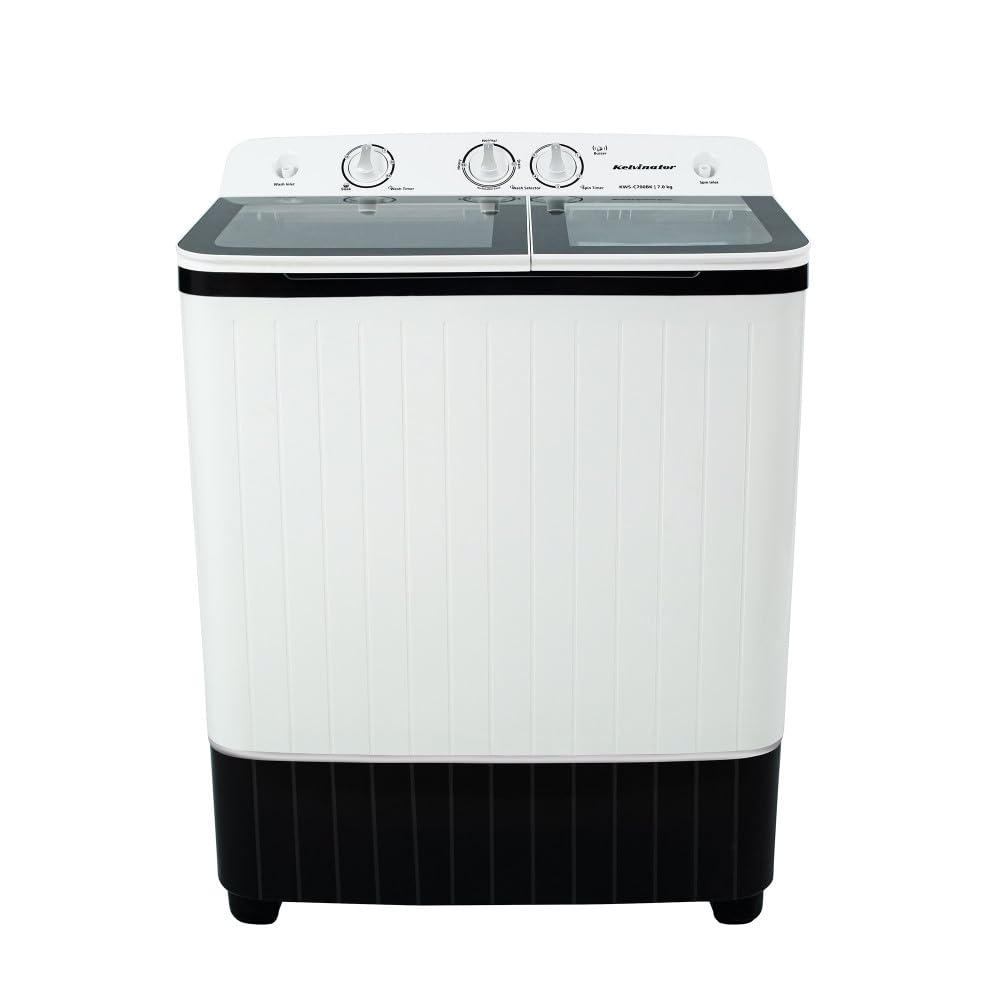
Image 3.1: Dimensions of the Kelvinator KWS-C700BK washing machine (Width: 750 mm, Depth: 450 mm, Height: 935 mm).
- നേരിട്ട് സൂര്യപ്രകാശം ഏൽക്കുകയോ താപ സ്രോതസ്സുകൾക്ക് സമീപം സ്ഥാപിക്കുകയോ ചെയ്യുന്നത് ഒഴിവാക്കുക.
- Ensure the ambient temperature is above 0°C.
- Maintain a minimum clearance of 10 cm from walls.
3.3 വാട്ടർ കണക്ഷൻ
- വാട്ടർ ഇൻലെറ്റ് ഹോസ് ഒരു തണുത്ത വാട്ടർ ടാപ്പുമായി ബന്ധിപ്പിക്കുക.
- Ensure the connection is tight to prevent leaks.
- Place the other end of the hose into the water inlet opening on the washing machine.
3.4 ഡ്രെയിനേജ്
Position the drain hose to ensure proper water discharge. The drain hose should be placed at a height that allows for gravity drainage, typically into a sink or a dedicated drain pipe.
- ഡ്രെയിൻ ഹോസ് വളഞ്ഞിട്ടില്ല അല്ലെങ്കിൽ അടഞ്ഞിട്ടില്ലെന്ന് ഉറപ്പാക്കുക.
- The end of the drain hose should be lower than the bottom of the machine for effective drainage.
3.5 പവർ കണക്ഷൻ
പവർ കോർഡ് ഒരു ഗ്രൗണ്ടഡ് ഇലക്ട്രിക്കൽ ഔട്ട്ലെറ്റിലേക്ക് പ്ലഗ് ചെയ്യുക. വോള്യം ഉറപ്പാക്കുകtage ഉം ഫ്രീക്വൻസിയും വാഷിംഗ് മെഷീനിന്റെ സവിശേഷതകളുമായി പൊരുത്തപ്പെടുന്നു.
4. പ്രവർത്തന നിർദ്ദേശങ്ങൾ
4.1 കൺട്രോൾ പാനൽ ഓവർview

ചിത്രം 4.1: ക്ലോസ്-അപ്പ് view of the control panel with knobs for Wash Timer, Wash Selector, and Spin Timer.
- വാഷ് ടൈമർ: Sets the duration of the wash cycle.
- വാഷ് സെലക്ടർ: Choose between different wash modes (e.g., Gentle, Normal, Strong).
- സ്പിൻ ടൈമർ: Sets the duration of the spin cycle.
4.2 കഴുകൽ നടപടിക്രമം
- ലോഡ് ലോൺഡ്രി: Open the wash tub lid and place clothes loosely inside. Do not overload the machine beyond its 7.0 Kg capacity.
- ഡിറ്റർജൻ്റ് ചേർക്കുക: ശുപാർശ ചെയ്യുന്ന അളവിൽ ഡിറ്റർജന്റ് വാഷ് ടബ്ബിലേക്ക് ഒഴിക്കുക.
- വെള്ളം നിറയ്ക്കുക: Turn on the water tap to fill the wash tub to the desired level.
- വാഷ് മോഡ് തിരഞ്ഞെടുക്കുക: തിരിയുക സെലക്ടർ കഴുകുക knob to the appropriate setting (e.g., Gentle for delicate items, Normal for everyday clothes, Strong for heavily soiled items).
- വാഷ് ടൈമർ സജ്ജീകരിക്കുക: തിരിയുക ടൈമർ കഴുകുക knob to the desired wash duration (e.g., 15-35 minutes). The machine will start washing.
- വെള്ളം ഒഴിക്കുക: Once the wash cycle is complete, set the Wash Selector to 'Drain' to empty the water from the wash tub.
- കഴുകിക്കളയുക (ഓപ്ഷണൽ): For rinsing, refill the wash tub with clean water, set the Wash Selector to 'Wash', and set the Wash Timer for a short duration (e.g., 5-10 minutes). Drain the water after rinsing.

ചിത്രം 4.2: View of the open wash tub, ready for loading laundry.
4.3 Spin Drying Procedure
- ട്രാൻസ്ഫർ വസ്ത്രങ്ങൾ: Carefully transfer the washed and rinsed clothes from the wash tub to the spin tub. Distribute them evenly to prevent imbalance.
- ലിഡ് അടയ്ക്കുക: Ensure the spin tub lid is securely closed.
- സ്പിൻ ടൈമർ സജ്ജമാക്കുക: തിരിയുക സ്പിൻ ടൈമർ knob to the desired spin duration (e.g., 1-5 minutes). The machine will begin spinning.
- വസ്ത്രങ്ങൾ നീക്കം ചെയ്യുക: Once the spin cycle is complete and the tub has stopped, open the lid and remove the spun clothes.
5. പരിപാലനവും പരിചരണവും
5.1 പുറംഭാഗം വൃത്തിയാക്കൽ
- ഒരു സോഫ്റ്റ്, ഡി ഉപയോഗിച്ച് മെഷീൻ്റെ പുറംഭാഗം തുടയ്ക്കുകamp തുണി.
- അബ്രാസീവ് ക്ലീനറുകളോ, ലായകങ്ങളോ, കഠിനമായ രാസവസ്തുക്കളോ ഉപയോഗിക്കരുത്, കാരണം ഇവ ഉപരിതലത്തിന് കേടുവരുത്തും.
5.2 ലിന്റ് ഫിൽറ്റർ വൃത്തിയാക്കൽ
The lint filter should be cleaned regularly (after every 2-3 washes) to maintain washing efficiency.
- വാഷ് ടബ്ബിനുള്ളിൽ ലിന്റ് ഫിൽട്ടർ കണ്ടെത്തുക.
- Remove the filter by pulling it upwards or unlatching it.
- Clean accumulated lint and debris under running water.
- ക്ലീൻ ലിന്റ് ഫിൽറ്റർ വീണ്ടും അതിന്റെ സ്ഥാനത്ത് സുരക്ഷിതമായി വയ്ക്കുക.
5.3 Care After Each Wash
- വാട്ടർ ടാപ്പ് ഓഫ് ചെയ്യുക.
- ഔട്ട്ലെറ്റിൽ നിന്ന് പവർ കോർഡ് അൺപ്ലഗ് ചെയ്യുക.
- Wipe the inside of the tubs dry to prevent mildew and odors.
- വായുസഞ്ചാരം ഉറപ്പാക്കാൻ മൂടികൾ ചെറുതായി തുറന്നിടുക.
6. പ്രശ്നപരിഹാരം
ഉപഭോക്തൃ സേവനവുമായി ബന്ധപ്പെടുന്നതിന് മുമ്പ്, പൊതുവായ പ്രശ്നങ്ങളും അവയുടെ പരിഹാരങ്ങളും അറിയാൻ ഇനിപ്പറയുന്ന പട്ടിക പരിശോധിക്കുക.
| പ്രശ്നം | സാധ്യമായ കാരണം | പരിഹാരം |
|---|---|---|
| മെഷീൻ ആരംഭിക്കുന്നില്ല | വൈദ്യുതി ഇല്ല; ലിഡ് ശരിയായി അടച്ചിട്ടില്ല; ടൈമർ സജ്ജീകരിച്ചിട്ടില്ല. | Check power plug and outlet; Ensure lids are fully closed; Set the Wash/Spin Timer. |
| വെള്ളം ഒഴുകുന്നില്ല | ഡ്രെയിൻ ഹോസ് വളഞ്ഞിരിക്കുന്നു അല്ലെങ്കിൽ അടഞ്ഞിരിക്കുന്നു; ഡ്രെയിൻ സെലക്ടർ 'ഡ്രെയിൻ' ആയി സജ്ജീകരിച്ചിട്ടില്ല. | Straighten drain hose, clear blockages; Set Wash Selector to 'Drain'. |
| അമിതമായ വൈബ്രേഷൻ/ശബ്ദം | Machine not level; Uneven load in spin tub. | Adjust machine to be level; Redistribute clothes evenly in the spin tub. |
| വെള്ളം ചോർച്ച | Loose inlet/drain hose connections; Damaged hose. | Tighten hose connections; Replace damaged hoses. |
7 സ്പെസിഫിക്കേഷനുകൾ
| ഫീച്ചർ | സ്പെസിഫിക്കേഷൻ |
|---|---|
| ബ്രാൻഡ് | കെൽവിനേറ്റർ |
| മോഡൽ | KWS-C700BK |
| ശേഷി | 7.0 കിലോഗ്രാം |
| Washing Machine Type | Semi-Automatic, Top Load |
| ഊർജ്ജ കാര്യക്ഷമത | 5 നക്ഷത്രം |
| പരമാവധി സ്പിൻ വേഗത | 1320 ആർപിഎം |
| വൈദ്യുതി ഉപഭോഗം | 350 വാട്ട് |
| Quick Wash Time | 35 മിനിറ്റ് |
| കൺട്രോൾ കൺസോൾ | നോബ് |
| മെറ്റീരിയൽ | എബിഎസ് |
| നിറം | കറുപ്പ് |
| ഇനത്തിൻ്റെ ഭാരം | 23 കി.ഗ്രാം |
| ഉൽപ്പന്ന അളവുകൾ (LxWxH) | 59 x 59.8 x 84.8 സെൻ്റീമീറ്റർ |
| ഉൾപ്പെടുത്തിയ ഘടകങ്ങൾ | വാഷിംഗ് മെഷീൻ |
8. വാറൻ്റിയും പിന്തുണയും
This Kelvinator washing machine comes with a standard manufacturer's warranty. Please refer to the warranty card provided with your purchase for specific terms and conditions, including warranty period and coverage details.
For technical assistance, service requests, or any questions regarding your appliance, please contact Kelvinator customer support. Contact information can typically be found on the warranty card or the official Kelvinator webസൈറ്റ്.
- വാറന്റി ക്ലെയിമുകൾക്കുള്ള വാങ്ങിയതിന്റെ തെളിവായി നിങ്ങളുടെ വാങ്ങൽ രസീത് സൂക്ഷിക്കുക.
- Do not attempt to repair the appliance yourself, as this may void the warranty.