ആമുഖം
This manual provides comprehensive instructions for the setup, operation, maintenance, and troubleshooting of your ViewSonic Omni VX2416 24-inch FHD IPS Gaming Monitor. Please read this manual thoroughly before using your monitor to ensure proper installation and optimal performance. Keep this manual for future reference.
സജ്ജീകരണ നിർദ്ദേശങ്ങൾ
1. പാക്കേജ് ഉള്ളടക്കം
പാക്കേജിൽ എല്ലാ ഇനങ്ങളും ഉണ്ടെന്ന് ഉറപ്പാക്കുക:
- Viewസോണിക് ഓമ്നി VX2416 മോണിറ്റർ
- പവർ കേബിൾ
- HDMI കേബിൾ
- ഡിസ്പ്ലേ പോർട്ട് കേബിൾ
- മോണിറ്റർ സ്റ്റാൻഡ് (ബേസും കഴുത്തും)
- ദ്രുത ആരംഭ ഗൈഡ്
2. മോണിറ്റർ സ്റ്റാൻഡ് കൂട്ടിച്ചേർക്കൽ
- പോറലുകൾ ഏൽക്കാതിരിക്കാൻ മോണിറ്റർ മൃദുവായതും വൃത്തിയുള്ളതുമായ ഒരു പ്രതലത്തിൽ ശ്രദ്ധാപൂർവ്വം മുഖം താഴേക്ക് വയ്ക്കുക.
- Attach the stand neck to the back of the monitor until it clicks into place or is secured with screws (refer to the Quick Start Guide for specific screw details).
- Attach the stand base to the stand neck, ensuring it is firmly secured.

ചിത്രം: പിൻഭാഗം view യുടെ ViewSonic VX2416 monitor with the stand fully assembled and attached. This shows the monitor's back panel and the ergonomic stand.
3. കേബിളുകൾ ബന്ധിപ്പിക്കുന്നു
ഏതെങ്കിലും കണക്ഷനുകൾ നടത്തുന്നതിന് മുമ്പ് മോണിറ്ററും നിങ്ങളുടെ കമ്പ്യൂട്ടറും ഓഫ് ചെയ്തിട്ടുണ്ടെന്ന് ഉറപ്പാക്കുക.
- പവർ കണക്ഷൻ: പവർ കേബിൾ മോണിറ്ററിന്റെ പവർ ഇൻപുട്ടിലേക്കും തുടർന്ന് ഒരു പവർ ഔട്ട്ലെറ്റിലേക്കും ബന്ധിപ്പിക്കുക.
- വീഡിയോ കണക്ഷൻ:
- For optimal performance, use the provided DisplayPort cable to connect your computer's DisplayPort output to the monitor's DisplayPort input.
- Alternatively, use the provided HDMI cable to connect your computer's HDMI output to one of the monitor's HDMI inputs.
- ഓഡിയോ കണക്ഷൻ (ഓപ്ഷണൽ): If you are using external speakers or headphones, connect them to the monitor's audio out port. The monitor also has built-in speakers.

ചിത്രം: വിശദമായത് view യുടെ ViewSonic VX2416 monitor's rear connectivity panel, showing the power input, HDMI ports, DisplayPort, and audio output.
4. പ്രാരംഭ പവർ ഓൺ
- പവർ കേബിൾ ഒരു മതിൽ ഔട്ട്ലെറ്റിലേക്ക് പ്ലഗ് ചെയ്യുക.
- മോണിറ്ററിലെ പവർ ബട്ടൺ അമർത്തുക.
- Power on your computer. The monitor should automatically detect the input signal. If not, you may need to manually select the input source using the On-Screen Display (OSD) menu.
പ്രവർത്തന നിർദ്ദേശങ്ങൾ
1. ഓൺ-സ്ക്രീൻ ഡിസ്പ്ലേ (OSD) മെനു
The OSD menu allows you to adjust various monitor settings. Use the buttons located on the bottom right of the monitor to navigate the menu.
- പവർ ബട്ടൺ: മോണിറ്റർ ഓൺ/ഓഫ് ചെയ്യുന്നു.
- മെനു ബട്ടൺ: OSD മെനു തുറക്കുന്നു.
- നാവിഗേഷൻ ബട്ടണുകൾ: മെനു ഓപ്ഷനുകളിലൂടെ നീങ്ങാനും മൂല്യങ്ങൾ ക്രമീകരിക്കാനും ഉപയോഗിക്കുന്നു.
- Select/Exit Button: Confirms selections or exits the menu.
2. ഡിസ്പ്ലേ ക്രമീകരണങ്ങൾ
Access the OSD menu to adjust the following display parameters:
- തെളിച്ചം/തീവ്രത: പ്രകാശ, ഇരുണ്ട പ്രദേശങ്ങൾ തമ്മിലുള്ള മൊത്തത്തിലുള്ള പ്രകാശവും വ്യത്യാസവും ക്രമീകരിക്കുക.
- വർണ്ണ ക്രമീകരണങ്ങൾ: വർണ്ണ താപനില, ഗാമ, വ്യക്തിഗത RGB ലെവലുകൾ എന്നിവ പരിഷ്കരിക്കുക.
- ഇൻപുട്ട് തിരഞ്ഞെടുക്കുക: HDMI, DisplayPort ഇൻപുട്ടുകൾക്കിടയിൽ സ്വമേധയാ മാറുക.
- പുതുക്കൽ നിരക്ക്: Ensure your system is set to 100Hz for optimal gaming performance.
- എഎംഡി ഫ്രീസിങ്ക്: Enable this feature in the OSD and your graphics card settings for tear-free gaming.
3. ഓഡിയോ ക്രമീകരണങ്ങൾ
The monitor includes built-in speakers. Adjust the volume through the OSD menu or your computer's sound settings.
4. എർഗണോമിക് ക്രമീകരണങ്ങൾ
The VX2416 monitor stand offers various adjustments for comfortable viewing:
- ഉയരം ക്രമീകരിക്കൽ: മോണിറ്റർ കണ്ണിന്റെ നിരപ്പിലേക്ക് ഉയർത്തുകയോ താഴ്ത്തുകയോ ചെയ്യുക.
- ടിൽറ്റ് അഡ്ജസ്റ്റ്മെന്റ്: Tilt the screen forward or backward to reduce glare and optimize viewing ആംഗിൾ.
- സ്വിവൽ അഡ്ജസ്റ്റ്മെന്റ്: നിങ്ങളുടെ സ്ക്രീൻ പങ്കിടാൻ മോണിറ്റർ തിരശ്ചീനമായി തിരിക്കുക അല്ലെങ്കിൽ നിങ്ങളുടെ viewസ്ഥാനം.
- ഛായാചിത്രം Viewing: Rotate the screen 90 degrees for vertical content.
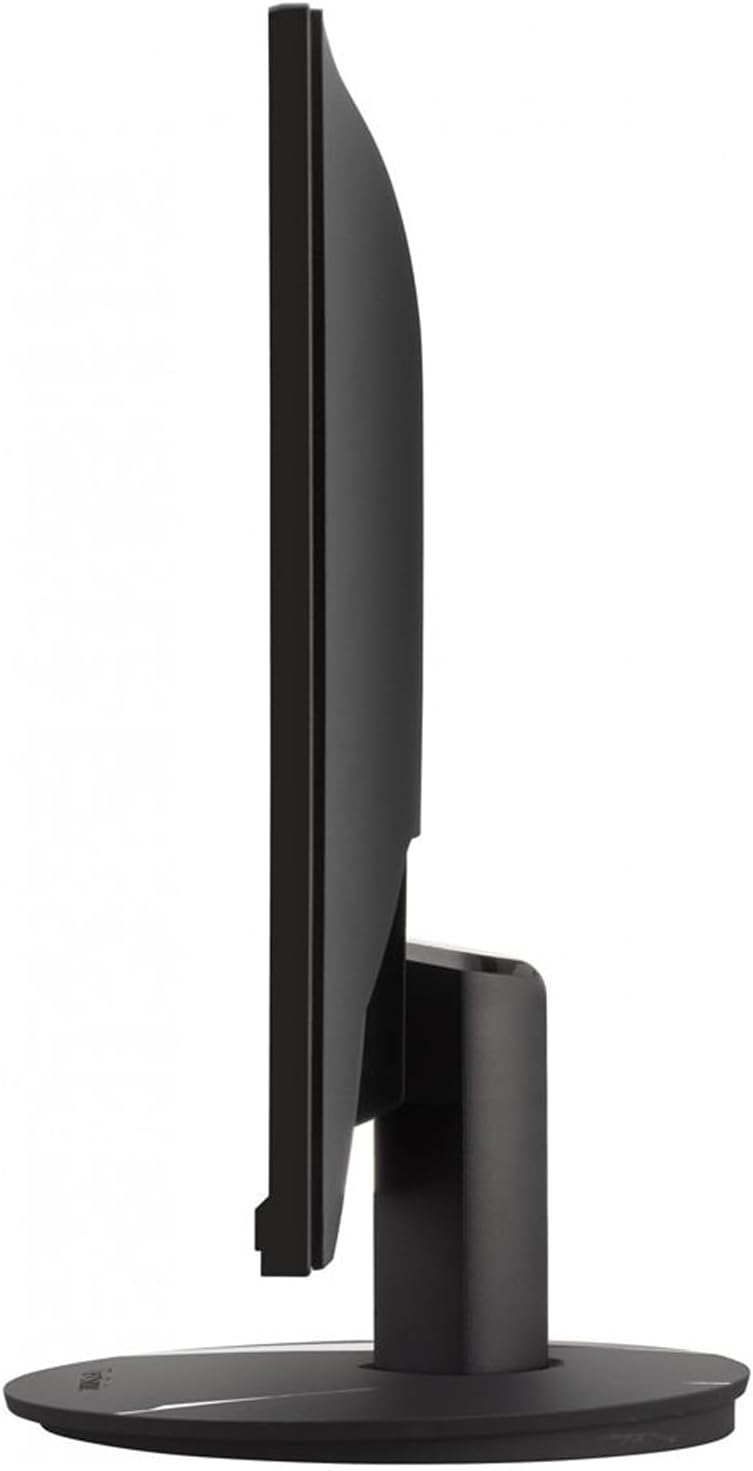
ചിത്രം: സൈഡ് പ്രോfile യുടെ ViewSonic VX2416 monitor, illustrating its ergonomic stand which allows for height, tilt, and swivel adjustments.
5. നേത്ര പരിചരണ സവിശേഷതകൾ
The monitor includes features designed to reduce eye strain during prolonged use:
- ഫ്ലിക്കർ-ഫ്രീ ടെക്നോളജി: Minimizes screen flickering to reduce eye fatigue.
- ബ്ലൂ ലൈറ്റ് ഫിൽട്ടർ: Reduces harmful blue light emissions. This can be adjusted or enabled/disabled via the OSD menu.
മെയിൻ്റനൻസ്
1. മോണിറ്റർ വൃത്തിയാക്കൽ
- വൃത്തിയാക്കുന്നതിന് മുമ്പ് എല്ലായ്പ്പോഴും മോണിറ്റർ ഓഫ് ചെയ്ത് പവർ കോർഡ് അഴിക്കുക.
- നനവില്ലാത്തതും ലിനില്ലാത്തതുമായ തുണി ചെറുതായി ഉപയോഗിക്കുകampവെള്ളം അല്ലെങ്കിൽ നേരിയതും, ഉരച്ചിലുകളില്ലാത്തതുമായ സ്ക്രീൻ ക്ലീനർ ഉപയോഗിച്ച് തുടയ്ക്കുക.
- ക്ലീനർ നേരിട്ട് സ്ക്രീനിൽ സ്പ്രേ ചെയ്യരുത്. ആദ്യം അത് തുണിയിൽ പുരട്ടുക.
- ബെൻസീൻ, കനംകുറഞ്ഞ, അമോണിയ അടിസ്ഥാനമാക്കിയുള്ള ക്ലീനറുകൾ, അല്ലെങ്കിൽ ഉരച്ചിലുകൾ ഉള്ള വസ്തുക്കൾ എന്നിവ ഉപയോഗിക്കുന്നത് ഒഴിവാക്കുക, കാരണം ഇവ സ്ക്രീൻ പ്രതലത്തിന് കേടുവരുത്തും.
2. ജനറൽ കെയർ
- നേരിട്ടുള്ള സൂര്യപ്രകാശത്തിലോ താപ സ്രോതസ്സുകൾക്ക് സമീപമോ മോണിറ്റർ സ്ഥാപിക്കുന്നത് ഒഴിവാക്കുക.
- മോണിറ്ററിന് ചുറ്റും മതിയായ വായുസഞ്ചാരം ഉറപ്പാക്കുക.
- വെന്റിലേഷൻ തുറക്കൽ തടയരുത്.
- മോണിറ്റർ താഴെയിടുകയോ ശക്തമായ ആഘാതങ്ങൾക്ക് വിധേയമാക്കുകയോ ചെയ്യുന്നത് ഒഴിവാക്കുക.
ട്രബിൾഷൂട്ടിംഗ്
| പ്രശ്നം | സാധ്യമായ കാരണം | പരിഹാരം |
|---|---|---|
| സ്ക്രീനിൽ ചിത്രമൊന്നുമില്ല |
|
|
| ചിത്രം മങ്ങിയതോ വളച്ചൊടിച്ചതോ ആണ് |
|
|
| സ്പീക്കറുകളിൽ നിന്ന് ശബ്ദമില്ല |
|
|
സ്പെസിഫിക്കേഷനുകൾ
| ഫീച്ചർ | വിശദാംശങ്ങൾ |
|---|---|
| ബ്രാൻഡ് | Viewസോണിക് |
| മോഡൽ നമ്പർ | VX2416 |
| സ്ക്രീൻ വലിപ്പം | 24 ഇഞ്ച് |
| റെസലൂഷൻ | FHD 1080p (1920 x 1080 പിക്സലുകൾ) |
| ഡിസ്പ്ലേ തരം | LED IPS |
| പുതുക്കിയ നിരക്ക് | 100 Hz |
| പ്രതികരണ സമയം | 1 മില്ലിസെക്കൻഡ് |
| വീക്ഷണാനുപാതം | 16:9 |
| തെളിച്ചം | 250 നിറ്റ് |
| കോൺട്രാസ്റ്റ് റേഷ്യോ | 2000:1 |
| Viewing ആംഗിൾ | 178 ഡിഗ്രി |
| കണക്റ്റിവിറ്റി | 2 x HDMI, 1 x DisplayPort, Audio Out |
| അഡാപ്റ്റീവ് സമന്വയം | എഎംഡി ഫ്രീസിങ്ക് |
| സ്പീക്കറുകൾ | Built-in (2 x 2W) |
| എർഗണോമിക്സ് | Height Adjustment, Swivel Adjustment, Tilt Adjustment, Portrait Viewing |
| നേത്ര പരിചരണ സവിശേഷതകൾ | ഫ്ലിക്കർ രഹിത, നീല വെളിച്ച ഫിൽട്ടർ |
| അളവുകൾ (D x W x H) | 12"D x 14"W x 18"H (സ്റ്റാൻഡോടുകൂടി) |
വാറൻ്റി വിവരങ്ങൾ
ViewSonic products are manufactured to the highest standards and deliver high-quality performance. For detailed warranty information specific to your region and product, please refer to the warranty card included in your product packaging or visit the official Viewസോണിക് webസൈറ്റ്.
സാധാരണ, ViewSonic monitors come with a limited warranty covering defects in materials and workmanship under normal use. Keep your purchase receipt as proof of purchase for warranty claims.
ഉപഭോക്തൃ പിന്തുണ
If you encounter any issues that cannot be resolved using the troubleshooting guide, or if you require further assistance, please contact Viewസോണിക് ഉപഭോക്തൃ പിന്തുണ.
- ഓൺലൈൻ പിന്തുണ: ഉദ്യോഗസ്ഥനെ സന്ദർശിക്കുക ViewSonic support webപതിവുചോദ്യങ്ങൾ, ഡ്രൈവർ ഡൗൺലോഡുകൾ, ബന്ധപ്പെടാനുള്ള വിവരങ്ങൾ എന്നിവയ്ക്കുള്ള സൈറ്റ്. www.viewsonic.com/support
- ടെലിഫോൺ പിന്തുണ: Refer to your product's Quick Start Guide or the Viewസോണിക് website for regional telephone support numbers.