
1. ആമുഖം
This manual provides detailed instructions for the safe operation, maintenance, and troubleshooting of your ATTOP W10 and X-PACK 18 Drones. Please read this manual thoroughly before operating the drone to ensure proper usage and to prevent damage or injury.
2. പാക്കേജ് ഉള്ളടക്കം
Before first use, please verify that all components listed below are present in your package.
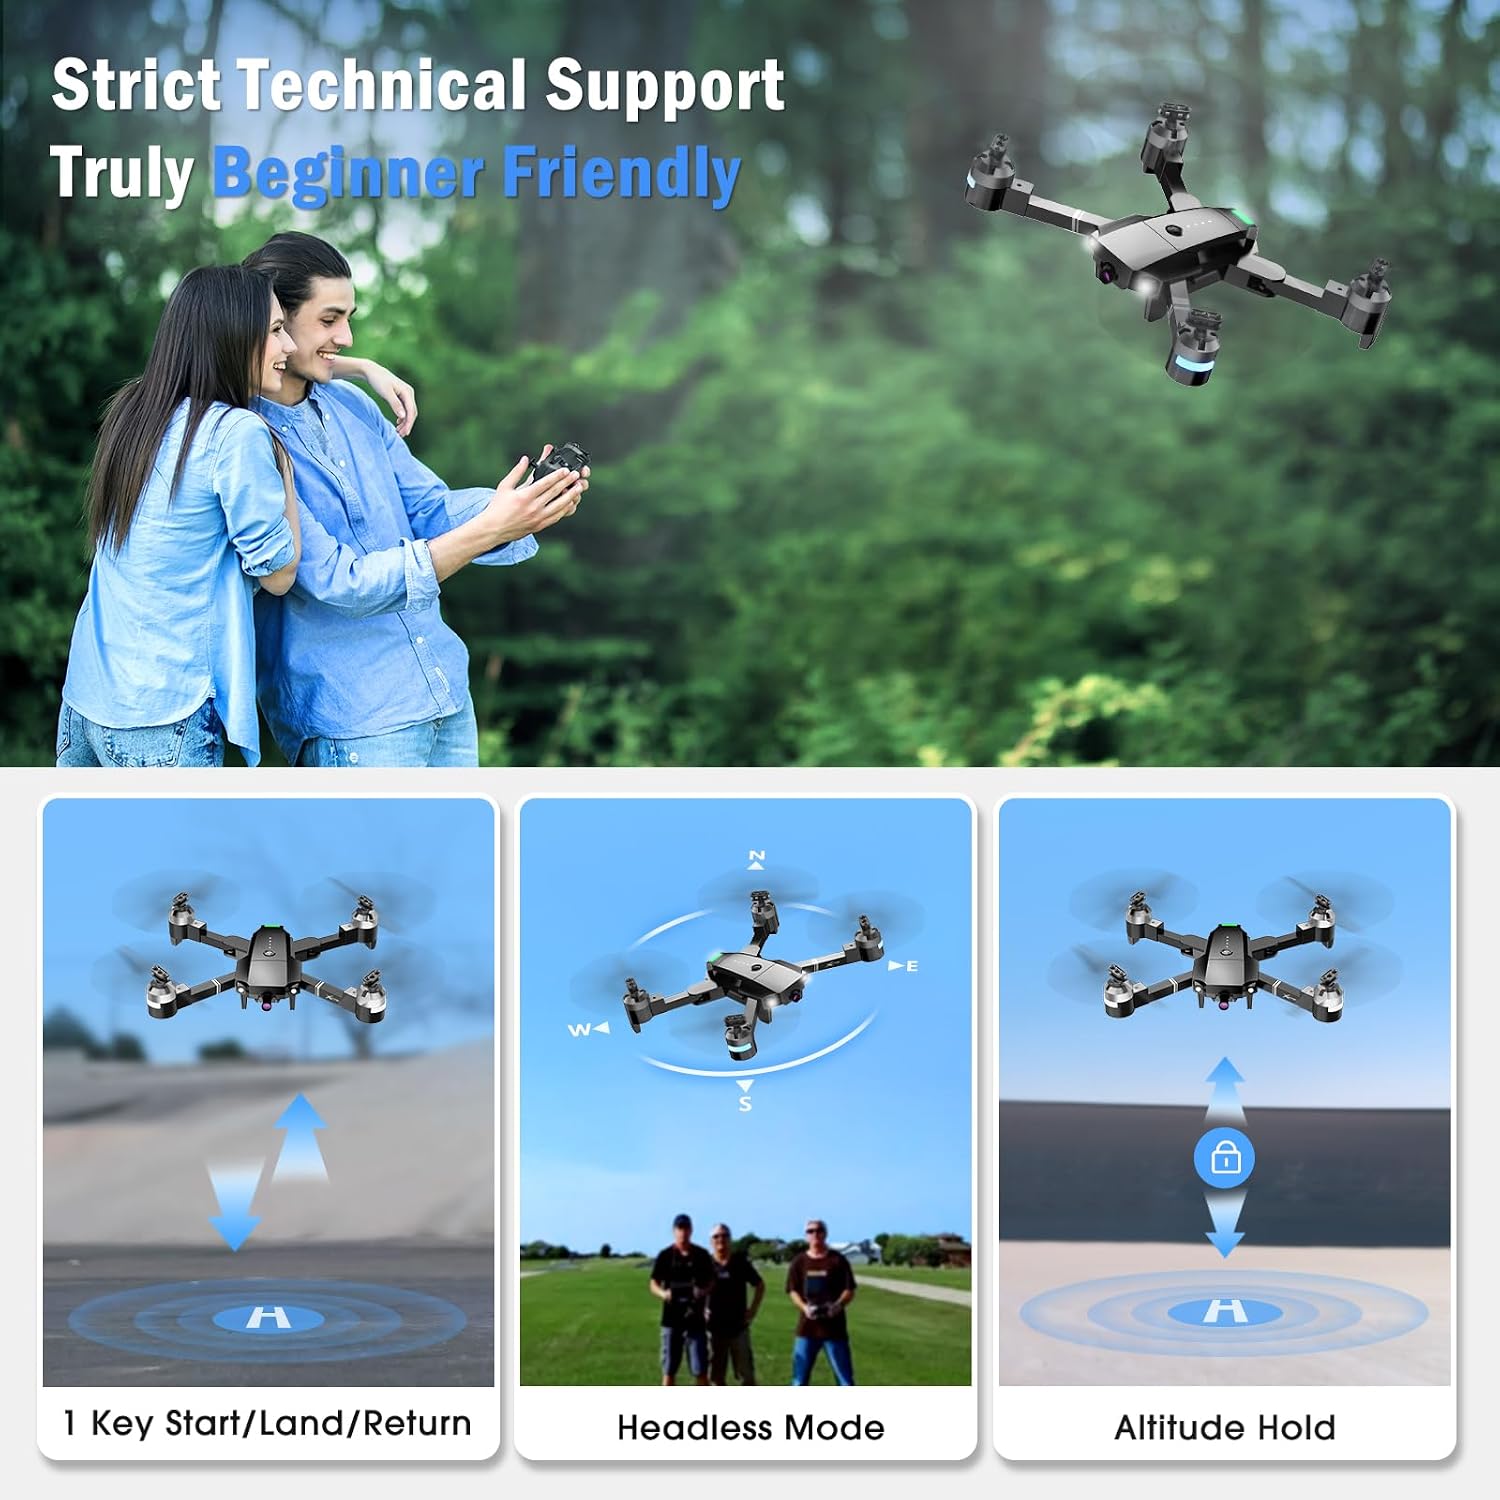
Image: The ATTOP W10 and X-PACK 18 drone, remote controller, two rechargeable batteries, spare propellers, propeller guards, USB charging cable, and a screwdriver are shown laid out.
- ATTOP W10 / X-PACK 18 Drone
- റിമോട്ട് കൺട്രോളർ
- Rechargeable Drone Batteries (2 included)
- സ്പെയർ പ്രൊപ്പല്ലറുകൾ
- പ്രൊപ്പല്ലർ ഗാർഡുകൾ
- യുഎസ്ബി ചാർജിംഗ് കേബിൾ
- സ്ക്രൂഡ്രൈവർ
- ഉപയോക്തൃ മാനുവൽ (ഈ പ്രമാണം)
- ചുമക്കുന്ന കേസ്
3. സജ്ജീകരണം
3.1 ബാറ്ററി ഇൻസ്റ്റാളേഷനും ചാർജിംഗും
- ഡ്റോൺ ബാറ്ററി: Insert the rechargeable drone battery into the battery compartment on the drone. Ensure it clicks securely into place.
- റിമോട്ട് കൺട്രോളർ ബാറ്ററികൾ: Open the battery cover on the back of the remote controller and insert 3 AAA batteries (not included), observing correct polarity.
- ചാർജിംഗ്: Connect the drone battery to the USB charging cable and plug it into a USB power source (e.g., computer, USB wall adapter). The indicator light on the charging cable will show charging status. A full charge typically takes 60-90 minutes.
3.2 പ്രൊപ്പല്ലർ ഇൻസ്റ്റലേഷൻ
If propellers are not pre-installed or need replacement, match the 'A' and 'B' markings on the propellers with the corresponding motor shafts. Secure them firmly.
3.3 പ്രൊപ്പല്ലർ ഗാർഡ് ഇൻസ്റ്റാളേഷൻ
Attach the propeller guards to the drone's arms for added protection during flight, especially for beginners.
3.4 അപ്ലിക്കേഷൻ ഇൻസ്റ്റാളേഷൻ
Download and install the "ATTOP CLUB" application on your smartphone or tablet. This app is required for FPV (First Person View) and advanced control features.
4. പ്രവർത്തന നിർദ്ദേശങ്ങൾ
4.1 പവർ ഓണും ജോടിയാക്കലും
- ഡ്രോൺ പരന്നതും ലെവൽ ഉപരിതലത്തിൽ വയ്ക്കുക.
- ഇൻഡിക്കേറ്റർ ലൈറ്റുകൾ ഓണാകുന്നതുവരെ ഡ്രോണിലെ പവർ ബട്ടൺ അമർത്തിപ്പിടിക്കുക.
- Turn on the remote controller. The indicator lights on both the drone and controller will flash.
- Push the left joystick up then down. The lights will become solid, indicating successful pairing.
- Connect your smartphone to the drone's Wi-Fi network (usually named "ATTOP-XXXXXX") and open the "ATTOP CLUB" app.
4.2 അടിസ്ഥാന ഫ്ലൈറ്റ് നിയന്ത്രണങ്ങൾ

Image: Three panels illustrating key flight features. The first shows a drone taking off/landing with a single button. The second shows a drone in Headless Mode, indicating orientation is relative to the pilot. The third shows a drone maintaining a stable altitude with Altitude Hold.
- വൺ-കീ ടേക്ക് ഓഫ്/ലാൻഡിംഗ്: Press the one-key takeoff/landing button on the remote controller or in the app to automatically launch or land the drone.
- ആൾട്ടിറ്റ്യൂഡ് ഹോൾഡ്: The drone will automatically maintain its current altitude, allowing for stable hovering and easier control.
- തലയില്ലാത്ത മോഡ്: In Headless Mode, the drone's orientation is relative to the pilot, simplifying control by eliminating the need to adjust for the drone's front direction.
- വേഗത ക്രമീകരണങ്ങൾ: The drone offers 3 speed settings (low, medium, high) to accommodate different skill levels. Press the speed switch button on the remote to cycle through speeds.
4.3 Camera Operation (FPV)

Image: A close-up of the drone's front, highlighting its 120-degree wide-angle 1080P FPV camera. Insets compare the wide field of view (1080p) with a narrower view (Other).
The drone is equipped with a 1080P 120° wide-angle camera for real-time video transmission (FPV) to your connected smartphone via the "ATTOP CLUB" app. You can capture photos and record videos directly through the app interface.
4.4 Advanced Flying Functions

Image: Three panels illustrating advanced flight features. The top panel shows a smartphone screen with a drawn flight path that the drone follows. The middle panel depicts a drone changing speed settings. The bottom panel shows a drone performing a 360-degree flip in the air.
- Flight Route: Draw a custom flight path on the "ATTOP CLUB" app screen, and the drone will automatically follow the designated route.
- 360° ഫ്ലിപ്പ്: Press the 360° flip button on the remote controller and move the right joystick in any direction to perform an aerial flip.
- ആംഗ്യ നിയന്ത്രണം: Make specific hand gestures (e.g., 'V' gesture for photos) in front of the drone's camera to trigger actions. Refer to the app for specific gesture commands.
- ശബ്ദ നിയന്ത്രണം: Use voice commands through the "ATTOP CLUB" app to control the drone's direction or actions (e.g., "Take off", "Forward").
- ജി-സെൻസർ മോഡ്: Compatible with VR glasses, this mode allows the drone to sync with your phone or iPad for an immersive 3D experience, controlling flight by tilting your device.

Image: Two panels demonstrating app-based controls. The top panel shows people using hand gestures to control the drone (Gesture Control). The bottom panel shows people using voice commands like "Take off" and "Forward" to control the drone (Voice Control).
4.5 സുരക്ഷാ സവിശേഷതകൾ

Image: Two panels illustrating safety features. The left panel shows a drone performing an Emergency Stop, landing quickly. The right panel shows a pilot receiving a Low-Battery Warning from the remote controller, indicated by 'bi bi bi' sounds.
- അടിയന്തരമായി നിർത്തുക: In case of an emergency or loss of control, press the emergency stop button on the remote controller to immediately halt the drone's motors and land it.
- കുറഞ്ഞ ബാറ്ററി മുന്നറിയിപ്പ്: The remote controller will emit an audible warning (beeping) when the drone's battery is low, prompting you to land the drone safely before power is depleted.
- ഒരു കീ റിട്ടേൺ: Press the one-key return button, and the drone will automatically fly back towards its takeoff point.
5. പരിപാലനം
5.1 വൃത്തിയാക്കൽ
Regularly clean the drone body, propellers, and camera lens with a soft, dry cloth. Avoid using harsh chemicals or liquids.
5.2 പ്രൊപ്പല്ലർ മാറ്റിസ്ഥാപിക്കൽ
If propellers are damaged or bent, replace them with new ones using the provided screwdriver. Ensure correct 'A' and 'B' propeller types are installed on the corresponding motor shafts.
5.3 ബാറ്ററി കെയർ
- ബാറ്ററികൾ അമിതമായി ചാർജ് ചെയ്യുകയോ ഡിസ്ചാർജ് ചെയ്യുകയോ ചെയ്യരുത്.
- നേരിട്ടുള്ള സൂര്യപ്രകാശത്തിൽ നിന്നും ഉയർന്ന താപനിലയിൽ നിന്നും അകലെ തണുത്തതും വരണ്ടതുമായ സ്ഥലത്ത് ബാറ്ററികൾ സൂക്ഷിക്കുക.
- If not used for an extended period, charge batteries to approximately 50% capacity before storage.
5.4 സംഭരണം

Image: The ATTOP W10/X-PACK 18 drone, remote controller, batteries, propellers, and charging cable are neatly arranged next to a black zippered carrying case, demonstrating its portability.
When not in use, fold the drone's arms and store it along with its accessories in the provided carrying case to protect it from dust and damage.
6. പ്രശ്നപരിഹാരം
- Drone not responding to controller:
- Ensure both drone and controller are fully charged.
- Re-pair the drone and controller following the pairing instructions.
- Check for interference from other Wi-Fi devices. - Poor camera feed or no FPV:
- Ensure your smartphone is connected to the drone's Wi-Fi network.
- Close and reopen the "ATTOP CLUB" app.
- Check for strong Wi-Fi signal between the drone and your phone. - പറക്കലിനിടെ ഡ്രോൺ ഒഴുകി നീങ്ങുന്നു:
- Perform a gyroscope calibration on a flat, level surface.
- Check for damaged propellers and replace if necessary. - കുറഞ്ഞ ഫ്ലൈറ്റ് സമയം:
- Ensure batteries are fully charged.
- Battery life can decrease over time; consider replacing old batteries.
7 സ്പെസിഫിക്കേഷനുകൾ
| ഫീച്ചർ | സ്പെസിഫിക്കേഷൻ |
|---|---|
| ബ്രാൻഡ് | ATTOP |
| മോഡലിൻ്റെ പേര് | W10, X-PACK 18 |
| വീഡിയോ ക്യാപ്ചർ റെസല്യൂഷൻ | 1080p |
| വീഡിയോ put ട്ട്പുട്ട് മിഴിവ് | 1920x1080 പിക്സലുകൾ |
| ബാറ്ററി ശേഷി | 1100 മില്ലിamp മണിക്കൂർ (ഓരോ ബാറ്ററിക്കും) |
| വയർലെസ് കമ്മ്യൂണിക്കേഷൻ | വൈഫൈ |
| ബാറ്ററികൾ ഉൾപ്പെടുത്തിയിട്ടുണ്ട് | Yes (2 rechargeable drone batteries) |
8. വാറൻ്റിയും പിന്തുണയും
ATTOP products are designed for reliability and performance. This product comes with a standard manufacturer's warranty against defects in materials and workmanship. For specific warranty terms, duration, and to register your product, please refer to the warranty card included in your package or visit the official ATTOP webസൈറ്റ്.
For technical support, troubleshooting assistance, or spare parts, please contact ATTOP customer service through their official website or the contact information provided in your product packaging. When contacting support, please have your model number (W10 or X-PACK 18) and purchase details ready.