
1. ആമുഖം
The Vivitek NovoDS DS310 is a high-performance 4K digital signage player designed for creating dynamic visual displays in various environments, including corporate and public spaces. This device facilitates the integration of media files, rich text, webpages, and social media content into customizable configurations. The NovoDS solution offers convenient content updates via NovoDS Studio and DS Cloud, utilizing a drag-and-drop interface for layout customization and intuitive playlist editing, making it accessible for users of all technical skill levels.
2 സുരക്ഷാ വിവരങ്ങൾ
ഉപകരണത്തിന് കേടുപാടുകൾ സംഭവിക്കാതിരിക്കാനോ സ്വയം പരിക്കേൽക്കാതിരിക്കാനോ എല്ലാ സുരക്ഷാ നിർദ്ദേശങ്ങളും ശ്രദ്ധാപൂർവ്വം വായിച്ച് പാലിക്കുക. ഭാവിയിലെ റഫറൻസിനായി ഈ മാനുവൽ സൂക്ഷിക്കുക.
- വൈദ്യുതി വിതരണം: Use only the power adapter provided with the device. Ensure the power source matches the voltagഇ ആവശ്യകതകൾ.
- വെൻ്റിലേഷൻ: വെന്റിലേഷൻ തുറസ്സുകൾ തടയരുത്. അമിതമായി ചൂടാകുന്നത് തടയാൻ ഉപകരണത്തിന് ചുറ്റും മതിയായ വായുസഞ്ചാരം ഉറപ്പാക്കുക.
- പരിസ്ഥിതി: Avoid exposing the device to extreme temperatures, humidity, dust, or direct sunlight.
- വൃത്തിയാക്കൽ: വൃത്തിയാക്കുന്നതിന് മുമ്പ് വൈദ്യുതി വിച്ഛേദിക്കുക. മൃദുവായതും ഉണങ്ങിയതുമായ തുണി ഉപയോഗിക്കുക. ലിക്വിഡ് അല്ലെങ്കിൽ എയറോസോൾ ക്ലീനറുകൾ ഉപയോഗിക്കരുത്.
- സേവനം: ഉപകരണം സ്വയം സേവിക്കാൻ ശ്രമിക്കരുത്. എല്ലാ സേവനങ്ങളും യോഗ്യതയുള്ള ഉദ്യോഗസ്ഥർക്ക് റഫർ ചെയ്യുക.
3. പാക്കേജ് ഉള്ളടക്കം
പാക്കേജിൽ എല്ലാ ഇനങ്ങളും ഉണ്ടെന്ന് ഉറപ്പാക്കുക:
- Vivitek NovoDS DS310 Digital Signage Player
- പവർ അഡാപ്റ്റർ
- റിമോട്ട് കൺട്രോൾ
- ദ്രുത ആരംഭ ഗൈഡ്
- Wi-Fi Antennas (x2)
4. ഉൽപ്പന്നം കഴിഞ്ഞുview
Familiarize yourself with the components and ports of the NovoDS DS310 player.
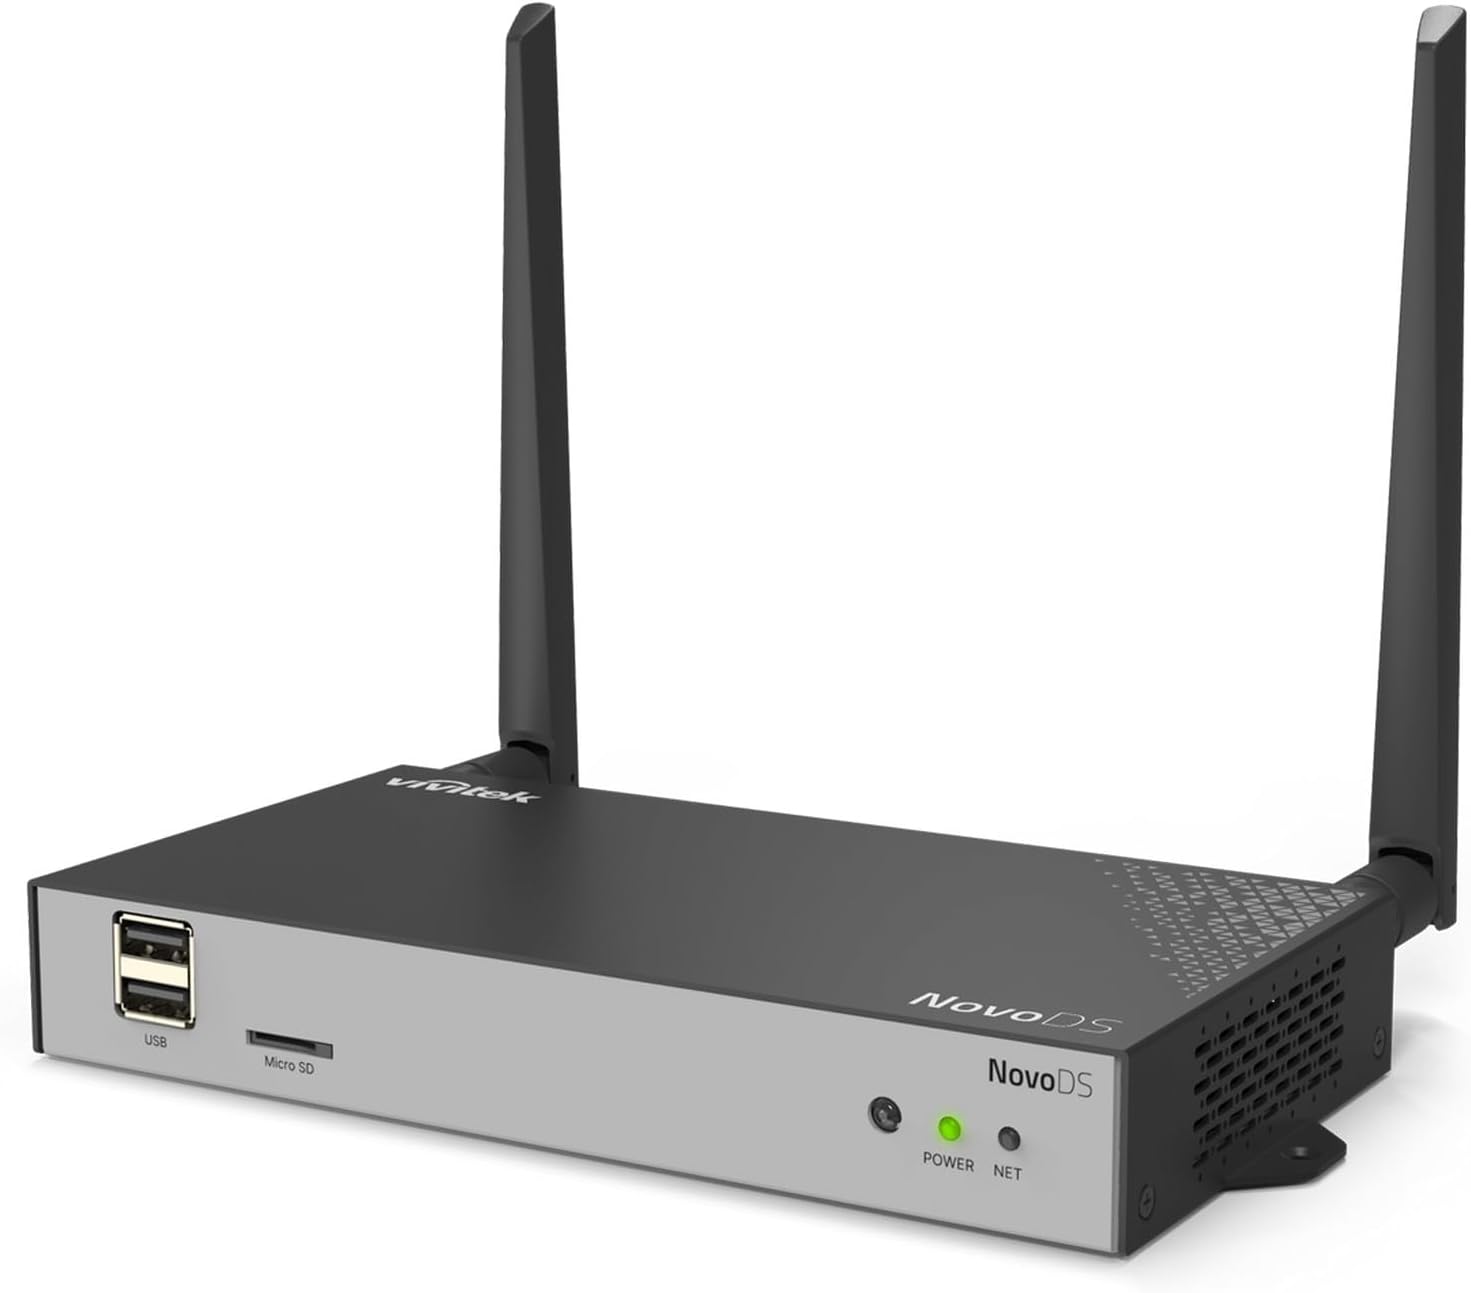
ചിത്രം 4.1: Overall front-left view of the Vivitek NovoDS DS310 player, showcasing its compact design with two Wi-Fi antennas, USB port, Micro SD slot, and status indicators.
4.1 ഫ്രണ്ട് പാനൽ

ചിത്രം 4.2: വിശദമായ മുൻഭാഗം view of the NovoDS DS310 player, clearly showing the USB ports, Micro SD slot, POWER indicator (green LED), and NET indicator (green LED).
- USB പോർട്ടുകൾ: Two USB-A ports for connecting USB storage devices, keyboards, mice, or other peripherals.
- മൈക്രോ എസ്ഡി സ്ലോട്ട്: For inserting a Micro SD card to expand storage or load content.
- പവർ സൂചകം: A green LED that illuminates when the device is powered on.
- നെറ്റ് സൂചകം: A green LED that illuminates when the device has an active network connection (wired or wireless).
4.2 പിൻ പാനൽ

ചിത്രം 4.3: വിശദമായ പിൻഭാഗം view of the NovoDS DS310 player, illustrating all available connectivity ports from left to right: LAN, HDMI-IN, HDMI-OUT, RS232, Type-C, Audio-IN, Audio-OUT, Reset button, and DC power input.
- LAN പോർട്ട്: RJ45 Ethernet port for a wired network connection.
- HDMI-IN: HDMI input for connecting an external video source to be displayed or integrated into signage content.
- HDMI-OUT: HDMI output for connecting the player to a display device (monitor, TV, projector).
- RS232: Serial port for advanced control and integration with external systems.
- തരം-സി: USB Type-C port for data transfer or peripheral connection.
- AUDIO-IN: 3.5mm ഓഡിയോ ഇൻപുട്ട് ജാക്ക്.
- AUDIO-OUT: 3.5mm audio output jack for connecting external speakers or audio systems.
- റീസെറ്റ് ബട്ടൺ: A small recessed button used to reboot the device or perform a factory reset.
- DC IN: ഉൾപ്പെടുത്തിയിരിക്കുന്ന പവർ അഡാപ്റ്ററിനുള്ള പവർ ഇൻപുട്ട് പോർട്ട്.
4.3 സൈഡ് പാനലുകൾ

ചിത്രം 4.4: ഇടത് വശം view of the NovoDS DS310 player, showing ventilation grilles and the GPIO port for custom integrations.
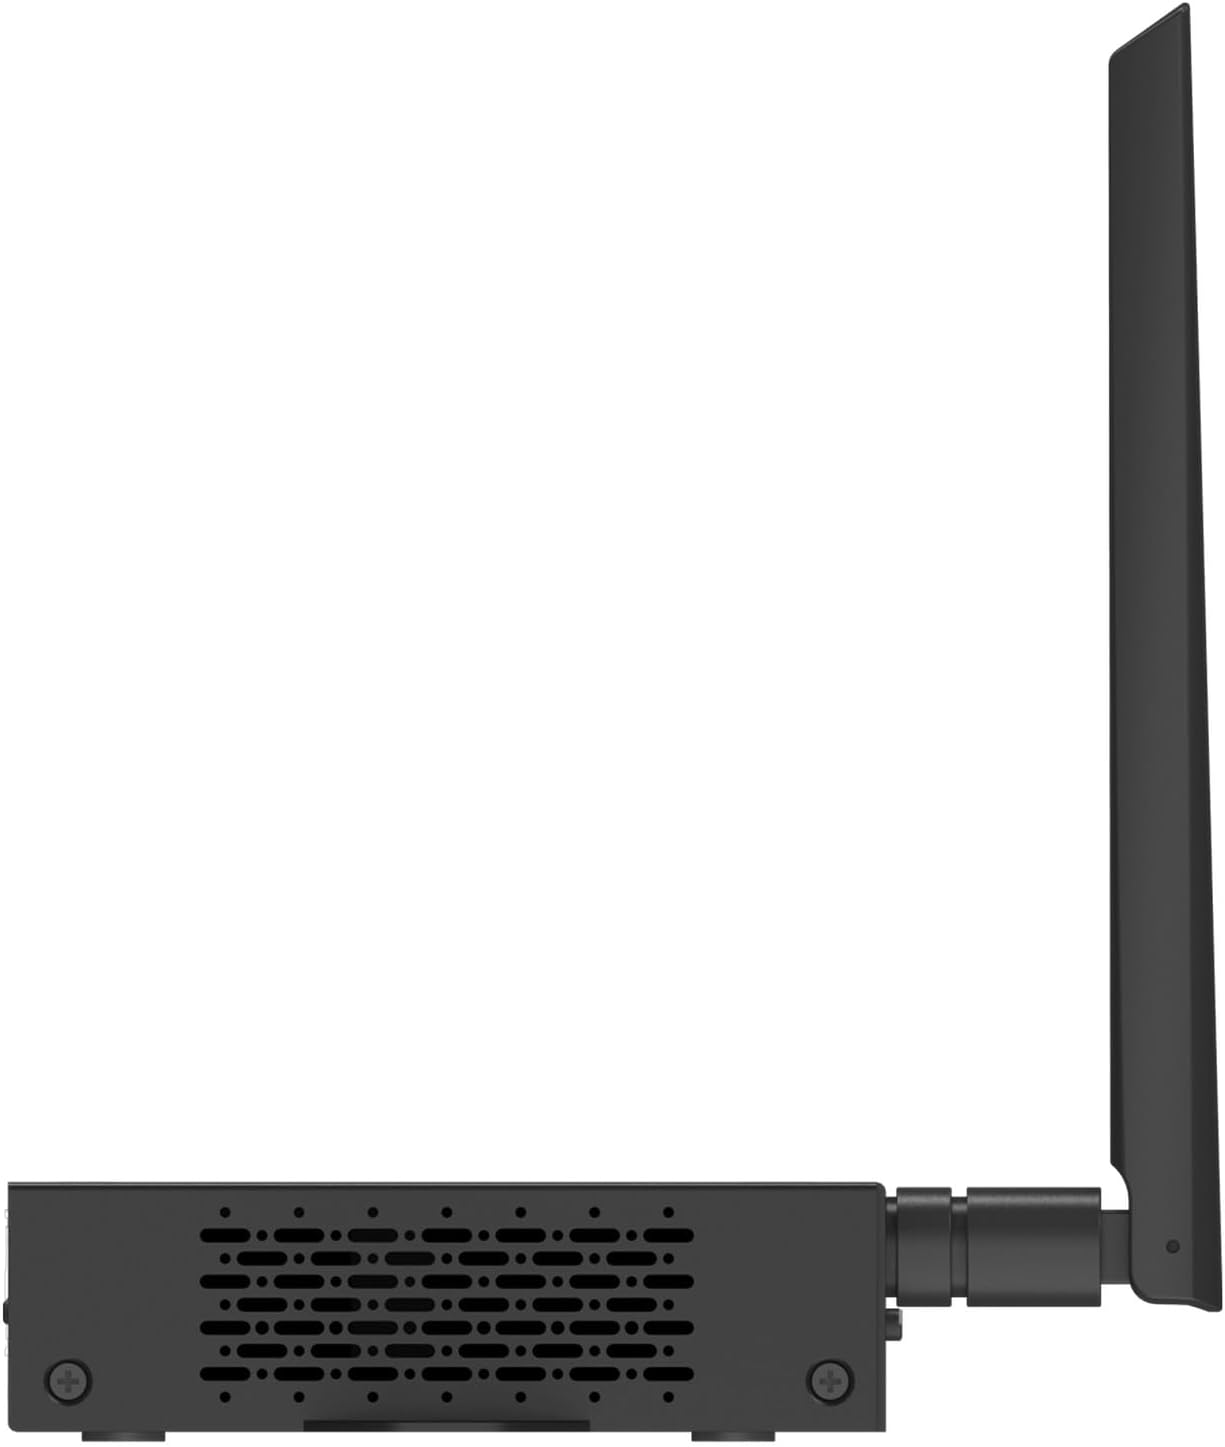
ചിത്രം 4.5: വലത് വശം view of the NovoDS DS310 player, showing ventilation grilles.
- GPIO പോർട്ട്: General Purpose Input/Output terminal for connecting external sensors or control devices, enabling interactive signage solutions.
- വെന്റിലേഷൻ ഗ്രില്ലുകൾ: Located on both side panels to ensure proper heat dissipation and maintain optimal operating temperature.
4.4 ടോപ്പ് View മൗണ്ടിംഗും

ചിത്രം 4.6: മുകളിൽ view of the NovoDS DS310 player, showing integrated mounting brackets for secure installation.
- മൗണ്ടിംഗ് ബ്രാക്കറ്റുകൾ: Integrated into the chassis for easy and secure installation on various surfaces or behind displays.
5. സജ്ജീകരണ നിർദ്ദേശങ്ങൾ
Follow these steps to set up your NovoDS DS310 player:
- ആന്റിനകൾ ബന്ധിപ്പിക്കുക: Screw the two Wi-Fi antennas onto the designated connectors on the rear of the device. Ensure they are securely fastened.
- ഡിസ്പ്ലേയിലേക്ക് കണക്റ്റുചെയ്യുക: ഒരു HDMI കേബിളിന്റെ ഒരു അറ്റം ബന്ധിപ്പിക്കുക HDMI-ഔട്ട് port on the NovoDS DS310 and the other end to an HDMI input on your display device (monitor, TV, projector).
- നെറ്റ്വർക്ക് കണക്ഷൻ:
- വയർ: Connect an Ethernet cable from your network router/switch to the ലാൻ port on the NovoDS DS310.
- വയർലെസ്: The device will prompt you to configure Wi-Fi during initial setup or you can configure it via the system settings.
- പവർ ഓൺ: നൽകിയിരിക്കുന്ന പവർ അഡാപ്റ്റർ ഇതിലേക്ക് ബന്ധിപ്പിക്കുക ഡിസി ഐഎൻ port on the NovoDS DS310, then plug the adapter into a power outlet. The POWER indicator will illuminate.
- പ്രാരംഭ ബൂട്ട്: The device will power on automatically and begin the boot process. Follow the on-screen instructions for initial configuration, including language selection and network setup.
6. പ്രവർത്തന നിർദ്ദേശങ്ങൾ
This section outlines basic operation of the NovoDS DS310 player.
6.1 Content Management with NovoDS Studio/Cloud
The NovoDS DS310 is managed using the NovoDS Studio software (for local management) or NovoDS Cloud service (for remote management). These platforms allow you to create, schedule, and deploy digital signage content.
- NovoDS Studio: Download and install the NovoDS Studio software on your computer. Connect the DS310 to the same local network as your computer. The software will detect the player, allowing you to upload content, design layouts, and manage playlists.
- NovoDS Cloud: Register your DS310 device with the NovoDS Cloud service. This enables remote content updates and management from any internet-connected location. Refer to the NovoDS Cloud documentation for detailed setup and usage.
6.2 റിമോട്ട് കൺട്രോൾ ഉപയോഗിക്കുന്നു
The included remote control allows for basic navigation and system settings adjustments on the connected display.
- നാവിഗേഷൻ: Use the arrow keys to move through menus and options.
- Select/OK: തിരഞ്ഞെടുക്കലുകൾ സ്ഥിരീകരിക്കുക.
- തിരികെ/മെനു: Return to the previous screen or access the main menu.
- വോളിയം: Adjust audio output volume (if applicable).
6.3 USB and Micro SD Card Usage
Content can also be loaded directly onto the device via USB drives or Micro SD cards.
- Insert a USB drive into a USB പോർട്ട് or a Micro SD card into the മൈക്രോ എസ്ഡി സ്ലോട്ട്.
- The system may automatically detect new content or you may need to navigate to the storage device through the system's file browser to import media.
7. പരിപാലനം
Proper maintenance ensures the longevity and optimal performance of your NovoDS DS310.
- വൃത്തിയാക്കൽ: Regularly wipe the exterior of the device with a soft, dry, lint-free cloth. Do not use abrasive cleaners, solvents, or spray directly onto the device.
- വെൻ്റിലേഷൻ: Ensure that the ventilation openings are clear of dust and obstructions. Periodically check for dust buildup and gently clean if necessary using compressed air.
- ഫേംവെയർ അപ്ഡേറ്റുകൾ: Check for and install firmware updates as recommended by Vivitek to ensure the device has the latest features and security enhancements. These updates are typically managed through NovoDS Studio or NovoDS Cloud.
- സംഭരണം: ഉപകരണം ദീർഘനേരം സൂക്ഷിക്കുകയാണെങ്കിൽ, അത് വൈദ്യുതിയിൽ നിന്ന് വിച്ഛേദിച്ച് തണുത്തതും വരണ്ടതുമായ സ്ഥലത്ത് സൂക്ഷിക്കുക.
8. പ്രശ്നപരിഹാരം
This section addresses common issues you might encounter with the NovoDS DS310.
| പ്രശ്നം | സാധ്യമായ കാരണം | പരിഹാരം |
|---|---|---|
| ശക്തിയില്ല | പവർ അഡാപ്റ്റർ ബന്ധിപ്പിച്ചിട്ടില്ല അല്ലെങ്കിൽ തകരാറുണ്ട്. പവർ ഔട്ട്ലെറ്റ് പ്രവർത്തിക്കുന്നില്ല. | Ensure the power adapter is securely connected to the device and a working power outlet. Test the outlet with another device. |
| ഡിസ്പ്ലേ ഔട്ട്പുട്ട് ഇല്ല | HDMI cable loose or faulty. Incorrect input selected on display. | Check HDMI cable connections. Ensure the display is set to the correct HDMI input source. Try a different HDMI cable. |
| നെറ്റ്വർക്ക് കണക്ഷനില്ല | Ethernet cable disconnected. Wi-Fi not configured or out of range. Network issues. | For wired connection, check Ethernet cable. For Wi-Fi, ensure correct network is selected and password entered. Verify router/network functionality. |
| Content not updating | Network connectivity issues. Incorrect content schedule. Device not registered with NovoDS Studio/Cloud. | Verify network connection. Check content schedule in NovoDS Studio/Cloud. Ensure the device is properly registered and online in the management platform. |
| ഉപകരണം പ്രതികരിക്കുന്നില്ല | താൽക്കാലിക സോഫ്റ്റ്വെയർ തകരാർ. | അമർത്തുക പുനഃസജ്ജമാക്കുക button briefly to reboot the device. If the issue persists, perform a factory reset (refer to advanced settings in NovoDS Studio/Cloud documentation). |
9 സ്പെസിഫിക്കേഷനുകൾ
Technical specifications for the Vivitek NovoDS DS310.
| ഫീച്ചർ | വിശദാംശങ്ങൾ |
|---|---|
| ബ്രാൻഡ് | വിവിടെക് |
| മോഡൽ നമ്പർ | DS310 |
| റെസലൂഷൻ | 4K |
| മെമ്മറി സ്റ്റോറേജ് കപ്പാസിറ്റി | 8 ജിബി |
| കൺട്രോളർ തരം | റിമോട്ട് കൺട്രോൾ |
| ഉൽപ്പന്ന അളവുകൾ | Approximately 1 x 1 x 1 inches (actual dimensions may vary slightly from placeholder) |
| ഇനത്തിൻ്റെ ഭാരം | ഏകദേശം 2 പൗണ്ട് |
| കണക്റ്റിവിറ്റി | LAN, Wi-Fi, HDMI-IN, HDMI-OUT, USB, Micro SD, RS232, Type-C, Audio-IN, Audio-OUT, GPIO |
| യു.പി.സി | 813097025746 |
10. വാറൻ്റിയും പിന്തുണയും
For warranty information and technical support, please refer to the official Vivitek website or contact their customer service directly. Details regarding warranty periods and service procedures are typically provided with your purchase documentation or available online.
Vivitek Official Webസൈറ്റ്: www.vivitekcorp.com
When contacting support, please have your product model (DS310) and serial number ready.