
W3.5M*H2.2M
Garderbor Arch Steel Frame User Manual
Model: W3.5M*H2.2M
ആമുഖം
Thank you for choosing the Garderbor Arch Steel Frame. This manual provides essential information for the safe assembly, operation, and maintenance of your new garden arch. Please read it thoroughly before beginning assembly and keep it for future reference.
The Garderbor Arch is designed to provide robust support for climbing plants and to enhance the aesthetic appeal of your garden, pathway, or entrance. Its weather-resistant steel construction ensures durability and longevity.
സുരക്ഷാ വിവരങ്ങൾ
- Always assemble the arch on a flat, stable surface.
- ഉപയോഗിക്കുന്നതിന് മുമ്പ് എല്ലാ കണക്ഷനുകളും സുരക്ഷിതമായി മുറുക്കിയിട്ടുണ്ടെന്ന് ഉറപ്പാക്കുക.
- Do not climb on or hang from the arch.
- ശ്വാസംമുട്ടൽ അപകടങ്ങൾ തടയാൻ അസംബ്ലി സമയത്ത് ചെറിയ ഭാഗങ്ങൾ കുട്ടികളിൽ നിന്ന് അകറ്റി നിർത്തുക.
- In strong winds, consider additional anchoring for stability.
- മുറിവുകളോ പിഞ്ചുകളോ ഒഴിവാക്കാൻ അസംബ്ലി സമയത്ത് കയ്യുറകൾ പോലുള്ള ഉചിതമായ സുരക്ഷാ ഉപകരണങ്ങൾ ധരിക്കുക.
പാക്കേജ് ഉള്ളടക്കം
അസംബ്ലി ചെയ്യുന്നതിനുമുമ്പ്, എല്ലാ ഘടകങ്ങളും നിലവിലുണ്ടെന്നും കേടുപാടുകൾ സംഭവിച്ചിട്ടില്ലെന്നും ഉറപ്പാക്കുക. ഏതെങ്കിലും ഭാഗങ്ങൾ നഷ്ടപ്പെട്ടിട്ടുണ്ടെങ്കിലോ കേടുപാടുകൾ സംഭവിച്ചിട്ടുണ്ടെങ്കിലോ, ദയവായി ഉപഭോക്തൃ പിന്തുണയുമായി ബന്ധപ്പെടുക.
| ഘടകം | അളവ് |
|---|---|
| Arch Frame Sections (Curved) | Varies by model (e.g., 2-4) |
| Vertical Support Pipes | Varies by model (e.g., 4-8) |
| അടിസ്ഥാന പ്ലേറ്റുകൾ | 2 |
| Connecting Bars/Crossbars | മോഡൽ അനുസരിച്ച് വ്യത്യാസപ്പെടുന്നു |
| മൗണ്ടിംഗ് സ്ക്രൂകൾ | മതിയായ അളവ് |
| Wrench/Hex Key (if applicable) | 1 |
Note: The exact number of components may vary based on the specific width and height of your Garderbor Arch model.
സജ്ജീകരണവും അസംബ്ലിയും
Follow these steps carefully to assemble your Garderbor Arch. It is recommended to have two people for easier assembly.
ഘട്ടം 1: ഭാഗങ്ങൾ അൺപാക്ക് ചെയ്ത് തിരിച്ചറിയുക
Carefully remove all components from the packaging. Lay them out on a clean, flat surface and identify each part according to the package contents list.
Step 2: Connect Vertical Support Pipes
Begin by connecting the vertical support pipes. Each pipe section has pre-drilled holes. Align the holes and insert the mounting screws to secure the connections. Ensure a snug fit.

Figure 1: Easy Installation - Close-up of a pipe connection showing a screw being inserted to secure two pipe sections. This image illustrates the simple screw-based connection mechanism for the arch components.
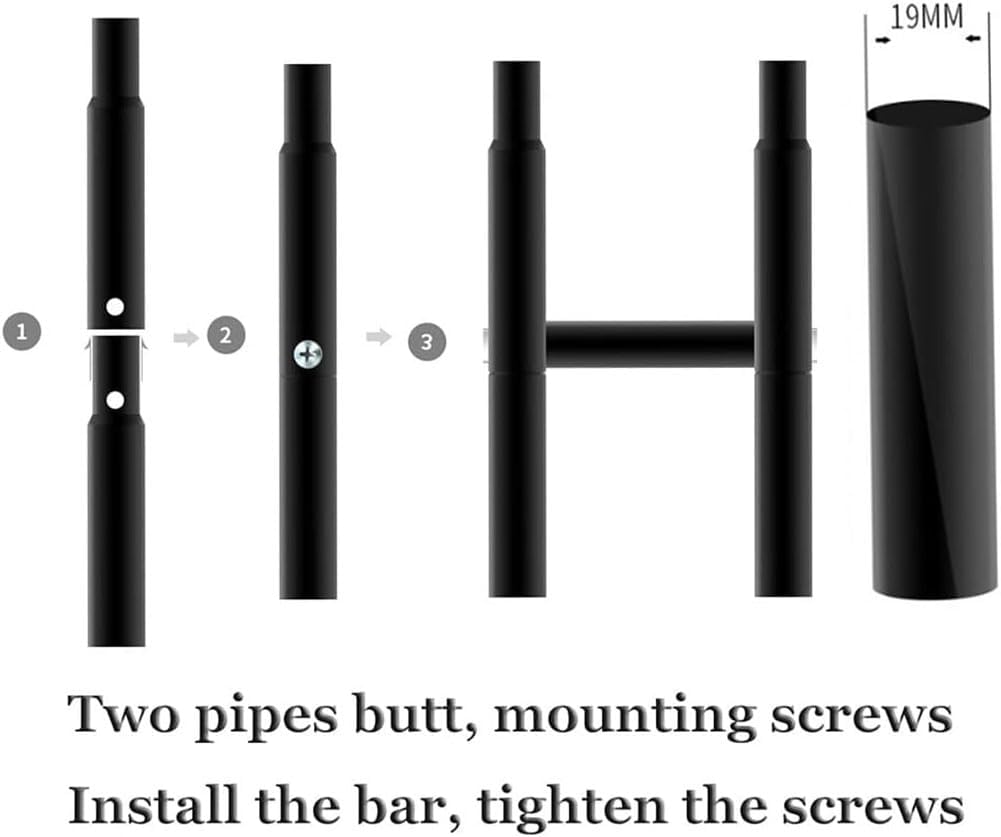
Figure 2: Pipe Assembly Diagram - A step-by-step diagram showing how two pipe sections butt together (1), how a screw is inserted (2), and the final tightened connection (3). This visual guide clarifies the process of joining the arch's tubular components.
ഘട്ടം 3: ബേസ് പ്ലേറ്റുകൾ ഘടിപ്പിക്കുക
Once the vertical supports are assembled, attach the base plates to the bottom of each side. These plates provide stability and allow for anchoring.
Step 4: Assemble Curved Arch Sections
Connect the curved arch sections at the top. These sections will form the main archway. Ensure they are securely fastened using the provided screws.
Step 5: Connect Vertical Supports to Arch Sections
Carefully lift the assembled vertical supports and connect them to the curved arch sections. This step may require assistance to hold the structure steady while securing the connections.
Step 6: Install Connecting Bars (if applicable)
If your model includes horizontal connecting bars, install them between the vertical supports to enhance structural rigidity.
ഘട്ടം 7: അന്തിമ മുറുക്കലും സ്ഥാനവും
Once all parts are connected, go back and ensure all screws are fully tightened. Carefully move the assembled arch to its desired location. For outdoor use, it is recommended to anchor the base plates into the ground using stakes (not included) for added stability, especially in windy conditions.

Figure 3: Assembled Garderbor Arch - A black steel archway standing in a garden, providing a decorative entrance and support for climbing plants. This image shows the completed product in a typical garden environment.
പ്രവർത്തനവും ഉപയോഗവും
The Garderbor Arch is designed for various applications:
- സസ്യ പിന്തുണ: Ideal for climbing plants such as roses, clematis, ivy, moonflowers, and other vines. Guide the plant tendrils around the arch frame as they grow.
- Decorative Entrance: Place at the entrance to a garden, pathway, or specific area to create a welcoming and elegant focal point.
- ഇവൻ്റ് അലങ്കാരം: Decorate with flowers, tulle, balloons, or lights for weddings, parties, or other outdoor events.
- Garden Corridor: Multiple arches can be placed side-by-side to create a beautiful garden tunnel or corridor.
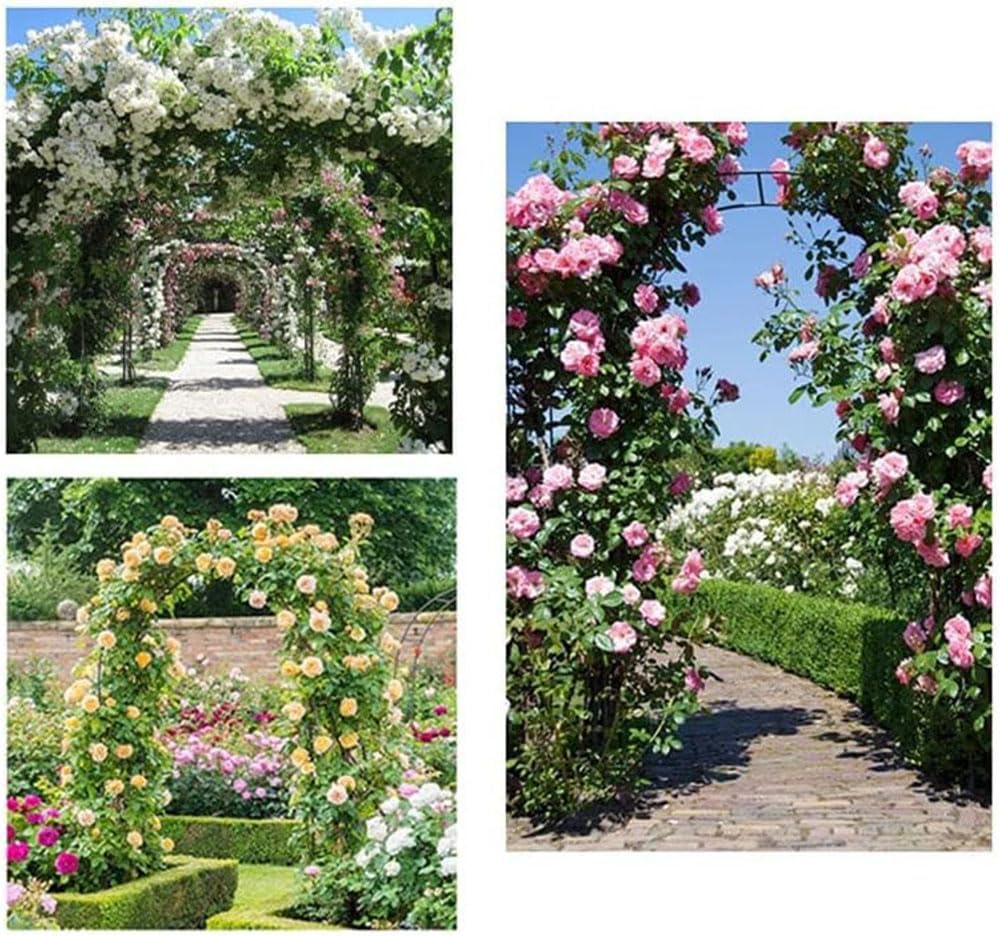
Figure 4: Archways with Climbing Plants - A collage showing multiple garden arches adorned with various climbing roses and plants, demonstrating their use as decorative plant supports. This image highlights the aesthetic potential of the arch when covered with foliage.

Figure 5: Arch as an Entrance Feature - A black garden arch positioned next to a large, ornate gate, illustrating its use as an elegant entranceway. This image shows how the arch can complement existing garden structures.
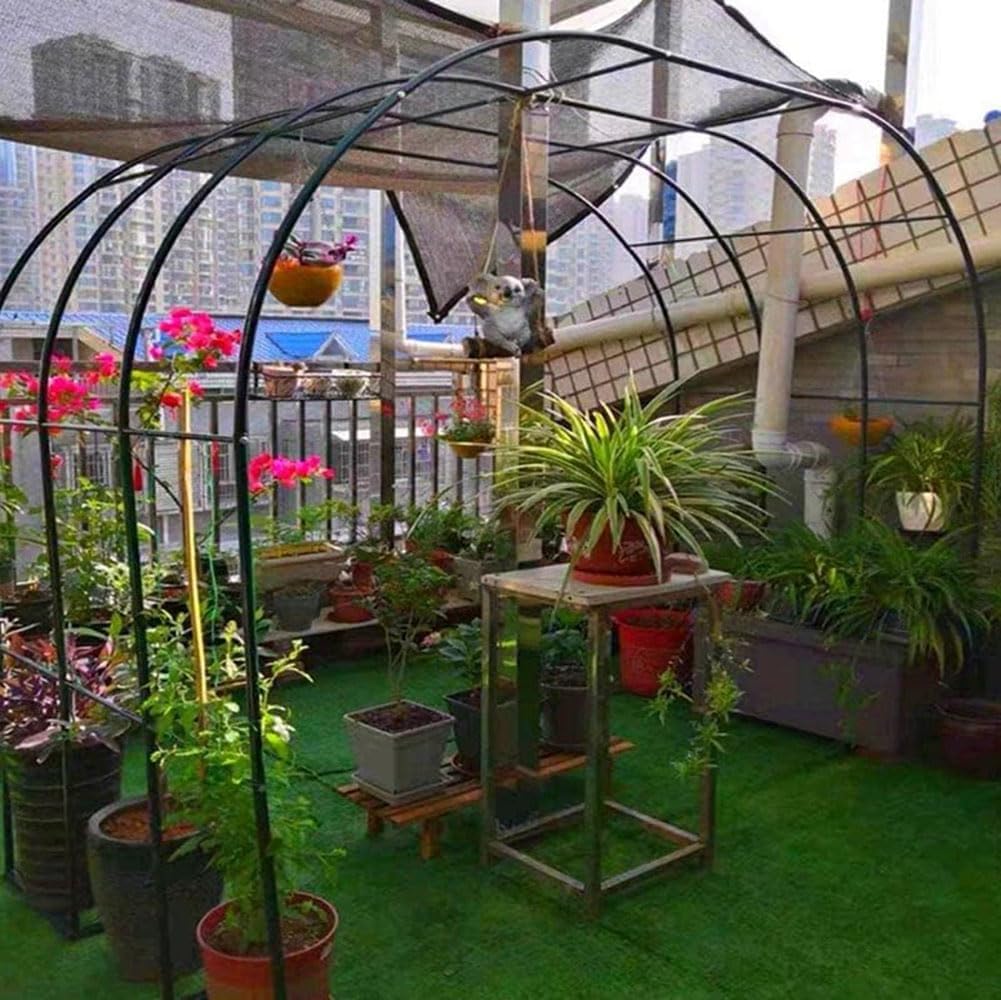
Figure 6: Arch as a Structure Frame - A garden arch being utilized as a framework for a small, temporary greenhouse or plant shelter on a patio, demonstrating its versatility. This image shows an alternative, practical application of the arch.
മെയിൻ്റനൻസ്
To ensure the longevity and appearance of your Garderbor Arch, follow these maintenance guidelines:
- വൃത്തിയാക്കൽ: Wipe down the arch periodically with a damp cloth to remove dirt, dust, and plant debris. Avoid abrasive cleaners that could damage the finish.
- പരിശോധന: Regularly inspect all connections and screws to ensure they remain tight. Re-tighten if necessary.
- തുരുമ്പ് തടയൽ: Although the arch is weather-resistant, inspect for any signs of rust, especially in areas where the coating might be scratched. Touch up with rust-inhibiting paint if needed.
- ശീതകാല പരിചരണം: In areas with heavy snow or ice, consider disassembling and storing the arch indoors during winter months to prevent damage from excessive weight or extreme cold.
ട്രബിൾഷൂട്ടിംഗ്
| പ്രശ്നം | സാധ്യമായ കാരണം | പരിഹാരം |
|---|---|---|
| Arch feels wobbly after assembly. | Screws are not fully tightened; uneven ground; insufficient anchoring. | Ensure all screws are tightened. Move to a level surface. Use ground stakes to anchor the base plates. |
| ഭാഗങ്ങൾ പരസ്പരം യോജിക്കുന്നില്ല. | ഭാഗങ്ങളുടെ തെറ്റായ ഓറിയന്റേഷൻ; നിർമ്മാണ വൈകല്യം. | Double-check the assembly instructions and diagrams. If parts still don't fit, contact customer support. |
| തുരുമ്പ് പാടുകൾ പ്രത്യക്ഷപ്പെടുന്നു. | Damage to protective coating; prolonged exposure to moisture. | Clean the area, lightly sand if necessary, and apply rust-inhibiting paint. |
സ്പെസിഫിക്കേഷനുകൾ
- ഉൽപ്പന്നത്തിൻ്റെ പേര്: Garderbor Arch Steel Frame
- മോഡൽ: W3.5M*H2.2M (White) - Other sizes available: 1.2M, 1.4M, 1.8M, 2.4M, 3M, 3.5M Wide
- മെറ്റീരിയൽ: Thickened and reinforced iron, high-temperature baking varnish bracket
- ട്യൂബ് വ്യാസം: Approximately 20mm (square tube)
- നിറം: White (as per current model)
- അളവുകൾ (W x H): 3.5 meters (11.5 feet) x 2.2 meters (7.2 feet)
- കാലാവസ്ഥ പ്രതിരോധം: അതെ
- അസംബ്ലി ആവശ്യമാണ്: അതെ
- മാതൃരാജ്യം: ചൈന

Figure 7: Product Dimensions - A diagram illustrating the typical dimensions of the Garderbor Arch, including height (220-240cm / 7.2-7.9ft), width (120-350cm / 3.9-11.5ft), and base depth (40cm / 1.3ft). This image provides a clear visual reference for the arch's size.
വാറൻ്റിയും പിന്തുണയും
This product is manufactured by Generic. For any questions regarding warranty, missing parts, or technical support, please refer to your purchase documentation or contact the seller directly through the platform where the product was purchased. Please have your order number and product model information ready when contacting support.
Ask a question about this manual
Ask about setup, troubleshooting, compatibility, parts, safety, or missing instructions. Manuals+ will review the question and use this page’s manual context to help answer it.