
Oasser AK2
Oasser Airbrush Set with Mini Compressor User Manual
മോഡൽ: AK2
1. ആമുഖം
Thank you for choosing the Oasser Airbrush Set. This comprehensive kit is designed for a wide range of artistic and hobby applications, offering precise control and ease of use. Featuring a double-action airbrush and a mini compressor with stepless pressure control from 2 to 36 PSI, it is suitable for both beginners and experienced users. This manual provides detailed instructions for setup, operation, maintenance, and troubleshooting to ensure optimal performance and longevity of your airbrush set.
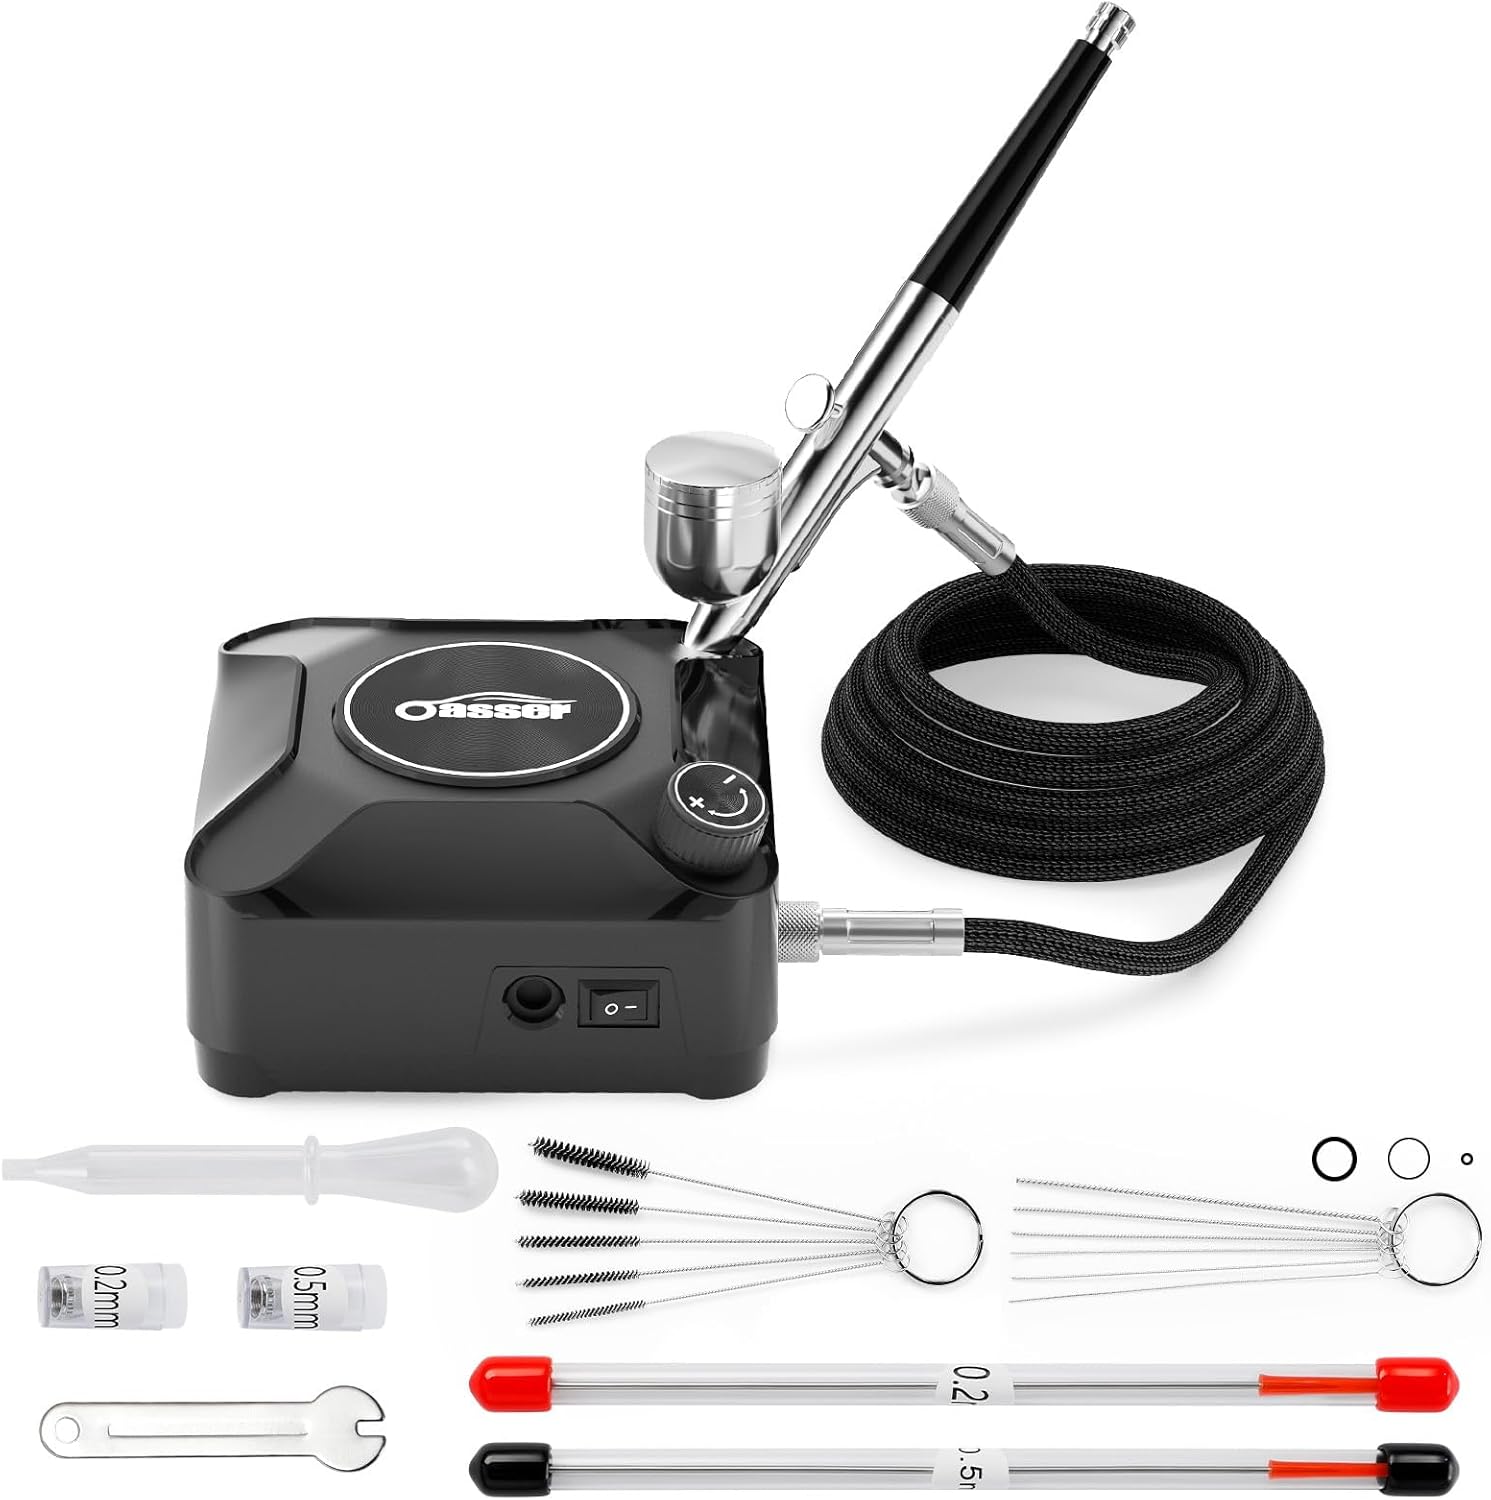
2. പാക്കേജ് ഉള്ളടക്കം
താഴെ ലിസ്റ്റ് ചെയ്തിരിക്കുന്ന എല്ലാ ഇനങ്ങളും നിങ്ങളുടെ പാക്കേജിൽ ഉൾപ്പെടുത്തിയിട്ടുണ്ടെന്ന് ദയവായി പരിശോധിക്കുക:
- എയർ ഹോസ്
- കംപ്രസ്സർ
- എസി അഡാപ്റ്റർ
- പാക്കേജിംഗ് ബോക്സ്
- Cleaning Brushes (various sizes)
- Cleaning Needles
- ഡ്രോപ്പർ
- Nozzles (0.2mm, 0.5mm)
- നോസൽ റെഞ്ച്
- ഒ-വളയങ്ങൾ
- Needles (0.2mm, 0.5mm)
- എയർബ്രഷ്
- Japanese User Manual (for detailed instructions in Japanese)

3. സജ്ജീകരണ ഗൈഡ്
Follow these steps to set up your Oasser Airbrush Set for first use:
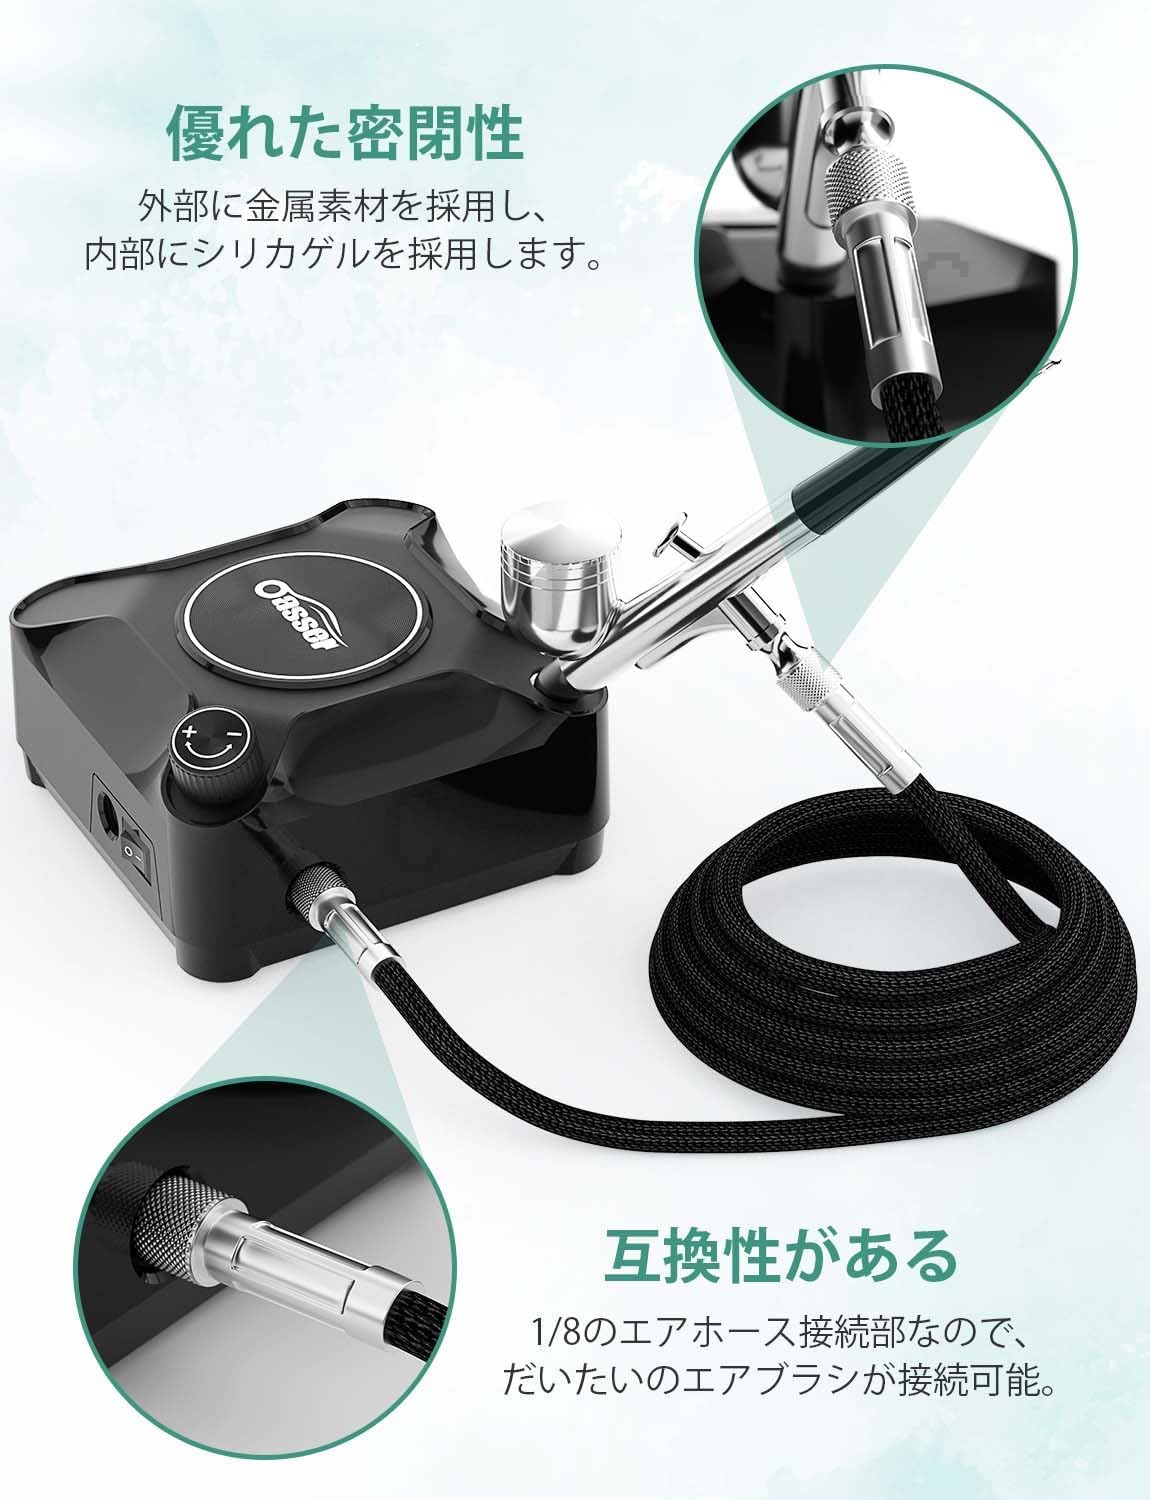
- എയർ ഹോസ് ബന്ധിപ്പിക്കുക: Securely attach the air hose to the compressor's air outlet. Ensure a tight connection to prevent air leaks.
- Fill the Paint Cup: Pour your desired paint (diluted as necessary) into the airbrush's paint cup. Do not fill more than 2/3 capacity.
- Connect Power and Turn On: Plug the AC adapter into a power outlet and connect it to the compressor. Turn the power switch to the "ON" position.
- വായു മർദ്ദം ക്രമീകരിക്കുക: Use the dial on the compressor to adjust the air pressure to your desired level (2-36 PSI).
- വായുപ്രവാഹം പരിശോധിക്കുക: Before applying paint, press the airbrush lever down to ensure air is flowing correctly.

This airbrush set features a "Plug and Play" design, meaning it's ready for immediate use once connected to power, without the need for battery charging.
4. പ്രവർത്തന നിർദ്ദേശങ്ങൾ
4.1 Double-Action Control
The Oasser airbrush features a double-action mechanism, allowing for independent control of both air and paint flow:
- Air Only: Press the lever down to release air only. This is useful for drying or clearing the nozzle.
- Air and Paint: While holding the lever down, pull it back to release paint. The further back you pull, the more paint is released, allowing for fine lines or broader coverage.

4.2 Stepless Pressure Control (2-36 PSI)
The compressor offers stepless pressure adjustment, enabling you to fine-tune the output for various applications:
- Low Pressure (e.g., 2-10 PSI): Ideal for delicate work such as nail art, makeup, or fine details.
- Medium Pressure (e.g., 10-25 PSI): Suitable for plastic models, DIY hand-painting, and general artwork.
- High Pressure (e.g., 25-36 PSI): Best for broader coverage, base coats, or larger painting projects like graffiti.

4.3 Nozzle and Needle Sizes
The set includes interchangeable nozzles and needles (0.2mm, 0.3mm, 0.5mm) to accommodate different painting needs:
- 0.2mm നോസൽ: For extremely fine lines and intricate details, such as camouflage patterns or delicate illustrations.
- 0.3mm നോസൽ: A versatile size for general purpose painting, including plastic models and body art.
- 0.5mm നോസൽ: For broader coverage, base coats, and thicker paints.
4.4 Paint Compatibility
This airbrush set is compatible with a variety of paint types. Always ensure paints are properly diluted to a milk-like consistency for optimal flow and to prevent clogging.
- വെള്ളം അടിസ്ഥാനമാക്കിയുള്ള പെയിന്റുകൾ
- അക്രിലിക് പെയിൻ്റ്സ്
- എണ്ണ അടിസ്ഥാനമാക്കിയുള്ള പെയിന്റുകൾ
- Metallic paints
Note: For first-time users, it is recommended to practice with water to understand the airbrush operation before using paint.

5. പരിപാലനവും ശുചീകരണവും
Proper cleaning and maintenance are crucial for the longevity and performance of your airbrush. Always clean the airbrush immediately after each use, especially parts that come into contact with paint.
5.1 വൃത്തിയാക്കൽ നടപടിക്രമം
- Empty Paint Cup: Remove any remaining paint from the cup.
- ക്ലീനിംഗ് സൊല്യൂഷൻ ചേർക്കുക: Pour a small amount of appropriate cleaning solution (e.g., water for water-based paints, thinner for oil-based paints) into the paint cup.
- Back-Flush: Block the nozzle with your finger or a cap, then press the lever down. This will cause air to bubble back into the paint cup, cleaning the inside.
- Spray Out: Remove your finger from the nozzle and spray the cleaning solution onto a paper towel or into a waste container until clear.
- വേർപെടുത്തി വൃത്തിയാക്കുക: For thorough cleaning, disassemble the airbrush (nozzle, needle, paint cup) and clean each component using the provided cleaning brushes and needles.


Important: Inadequate or improper cleaning can lead to paint blockages inside the airbrush, which may cause the compressor to malfunction or the airbrush to stop spraying. Refer to the included Japanese manual and product videos for detailed cleaning demonstrations.
6. പ്രശ്നപരിഹാരം
If you encounter issues with your Oasser Airbrush Set, please refer to the following common problems and solutions:
| പ്രശ്നം | സാധ്യമായ കാരണം | പരിഹാരം |
|---|---|---|
| No air output from airbrush. | Air hose not securely connected; compressor not powered on; airbrush lever not pressed down. | Ensure air hose is firmly attached to compressor. Verify power switch is ON. Press airbrush lever down fully. |
| Paint not spraying or sputtering. | Paint too thick; nozzle/needle clogged; air pressure too low. | Dilute paint to proper consistency. Clean nozzle and needle thoroughly. Increase air pressure using the dial. |
| Air leaks from hose connection. | Loose connection; damaged O-ring. | Tighten the hose connection. Inspect O-rings for damage and replace if necessary. |
| Compressor not turning on. | Power cord not fully inserted; power outlet issue. | Ensure power cord is firmly inserted into the compressor. Test the power outlet with another device. |
If the problem persists after attempting these solutions, please contact Oasser customer support for further assistance.
7. ഉൽപ്പന്ന സവിശേഷതകൾ
| ഫീച്ചർ | സ്പെസിഫിക്കേഷൻ |
|---|---|
| ബ്രാൻഡ് | ഒസ്സർ |
| മോഡൽ നമ്പർ | എകെ 2 |
| ഉൽപ്പന്ന അളവുകൾ | 13 x 13 x 6 സെ.മീ |
| ഇനത്തിൻ്റെ ഭാരം | 1.08 കി.ഗ്രാം |
| പവർ ഉറവിടം | കോർഡഡ് ഇലക്ട്രിക് |
| വാല്യംtage | 12 വോൾട്ട് (DC) |
| പ്രവർത്തന ശബ്ദ നില | 40 ഡി.ബി |
| ഉൾപ്പെടുത്തിയ ഘടകങ്ങൾ | Handpiece, Japanese User Manual |
| ശുപാർശ ചെയ്യുന്ന ഉപയോഗം | എയർബ്രഷിംഗ് |
| പരമാവധി പ്രവർത്തന സമ്മർദ്ദം | 36 പി.എസ്.ഐ |
8. ഔദ്യോഗിക ഉൽപ്പന്ന വീഡിയോ
Watch the official product video for a visual guide on setting up and using your Oasser Airbrush Set.
9. വാറൻ്റിയും പിന്തുണയും
Oasser products are designed for quality and reliability. For any questions, concerns, or technical support regarding your airbrush set, please refer to the contact information provided in your product packaging or visit the official Oasser website. Our customer support team is ready to assist you.
ഏതെങ്കിലും വാറന്റി ക്ലെയിമുകൾക്കുള്ള വാങ്ങിയതിന്റെ തെളിവായി നിങ്ങളുടെ വാങ്ങൽ രസീത് സൂക്ഷിക്കുക.
Ask a question about this manual
Ask about setup, troubleshooting, compatibility, parts, safety, or missing instructions. Manuals+ will review the question and use this page’s manual context to help answer it.