
1. ആമുഖം
This manual provides essential information for the safe and effective operation, setup, and maintenance of your Reboot RBM2500 6-in-1 Multi-Process Welding Machine. The RBM2500 is a versatile welding unit capable of performing Gas MIG (GMAW), Gas-free Flux Core MIG (FCAW), Stick/MMA, Spot Welding, and Lift TIG processes. It also supports an optional spool gun for aluminum welding.
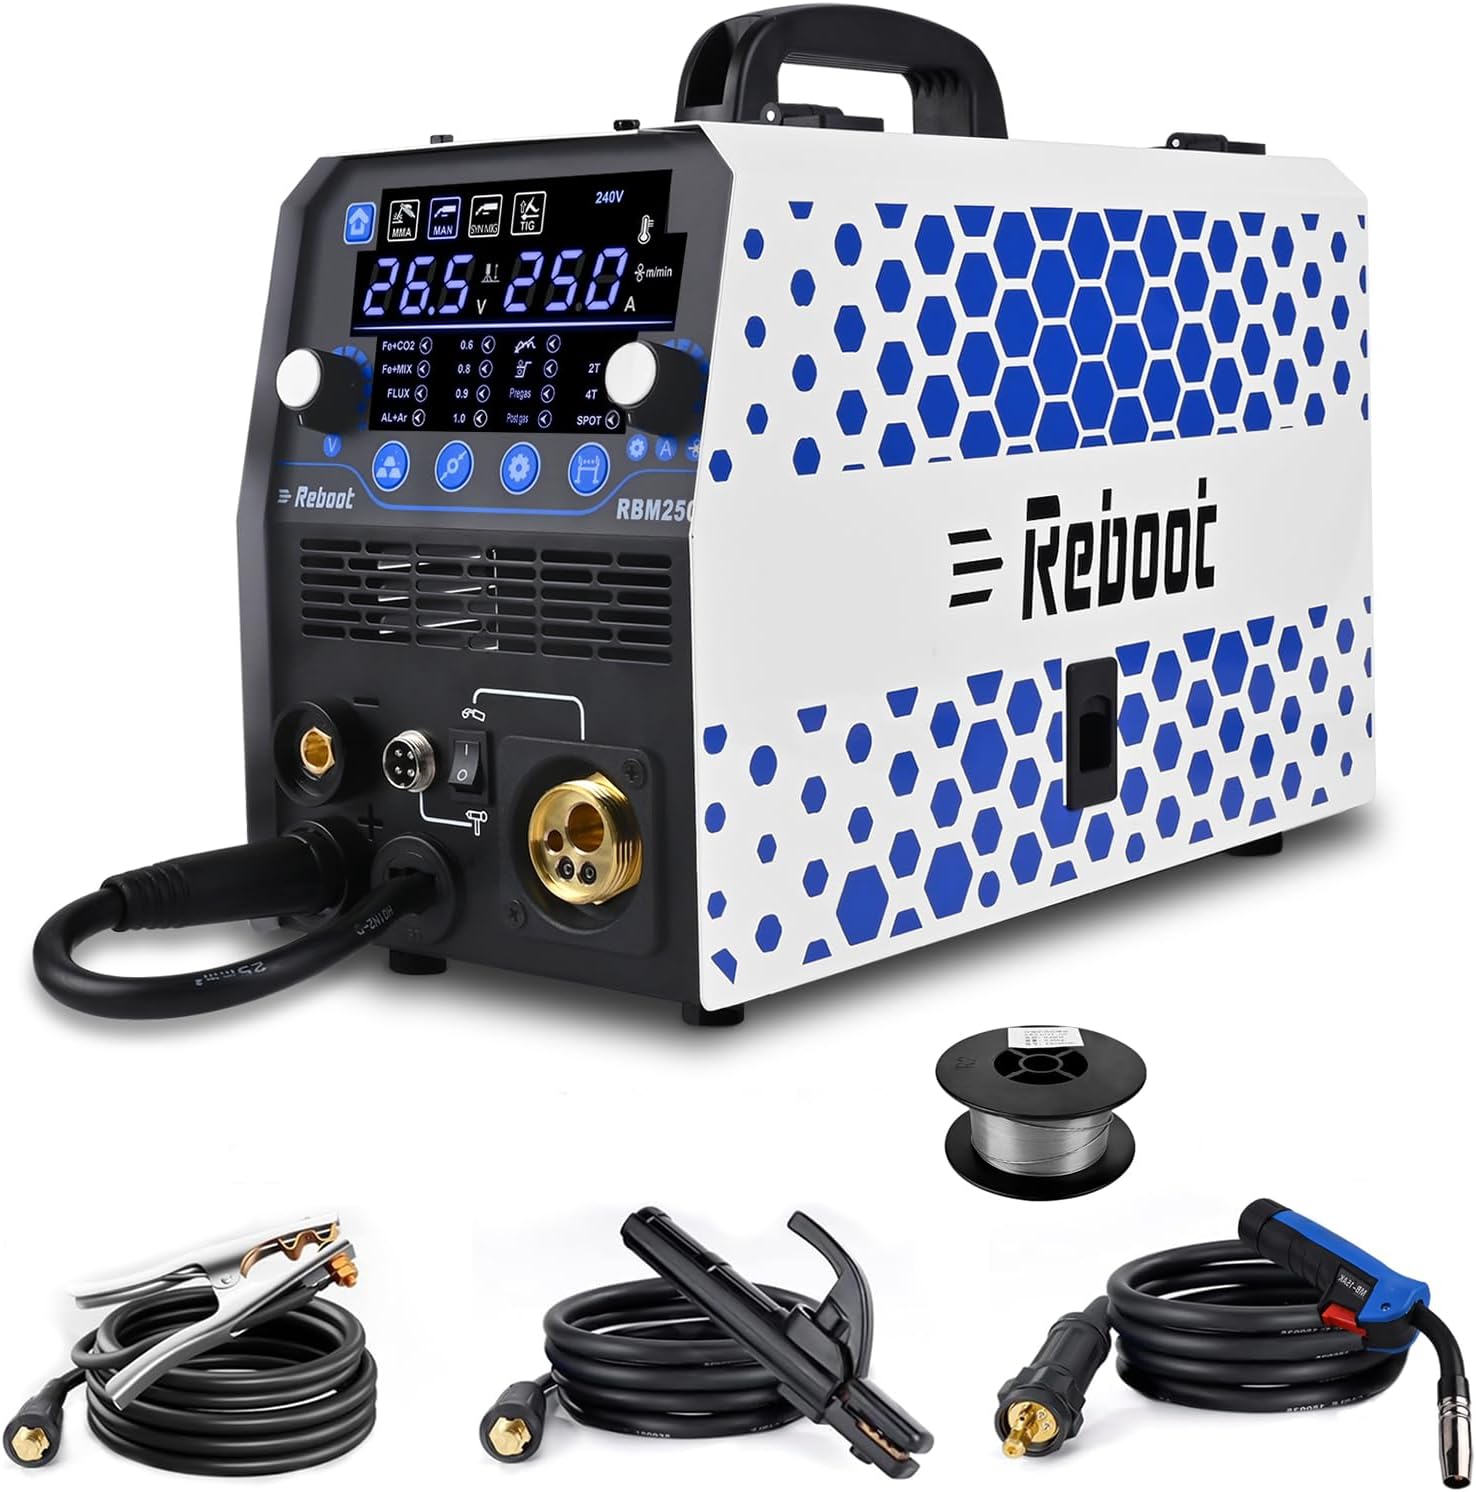
Figure 1: Reboot RBM2500 Multi-Process Welding Machine and included accessories.
2. സുരക്ഷാ മുൻകരുതലുകൾ
WARNING: Welding can be dangerous. Always follow safety guidelines to prevent injury or death.
- വ്യക്തിഗത സംരക്ഷണ ഉപകരണങ്ങൾ (PPE): എല്ലായ്പ്പോഴും അനുയോജ്യമായ തണലുള്ള വെൽഡിംഗ് ഹെൽമെറ്റ്, തീജ്വാലയെ പ്രതിരോധിക്കുന്ന വസ്ത്രങ്ങൾ, വെൽഡിംഗ് കയ്യുറകൾ, സുരക്ഷാ ഷൂകൾ എന്നിവ ധരിക്കുക.
- വെൻ്റിലേഷൻ: Ensure adequate ventilation to remove welding fumes and gases from the work area.
- അഗ്നി അപകടങ്ങൾ: വെൽഡിംഗ് സ്ഥലത്ത് നിന്ന് തീപിടിക്കുന്ന വസ്തുക്കൾ മാറ്റി വയ്ക്കുക. ഒരു അഗ്നിശമന ഉപകരണം എപ്പോഴും ലഭ്യമാക്കുക.
- ഇലക്ട്രിക്കൽ സുരക്ഷ: Ensure the welding machine is properly grounded. Do not operate in wet conditions. Inspect cables for damage before use.
- കണ്ണിന്റെയും ചർമ്മത്തിന്റെയും സംരക്ഷണം: Welding arcs emit intense ultraviolet and infrared rays that can cause severe burns to eyes and skin.
- പുക ശ്വസിക്കൽ: Avoid breathing welding fumes. Use local exhaust ventilation or respirators if necessary.
3. ഉൽപ്പന്ന സവിശേഷതകളും ഘടകങ്ങളും
3.1 Multi-Process Capabilities
The RBM2500 offers six distinct welding functions:
- Gas MIG (GMAW)
- Gas-free Flux Core MIG (FCAW)
- Stick/MMA Welding
- സ്പോട്ട് വെൽഡിംഗ്
- Lift TIG Welding (requires optional TIG torch)
- Spool Gun Connector (for aluminum welding, spool gun optional)
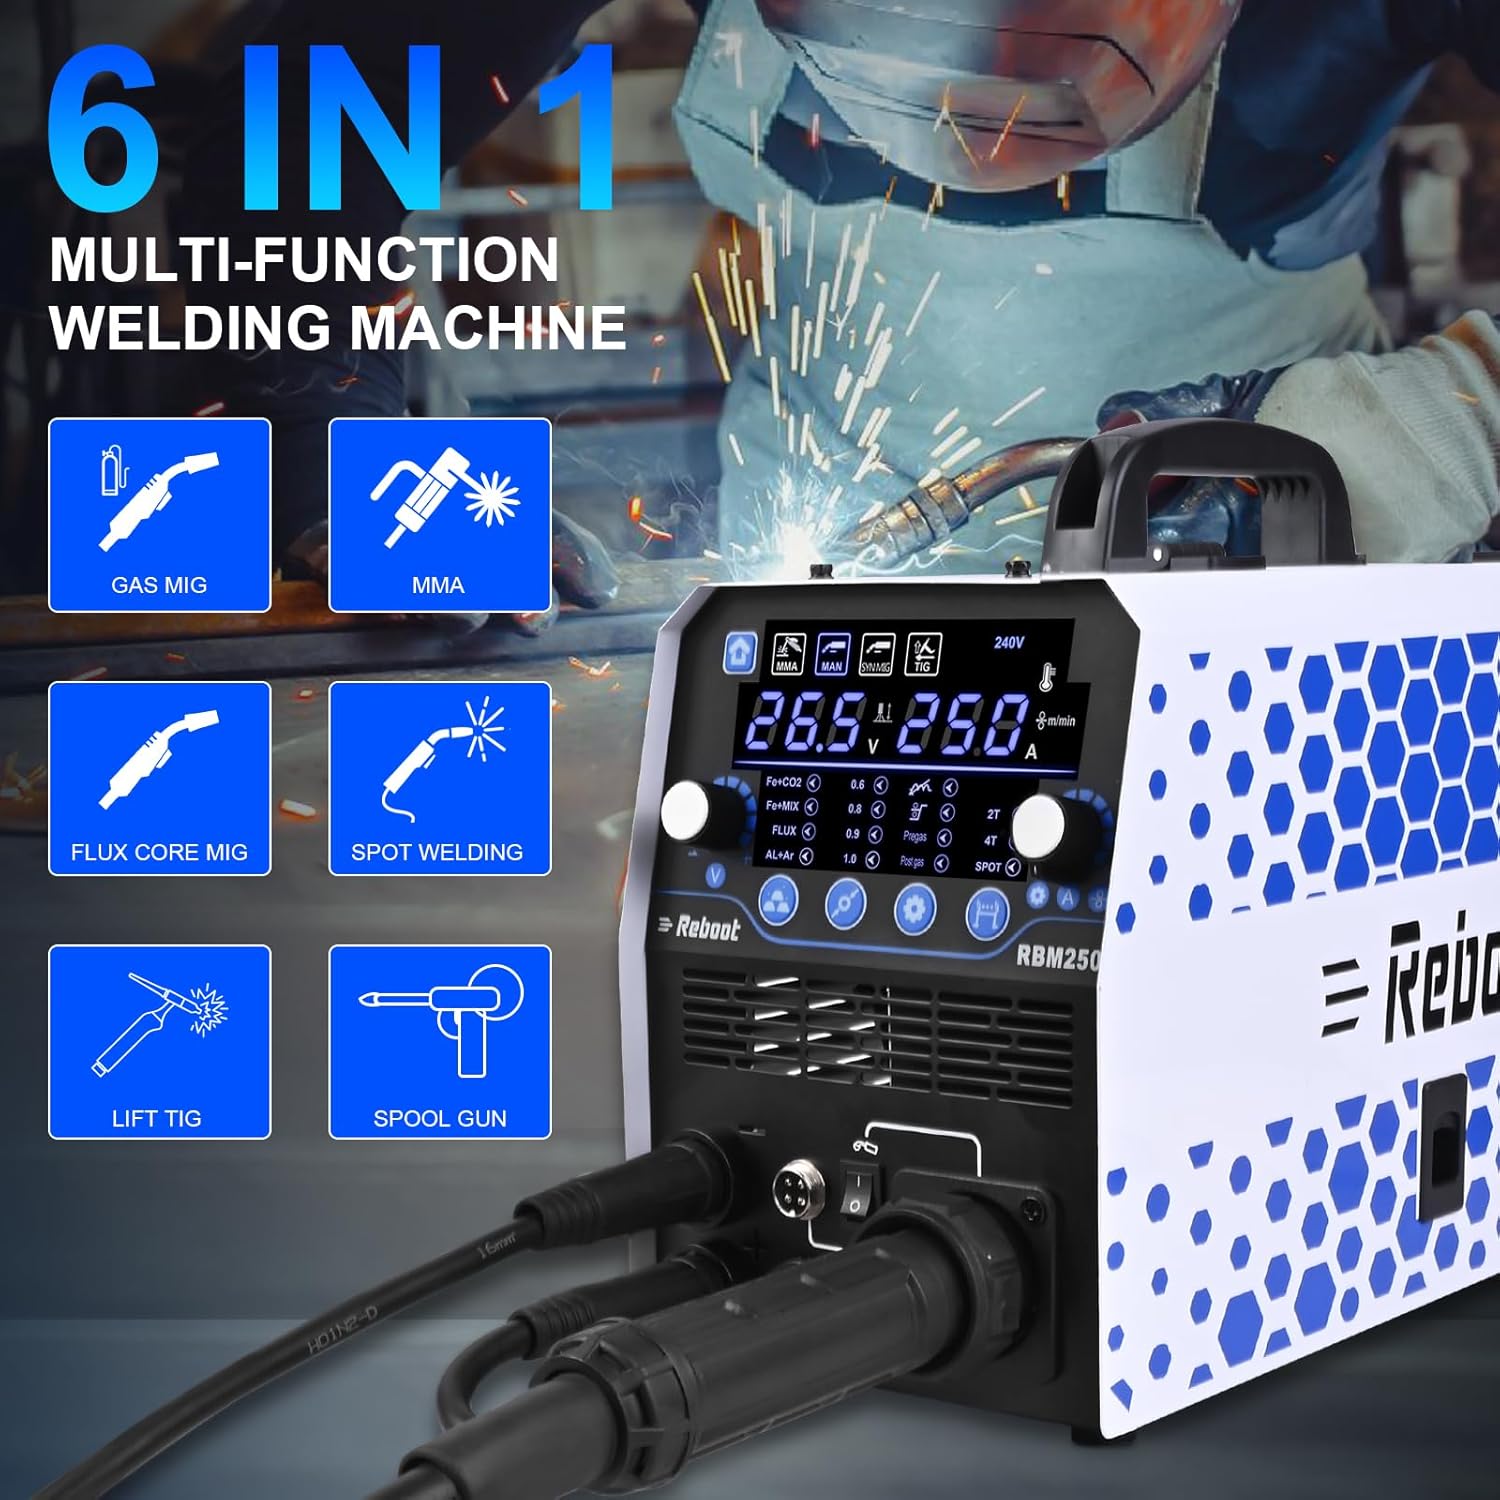
ചിത്രം 2: ഓവർview of the RBM2500's 6-in-1 welding functions.
3.2 നിയന്ത്രണ പാനലും ഡിസ്പ്ലേയും
The machine features a large LED display for clear monitoring of welding parameters. It allows for digital control and automatic adjustment of recommended current and wire feed speed based on selected wire diameter and material. Manual adjustments are also possible.

Figure 3: The large LED display provides accurate data for various welding modes.
3.3 Wire Feed Structure
The RBM2500 incorporates a stable and smooth wire feed mechanism, crucial for consistent welding performance.

Figure 4: The wire feed structure includes the welding wire spool, wire pressing wheel, automatic wire feed, and wire feeding wheel.
4. സജ്ജീകരണ ഗൈഡ്
4.1 പവർ കണക്ഷൻ
- മെഷീനിന്റെ പവർ സ്വിച്ച് ഓഫ് പൊസിഷനിൽ ആണെന്ന് ഉറപ്പാക്കുക.
- Connect the power cord to a 240V power supply. Verify the power outlet is properly grounded and can handle the machine's wattagഇ (6 കിലോവാട്ട്).
4.2 ഗ്രൗണ്ട് Clamp കണക്ഷൻ
- ഗ്രൗണ്ട് cl കണക്ട് ചെയ്യുകamp cable to the appropriate terminal on the front panel of the welding machine.
- ഗ്രൗണ്ട് cl സുരക്ഷിതമായി ഘടിപ്പിക്കുകamp to the workpiece or a clean, bare metal portion of the welding table. Ensure good electrical contact.
4.3 Welding Torch/Holder Connection
- MIG ടോർച്ച്: Connect the MIG torch cable to the designated MIG connector on the front panel.
- ഇലക്ട്രോഡ് ഹോൾഡർ (എംഎംഎ): ഇലക്ട്രോഡ് ഹോൾഡർ കേബിൾ പോസിറ്റീവ് (+) ടെർമിനലിലേക്കും ഗ്രൗണ്ട് cl-ലേക്കും ബന്ധിപ്പിക്കുക.amp to the negative (-) terminal for most electrodes. Consult electrode specifications for reverse polarity.
- Lift TIG Torch (Optional): Connect the TIG torch to the appropriate connector. A separate gas line will also be required for TIG welding.
4.4 Welding Wire Installation (MIG/Flux Core)
- Open the wire feed compartment.
- Place the welding wire spool onto the spindle, ensuring it rotates freely.
- Thread the wire through the wire guide and into the drive rollers.
- Adjust the wire pressing wheel tension to ensure proper wire feeding without crushing or slipping.
- Select the correct drive roller groove for your wire diameter (.023"/.030"/.035" solid wire, .023"/.030"/.035" flux core wire, .040" aluminum wire).
- Feed the wire through the MIG torch liner until it exits the contact tip.
4.5 Gas Cylinder Connection (for Gas MIG/Lift TIG)
- Securely mount the gas cylinder (e.g., Argon for TIG, Argon/CO2 mix for MIG).
- Attach the gas regulator to the cylinder valve and tighten.
- Connect the gas hose from the regulator to the gas inlet on the welding machine.
- Open the cylinder valve slowly and adjust the gas flow rate on the regulator as required for the welding process.
5. ഓപ്പറേഷൻ മോഡുകൾ
5.1 പൊതു നിയന്ത്രണങ്ങൾ
The RBM2500 features intuitive controls for selecting welding modes and adjusting parameters. The large LED display provides real-time feedback on voltage, amperage, and wire feed speed.
- മോഡ് തിരഞ്ഞെടുക്കൽ: Use the dedicated buttons to switch between MMA, MAN MIG, SYN MIG, and TIG modes.
- പാരാമീറ്റർ അഡ്ജസ്റ്റ്മെന്റ്: Rotary knobs allow fine-tuning of welding current, voltage, and wire feed speed.
- Synergic Control: In SYN MIG mode, the machine automatically adjusts recommended current and wire feed speed based on selected wire diameter and material.
- Inductance Adjustment: This function allows control over the arc stiffness and puddle fluidity, affecting bead appearance and penetration.
- Pre-flow/Post-flow: These settings control the gas flow before and after the arc, protecting the weld puddle from atmospheric contamination.
- 2T/4T Trigger Modes: Select 2T for standard trigger operation (press to weld, release to stop) or 4T for continuous welding without holding the trigger (press and release to start, press and release again to stop).
- Fast Wire Feed: Press and hold the "welding wire selection" button for fast wire feeding.
5.2 MIG Welding (GMAW/FCAW)
The RBM2500 supports both Gas MIG (with shielding gas and solid wire) and Gas-free Flux Core MIG (with flux-cored wire).
- Select either 'MAN MIG' for manual control or 'SYN MIG' for synergic settings.
- Choose the appropriate wire diameter and material type on the control panel.
- വോളിയം ക്രമീകരിക്കുകtage and wire feed speed. In SYN MIG, these will be pre-set but can be fine-tuned.
- For Gas MIG, ensure shielding gas is flowing at the correct rate.
- Begin welding, maintaining proper torch angle and travel speed.
5.3 Stick Welding (MMA)
- Select 'MMA' mode.
- ഇലക്ട്രോഡ് ഹോൾഡറിലേക്ക് ഉചിതമായ ഇലക്ട്രോഡ് തിരുകുക.
- Set the welding current (amperage) according to the electrode manufacturer's recommendations.
- Strike an arc and maintain a consistent arc length and travel speed.
5.4 ലിഫ്റ്റ് ടിഐജി വെൽഡിംഗ്
This mode requires an optional TIG torch and a shielding gas (typically Argon).
- Select 'TIG' mode.
- Ensure the TIG torch is connected and shielding gas is flowing.
- വെൽഡിംഗ് കറന്റ് സജ്ജമാക്കുക.
- Initiate the arc by gently touching the tungsten electrode to the workpiece and quickly lifting it a small distance.
- Maintain a consistent arc length and add filler rod as needed.
5.5 Spot Welding
The RBM2500 includes a spot welding function for joining overlapping metal sheets.
- Select 'SPOT' mode.
- Adjust the spot welding time and current as required for the material thickness.
- Position the MIG torch over the desired spot on the overlapping sheets and activate the trigger.

Figure 5: The RBM2500 is suitable for welding carbon steel, stainless steel, iron, and various alloys.
6. പരിപാലനം
പതിവ് അറ്റകുറ്റപ്പണികൾ നിങ്ങളുടെ വെൽഡിംഗ് മെഷീനിന്റെ ദീർഘായുസ്സും ഒപ്റ്റിമൽ പ്രകടനവും ഉറപ്പാക്കുന്നു.
- വൃത്തിയാക്കൽ: Periodically clean the machine's exterior with a dry cloth. Use compressed air to clear dust from internal components, ensuring the machine is unplugged.
- കേബിൾ പരിശോധന: Regularly inspect all welding cables, power cords, and gas hoses for cuts, abrasions, or loose connections. Replace damaged components immediately.
- വയർ ഫീഡ് സംവിധാനം: Clean the drive rollers and wire guide to prevent wire feeding issues. Check the contact tip and nozzle of the MIG torch for spatter buildup and replace if worn.
- കൂളിംഗ് ഫാൻ: Ensure the cooling fan vents are clear of obstructions to prevent overheating.
7. പ്രശ്നപരിഹാരം
പ്രവർത്തന സമയത്ത് നിങ്ങൾ നേരിട്ടേക്കാവുന്ന സാധാരണ പ്രശ്നങ്ങളെ ഈ വിഭാഗം അഭിസംബോധന ചെയ്യുന്നു.
- ശക്തിയില്ല: Check the power cord connection, wall outlet, and circuit breaker. Ensure the machine's power switch is ON.
- ആർക്ക് ഇല്ല: Verify the ground clamp is securely attached to the workpiece. Check all cable connections. Ensure the correct welding mode is selected. For MIG, check wire feed and gas flow. For MMA, ensure the electrode is making good contact.
- വെൽഡിംഗ് ഗുണനിലവാരം മോശമാണ്: Adjust welding parameters (current, voltage, wire feed speed). Ensure proper gas flow (for Gas MIG/TIG) and correct wire/electrode selection. Clean the workpiece of rust, paint, or oil.
- Wire Feeding Problems: Check wire spool tension, drive roller tension, and ensure the correct drive roller groove is used. Inspect the MIG torch liner for blockages or kinks. Replace worn contact tips.
- അമിത ചൂടാക്കൽ: If the machine shuts down due to overheating, allow it to cool down. Ensure cooling vents are clear and the duty cycle is not exceeded.
8 സാങ്കേതിക സവിശേഷതകൾ
| സ്പെസിഫിക്കേഷൻ | മൂല്യം |
|---|---|
| മോഡൽ നമ്പർ | RBM2500 |
| നിർമ്മാതാവ് | Reboot-EU |
| പവർ ഉറവിടം | എസി/ഡിസി |
| ഇൻപുട്ട് വോളിയംtage | 240 വി |
| വാട്ട്tage | 6 കെ.ഡബ്ല്യു |
| ഇനത്തിൻ്റെ ഭാരം | 10.7 കി.ഗ്രാം |
| പാഴ്സൽ അളവുകൾ | 45.7 x 33 x 30 സെ.മീ |
| Supported Wire Diameters | .023"/.030"/.035" solid wire, .023"/.030"/.035" flux core wire, .040" aluminum wire |
9. വാറൻ്റിയും പിന്തുണയും
The Reboot RBM2500 welding machine comes with a 1 വർഷത്തെ വാറൻ്റി വാങ്ങിയ തീയതി മുതൽ. കൂടാതെ, ഒരു 30 ദിവസത്തെ പണം തിരികെ നൽകാനുള്ള ഗ്യാരണ്ടി വാഗ്ദാനം ചെയ്യുന്നു.
For any questions, technical assistance, or warranty claims, please contact Reboot customer support through their online support channels. Provide your product model number (RBM2500) and purchase details for efficient service.