
Bestier H105314ZUS
Bestier H105314ZUS Gaming Desk User Manual
Model: H105314ZUS | Brand: Bestier
1. ആമുഖം
This manual provides detailed instructions for the assembly, operation, maintenance, and troubleshooting of your Bestier H105314ZUS Gaming Desk. Please read this manual thoroughly before assembly and use to ensure safe and correct operation. Keep this manual for future reference.
2 സുരക്ഷാ വിവരങ്ങൾ
ഉൽപ്പന്നത്തിന് പരിക്കോ കേടുപാടുകളോ ഉണ്ടാകാതിരിക്കാൻ ഇനിപ്പറയുന്ന സുരക്ഷാ മുൻകരുതലുകൾ പാലിക്കുക:
- അസംബ്ലി ആരംഭിക്കുന്നതിന് മുമ്പ് എല്ലാ ഭാഗങ്ങളും ഉണ്ടെന്നും കേടുപാടുകൾ സംഭവിച്ചിട്ടില്ലെന്നും ഉറപ്പാക്കുക. കേടായ ഭാഗങ്ങൾ ഉപയോഗിക്കരുത്.
- പോറലുകൾ ഉണ്ടാകാതിരിക്കാൻ മൃദുവായതും വൃത്തിയുള്ളതുമായ ഒരു പ്രതലത്തിൽ മേശ കൂട്ടിച്ചേർക്കുക.
- എല്ലാ സ്ക്രൂകളും ഫാസ്റ്റനറുകളും സുരക്ഷിതമായി മുറുക്കുക, പക്ഷേ അമിതമായി മുറുക്കരുത്.
- Do not exceed the maximum weight capacity of the desk or its shelves.
- കുട്ടികളെയും വളർത്തുമൃഗങ്ങളെയും അസംബ്ലി ഏരിയയിൽ നിന്ന് അകറ്റി നിർത്തുക.
- For electrical components (power outlets, LED lights), ensure proper connection to a grounded power source. Do not overload the power outlets.
- Avoid placing liquids directly on the desk surface, especially near electrical outlets.
- എല്ലാ കണക്ഷനുകളും ഫാസ്റ്റനറുകളും ഇറുകിയതായി ഉറപ്പാക്കാൻ ഇടയ്ക്കിടെ പരിശോധിക്കുക.
3. പാക്കേജ് ഉള്ളടക്കം
Verify that all components listed below are included in your package. If any parts are missing or damaged, please contact Bestier customer support.
ഡെസ്ക് ഘടകങ്ങൾ
- ✓ Desk Top Panels
- ✓ Monitor Stand Panel
- ✓ Side Shelf Panels (Adjustable)
- ✓ Metal Frame Components (Legs, Crossbars)
- ✓ Power Outlet Unit with LED Controller
- ✓ Cup Holder
- ✓ Headphone Hook
- ✓ Adjustable Feet
ഹാർഡ്വെയറും ടൂളുകളും
- ✓ Screws, Bolts, and Washers (various sizes)
- ✓ Allen Wrench / Hex Key
- ✓ Assembly Instructions Manual
- ✓ Accessory Bag

4. സജ്ജീകരണവും അസംബ്ലിയും
Follow these steps carefully for proper assembly. It is recommended to have two people for assembly, although one person can complete it with sufficient time and patience.
- ഭാഗങ്ങൾ അൺപാക്ക് ചെയ്ത് തിരിച്ചറിയുക: Lay out all components on a clean, soft surface. Refer to the "Package Contents" section and Figure 3.1 to identify each part.
- പ്രധാന ഫ്രെയിം കൂട്ടിച്ചേർക്കുക:
- Attach the main desk legs to the central crossbars using the specified screws. Do not fully tighten yet.
- Connect the X-shaped crossbar at the back for stability.
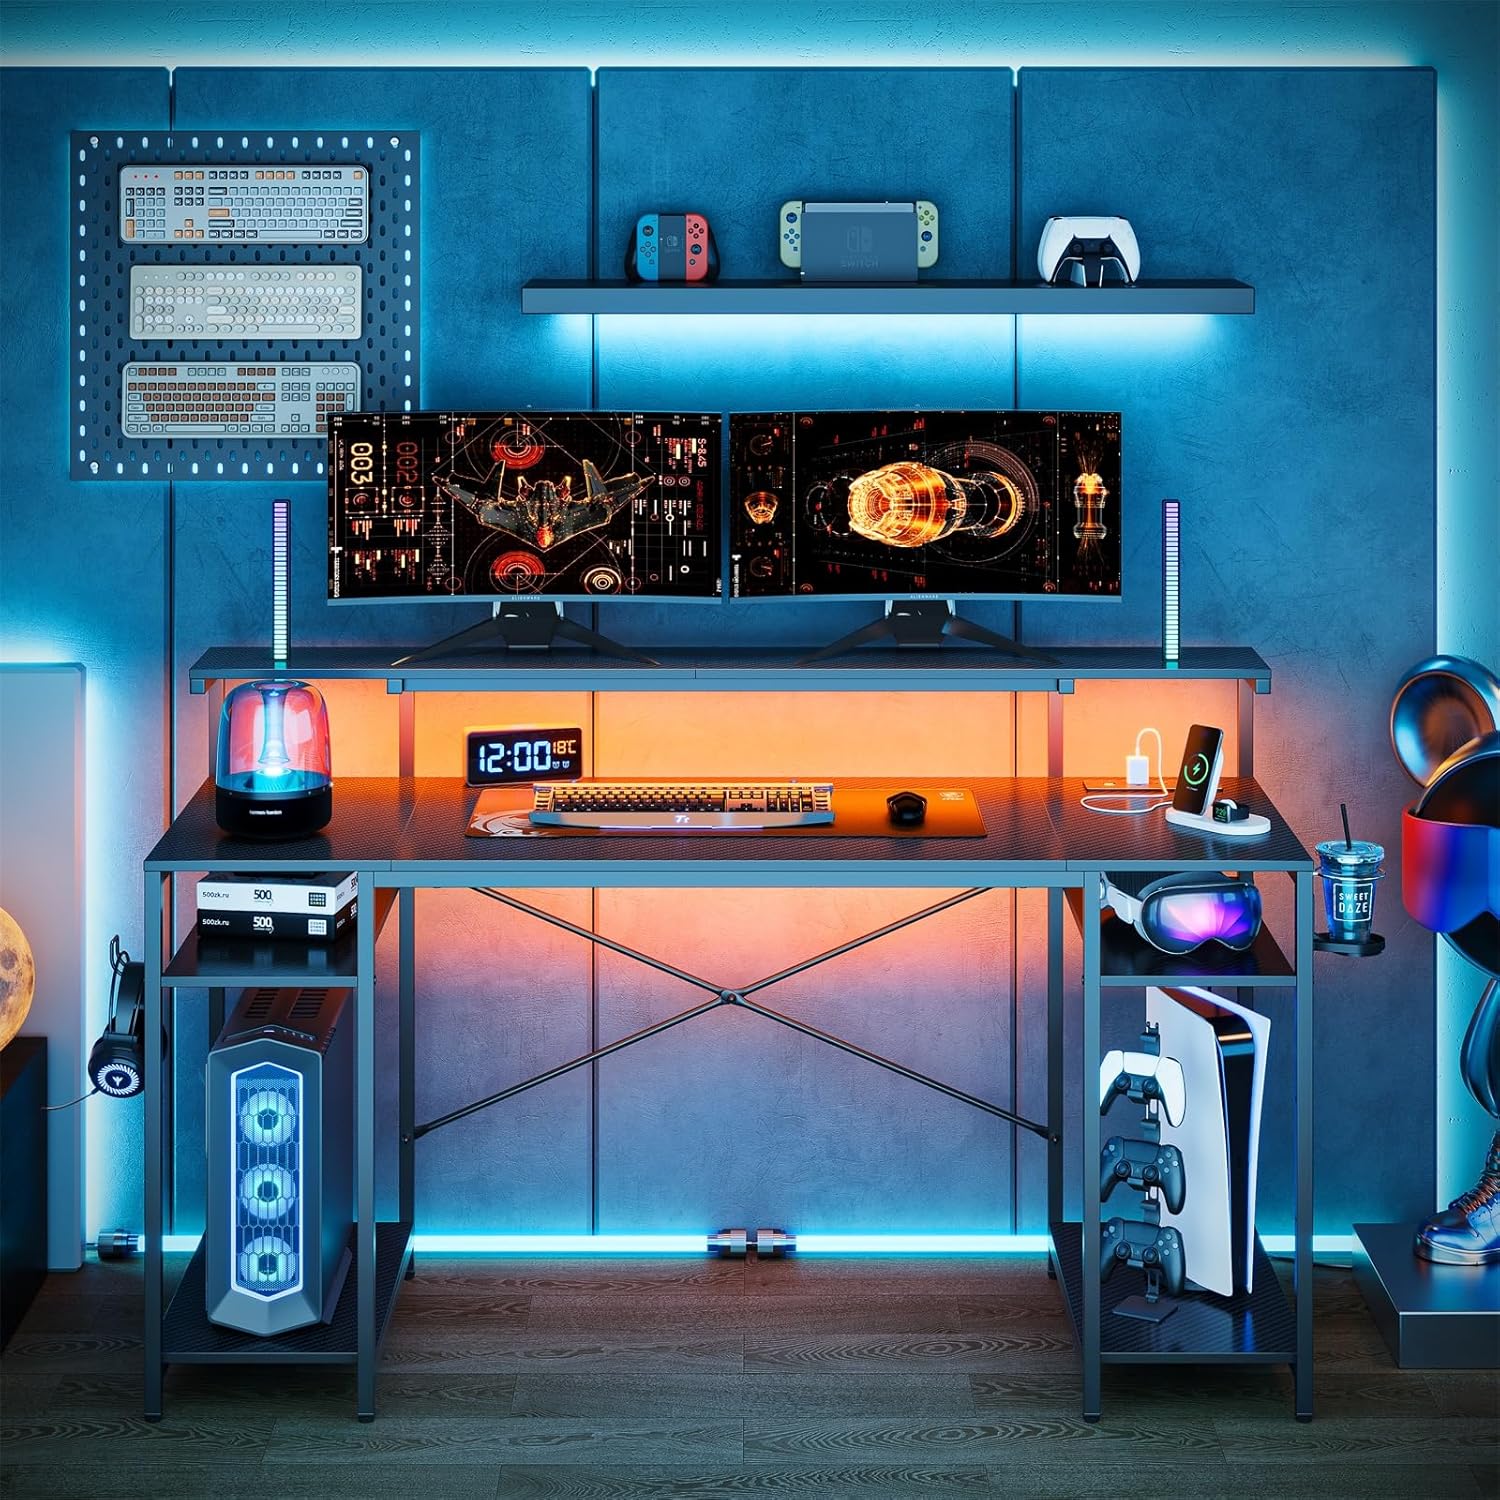
Figure 4.1: Initial frame assembly. - ഡെസ്ക് പാനലുകൾ ഘടിപ്പിക്കുക: Secure the main desk top panels to the assembled frame using the provided screws. Ensure alignment before tightening.
- മോണിറ്റർ സ്റ്റാൻഡ് ഇൻസ്റ്റാൾ ചെയ്യുക: Place the monitor stand panel on the designated supports on the main frame and secure it.
- Assemble Side Shelves:
- Attach the side frame supports for the shelves.
- Insert the adjustable shelf panels into the desired height slots.
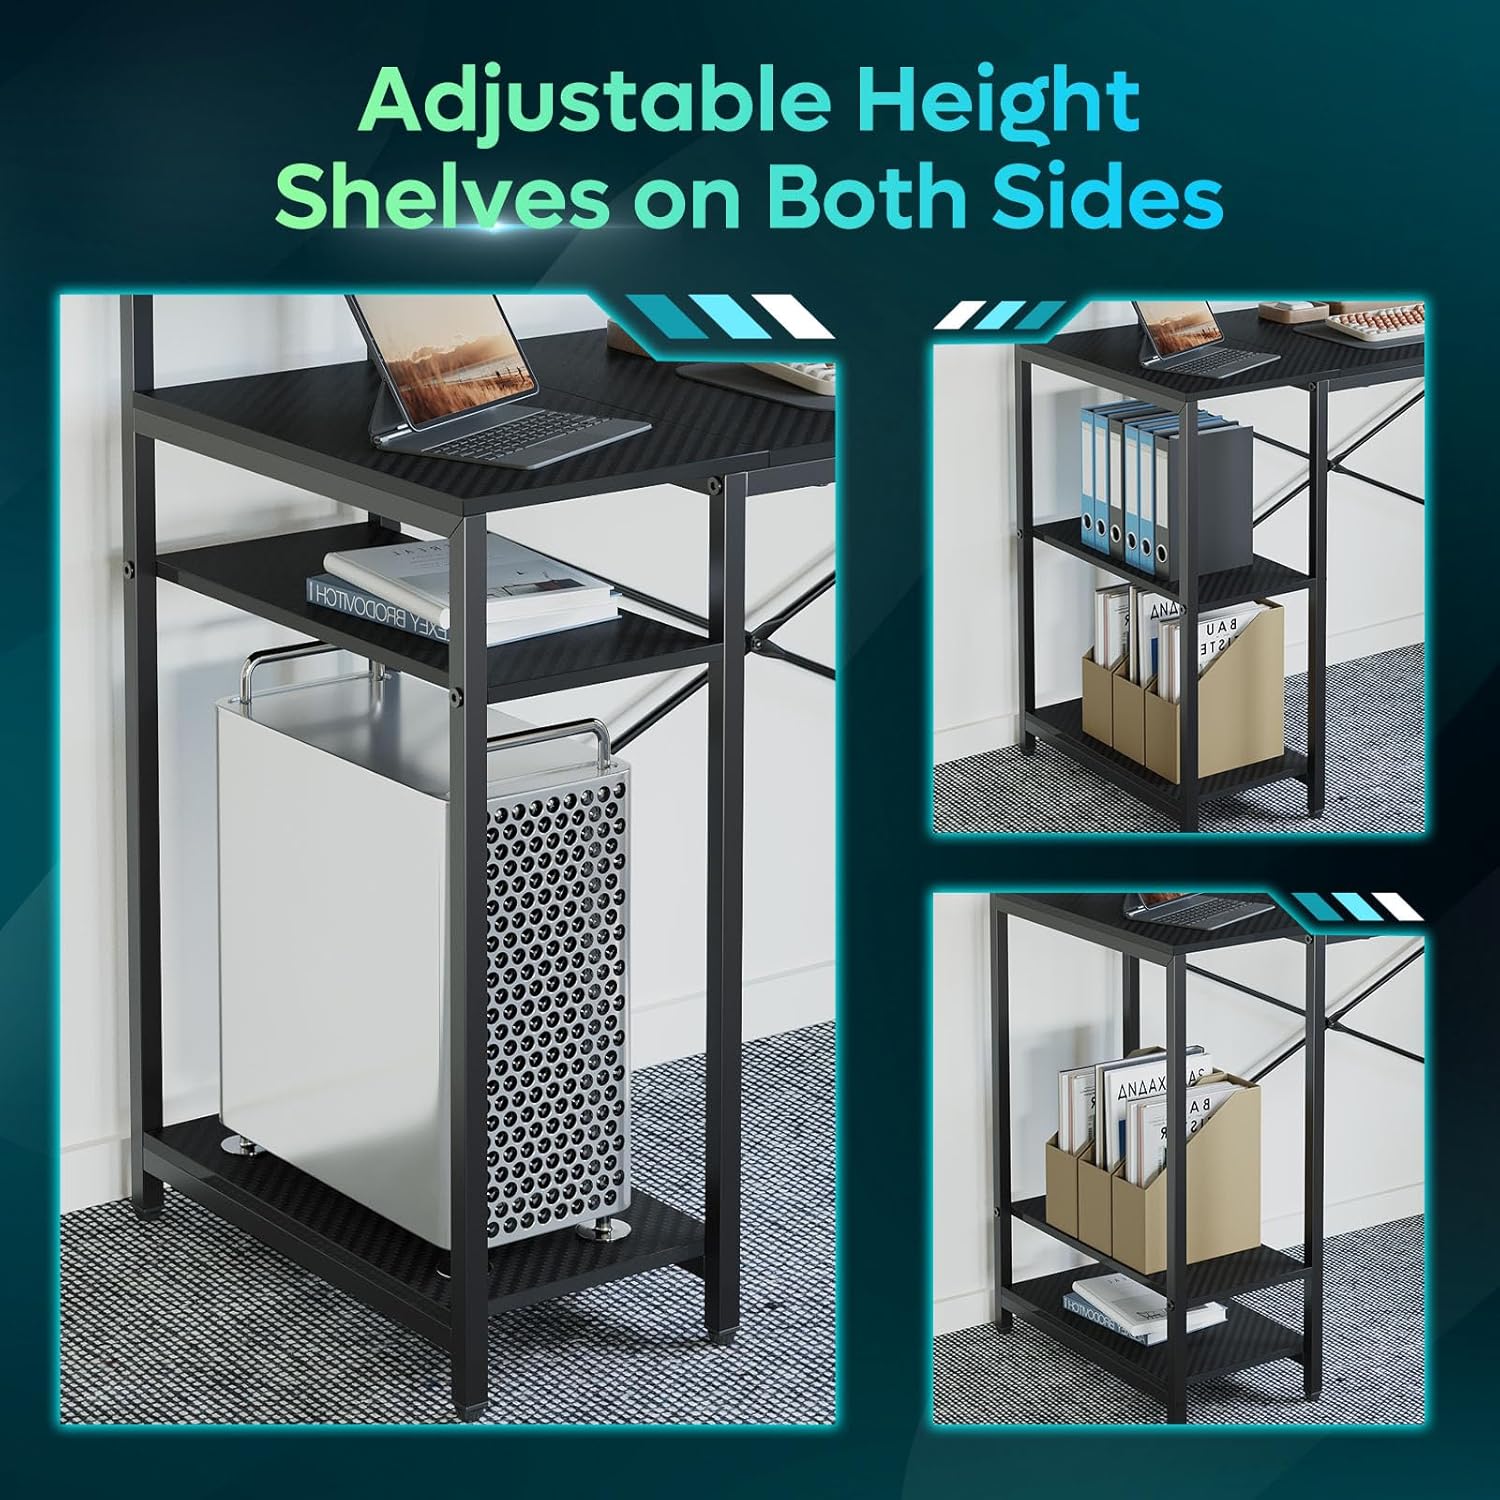
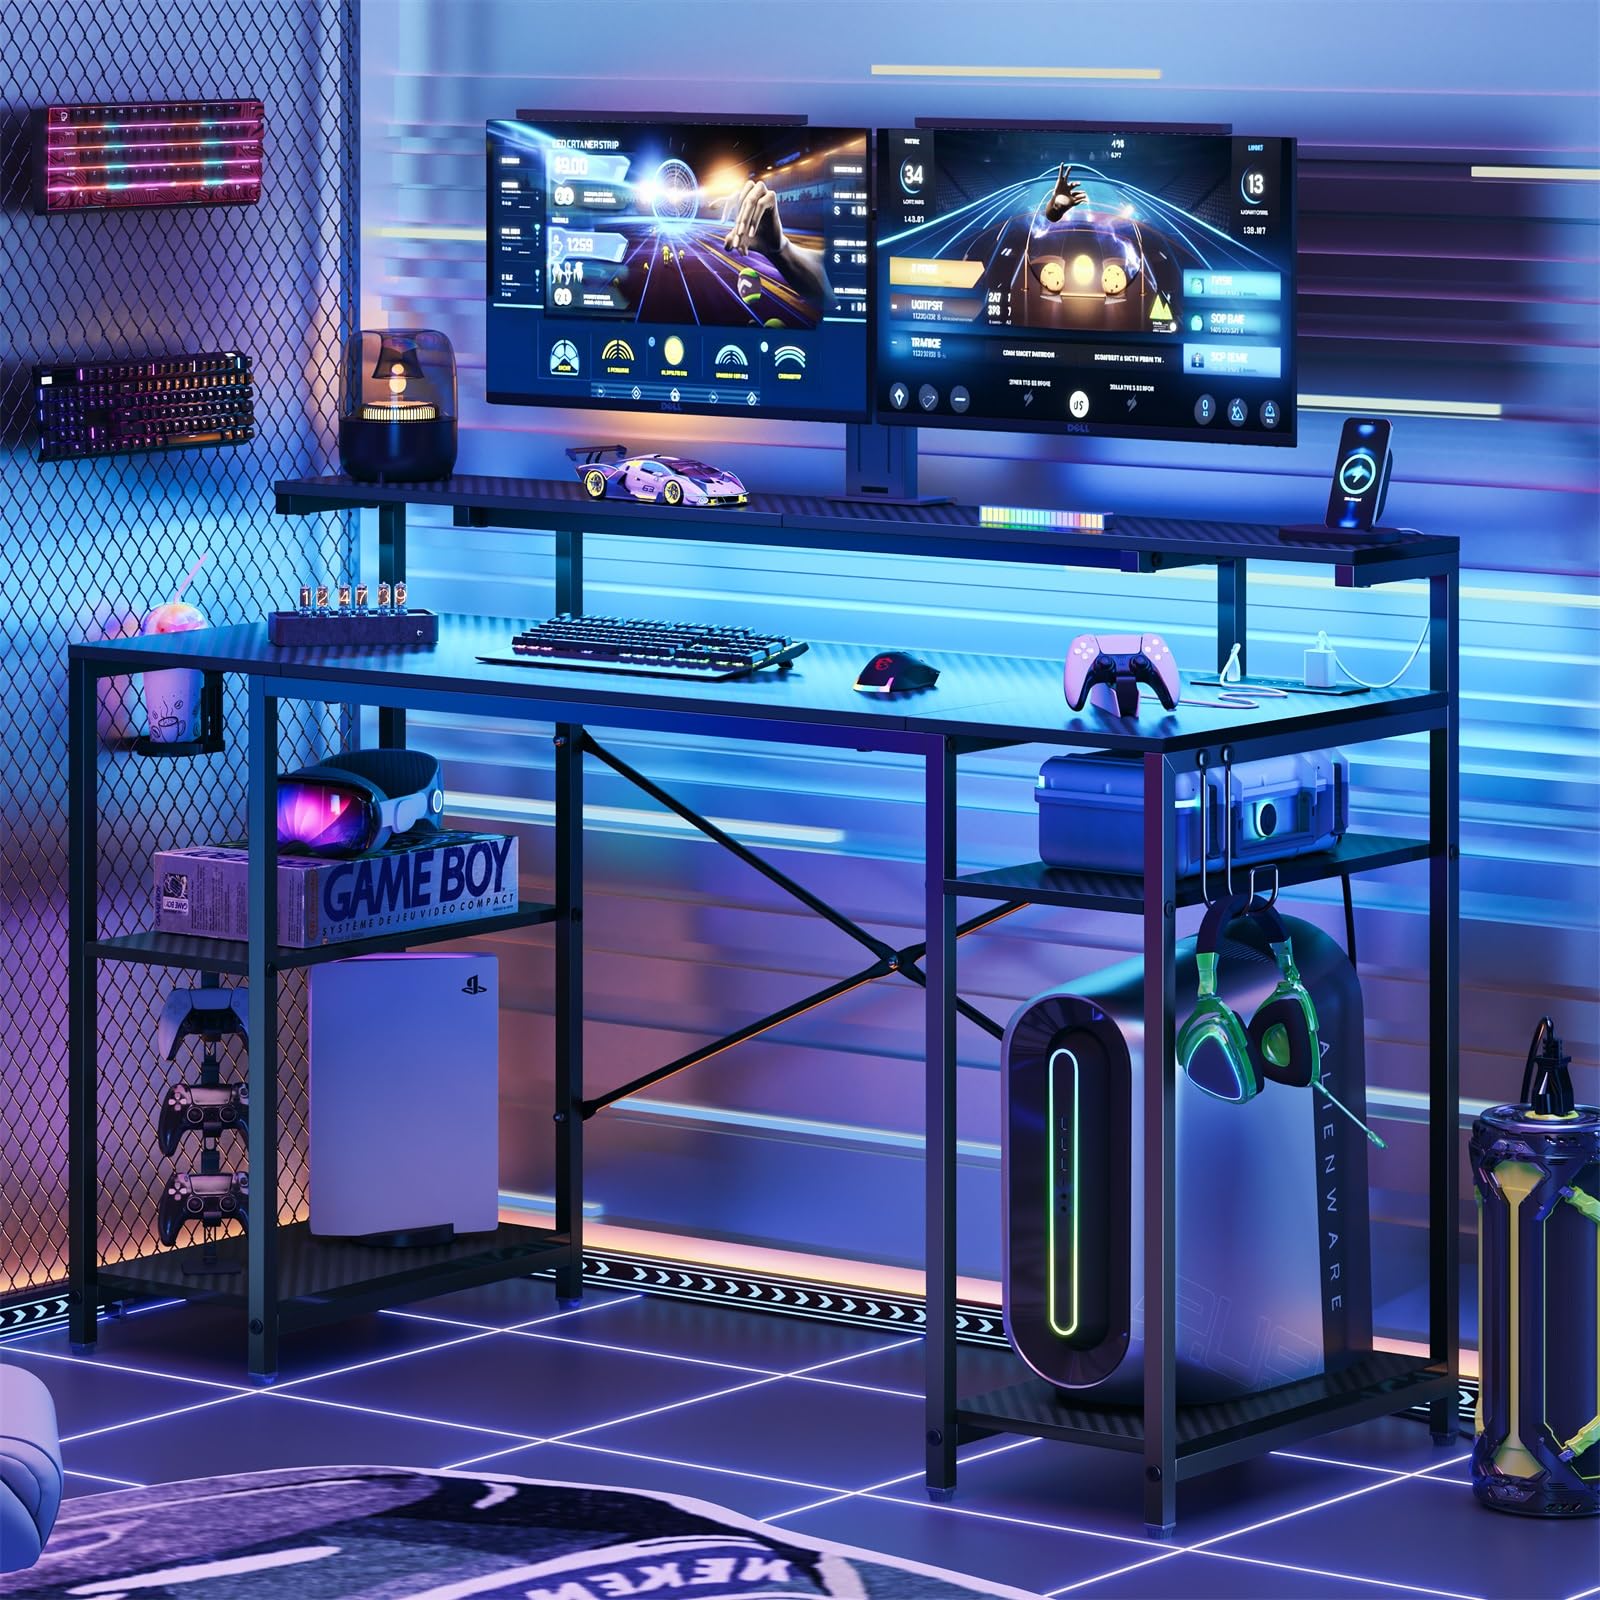
Figure 4.2: Attaching desk panels and side shelves. - Install Power Outlet Unit and LED Lights:
- Mount the power outlet unit to the underside of the desk in the designated area.
- Connect the LED light strip to the controller on the power outlet unit.
- ആക്സസറികൾ അറ്റാച്ചുചെയ്യുക: Secure the cup holder and headphone hook to the side of the desk as desired.
- പാദങ്ങൾ ക്രമീകരിക്കുക: Level the desk by adjusting the screw-in feet at the bottom of each leg.
- അന്തിമ മുറുക്കൽ: Once the desk is fully assembled and leveled, carefully tighten all screws and bolts.
5. പ്രവർത്തന നിർദ്ദേശങ്ങൾ
5.1 Power Outlets and USB Ports
The desk is equipped with a built-in power strip featuring 3 AC outlets and 2 USB charging ports (including one Type-C port). This allows for convenient charging of multiple devices directly from your desk.
- Plug the desk's main power cord into a grounded wall outlet.
- Connect your devices to the AC outlets or USB ports as needed.
- Ensure the total power draw of connected devices does not exceed the power strip's maximum rating.

5.2 എൽഇഡി ലൈറ്റിംഗ് സിസ്റ്റം
The desk features RGB LED lighting with 7 colors and 22 dynamic effects, controlled via a remote. The LED strip is typically pre-installed or easily attachable to the underside of the monitor stand or main desk.
- Ensure the LED light strip is securely connected to the controller on the power outlet unit.
- Use the provided remote control to power on/off the lights, change colors, adjust brightness, and select dynamic lighting modes.
- Refer to the remote control's specific button functions for detailed operation.
5.3 ക്രമീകരിക്കാവുന്ന ഷെൽഫുകൾ
The side shelves are height-adjustable, allowing you to customize storage space for various items like computer towers, books, or accessories.
- To adjust a shelf, remove any items from it.
- Carefully lift the shelf panel and reposition it into the desired slots on the side frame.
- Ensure the shelf is securely seated in all four support pins before placing items on it.

5.4 Cup Holder and Headphone Hook
The desk includes a foldable cup holder and a flexible headphone hook for convenience and organization.
- The cup holder can be folded away when not in use.
- The headphone hook can be used to hang headphones or other small accessories, keeping your workspace tidy.

6. പരിപാലനം
Regular maintenance helps prolong the life and appearance of your desk.
- വൃത്തിയാക്കൽ: മേശയുടെ പ്രതലങ്ങൾ മൃദുവായ, ഡി-ടച്ച് ഉപയോഗിച്ച് തുടയ്ക്കുക.amp cloth. Avoid harsh chemicals or abrasive cleaners that could damage the finish. For the carbon fiber texture, a gentle wipe is sufficient.
- പൊടിയിടൽ: Regularly dust all surfaces, including the monitor stand and shelves, to prevent buildup.
- ഫാസ്റ്റനർ പരിശോധന: ഇടയ്ക്കിടെ (ഉദാഹരണത്തിന്, ഓരോ 3-6 മാസത്തിലും) എല്ലാ സ്ക്രൂകളും ബോൾട്ടുകളും ഇറുകിയതാണെന്ന് ഉറപ്പാക്കാൻ പരിശോധിക്കുക. സ്ഥിരത നിലനിർത്താൻ ആവശ്യമെങ്കിൽ വീണ്ടും മുറുക്കുക.
- ഇലക്ട്രിക്കൽ ഘടകങ്ങൾ: Keep the power outlets and LED lights free from dust and moisture. Do not attempt to repair electrical components yourself.
- ചോർച്ച: In case of spills, wipe immediately with a dry cloth to prevent liquid from seeping into the material or affecting electrical components.
7. പ്രശ്നപരിഹാരം
If you encounter issues with your Bestier Gaming Desk, refer to the following common problems and solutions:
| പ്രശ്നം | സാധ്യമായ കാരണം | പരിഹാരം |
|---|---|---|
| മേശ ഇളകുകയോ അസ്ഥിരമാവുകയോ ചെയ്യുന്നു. |
|
|
| LED lights are not working or flickering. |
|
|
| Power outlets/USB ports are not providing power. |
|
|
| എത്തിച്ചേരുമ്പോൾ കാണാതായതോ കേടായതോ ആയ ഭാഗങ്ങൾ. |
|
|
8 സ്പെസിഫിക്കേഷനുകൾ
| ബ്രാൻഡ് | ബെസ്റ്റിയർ |
| മോഡൽ നമ്പർ | H105314ZUS |
| യു.പി.സി | 840408605472 |
| നിറം | Black (3D Carbon Fiber Texture) |
| ശൈലി | ഗെയിമിംഗ് ഡെസ്ക് |
| ആകൃതി | I ആകൃതിയിലുള്ള |
| മെറ്റീരിയൽ | P2 Particle Board (Desk Top), High-Strength Steel (Frame) |
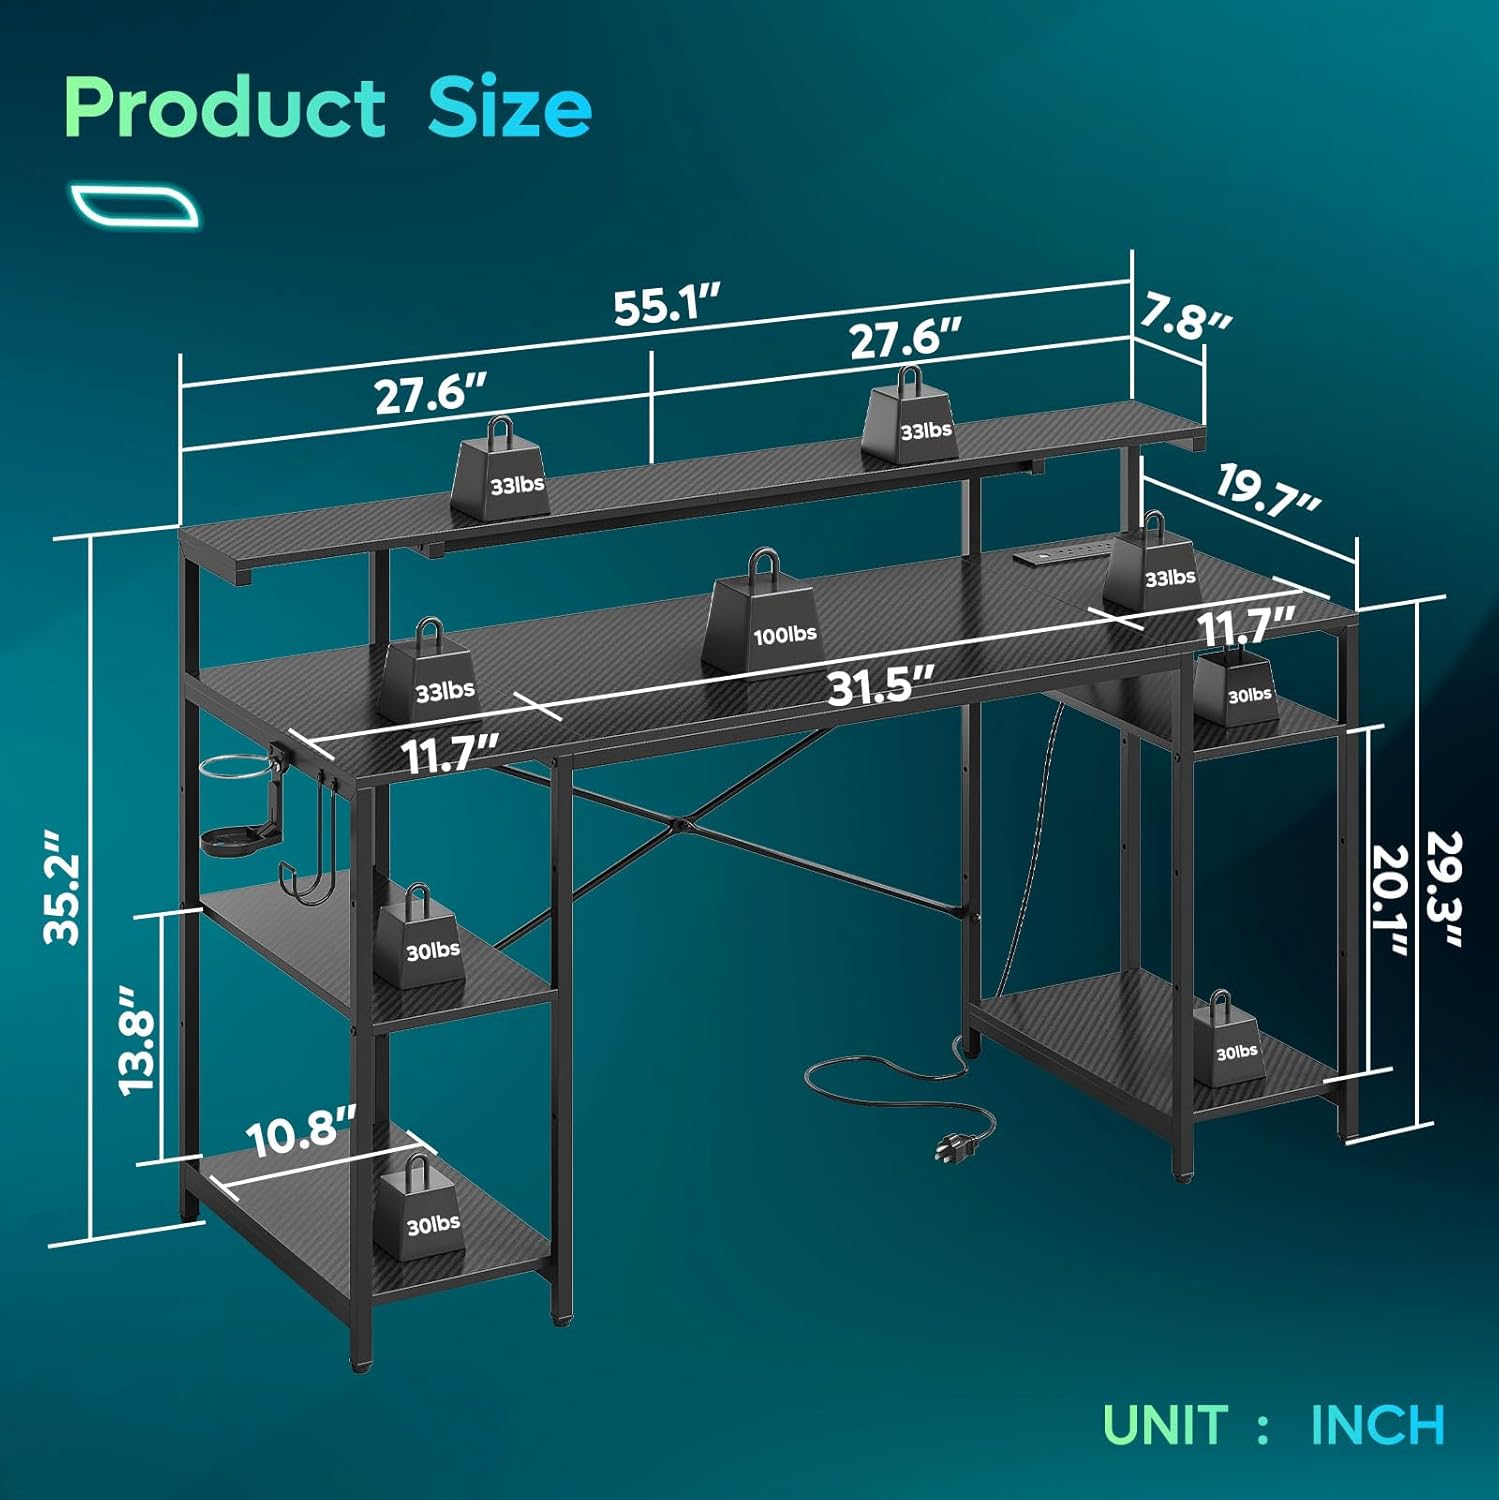
| മൊത്തത്തിലുള്ള അളവുകൾ (L x W x H) | ഏകദേശം. 55.1 x 20.5 x 35.2 ഇഞ്ച് (140 x 52.1 x 89.5 സെ.മീ) |
| ഇനത്തിൻ്റെ ഭാരം | ഏകദേശം 40.23 പൗണ്ട് (18.25 കി.ഗ്രാം) |
| ഭാരം ശേഷി | Total load capacity up to 355 lbs (161 kg) |
| പവർ lets ട്ട്ലെറ്റുകൾ | 3 AC Outlets, 2 USB Charging Ports (1x USB-A, 1x USB-C) |
| LED ലൈറ്റിംഗ് | RGB LED, 7 Colors, 22 Dynamic Modes, Remote Controlled |
| ഫീച്ചറുകൾ | Monitor Stand, Adjustable Side Shelves, Foldable Cup Holder, Headphone Hook, Adjustable Leveling Feet, X-shaped Crossbar for Stability |
| അസംബ്ലി ആവശ്യമാണ് | Yes (Recommended 1-2 persons) |
9. വാറൻ്റിയും പിന്തുണയും
Bestier provides customer support for product inquiries, missing parts, or warranty claims. Please retain your proof of purchase.
- For specific warranty details, please refer to the warranty card included in your package or visit the official Bestier webസൈറ്റ്.
- If you require assistance, please contact Bestier customer service with your model number (H105314ZUS) and purchase date.
Ask a question about this manual
Ask about setup, troubleshooting, compatibility, parts, safety, or missing instructions. Manuals+ will review the question and use this page’s manual context to help answer it.