
Andoer 0226b5d0-9fdc-46fa-87a1-023ef5ed8edc
Andoer 4K Digital Camera User Manual
Model: 0226b5d0-9fdc-46fa-87a1-023ef5ed8edc
ആമുഖം
This manual provides detailed instructions for the safe and effective use of your Andoer 4K Digital Camera. Please read this manual thoroughly before operating the camera and retain it for future reference. This camera is designed for capturing high-quality photos at 48MP and videos at 4K resolution, featuring a 2.8-inch screen, 16X digital zoom, auto-focus, anti-shake technology, and a built-in flash.
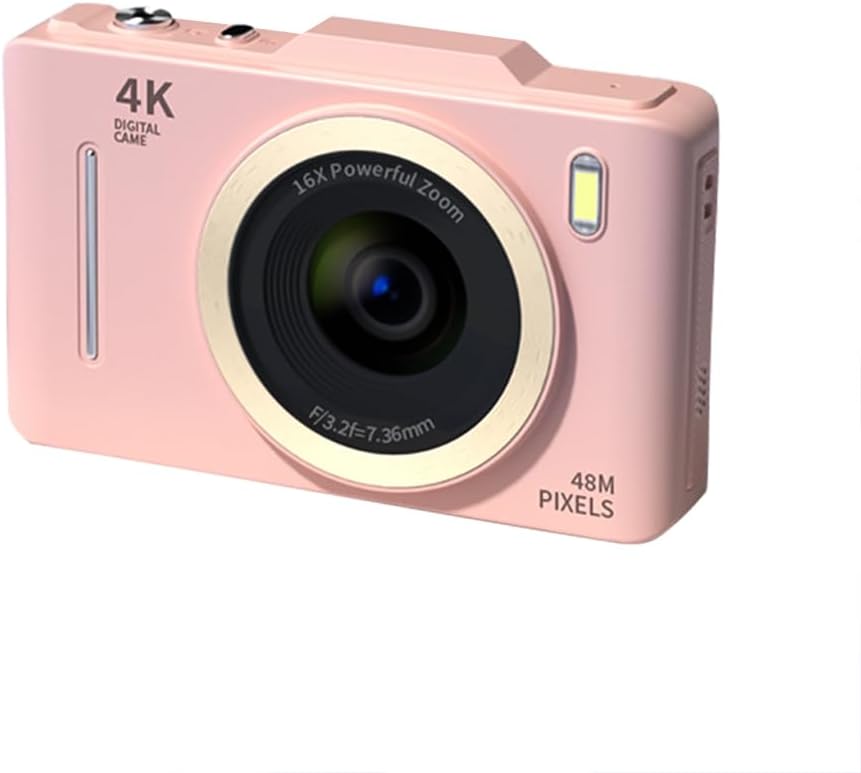
ചിത്രം: മുൻഭാഗം view of the Andoer 4K Digital Camera in pink, showcasing its lens, flash, and 4K Digital Camera branding.
പ്രധാനപ്പെട്ട സുരക്ഷാ വിവരങ്ങൾ
മുന്നറിയിപ്പ്:
- Not suitable for children. Please read the product instructions and applicable age range carefully before purchase and use.
- Do not expose the camera to water or excessive moisture.
- ക്യാമറ താഴെയിടുകയോ ശക്തമായ ആഘാതങ്ങൾക്ക് വിധേയമാക്കുകയോ ചെയ്യരുത്.
- Use only specified batteries and charging methods.
- ക്യാമറ ഡിസ്അസംബ്ലിംഗ് ചെയ്യാനോ പരിഷ്കരിക്കാനോ ശ്രമിക്കരുത്.

Image: A warning label indicating that the product is not suitable for children, with the warning translated into multiple languages.
പാക്കേജ് ഉള്ളടക്കം
പാക്കേജിൽ എല്ലാ ഇനങ്ങളും ഉണ്ടോ എന്ന് ദയവായി പരിശോധിക്കുക:
- Andoer 4K Digital Camera
- USB കേബിൾ
- റീചാർജ് ചെയ്യാവുന്ന ലിഥിയം ബാറ്ററി
- ഉപയോക്തൃ മാനുവൽ
- റിസ്റ്റ് സ്ട്രാപ്പ് (പാക്കേജിനെ ആശ്രയിച്ച് വ്യത്യാസപ്പെടാം)
ഉൽപ്പന്നം കഴിഞ്ഞുview
ക്യാമറയുടെ ഘടകങ്ങളുമായി പരിചയപ്പെടുക:
- ലെൻസ്: ചിത്രങ്ങൾ പകർത്തുന്നതിനുള്ള പ്രധാന ഒപ്റ്റിക്കൽ ഘടകം.
- ഫ്ലാഷ്: Provides additional light in low-light conditions.
- 2.8-ഇഞ്ച് LCD സ്ക്രീൻ: വേണ്ടി viewing live feed, reviewing photos/videos, and navigating menus.
- നിയന്ത്രണ ബട്ടണുകൾ: Power, Shutter, Zoom (W/T), Menu, OK, Display, Delete.
- USB പോർട്ട്: ചാർജിംഗിനും ഡാറ്റ കൈമാറ്റത്തിനും.
- ബാറ്ററി കമ്പാർട്ട്മെൻ്റ്: റീചാർജ് ചെയ്യാവുന്ന ബാറ്ററിയാണ് ഇവിടെ സ്ഥാപിച്ചിരിക്കുന്നത്.
- മെമ്മറി കാർഡ് സ്ലോട്ട്: ഒരു SD കാർഡ് ചേർക്കുന്നതിന് (ഉൾപ്പെടുത്തിയിട്ടില്ല).

ചിത്രം: പിൻഭാഗം view of the camera highlighting the 2.8-inch display screen and various control buttons for navigation and operation.
സജ്ജമാക്കുക
1. ബാറ്ററി ഇൻസ്റ്റാളേഷനും ചാർജിംഗും
- ക്യാമറയുടെ അടിയിൽ സ്ഥിതിചെയ്യുന്ന ബാറ്ററി കമ്പാർട്ട്മെന്റ് കവർ തുറക്കുക.
- Insert the provided lithium battery, ensuring the correct polarity.
- ബാറ്ററി കമ്പാർട്ട്മെൻ്റ് കവർ സുരക്ഷിതമായി അടയ്ക്കുക.
- Connect the camera to a power source using the USB cable for charging. The charging indicator light will illuminate.
- ഇൻഡിക്കേറ്റർ ലൈറ്റ് ഓഫാകുമ്പോൾ ചാർജിംഗ് പൂർത്തിയാകും.
2. മെമ്മറി കാർഡ് ഇൻസ്റ്റാളേഷൻ
ഫോട്ടോകളും വീഡിയോകളും സൂക്ഷിക്കാൻ ഒരു മെമ്മറി കാർഡ് (SD കാർഡ്, ഉൾപ്പെടുത്തിയിട്ടില്ല) ആവശ്യമാണ്.
- മെമ്മറി കാർഡ് സ്ലോട്ട് കണ്ടെത്തുക, സാധാരണയായി ബാറ്ററി കമ്പാർട്ടുമെന്റിന് സമീപം.
- ക്യാമറയുടെ മുൻവശത്തേക്ക് അഭിമുഖമായി മെറ്റൽ കോൺടാക്റ്റുകൾ വരുന്ന വിധത്തിൽ, അത് ശരിയായ സ്ഥാനത്ത് ക്ലിക്കുചെയ്യുന്നതുവരെ SD കാർഡ് ഇടുക.
- കാർഡ് നീക്കം ചെയ്യാൻ, അത് പുറത്തേക്ക് വരുന്നത് വരെ സൌമ്യമായി അമർത്തുക.
പ്രവർത്തന നിർദ്ദേശങ്ങൾ
പവർ ഓൺ/ഓഫ്
- അമർത്തിപ്പിടിക്കുക ശക്തി ക്യാമറ ഓണാക്കാനോ ഓഫാക്കാനോ ഉള്ള ബട്ടൺ.
ഫോട്ടോകൾ എടുക്കുന്നു
- ക്യാമറ ഓണാക്കുക.
- 2.8 ഇഞ്ച് എൽസിഡി സ്ക്രീൻ ഉപയോഗിച്ച് നിങ്ങളുടെ ഷോട്ട് ഫ്രെയിം ചെയ്യുക.
- അമർത്തുക ഷട്ടർ button halfway down to activate auto-focus (AF).
- Once focused, press the ഷട്ടർ button fully to capture the photo.
വീഡിയോകൾ റെക്കോർഡുചെയ്യുന്നു
- ക്യാമറ ഓണാക്കുക.
- Switch to video mode (refer to the on-screen icons or menu for mode selection).
- അമർത്തുക ഷട്ടർ റെക്കോർഡിംഗ് ആരംഭിക്കുന്നതിനുള്ള ബട്ടൺ.
- അമർത്തുക ഷട്ടർ റെക്കോർഡിംഗ് നിർത്താൻ വീണ്ടും ബട്ടൺ.
സൂം പ്രവർത്തനം
- ഉപയോഗിക്കുക W (വിശാലം) കൂടാതെ T (Telephoto) buttons to adjust the 16X digital zoom.

Image: A visual comparison demonstrating the effect of 1x digital zoom versus 16x digital zoom, showing how the camera can magnify distant subjects.
ഫ്ലാഷ് ഉപയോഗിക്കുന്നു
- The built-in flash can be activated in low-light conditions. Access flash settings via the menu to select modes like Auto Flash, Fill-in Flash, or Flash Off.

Image: Illustrates the effect of the built-in flash, showing a scene with and without flash to demonstrate improved lighting in dark environments.
Anti-Shake Feature
- The camera features digital anti-shake technology to reduce blur caused by camera movement. This feature is typically active by default or can be enabled in the settings menu.

Image: Demonstrates the effectiveness of the anti-shake feature by comparing a clear image taken with anti-shake mode to a blurry image without it, both showing people in motion.
ബ്യൂട്ടി ഫിൽട്ടറുകൾ
- Access the menu to apply various beauty filters (e.g., Original, Cool colors, Retro, Black and white) to your photos for creative effects.

Image: Displays different beauty filter options available on the camera, including Original, Cool colors, Retro, and Black and white, applied to a portrait.
മോഷൻ ഡിറ്റക്ഷൻ വീഡിയോ
- Enable motion detection in the video settings. The camera will automatically start recording when movement is detected within the frame.

Image: Illustrates the motion detection feature, showing a dog in motion with a white square indicating the detection area.
പ്ലേബാക്കും റീയുംview
- അമർത്തുക പ്ലേബാക്ക് button (often labeled with a play icon) to view ഫോട്ടോകളും വീഡിയോകളും പിടിച്ചെടുത്തു.
- നിങ്ങളുടെ മീഡിയയിലൂടെ സ്ക്രോൾ ചെയ്യാൻ നാവിഗേഷൻ ബട്ടണുകൾ ഉപയോഗിക്കുക.
- അമർത്തുക ഇല്ലാതാക്കുക button to remove unwanted files.
ഒരു കമ്പ്യൂട്ടറിലേക്ക് ബന്ധിപ്പിക്കുന്നു
- നൽകിയിരിക്കുന്ന USB കേബിൾ ഉപയോഗിച്ച് നിങ്ങളുടെ കമ്പ്യൂട്ടറിലേക്ക് ക്യാമറ ബന്ധിപ്പിക്കുക.
- The camera will appear as a removable disk drive, allowing you to transfer files.
മെയിൻ്റനൻസ്
- ലെൻസ് വൃത്തിയാക്കൽ: ക്യാമറ ലെൻസുകൾക്കായി പ്രത്യേകം രൂപകൽപ്പന ചെയ്ത മൃദുവായ, ലിന്റ് രഹിത തുണി ഉപയോഗിക്കുക. ഉരച്ചിലുകളുള്ള വസ്തുക്കളോ കഠിനമായ രാസവസ്തുക്കളോ ഉപയോഗിക്കരുത്.
- സ്ക്രീൻ വൃത്തിയാക്കൽ: Wipe the LCD screen gently with a soft, dry cloth.
- സംഭരണം: When not in use for extended periods, remove the battery and store the camera in a cool, dry place away from direct sunlight.
- ബാറ്ററി കെയർ: Fully charge the battery before first use. Avoid completely draining the battery frequently to prolong its lifespan.
ട്രബിൾഷൂട്ടിംഗ്
| പ്രശ്നം | സാധ്യമായ പരിഹാരം |
|---|---|
| ക്യാമറ ഓണാകുന്നില്ല. | ബാറ്ററി ശരിയായി ഇൻസ്റ്റാൾ ചെയ്തിട്ടുണ്ടെന്നും പൂർണ്ണമായും ചാർജ്ജ് ചെയ്തിട്ടുണ്ടെന്നും ഉറപ്പാക്കുക. |
| ഫോട്ടോകൾ എടുക്കാനോ വീഡിയോകൾ റെക്കോർഡ് ചെയ്യാനോ കഴിയില്ല. | Check if a memory card is inserted and has sufficient free space. Ensure the camera is in the correct mode (photo/video). |
| ചിത്രങ്ങൾ അവ്യക്തമാണ്. | Ensure the lens is clean. Check lighting conditions. Enable anti-shake feature. Hold the camera steady. |
| Flash is not working. | Check flash settings in the menu; ensure it's not set to 'Flash Off'. |
| കമ്പ്യൂട്ടർ ക്യാമറ തിരിച്ചറിഞ്ഞില്ല. | Ensure the USB cable is securely connected. Try a different USB port or cable. Restart both camera and computer. |
സ്പെസിഫിക്കേഷനുകൾ
| ഫീച്ചർ | വിശദാംശങ്ങൾ |
|---|---|
| ബ്രാൻഡ് | അൻഡോയർ |
| മോഡൽ നമ്പർ | 0226b5d0-9fdc-46fa-87a1-023ef5ed8edc |
| ഫലപ്രദമായ സ്റ്റിൽ റെസല്യൂഷൻ | 48 എം.പി |
| വീഡിയോ റെസല്യൂഷൻ | 4K (2160p) |
| സ്ക്രീൻ വലിപ്പം | 2.8 ഇഞ്ച് |
| ഡിജിറ്റൽ സൂം | 16X |
| ഓട്ടോ ഫോക്കസ് | Yes (Contrast Detection) |
| ഇമേജ് സ്റ്റെബിലൈസേഷൻ | ഡിജിറ്റൽ ആന്റി-ഷേക്ക് |
| ബിൽറ്റ്-ഇൻ ഫ്ലാഷ് | അതെ |
| ബാറ്ററി തരം | ലിഥിയം അയോൺ |
| ഫോട്ടോ ഫോർമാറ്റ് | JPEG |
| വീഡിയോ ഫോർമാറ്റ് | MP4 |
| ബാഹ്യ ഇൻ്റർഫേസ് | USB |
| സെൻസർ തരം | CMOS |
| നിറം | Pink (variant) |
| ജല പ്രതിരോധ നില | വാട്ടർ റെസിസ്റ്റൻ്റ് അല്ല |
വാറൻ്റിയും പിന്തുണയും
For warranty information and technical support, please refer to the documentation included with your purchase or visit the official Andoer webസൈറ്റ്. വാറന്റി ക്ലെയിമുകൾക്കായി നിങ്ങളുടെ വാങ്ങലിന്റെ തെളിവ് സൂക്ഷിക്കുക.
Andoer Official Store: Visit Andoer Store on Amazon
Ask a question about this manual
Ask about setup, troubleshooting, compatibility, parts, safety, or missing instructions. Manuals+ will review the question and use this page’s manual context to help answer it.