1. ആമുഖം
The SanJie DS17 Wireless Door Sensor Chime system is designed to provide an audible alert when a door or window is opened. This system is versatile, serving as a reminder for monitoring children or the elderly, and as an entry alert for businesses. It features a long wireless range, multiple chime options, and adjustable volume levels.

Image: Illustrates the use of the door chime to monitor children or elderly individuals, providing an alert when a door is opened.

Image: Shows the door chime being used in business, office, and patient medical supervision settings to alert staff of entries.
2. പാക്കേജ് ഉള്ളടക്കം
പാക്കേജിൽ ഇനിപ്പറയുന്ന ഇനങ്ങൾ ഉണ്ടോ എന്ന് പരിശോധിക്കുക:
- 2 x Receiver Units
- 3 x Door Sensor Units (each with pre-installed 12V battery)
- മൗണ്ടിംഗ് സ്ക്രൂകൾ
- ഇരട്ട-വശങ്ങളുള്ള പശ ടേപ്പ്
- നിർദ്ദേശ മാനുവൽ (ഈ പ്രമാണം)
3. ഉൽപ്പന്നം കഴിഞ്ഞുview
റിസീവർ യൂണിറ്റ്
The receiver unit plugs into a standard AC outlet and produces the chime sound. It features controls for volume and chime selection.

ചിത്രം: വിശദമായത് view of the receiver and sensor components, highlighting the LED light, US 2-pins plug, high-quality speaker, volume buttons, and forward/back buttons on the receiver, and the LED light on the sensor.
- LED ലൈറ്റ്: Indicates power and chime activation.
- US 2-Pins Plug: ഒരു എസി പവർ ഔട്ട്ലെറ്റിലേക്ക് കണക്റ്റുചെയ്യുന്നതിന്.
- High Quality Speaker: Emits the selected chime sound.
- വോളിയം +/- ബട്ടണുകൾ: Adjusts the chime volume (5 levels, including mute).
- ഫോർവേഡ്/ബാക്ക് ബട്ടണുകൾ: Selects from 55 available chime melodies.
സെൻസർ യൂണിറ്റ്
The sensor unit consists of two parts: a main sensor and a magnetic strip. When these two parts separate (e.g., a door opens), the sensor sends a signal to the receiver.
- Main Sensor Unit: Contains the transmitter and battery.
- Magnetic Strip: Triggers the sensor when separated from the main unit.
- LED ലൈറ്റ്: Indicates sensor activation.
4. സജ്ജീകരണവും ഇൻസ്റ്റാളേഷനും
The sensor and receiver units are pre-paired at the factory for convenience. Follow these steps for installation:
- Step 1: Power the Receiver
Plug the receiver unit into a standard AC power outlet. Ensure it is within the effective wireless range of your sensor units (up to 500 feet / 150 meters in open areas).

Image: Visual guide showing Step 1: Plugging the receiver into a socket, and Step 2: Attaching the magnetic sensor to a door or window using double-sided tape or screws.
- Step 2: Mount the Sensor Unit
Choose a door or window where you want to detect opening. Attach the main sensor unit to the door/window frame and the magnetic strip to the moving part of the door/window. Ensure the two parts are aligned and close to each other (within 1 cm) when the door/window is closed.
You can use either the provided double-sided adhesive tape or screws for mounting. For optimal performance, ensure the sensor is securely attached.
Pairing Additional Sensors or Changing Chimes
While units are pre-paired, you can pair additional sensors or assign different chimes to individual sensors:
- To Change Chime for a Sensor:
- റിസീവർ പ്ലഗ് ഇൻ ചെയ്യുക.
- Press the "Forward" or "Back" button on the receiver to select your desired chime melody.
- Once the desired chime is playing, immediately open the door/window where the sensor is installed. The sensor will trigger, and the receiver will play the selected chime, indicating successful pairing of that chime to the sensor.
- To Pair a New Sensor:
If you have an un-paired sensor, follow the same steps as "To Change Chime for a Sensor". The new sensor will be paired with the currently selected chime.
Note: You can pair an unlimited number of magnetic sensors to a single receiver, and assign different ringtones to each sensor to identify which door is triggered.
5. പ്രവർത്തന നിർദ്ദേശങ്ങൾ
വോളിയം ക്രമീകരിക്കുന്നു
അമർത്തുക വോളിയം +/- buttons on the receiver to cycle through 5 adjustable volume levels, ranging from mute to 110 dB. The LED indicator will flash with each adjustment.

Image: Illustration showing different decibel levels (45dB, 65dB, 85dB, 110dB) and their corresponding volume slider positions on the receiver, indicating the range of audible alerts.
Selecting Chime Melody
അമർത്തുക മുന്നോട്ട് or തിരികെ buttons on the receiver to cycle through the 55 available chime melodies. The receiver will play a preview of each melody as you select it.
മെമ്മറി ഫംഗ്ഷൻ
The receiver unit is equipped with a memory function. It will retain your last selected chime melody and volume setting even after being unplugged and re-plugged into a power outlet.
6. പരിപാലനം
Battery Replacement (Sensor Unit)
Each sensor unit is powered by a 12V battery. When the sensor's LED indicator no longer flashes upon activation, or if the range decreases significantly, it may be time to replace the battery.
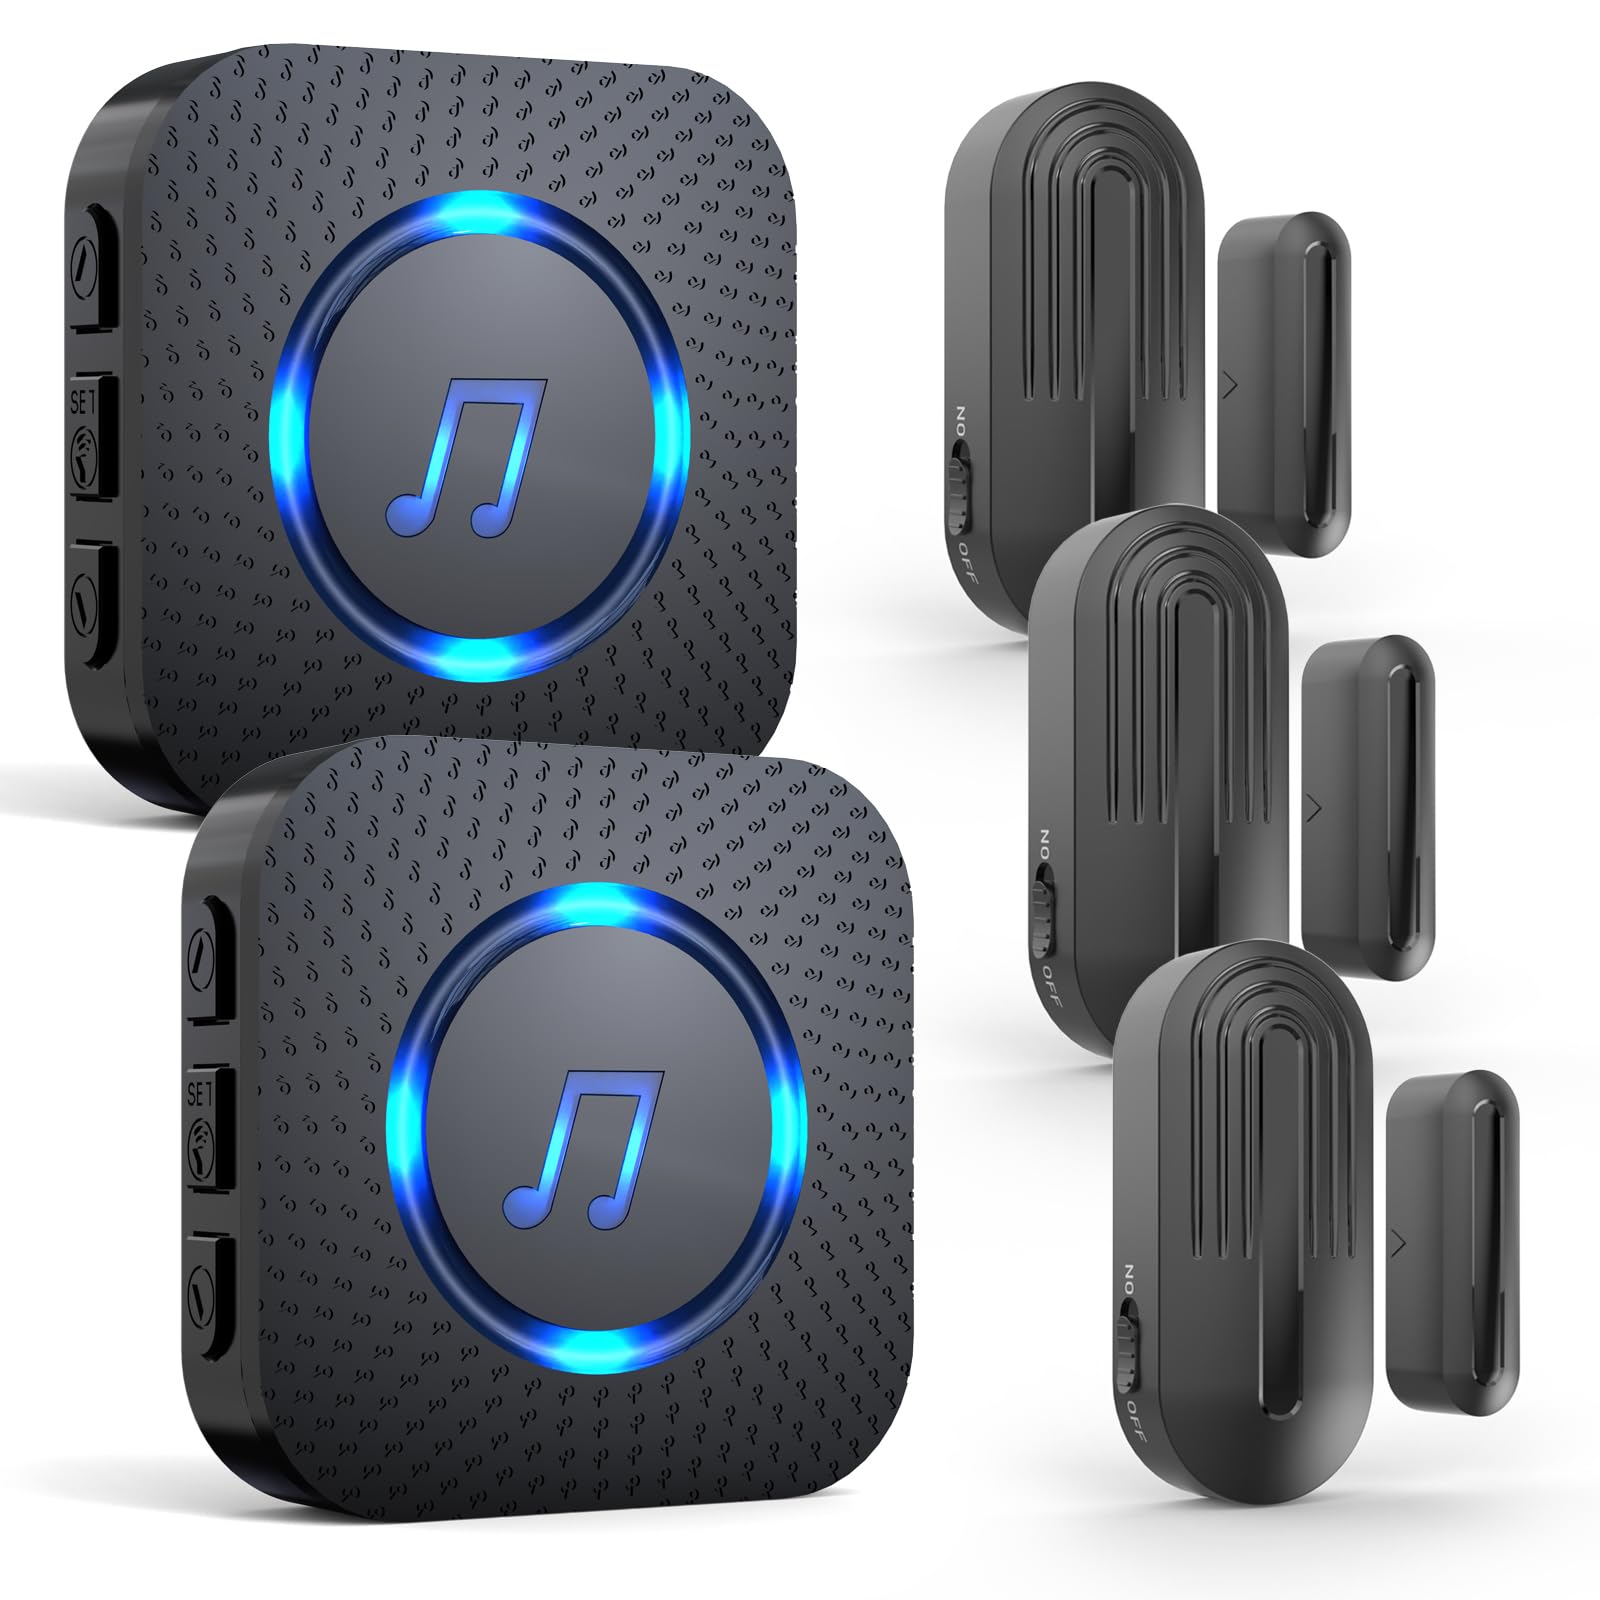
Image: Diagram illustrating the internal components of the sensor, including the 12V battery, and highlighting the product's upgraded battery life of up to 100,000 uses, estimated for 3-5 years of typical use.
- Carefully open the sensor unit casing.
- പഴയ 12V ബാറ്ററി നീക്കം ചെയ്യുക.
- Insert a new 12V battery, ensuring correct polarity.
- Close the sensor unit casinഗ്രാം സുരക്ഷിതമായി.
The sensor batteries are designed for long life, typically lasting 3-5 years or up to 100,000 uses.
വൃത്തിയാക്കൽ
Wipe the receiver and sensor units with a soft, dry cloth. Do not use abrasive cleaners or immerse the units in water.
7. പ്രശ്നപരിഹാരം
- മണിനാദമില്ല:
- Ensure the receiver is properly plugged into a live AC outlet.
- Check the volume setting; it might be set to mute. Press the Volume +/- buttons to increase the volume.
- Verify the sensor battery. Replace if necessary.
- Ensure the sensor and receiver are within range and not obstructed by thick walls or metal objects.
- Sensor Not Triggering Chime:
- Confirm the sensor and magnetic strip are aligned correctly and are close enough (within 1 cm) when the door/window is closed.
- Check the sensor battery. Replace if necessary.
- Re-pair the sensor with the receiver as described in the "Setup and Installation" section.
- Reduced Wireless Range:
- The maximum range of 500 feet (150 meters) is for open areas. Obstacles like walls, metal structures, and other wireless devices can reduce the effective range.
- Relocate the receiver or sensor to minimize obstructions.
- Check sensor battery. A low battery can affect range.

Image: Diagram illustrating the effective wireless range of 500 feet (150 meters) between sensors and receiver, and how different chimes can be set for multiple sensors to identify specific entry points. It also notes that indoor distance may be reduced.
- Chime Not Retaining Settings:
- Ensure the receiver is not being subjected to frequent power interruptions or surges.
- If the issue persists, try resetting the receiver by unplugging it for a few minutes and then re-plugging it.
8 സ്പെസിഫിക്കേഷനുകൾ
| ഫീച്ചർ | സ്പെസിഫിക്കേഷൻ |
|---|---|
| ബ്രാൻഡ് | സാൻജി |
| മോഡൽ നമ്പർ | DS17 |
| റിസീവർ പവർ ഉറവിടം | എസി (120 വോൾട്ട്) |
| സെൻസർ പവർ സോഴ്സ് | 12V ബാറ്ററി (ഉൾപ്പെട്ടിരിക്കുന്നു) |
| ബാറ്ററികളുടെ എണ്ണം | 3 x 12V batteries (for sensors, included) |
| കേൾക്കാവുന്ന ശബ്ദം | Up to 110 Decibels |
| പരമാവധി വയർലെസ് റേഞ്ച് | 500 Feet (150 meters) in open areas |
| മണിനാദങ്ങളുടെ എണ്ണം | 55 |
| വോളിയം ലെവലുകൾ | 5 (including mute) |
| വാട്ട്tage | 1 വാട്ട് |
| മൗണ്ടിംഗ് തരം | Adhesive tape, Screws |
9. വാറൻ്റി വിവരങ്ങൾ
The SanJie DS17 Wireless Door Sensor Chime comes with a ആജീവനാന്ത വാറൻ്റി from the manufacturer. Please retain your proof of purchase for warranty claims. For details regarding the warranty policy, please contact SanJie customer support.
10. ഉപഭോക്തൃ പിന്തുണ
If you encounter any issues or have questions regarding your SanJie DS17 Wireless Door Sensor Chime, please contact SanJie customer support through the retailer's platform or the official SanJie website. Please have your model number (DS17) and purchase information ready when contacting support.