
ARCCAPTAIN LY800F
ARCCAPTAIN LY800F Auto Darkening Welding Helmet Instruction Manual
Comprehensive guide for the ARCCAPTAIN LY800F True Color Auto Darkening Welding Helmet.
1. ആമുഖം
This manual provides essential information for the safe and effective use of your ARCCAPTAIN LY800F True Color Auto Darkening Welding Helmet. Please read these instructions carefully before operation and retain for future reference.
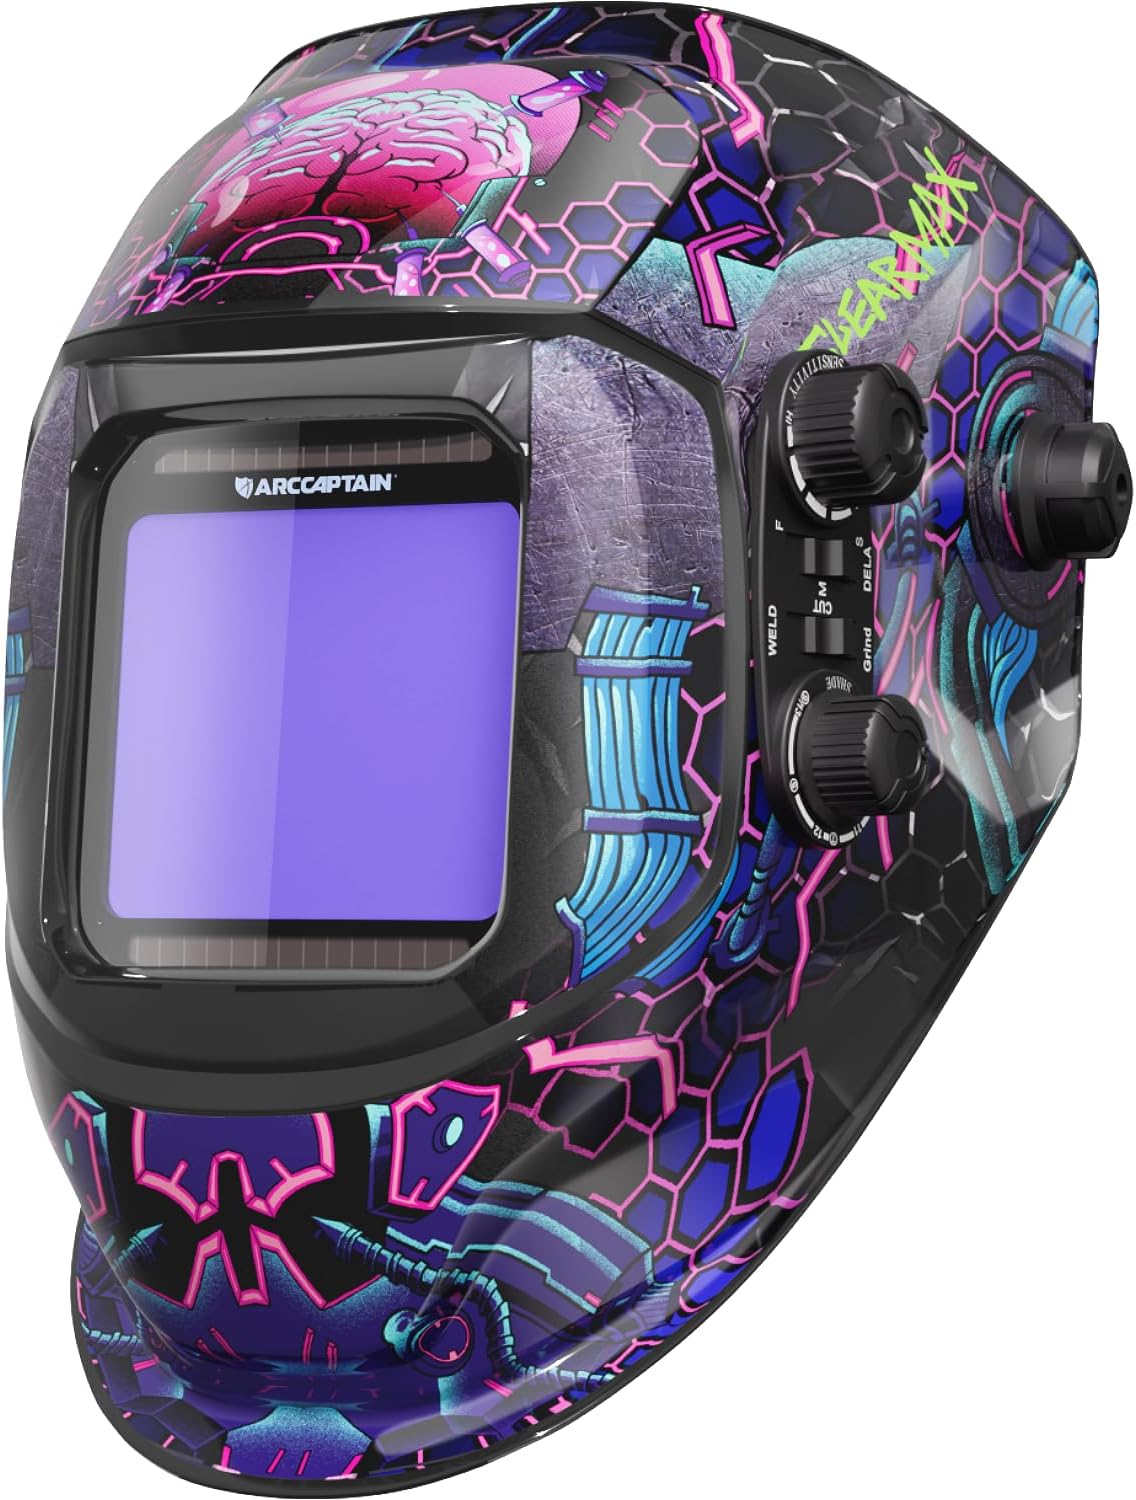
Image 1: ARCCAPTAIN LY800F True Color Auto Darkening Welding Helmet, showcasing അതിന്റെ ഊർജ്ജസ്വലമായ രൂപകൽപ്പന.
2 സുരക്ഷാ വിവരങ്ങൾ
Always prioritize safety when welding. This helmet is designed to protect your eyes and face from harmful radiation, sparks, and spatter during welding operations. Adhere to all local and national safety regulations.
- Ensure the helmet is properly assembled and adjusted before each use.
- Inspect the helmet and lenses for any damage before use. Replace damaged parts immediately.
- Do not use the helmet if the auto-darkening function is not working correctly.
- Always wear appropriate personal protective equipment (PPE) in addition to the welding helmet.
- Avoid direct exposure to welding arc without proper eye protection.
- The helmet is compliant with ANSI Z87.1, EN379 CE, and CSA Z94.3 standards.
3. ഉൽപ്പന്ന സവിശേഷതകൾ
The ARCCAPTAIN LY800F welding helmet offers advanced features for enhanced safety and performance:
- Auto Darkening Filter: Equipped with a high-end auto-darkening lens and 4 premium arc sensors. Adjustable shade and sensitivity for ARC, MIG, and TIG welding. Light state: DIN4. Dark state: DIN5-9/9-13.
- Optimal Eye Protection: Smart filters provide full UV/IR protection up to DIN 16 at all times, safeguarding against intense welding glare and harmful light.
- True Color Technology: Features a 1/1/1/2 optical clarity lens with advanced true-color technology and a large viewing screen (3.93" x 3.66") for improved visual experience and precision.
- മികച്ച സുഖസൗകര്യങ്ങൾ: Weighing only 2 pounds, this lightweight helmet reduces cervical spine load during extended use. Dynamically adjustable headgear with breathable padding ensures a comfortable and secure fit.
- അവസാനം വരെ നിർമ്മിച്ചത്: Constructed from durable PP material, offering shock resistance and flame resistance. Powered by a solar cell and a replaceable CR2450 lithium battery for long-lasting operation.

Image 2: Durability features of the ARCCAPTAIN welding helmet, highlighting corrosion, shock, and flame resistance, along with lightweight and comfortable design.

Image 3: Illustration of the helmet's fast darkening feature, showing 4 premium arc sensors and a 1/10000s response time.

Image 4: Key features of the upgraded ARCCAPTAIN welding helmet, including True Color technology, PA durable material, 1/25000s darkening speed, and a large screen.

Image 5: Demonstrates the wide application of the ARCCAPTAIN welding helmet for Stick, MIG, TIG, and Cutting processes.
4. സജ്ജീകരണം
4.1 Headgear Assembly and Adjustment
Proper adjustment of the headgear is crucial for comfort and safety. The headgear features adjustable straps and spacers to ensure a secure fit and optimal viewing ദൂരം.
- Attach Headgear: Fit the studs of the headgear into the lateral adjustment boxes on the helmet.
- Adjust Horizontal Distance: The headgear has three adjustment slots. Place the spacers in the corresponding holes to adjust the horizontal distance between your eyes and the viewing window. This controls the space between your face and the helmet.
- For the left position, place the spacer on the second post.
- For the middle position, place the spacer on the third post.
- For the right position, place the spacer on the fourth post.
- Seating Spacer: Snap the seating spacer directly onto the top of the welding helmet.
- Mounting Locating Spacer: Attach the mounting locating spacer and nut on the outside of the weld helmet.
- Head Circumference: Use the comfortable head adjustment knob at the back of the headgear to tighten or loosen the fit around your head.
- ആംഗിൾ അഡ്ജസ്റ്റ്മെൻ്റ്: Adjust the forward tilt of the helmet using the angle adjustment mechanism to achieve a comfortable and effective viewing ആംഗിൾ.
Video 1: Demonstrates the assembly and adjustment of the welding helmet headgear, including spacer placement and angle adjustment.
5. പ്രവർത്തന നിർദ്ദേശങ്ങൾ
5.1 Power On/Off and Test Function
The helmet features fully automatic power on/off. Before welding, always perform a test of the auto-darkening function.
- The helmet automatically powers on when exposed to light and off when stored in darkness.
- Locate the "TEST" button inside the helmet. Press it to verify the auto-darkening function. The lens should momentarily darken and then return to the light state.
- A low battery indicator light is located near the test button. If it illuminates, replace the battery.
5.2 Mode Selection and Adjustments
The helmet offers various modes and adjustable settings to suit different welding and cutting applications.
- ഷേഡ് അഡ്ജസ്റ്റ്മെൻ്റ്: Use the SHADE dial to select the appropriate shade level (DIN 5-9 or DIN 9-13) for your welding process. The light state is DIN 4.
- മോഡ് സെലക്ടർ: Switch between GRIND, CUT, and WELD modes using the dedicated selector.
- GRIND Mode: For grinding operations (Shade DIN 4).
- കട്ട് മോഡ്: For cutting operations (Shade DIN 5-9).
- WELD Mode: For welding operations (Shade DIN 9-13).
- സംവേദനക്ഷമത നിയന്ത്രണം: Adjust the SENSITIVITY dial from MIN to MAX to accommodate different lighting conditions and ensure proper arc detection. Higher sensitivity is for weak arcs (e.g., 20A), lower sensitivity for strong arcs (e.g., 200A).
- കാലതാമസം നിയന്ത്രണം: Adjust the DELAY dial from FAST to SLOW. This controls the time it takes for the lens to switch back to the clear state after welding, preventing eye fatigue from residual glow.
വീഡിയോ 2: കഴിഞ്ഞുview of the ARCCAPTAIN auto-darkening welding helmet, highlighting its features, controls, and application modes (Grind, Cut, Weld).
Video 3: Detailed demonstration of the 1/1/1/1 optical clarity and auto-darkening features of the ARCCAPTAIN welding helmet, including sensitivity and delay adjustments.
വീഡിയോ 4: ഷോർട്ട് പ്രെview demonstrating the high sensitivity and fast darkening capabilities of the welding helmet.
6. പരിപാലനം
6.1 വൃത്തിയാക്കൽ
- Clean the helmet shell with a mild soap and water solution. Avoid harsh solvents.
- Clean the auto-darkening filter (ADF) and cover lenses with a soft, clean cloth and a non-abrasive cleaner. Do not use abrasive materials or solvents.
- Regularly inspect the helmet for any signs of wear or damage.
6.2 ബാറ്ററി മാറ്റിസ്ഥാപിക്കൽ
The helmet is powered by a solar cell and a replaceable CR2450 lithium battery. When the low battery indicator illuminates, replace the battery.
- Locate the battery compartment, typically on the inside of the auto-darkening filter.
- Carefully open the compartment and remove the old CR2450 battery.
- ശരിയായ ധ്രുവീകരണം ഉറപ്പാക്കിക്കൊണ്ട് ഒരു പുതിയ CR2450 ബാറ്ററി ചേർക്കുക.
- ബാറ്ററി കമ്പാർട്ട്മെൻ്റ് സുരക്ഷിതമായി അടയ്ക്കുക.
- Perform the test function to confirm the new battery is working.
6.3 Lens Replacement
Replace the outer and inner cover lenses if they become scratched, pitted, or damaged to maintain optimal visibility and protection.
- Carefully remove the retaining frame or clips holding the cover lens in place.
- Remove the old cover lens.
- Insert a new, clean cover lens.
- Secure the retaining frame or clips.
7. പ്രശ്നപരിഹാരം
| പ്രശ്നം | സാധ്യമായ കാരണം | പരിഹാരം |
|---|---|---|
| Lens does not darken when arc is struck. |
|
|
| Lens remains dark after arc stops. |
|
|
| Inconsistent darkening. |
|
|
8 സ്പെസിഫിക്കേഷനുകൾ
| ഫീച്ചർ | വിശദാംശങ്ങൾ |
|---|---|
| മോഡൽ നമ്പർ | LY800F |
| ഒപ്റ്റിക്കൽ ക്ലാരിറ്റി | 1/1/1/2 |
| Viewing ഏരിയ | 3.93" x 3.66" (100 മിമി x 93 മിമി) |
| ലൈറ്റ് സ്റ്റേറ്റ് | DIN 4 |
| ഇരുണ്ട സംസ്ഥാനം | Variable shade ranges from DIN 5-9 and DIN 9-13, adjustable externally |
| ആർക്ക് സെൻസറുകൾ | 4 |
| പ്രതികരണ സമയം | ≤1/30,000 seconds (light to dark under normal temperature conditions) |
| സംവേദനക്ഷമത നിയന്ത്രണം | Adjustable with low/high settings |
| വൈദ്യുതി വിതരണം | Solar cell with replaceable CR2450 battery (included) |
| UV/IR സംരക്ഷണം | എല്ലാ സമയത്തും DIN 16 വരെ |
| പവർ ഓൺ/ഓഫ് | പൂർണ്ണമായും ഓട്ടോമാറ്റിക് |
| കുറഞ്ഞ വോളിയംtagഇ സൂചകം | അതെ |
| ADF Self-Check | അതെ |
| പ്രവർത്തന താപനില | 23°F മുതൽ 131°F വരെ (-5°C മുതൽ 55°C വരെ) |
| സംഭരണ താപനില | -4°F മുതൽ 158°F വരെ (-20°C മുതൽ 70°C വരെ) |
| ഭാരം | ഏകദേശം 1.1 പൗണ്ട് (499 ഗ്രാം) |
| മെറ്റീരിയൽ | പിപി പ്ലാസ്റ്റിക് |
| പാലിക്കൽ | Meets ANSI Z87.1, EN379 CE, and CSA Z94.3 standards |
| നിർമ്മാതാവ് | ARCCAPTAIN |
| മാതൃരാജ്യം | ചൈന |
9. വാറൻ്റിയും പിന്തുണയും
ARCCAPTAIN products are manufactured to high-quality standards. For warranty information, technical support, or service inquiries, please refer to the contact information provided with your product packaging or visit the official ARCCAPTAIN webസൈറ്റ്.
വാറന്റി ക്ലെയിമുകൾക്കുള്ള വാങ്ങിയതിന്റെ തെളിവായി നിങ്ങളുടെ വാങ്ങൽ രസീത് സൂക്ഷിക്കുക.
Ask a question about this manual
Ask about setup, troubleshooting, compatibility, parts, safety, or missing instructions. Manuals+ will review the question and use this page’s manual context to help answer it.