1. ആമുഖം
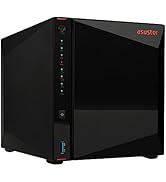
The ASUSTOR Lockerstor 6 Gen3 AS6806T is a high-performance 6-bay Network Attached Storage (NAS) device designed for video and content creators. Powered by an AMD Ryzen Quad-Core 2.3GHz CPU and 16GB ECC DDR5 RAM, it offers robust data storage and management capabilities. Key features include four M.2 NVMe slots for doubled performance with PCIe 4.0, dual 5GbE and 10GbE ports for high-speed networking, and versatile USB4 ports for external storage. This manual provides essential information for setting up, operating, and maintaining your AS6806T NAS.
പ്രധാന സവിശേഷതകൾ:
- Quad-Core AMD Ryzen Embedded V3C14 CPU @ 2.3 GHz - 3.8 GHz Turbo
- DDR5 ECC RAM support
- Quad M.2 slots for NVMe SSDs – Doubled Performance with PCIe 4.0
- Two USB4 ports at 40 Gbps. 3x USB 3.2 Gen 2 Type-A at 10 Gbps. 2x 10-Gigabit Ethernet. 2x 5-Gigabit Ethernet.
- Supports Wake on LAN and Wake on WAN
2. പാക്കേജ് ഉള്ളടക്കം
താഴെ ലിസ്റ്റ് ചെയ്തിരിക്കുന്ന എല്ലാ ഇനങ്ങളും നിങ്ങളുടെ പാക്കേജിൽ ഉൾപ്പെടുത്തിയിട്ടുണ്ടെന്ന് ഉറപ്പാക്കുക:
- AS6806T Unit x1
- എസി പവർ കോർഡ് x1
- 10GbE LAN Cable (Cat 6a) x4
- Flat Head Screws for 3.5" HDD x24
- Flat Head Screws for 2.5" HDD x24
- ദ്രുത ഇൻസ്റ്റലേഷൻ ഗൈഡ് x1

ചിത്രം: ASUSTOR Lockerstor 6 Gen3 AS6806T package contents and dimensions. This image displays the NAS unit, power cord, LAN cables, various screws, and the quick installation guide. It also shows the device dimensions: 185.5mm (7.303 inches) height, 230mm (9.055 inches) depth, and 233mm (9.173 inches) width.
3. ഹാർഡ്വെയർ ഓവർview
പിൻ പാനൽ:

ചിത്രം: Rear panel of the ASUSTOR Lockerstor 6 Gen3 AS6806T NAS. This view highlights the various ports and cooling fan on the back of the device.
ഘടകം തിരിച്ചറിയൽ:
ചിത്രം: Diagram illustrating the port identification on the ASUSTOR Lockerstor 6 Gen3 AS6806T. The image shows the DC power input, Reset button, USB4 ports, USB 3.2 Gen 2 Type-A ports, 5-Gigabit Ethernet ports, and 10-Gigabit Ethernet ports.
- DC ഇൻപുട്ട്: Power connection port.
- റീസെറ്റ് ബട്ടൺ: Used to reset the device settings.
- USB4 പോർട്ടുകൾ: Two 40 Gbps USB4 ports for high-speed data transfer.
- USB 3.2 Gen 2 Type-A Ports: Three 10 Gbps USB 3.2 Gen 2 Type-A ports.
- 5-Gigabit Ethernet Ports: Two 5GbE ports for network connectivity.
- 10-Gigabit Ethernet Ports: Two 10GbE ports for high-speed network connectivity.
4. സജ്ജീകരണം
4.1. Installing M.2 NVMe SSDs
The Lockerstor 6 Gen3 AS6806T features four M.2 NVMe slots for high-speed storage. Follow these steps to install M.2 SSDs:
- Power off the NAS and disconnect all cables.
- പുറത്തെ സി നീക്കം ചെയ്യുകasing of the NAS to access the M.2 slots.
- Carefully insert the M.2 NVMe SSD into an available slot at an angle.
- Gently push down the SSD until it clicks into place or can be secured with a screw.
- പുറത്തെ സി മാറ്റിസ്ഥാപിക്കുകasing and reconnect all cables.

ചിത്രം: Diagram showing the location of the M.2 NVMe SSD slots inside the ASUSTOR Lockerstor 6 Gen3 AS6806T. The image indicates four M.2 slots, supporting PCIe Gen4x1 and Gen4x2.
വീഡിയോ: This video demonstrates the process of adding M.2 SSDs to your Lockerstor Gen3 NAS. It shows how to open the device, locate the M.2 slots, insert the SSDs, and secure them.
4.2. Replacing RAM
The Lockerstor 6 Gen3 AS6806T supports DDR5 ECC RAM. Follow these steps to replace or upgrade the RAM modules:
- Power off the NAS and disconnect all cables.
- പുറത്തെ സി നീക്കം ചെയ്യുകasing of the NAS to access the RAM slots.
- Gently push the clips on both sides of the RAM module outwards to release it.
- Carefully remove the old RAM module.
- Align the notch on the new RAM module with the slot and insert it at an angle.
- Push down firmly until the clips snap into place, securing the module.
- പുറത്തെ സി മാറ്റിസ്ഥാപിക്കുകasing and reconnect all cables.

ചിത്രം: Diagram showing the location of the RAM slots inside the ASUSTOR Lockerstor 6 Gen3 AS6806T. The image highlights the DDR5 ECC RAM modules.
വീഡിയോ: This video demonstrates the process of replacing RAM on your Lockerstor Gen3 NAS. It guides you through opening the device, removing existing RAM, and installing new modules.
4.3. Installing Hard Disk Drives (HDDs)
The Lockerstor 6 Gen3 AS6806T supports 3.5-inch and 2.5-inch SATA HDDs/SSDs. Follow these steps to install your drives:
- Gently pull the drive tray handle to release and slide out a drive tray.
- For 3.5-inch HDDs, align the drive with the tray and secure it using the provided screws. For 2.5-inch HDDs/SSDs, use the appropriate screw holes on the tray.
- Slide the populated drive tray back into the empty bay until it clicks into place.
- Repeat for all desired drives.
5. Operating System (ADM)
The ASUSTOR Lockerstor 6 Gen3 AS6806T runs on ASUSTOR Data Master (ADM), ASUSTOR's intuitive and feature-rich operating system. ADM provides a user-friendly interface for managing your NAS, files, and applications. Key functionalities include:
- File മാനേജ്മെൻ്റ്: Easily organize, access, and share your data across various platforms.
- Backup & Restore: Comprehensive backup solutions to protect your valuable data.
- മൾട്ടിമീഡിയ ആപ്ലിക്കേഷനുകൾ: Stream media, manage photos, and enjoy your digital content.
- ആപ്പ് സെൻട്രൽ: Expand NAS functionality with a wide range of apps for various needs.
- സുരക്ഷ: Robust security features, including real-time virus protection and powerful firewalls.
Post-Quantum Cryptography (PQC) Ready
The ASUSTOR Lockerstor Gen3 NAS is PQC Ready, offering enhanced security against future quantum computing threats. This ensures your data remains protected with advanced cryptographic algorithms.
വീഡിയോ: This video explains the Post-Quantum Cryptography (PQC) readiness of ASUSTOR NAS devices, highlighting their defense against future quantum attacks.
6. പരിപാലനം
Regular maintenance ensures the optimal performance and longevity of your ASUSTOR NAS.
6.1. സോഫ്റ്റ്വെയർ അപ്ഡേറ്റുകൾ
- Regularly check for and install ADM updates via the Control Panel to ensure you have the latest features, security patches, and bug fixes.
6.2. Drive Health Monitoring
- Utilize ADM's built-in tools to monitor the health of your HDDs and SSDs (e.g., S.M.A.R.T. status).
- Replace drives promptly if any warnings or errors are detected to prevent data loss.
6.3. System Reboot
- Consider scheduling weekly reboots to maintain system stability and clear temporary data.
7 സ്പെസിഫിക്കേഷനുകൾ
| ഫീച്ചർ | വിശദാംശങ്ങൾ |
|---|---|
| ബ്രാൻഡ് | Asustor |
| ഇനം മോഡൽ നമ്പർ | AS6806T |
| സിപിയു | Quad-Core AMD Ryzen Embedded V3C14 @ 2.3 GHz - 3.8 GHz Turbo |
| റാം | 16GB ECC DDR5 |
| M.2 NVMe Slots | 4 (PCIe 4.0) |
| USB4 പോർട്ടുകൾ | 2 (40 Gbps) |
| USB 3.2 Gen 2 ടൈപ്പ്-എ പോർട്ടുകൾ | 3 (10 Gbps) |
| 10-ജിഗാബൈറ്റ് ഇഥർനെറ്റ് | 2 |
| 5-ജിഗാബൈറ്റ് ഇഥർനെറ്റ് | 2 |
| ഇനത്തിൻ്റെ ഭാരം | 10.14 പൗണ്ട് (4.6 കി.ഗ്രാം) |
| ഉൽപ്പന്ന അളവുകൾ | 12.6 x 12.6 x 12.2 ഇഞ്ച് |
| അനുയോജ്യമായ ഉപകരണങ്ങൾ | സെർവർ |
| മൗണ്ടിംഗ് തരം | റാക്ക് മൌണ്ട് |
8. വാറണ്ടിയും പിന്തുണയും
For detailed warranty information, please refer to the documentation included with your product or visit the official ASUSTOR website. ASUSTOR may offer extended protection plans separately.
പിന്തുണാ ഉറവിടങ്ങൾ:
- ASUSTOR Webസൈറ്റ്: Visit the official ASUSTOR website for the latest drivers, firmware updates, FAQs, and support articles.
- സാങ്കേതിക സഹായം: Contact ASUSTOR technical support for assistance with any issues or questions regarding your NAS.