
ആമുഖം
This manual provides essential information for the safe and effective operation of your E99 K3 Pro 4K Single/Dual Camera FPV 6-Axis RC Drone. Please read it thoroughly before first use and retain it for future reference.
The E99 K3 Pro drone features a foldable design for portability, 4K camera capabilities for aerial photography and video, altitude hold for stable flight, and various intelligent flight modes including headless mode and trajectory flight.
സുരക്ഷാ വിവരങ്ങൾ
- ആളുകൾ, മൃഗങ്ങൾ, തടസ്സങ്ങൾ എന്നിവയിൽ നിന്ന് മാറി തുറന്ന സ്ഥലങ്ങളിൽ എപ്പോഴും ഡ്രോൺ പ്രവർത്തിപ്പിക്കുക.
- വിമാനത്താവളങ്ങൾ, നിയന്ത്രിത വ്യോമാതിർത്തി, അല്ലെങ്കിൽ സെൻസിറ്റീവ് ഇൻസ്റ്റാളേഷനുകൾ എന്നിവയ്ക്ക് സമീപം പറക്കരുത്.
- ഓരോ ഫ്ലൈറ്റിനും മുമ്പായി ബാറ്ററി പൂർണ്ണമായി ചാർജ് ചെയ്തിട്ടുണ്ടെന്ന് ഉറപ്പാക്കുക.
- ശക്തമായ കാറ്റിലോ പ്രതികൂല കാലാവസ്ഥയിലോ പറക്കരുത്.
- കറങ്ങുന്ന പ്രൊപ്പല്ലറുകളിൽ നിന്ന് വിരലുകളും അയഞ്ഞ വസ്ത്രങ്ങളും അകറ്റി നിർത്തുക.
- ഡ്രോൺ പ്രവർത്തിപ്പിക്കുന്ന കുട്ടികളെ മേൽനോട്ടം വഹിക്കുക.
- Follow all local laws and regulations regarding drone operation.
- ഡ്രോണിലോ അതിന്റെ ഘടകങ്ങളിലോ മാറ്റം വരുത്തരുത്.
പാക്കേജ് ഉള്ളടക്കം
Verify that all items listed below are included in your package.

Image: The E99 K3 Pro drone, its remote control, multiple batteries, and a compact carrying case, illustrating the complete package contents.
- E99 K3 Pro Drone
- റിമോട്ട് കൺട്രോൾ
- Rechargeable Drone Battery(ies)
- യുഎസ്ബി ചാർജിംഗ് കേബിൾ
- സ്പെയർ പ്രൊപ്പല്ലറുകൾ
- സ്ക്രൂഡ്രൈവർ
- ഉപയോക്തൃ മാനുവൽ (ഈ പ്രമാണം)
- Carrying Case (may vary by package)
ഉൽപ്പന്നം കഴിഞ്ഞുview
Familiarize yourself with the main components of your E99 K3 Pro drone and its remote control.

ചിത്രം: വിശദമായ ഒരു മുൻഭാഗം view of the E99 K3 Pro drone, showcasing its foldable arms, integrated 4K camera, and bright front LED lights.
ഡ്രോൺ ഘടകങ്ങൾ
- മടക്കാവുന്ന കൈകൾ: ഒതുക്കമുള്ള സംഭരണത്തിനും പോർട്ടബിലിറ്റിക്കും.
- പ്രൊപ്പല്ലറുകൾ: Four propellers for lift and thrust.
- 4K ക്യാമറ: High-resolution camera for photo and video capture.
- LED ലൈറ്റുകൾ: Front and rear lights for orientation and night flight.
- ബാറ്ററി കമ്പാർട്ട്മെൻ്റ്: Located on the underside of the drone.
- Optical Flow Sensor (if applicable): For stable hovering.
റിമോട്ട് കൺട്രോൾ ഗൈഡ്

Image: A comprehensive diagram of the remote control, clearly labeling all buttons, joysticks, and their corresponding functions, including antenna, headless mode, speed gears, trim adjustments, one-touch takeoff/landing, 360° roll, and mobile phone bracket.
Refer to the diagram for button layout and functions:
- Left Operating Lever: Controls ascent/descent and left/right turn.
- Right Operating Lever: Controls forward/backward and left/right flight.
- One Touch Takeoff/Landing Button: ഓട്ടോമാറ്റിക് ടേക്ക് ഓഫ് അല്ലെങ്കിൽ ലാൻഡിംഗ് ആരംഭിക്കുന്നു.
- ഹെഡ്ലെസ്സ് മോഡ് ബട്ടൺ: തലയില്ലാത്ത ഫ്ലൈറ്റ് സജീവമാക്കുന്നു.
- Fast/Slow Gear Button: Switches between flight speeds.
- 360° Roll Button: Performs a flip.
- ഫോട്ടോ/വീഡിയോ ബട്ടൺ: ഫോട്ടോകൾ എടുക്കുന്നു അല്ലെങ്കിൽ വീഡിയോ റെക്കോർഡിംഗ് ആരംഭിക്കുന്നു/നിർത്തുന്നു.
- ബട്ടണുകൾ ട്രിം ചെയ്യുക: Adjusts drone drift (Front, Rear, Left, Right Trim).
- One Button Reset: Resets drone calibration.
- Mobile Phone Bracket: Holds your smartphone for FPV viewing.
സജ്ജമാക്കുക
1. ഡ്രോൺ തുറക്കൽ
Gently unfold the drone arms until they click into place. Ensure all four arms are fully extended.
2. ബാറ്ററി ഇൻസ്റ്റാളേഷൻ
ഡ്രോൺ ബാറ്ററി
- Open the battery compartment on the underside of the drone.
- Insert the fully charged drone battery, ensuring correct polarity.
- ബാറ്ററി കമ്പാർട്ട്മെൻ്റ് സുരക്ഷിതമായി അടയ്ക്കുക.
റിമോട്ട് കൺട്രോൾ ബാറ്ററികൾ
- റിമോട്ട് കൺട്രോളിന്റെ പിൻഭാഗത്തുള്ള ബാറ്ററി കവർ തുറക്കുക.
- Insert 3 x AA batteries (not included), observing the correct polarity.
- ബാറ്ററി കവർ അടയ്ക്കുക.
3. Propeller Installation (if not pre-installed)
Each propeller is marked with an 'A' or 'B'. Match the propeller type to the corresponding motor shaft. Ensure they are securely fastened.
4 ബാറ്ററി ചാർജ് ചെയ്യുന്നു
Connect the drone battery to the USB charging cable, then plug the USB cable into a 5V/1A USB adapter (e.g., computer USB port, phone charger). The indicator light will show charging status and turn off when fully charged. Charging time is approximately 60-80 minutes.
5. ആപ്പ് ഇൻസ്റ്റാളേഷനും കണക്ഷനും
FPV-ക്ക് (ആദ്യ വ്യക്തി) View) and advanced features, download the companion app (e.g., "WiFi_CAM" or similar, check packaging for exact app name) from your smartphone's app store (iOS/Android).
- ഡ്രോണിൽ പവർ ഓൺ ചെയ്യുക.
- Go to your phone's Wi-Fi settings and connect to the drone's Wi-Fi network (e.g., "WiFi_UFO-XXXXXX").
- Open the installed app. The drone's camera feed should appear on your phone screen.
പ്രവർത്തന നിർദ്ദേശങ്ങൾ
1. ഡ്രോണും റിമോട്ട് കൺട്രോളും ജോടിയാക്കൽ
- ഡ്രോൺ പരന്നതും ലെവൽ ഉപരിതലത്തിൽ വയ്ക്കുക.
- ഡ്രോണിന്റെ പവർ ഓൺ ചെയ്യുക. LED ലൈറ്റുകൾ മിന്നിമറയും.
- റിമോട്ട് കൺട്രോൾ ഓൺ ചെയ്യുക.
- Push the left operating lever (throttle) all the way up, then pull it all the way down. The drone's LED lights will stop flashing and remain solid, indicating successful pairing.
2. ഗൈറോസ്കോപ്പ് കാലിബ്രേഷൻ
After pairing, push both operating levers down and to the right simultaneously for 2-3 seconds. The drone's lights will flash rapidly and then become solid, indicating successful calibration. This ensures stable flight.
3. ടേക്ക് ഓഫും ലാൻഡിംഗും
One-Key Takeoff
After pairing and calibration, press the One Touch Takeoff/Landing button. The drone will automatically ascend and hover at a certain altitude.
സ്വമേധയാലുള്ള ടേക്ക് ഓഫ്
After pairing and calibration, slowly push the left operating lever (throttle) upwards. The propellers will spin, and the drone will ascend.
വൺ-കീ ലാൻഡിംഗ്
During flight, press the One Touch Takeoff/Landing button. The drone will automatically descend and land gently.
മാനുവൽ ലാൻഡിംഗ്
Slowly pull the left operating lever (throttle) downwards until the drone lands. Once landed, pull the lever all the way down to stop the propellers.
4. അടിസ്ഥാന ഫ്ലൈറ്റ് നിയന്ത്രണങ്ങൾ
| ആക്ഷൻ | റിമോട്ട് കൺട്രോൾ ഇൻപുട്ട് |
|---|---|
| കയറുക | Push Left Operating Lever Up |
| ഇറങ്ങുക | Pull Left Operating Lever Down |
| ഇടത്തോട്ട് തിരിയുക | Push Left Operating Lever Left |
| വലത്തോട്ട് തിരിയുക | Push Left Operating Lever Right |
| മുന്നോട്ട് പറക്കുക | Push Right Operating Lever Up |
| Fly Backward | Pull Right Operating Lever Down |
| Fly Left (Sideways) | Push Right Operating Lever Left |
| Fly Right (Sideways) | Push Right Operating Lever Right |
5. Special Flight Modes and Features
തലയില്ലാത്ത മോഡ്

Image: An illustration of the drone in flight, surrounded by circular patterns symbolizing its ability to identify direction automatically in headless mode, making control easier for beginners.
Press the Headless Mode button on the remote. In headless mode, the drone's orientation is relative to the pilot, regardless of the drone's actual front. This simplifies control, especially for beginners. Press the button again to exit headless mode.
ആൾട്ടിറ്റ്യൂഡ് ഹോൾഡ്

Image: The drone maintaining a stable hover above a body of water, with a rocky cliff in the background, demonstrating its intelligent air pressure altitude hold feature for steady flight and improved photography.
The E99 K3 Pro features an altitude hold function, allowing the drone to maintain a stable height automatically. This makes it easier to control and capture steady photos/videos.
360° Roll (Flip)
Press the 360° Roll button, then quickly push the Right Operating Lever in any direction (forward, backward, left, or right) to perform a flip in that direction. Ensure sufficient altitude before attempting.
സ്പീഡ് അഡ്ജസ്റ്റ്മെൻ്റ്
Press the Fast/Slow Gear button to cycle through different speed modes (e.g., low, medium, high). The remote will typically beep to indicate the current speed setting.
Camera Operation (via App)

Image: A visual representation of the drone's 4K dual camera system, highlighting its ability to adjust the lens angle freely for both head-up (front lens) and top-view (bottom lens) shooting, capturing diverse perspectives.
- ഫോട്ടോ: Tap the camera icon in the app to take a photo.
- വീഡിയോ: Tap the video icon to start recording; tap again to stop.
- Dual Camera Switch: If your model has dual cameras, use the app to switch between the front and bottom cameras.
- Face Recognition Automatic Photo: Enable this feature in the app for automatic photo capture when a face is detected.
- ട്രാക്ക് ഫ്ലൈറ്റ്: Draw a path on your phone screen in the app, and the drone will follow the designated trajectory.
- ഗുരുത്വാകർഷണ സെൻസർ: Control the drone's flight by tilting your smartphone (enable in app).
- 50x Zoom Shooting: The app may offer digital zoom capabilities for closer shots.

Image: The drone flying above ocean waves, with an inset showing a magnified view of a distant surfer, illustrating the 50x zoom shooting capability for capturing details from afar.
ഒരു കീ റിട്ടേൺ
Press the One-Key Return button on the remote control. The drone will automatically fly back towards its takeoff point. Note: This function relies on the drone's initial takeoff coordinates and may not be precise.
രാത്രി വിമാനയാത്ര
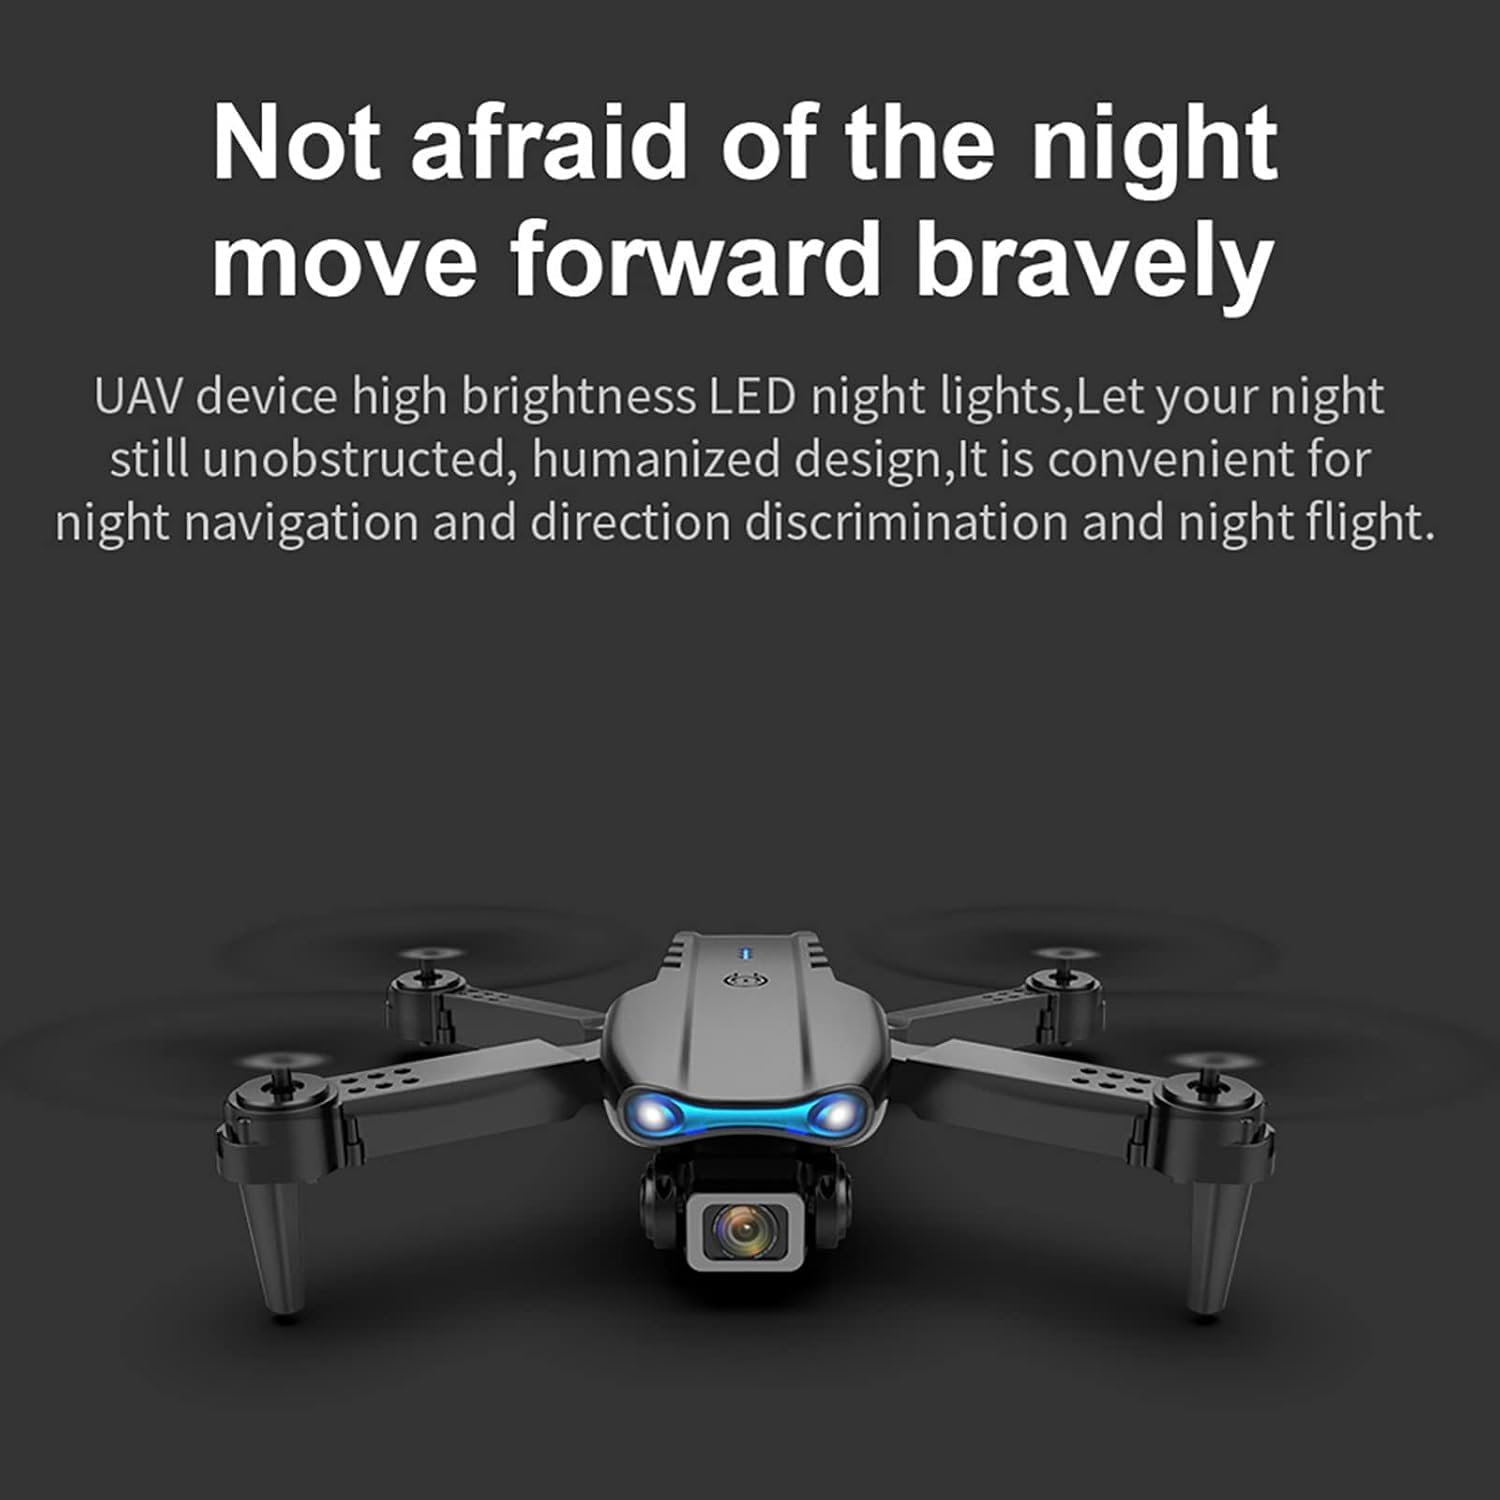
Image: The drone positioned in a dark environment with its bright LED lights illuminated, highlighting its design for unobstructed night navigation and direction discrimination.
The drone is equipped with high brightness LED night lights, allowing for improved visibility and navigation during low-light conditions or night flights.
മെയിൻ്റനൻസ്
വൃത്തിയാക്കൽ
Use a soft, dry cloth to clean the drone and remote control. Do not use liquid cleaners or solvents.
പ്രൊപ്പല്ലർ മാറ്റിസ്ഥാപിക്കൽ
If a propeller is damaged, replace it with a spare propeller of the correct type (A or B). Use the provided screwdriver to remove and install screws.
ബാറ്ററി കെയർ
- ബാറ്ററി അമിതമായി ചാർജ് ചെയ്യുകയോ ഡിസ്ചാർജ് ചെയ്യുകയോ ചെയ്യരുത്.
- നേരിട്ടുള്ള സൂര്യപ്രകാശത്തിൽ നിന്നും ഉയർന്ന താപനിലയിൽ നിന്നും അകലെ തണുത്തതും വരണ്ടതുമായ സ്ഥലത്ത് ബാറ്ററികൾ സൂക്ഷിക്കുക.
- If not used for a long period, charge the battery to about 50% capacity every 3 months.
- Discard damaged or swollen batteries safely according to local regulations.
സംഭരണം
Fold the drone arms and store it in its carrying case or original packaging when not in use. Keep it away from dust and moisture.
ട്രബിൾഷൂട്ടിംഗ്
| പ്രശ്നം | സാധ്യമായ കാരണം | പരിഹാരം |
|---|---|---|
| ഡ്രോൺ റിമോട്ടിനോട് പ്രതികരിക്കുന്നില്ല. | ജോടിയാക്കിയിട്ടില്ല അല്ലെങ്കിൽ ബാറ്ററി കുറവാണ്. | Ensure drone and remote are powered on and paired correctly. Charge batteries. |
| പറക്കലിനിടെ ഡ്രോൺ തെന്നിമാറി. | Not calibrated or trim settings incorrect. | Perform gyroscope calibration. Use trim buttons to adjust. |
| പ്രൊപ്പല്ലറുകൾ കറങ്ങുന്നില്ല. | Battery low, propellers obstructed, or motor issue. | Charge battery. Check for obstructions. Contact support if motors are faulty. |
| FPV image is blurry or disconnected. | Weak Wi-Fi signal or app issue. | Ensure strong Wi-Fi connection. Restart app and drone. Fly closer to drone. |
| ഡ്രോൺ എളുപ്പത്തിൽ തകർന്നു വീഴും. | Lack of experience, strong winds, or damaged propellers. | Practice in open areas. Avoid windy conditions. Replace damaged propellers. |
സ്പെസിഫിക്കേഷനുകൾ
| ഫീച്ചർ | വിശദാംശങ്ങൾ |
|---|---|
| ബ്രാൻഡ് | ജനറിക് |
| മോഡലിൻ്റെ പേര് | E99 |
| മോഡൽ നമ്പർ | E99006 |
| പ്രത്യേക സവിശേഷതകൾ | Dual Camera FPV, Altitude Hold, Face Recognition, Gravity Sensor, Trajectory Flight, Height-fixing function |
| വീഡിയോ ക്യാപ്ചർ റെസല്യൂഷൻ | 4K |
| കണക്റ്റിവിറ്റി ടെക്നോളജി | വൈഫൈ |
| നിയന്ത്രണ തരം | റിമോട്ട് കൺട്രോൾ |
| ഇനത്തിൻ്റെ ഭാരം | 450 ഗ്രാം (ഏകദേശം 15.9 ഔൺസ്) |
| ബാറ്ററി ശേഷി | 450 മില്ലിamp മണിക്കൂർ (ലി-പോ) |
| ഉൽപ്പന്ന അളവുകൾ | Approx. 300"L x 300"W x 300"H (Note: This dimension seems unusually large, likely a data entry error, but provided as per source.) |
| മെറ്റീരിയൽ | പ്ലാസ്റ്റിക് |
| നൈപുണ്യ നില | ഇൻ്റർമീഡിയറ്റ് |
വാറൻ്റിയും പിന്തുണയും
For warranty information and technical support, please refer to the contact details provided on the product packaging or contact the seller directly. Keep your purchase receipt as proof of purchase.
For further assistance, you may also visit the product page on Amazon.com: E99 K3 Pro Drone Product Page.