
1. ആമുഖം
Thank you for choosing the BuTure VAC 4000A Car Jump Starter. This powerful and versatile device is designed to provide reliable jump-starting for vehicles with up to 8.5L gas or 8.0L diesel engines. Beyond its primary function, it also serves as a portable power bank for your electronic devices and features a multi-mode LED flashlight for emergencies. Please read this manual thoroughly before use to ensure safe and optimal operation.
2 സുരക്ഷാ വിവരങ്ങൾ
WARNING: Read and understand all safety information before using this product. Failure to follow these instructions may result in electric shock, fire, or serious injury.
- Do not operate the jump starter if the cables or clampകൾ കേടായി.
- Ensure proper polarity connection (red to positive, black to negative) to avoid sparks or damage.
- ശീതീകരിച്ച ബാറ്ററി ചാടരുത്.
- ജമ്പ് സ്റ്റാർട്ടർ കുട്ടികളിൽ നിന്ന് അകറ്റി നിർത്തുക.
- മഴയിലോ തീവ്രമായ താപനിലയിലോ ഉപകരണം തുറന്നുകാട്ടരുത്.
- Always remove the jump starter from the vehicle battery within 30 seconds after the engine starts.
- Do not short-circuit the positive and negative clamps.
3. പാക്കേജ് ഉള്ളടക്കം
നിങ്ങളുടെ പാക്കേജിൽ എല്ലാ ഇനങ്ങളും ഉണ്ടെന്ന് ഉറപ്പാക്കുക:
- BuTure VAC 4000A Car Jump Starter (Model: Beta02)
- Heavy-Duty Jumper Cables with Smart Clamps
- USB-C ചാർജിംഗ് കേബിൾ
- പരുക്കൻ ചുമക്കുന്ന കേസ്
- ഉപയോക്തൃ മാനുവൽ

4. ഉൽപ്പന്നം കഴിഞ്ഞുview
Familiarize yourself with the components of your BuTure VAC Jump Starter:
- പ്രധാന യൂണിറ്റ്: Portable power pack with integrated battery.
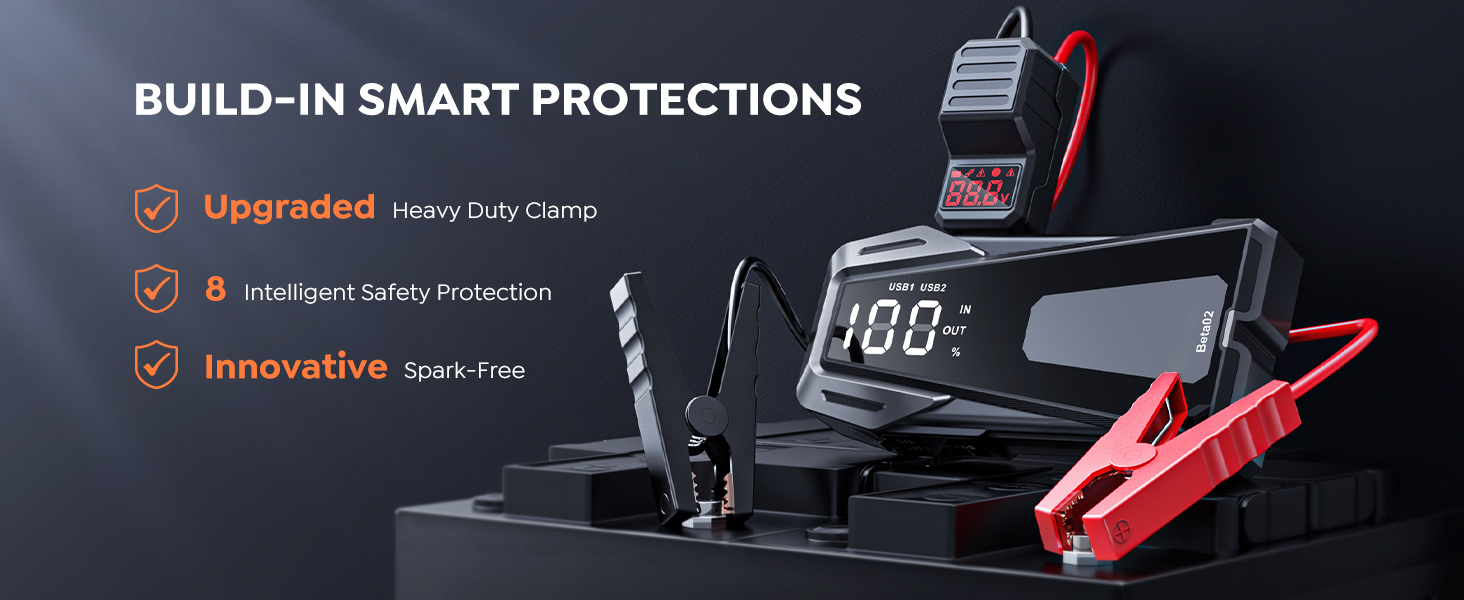
- 5 ഇഞ്ച് LCD ഡിസ്പ്ലേ: Shows real-time power levels, status updates, and charging indicators.
- പവർ ബട്ടൺ: Activates the device and controls flashlight modes.
- ജമ്പർ കേബിൾ പോർട്ട്: Dedicated port for connecting smart jumper cables.
- ഡ്യുവൽ യുഎസ്ബി ഔട്ട്പുട്ട് പോർട്ടുകൾ: സ്മാർട്ട്ഫോണുകൾ, ടാബ്ലെറ്റുകൾ, മറ്റ് യുഎസ്ബി-പവർ ഉപകരണങ്ങൾ എന്നിവ ചാർജ് ചെയ്യുന്നതിന്.
- USB-C ഇൻപുട്ട് പോർട്ട്: ജമ്പ് സ്റ്റാർട്ടർ യൂണിറ്റ് റീചാർജ് ചെയ്യുന്നതിന്.
- LED ഫ്ലാഷ്ലൈറ്റ്: Features multiple modes (flashlight, SOS, flashing).

5. സജ്ജീകരണം
5.1 ജമ്പ് സ്റ്റാർട്ടർ ചാർജ് ചെയ്യുന്നു
Before first use, fully charge the jump starter. It is recommended to recharge the unit every 3-6 months to maintain battery health, even if not in use.
- Connect the provided USB-C charging cable to the USB-C input port on the jump starter.
- Connect the other end of the USB-C cable to a suitable USB wall adapter (not included) or a car charger.
- The LCD display will show the charging progress. The unit is fully charged when the display shows 100%.

6. പ്രവർത്തന നിർദ്ദേശങ്ങൾ
6.1 ഒരു വാഹനം ആരംഭിക്കുമ്പോൾ ചാടുക
വാഹനം ജമ്പ് സ്റ്റാർട്ട് ചെയ്യാൻ ശ്രമിക്കുന്നതിന് മുമ്പ് ജമ്പ് സ്റ്റാർട്ടർ കുറഞ്ഞത് 50% ചാർജ്ജ് ചെയ്തിട്ടുണ്ടെന്ന് ഉറപ്പാക്കുക.
- Turn off your vehicle's ignition and all accessories (lights, radio, etc.).
- Insert the smart jumper cable plug fully into the jump starter's jumper cable port.
- ചുവപ്പ് (+) cl കണക്റ്റുചെയ്യുകamp വാഹന ബാറ്ററിയുടെ പോസിറ്റീവ് (+) ടെർമിനലിലേക്ക്.
- കറുപ്പ് (-) cl കണക്റ്റുചെയ്യുകamp വാഹന ബാറ്ററിയുടെ നെഗറ്റീവ് (-) ടെർമിനലിലേക്ക്.
- സ്മാർട്ട് clamps' indicator light will turn solid green, indicating a safe connection. If it flashes red or beeps, check the connections for proper polarity.
- നിങ്ങളുടെ വാഹനത്തിന്റെ എഞ്ചിൻ സ്റ്റാർട്ട് ചെയ്യുക.
- എഞ്ചിൻ സ്റ്റാർട്ട് ചെയ്തുകഴിഞ്ഞാൽ, ഉടൻ തന്നെ കറുത്ത (-) cl നീക്കം ചെയ്യുക.amp, പിന്നെ ചുവപ്പ് (+) clamp വാഹന ബാറ്ററിയിൽ നിന്ന്.
- ജമ്പ് സ്റ്റാർട്ടറിൽ നിന്ന് സ്മാർട്ട് ജമ്പർ കേബിൾ വിച്ഛേദിക്കുക.


6.2 പവർ ബാങ്കായി ഉപയോഗിക്കുന്നത്
The jump starter features dual USB output ports to charge your portable electronic devices.
- ജമ്പ് സ്റ്റാർട്ടറിലെ USB ഔട്ട്പുട്ട് പോർട്ടുകളിൽ ഒന്നിലേക്ക് നിങ്ങളുടെ ഉപകരണത്തിന്റെ USB ചാർജിംഗ് കേബിൾ ബന്ധിപ്പിക്കുക.
- ജമ്പ് സ്റ്റാർട്ടർ നിങ്ങളുടെ ഉപകരണം സ്വയമേവ ചാർജ് ചെയ്യാൻ തുടങ്ങും.
- ശേഷിക്കുന്ന ബാറ്ററി ശതമാനം LCD ഡിസ്പ്ലേ കാണിക്കും.tagജമ്പ് സ്റ്റാർട്ടറിന്റെ ഇ.

6.3 LED ഫ്ലാഷ്ലൈറ്റ് ഉപയോഗിക്കുന്നു
The integrated LED flashlight offers multiple lighting modes for various situations.
- Press and hold the Power Button for 3 seconds to turn on the flashlight (steady light mode).
- Press the Power Button again to cycle through the modes: Steady Light → SOS → Flashing → Off.
- To turn off the flashlight directly from any mode, press and hold the Power Button for 3 seconds.
7. പരിപാലനവും സംഭരണവും
- Store the jump starter in its rugged carrying case when not in use to protect it from dust and damage.
- Recharge the unit every 3-6 months to maintain optimal battery performance and extend its lifespan.
- ഉണങ്ങിയതും മൃദുവായതുമായ തുണി ഉപയോഗിച്ച് ഉപകരണം വൃത്തിയാക്കുക. കഠിനമായ രാസവസ്തുക്കളോ ഉരച്ചിലുകളോ ഉള്ള വസ്തുക്കളോ ഉപയോഗിക്കരുത്.
- Keep the jump starter in a cool, dry place, away from direct sunlight and heat sources.

8. പ്രശ്നപരിഹാരം
| പ്രശ്നം | സാധ്യമായ കാരണം | പരിഹാരം |
|---|---|---|
| വാഹനം സ്റ്റാർട്ട് ആകുന്നില്ല. | Low battery on jump starter. Incorrect clamp connection. Vehicle battery completely dead. | Ensure jump starter is sufficiently charged. Check clamp polarity (red to +, black to -). Try the 'Force Start' function if available (refer to smart clamp നിർദ്ദേശങ്ങൾ). |
| സ്മാർട്ട് clamps indicator light is red/beeping. | Reverse polarity connection. Short circuit. | cl വിച്ഛേദിക്കുകamps and re-connect with correct polarity. Ensure clampപരസ്പരം സ്പർശിക്കുന്നില്ല. |
| ജമ്പ് സ്റ്റാർട്ടർ ചാർജ് ചെയ്യുന്നില്ല. | ചാർജിംഗ് കേബിളിനോ അഡാപ്റ്ററിനോ തകരാറ്. | Try a different USB-C cable and/or wall adapter. Ensure connections are secure. |
| USB ഉപകരണങ്ങൾ ചാർജ് ചെയ്യുന്നില്ല. | Jump starter battery low. Faulty USB cable. | Recharge the jump starter. Try a different USB cable. |
9 സ്പെസിഫിക്കേഷനുകൾ
- മോഡൽ: ബീറ്റ02
- പീക്ക് കറന്റ്: 4000എ
- ബാറ്ററി ശേഷി: 21800mAh
- വാല്യം ആരംഭിക്കുകtage: 12V
- എഞ്ചിൻ അനുയോജ്യത: 8.5 ലിറ്റർ ഗ്യാസ് / 8.0 ലിറ്റർ ഡീസൽ വരെ
- USB ഔട്ട്പുട്ട്: Dual USB ports (specifications may vary, refer to device for exact output)
- യുഎസ്ബി-സി ഇൻപുട്ട്: For charging the unit
- LED ഫ്ലാഷ്ലൈറ്റ് മോഡുകൾ: Steady, SOS, Flashing
- പ്രവർത്തന താപനില: -20°C മുതൽ 60°C വരെ (-4°F മുതൽ 140°F വരെ)
- അളവുകൾ: 18.4 x 8.6 x 3.5 സെ.മീ
- ഭാരം: 460 ഗ്രാം
- ബാറ്ററി സെൽ കോമ്പോസിഷൻ: ലിഥിയം പോളിമർ
10. വാറണ്ടിയും പിന്തുണയും
Your BuTure VAC Car Jump Starter is backed by a 2 വർഷത്തെ വാറൻ്റി for returns and lifetime technical support. For any questions, concerns, or technical assistance, please contact our customer support team through the retailer's platform or visit the official BuTure VAC store.
BuTure VAC Store: Visit the BuTure VAC Store on Amazon