1. ആമുഖം
This manual provides essential information for the safe and effective use of your Music Boxing Machine. Please read it thoroughly before operation and retain it for future reference. This device is designed for boxing enthusiasts of all ages, offering a dynamic and engaging workout experience with smart features.

ചിത്രം 1: മുൻഭാഗം view of the Music Boxing Machine with illuminated pads.
2 സുരക്ഷാ വിവരങ്ങൾ
- Ensure the machine is securely mounted to a stable wall surface before use.
- Do not apply excessive force beyond the machine's intended use, as this may cause damage or injury.
- Keep hands and fingers clear of moving parts or impact zones during operation.
- അപകടങ്ങൾ തടയുന്നതിന് ഉപയോഗ സമയത്ത് കുട്ടികളെ നിരീക്ഷിക്കുക.
- ഉപകരണത്തെ വെള്ളത്തിലോ ഉയർന്ന താപനിലയിലോ തുറന്നുകാട്ടുന്നത് ഒഴിവാക്കുക.
- Use only the provided USB charging cable for power.
3. പാക്കേജ് ഉള്ളടക്കം
പാക്കേജിൽ ഇനിപ്പറയുന്ന ഇനങ്ങൾ ഉണ്ടോ എന്ന് പരിശോധിക്കുക:
- Music Boxing Machine Unit
- യുഎസ്ബി ചാർജിംഗ് കേബിൾ
- Mounting Accessories (EVA stickers and/or Velcro straps)
- ഉപയോക്തൃ മാനുവൽ (ഈ പ്രമാണം)

Figure 2: Included mounting accessories (Adhesive Velcro and Velcro straps) and product dimensions.
4. സജ്ജീകരണം
4.1 Mounting the Machine
The Music Boxing Machine can be mounted on various smooth wall surfaces without drilling.
- Choose a suitable, smooth wall surface such as marble, tiles, or solid wood. Ensure the surface is clean and dry.
- Decide on your preferred mounting method:
- EVA Stickers: For a strong, permanent hold on very smooth surfaces.
- Adjustable Velcro Straps: For flexible height adjustment, suitable for adults, teenagers, and children. Apply the adhesive Velcro strips to the back of the machine and the corresponding strips to the wall.
- Mount the machine securely at a comfortable height for all users. The adjustable Velcro straps allow for easy repositioning.
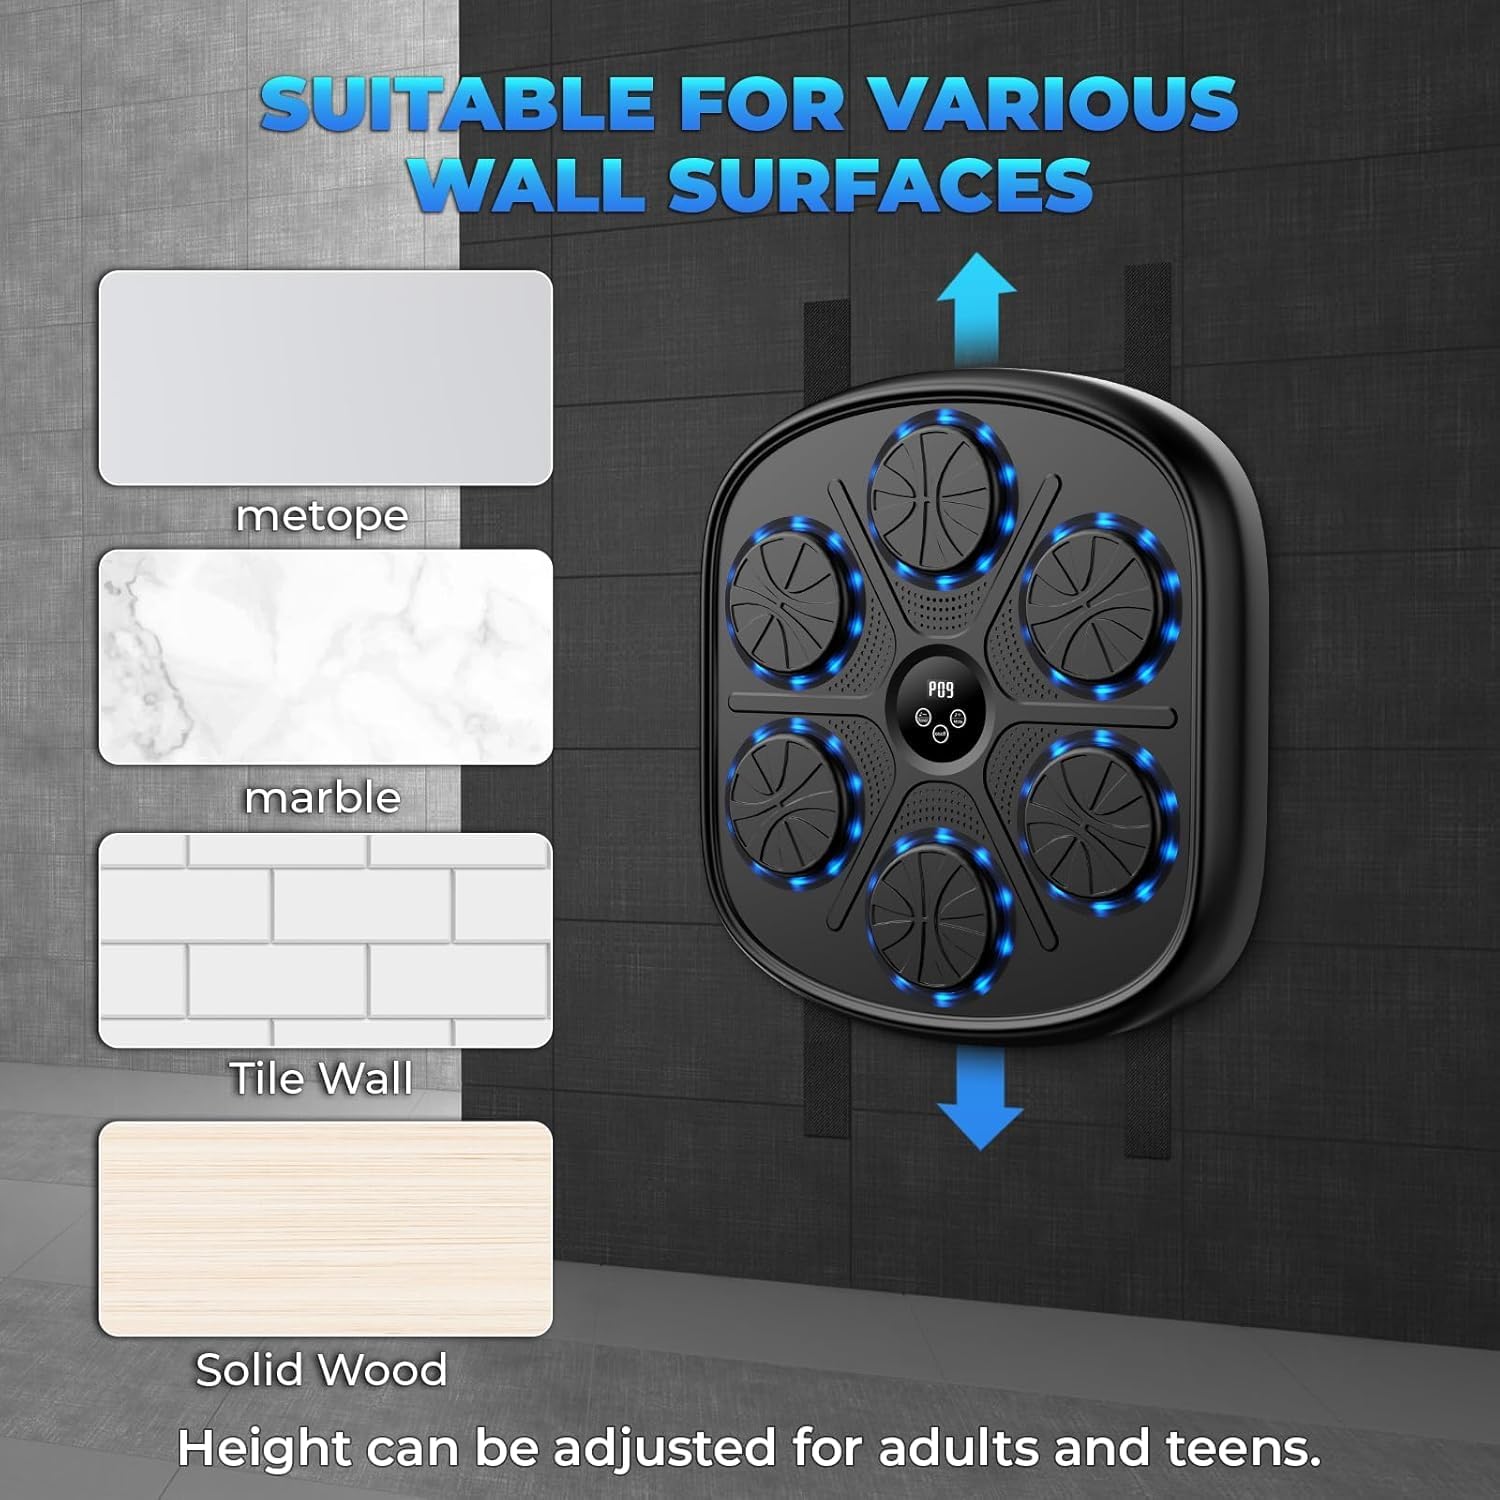
ചിത്രം 3: ഉദാamples of suitable wall surfaces for mounting the boxing machine.
4.2 Charging the Machine
The Music Boxing Machine is equipped with USB charging.
- Locate the USB charging port on the device.
- Connect the provided USB charging cable to the machine and a compatible USB power source (e.g., wall adapter, computer USB port).
- Allow the machine to charge fully before first use. An indicator light may show charging status.
5. പ്രവർത്തന നിർദ്ദേശങ്ങൾ
5.1 പവർ ഓൺ/ഓഫ്
Press and hold the power button (usually located on the central display) to turn the machine on or off.
5.2 ബ്ലൂടൂത്ത് കണക്റ്റിവിറ്റി
Connect your smartphone via Bluetooth to play your favorite music during workouts.
- Ensure the Music Boxing Machine is powered on.
- നിങ്ങളുടെ സ്മാർട്ട്ഫോണിലോ ഓഡിയോ ഉപകരണത്തിലോ ബ്ലൂടൂത്ത് പ്രവർത്തനക്ഷമമാക്കുക.
- ഇതിനായി തിരയുക available Bluetooth devices and select "Music Boxing Machine" (or similar name) to pair.
- Once paired, you can play music from your device through the machine's speakers.
5.3 Adjusting Speed and Modes
The machine offers 9 modes and 10 speeds to customize your workout intensity and challenge.
- Use the mode selection button (often labeled "Mode" or with an icon) to cycle through the 9 available modes. These may include various punch sequences, including unpredictable patterns.
- Use the speed adjustment buttons (often labeled "+" and "-" or with speed icons) to select from 10 different speeds. Higher speeds increase the pace of the light prompts and required reactions.

Figure 4: The central display indicating available modes and speed settings.
5.4 Smart Digital Display and Training
The intelligent digital display provides real-time data to enhance your training.
- The display shows data such as striking speed, striking power, and consecutive hit counts.
- Follow the light guides on the punching pads. When a pad illuminates, strike it.
- Music synchronization with the light guides makes training engaging and helps maintain rhythm.

Figure 5: The Music Boxing Machine in use, demonstrating its suitability for home exercise.
6. പരിപാലനം
6.1 വൃത്തിയാക്കൽ
To maintain the cleanliness and longevity of your Music Boxing Machine:
- മൃദുവായ, ഡി ഉപയോഗിച്ച് ഉപരിതലം തുടയ്ക്കുകamp തുണി.
- Do not use abrasive cleaners or solvents, as these may damage the material.
- Ensure the machine is powered off and unplugged before cleaning.
6.2 സംഭരണം
When not in use, store the machine in a cool, dry place away from direct sunlight and extreme temperatures.
7. പ്രശ്നപരിഹാരം
| പ്രശ്നം | സാധ്യമായ കാരണം | പരിഹാരം |
|---|---|---|
| മെഷീൻ പവർ ഓൺ ചെയ്യുന്നില്ല. | കുറഞ്ഞ ബാറ്ററി അല്ലെങ്കിൽ പവർ ഇല്ല. | Charge the machine using the USB cable. Ensure the power button is pressed and held. |
| ബ്ലൂടൂത്ത് കണക്ഷൻ പരാജയപ്പെടുന്നു. | Bluetooth not enabled on device, machine not in pairing mode, or too far. | Ensure Bluetooth is on. Restart both devices. Move closer to the machine. |
| Lights or sounds are not working correctly. | Incorrect mode selected or internal malfunction. | Cycle through modes. Restart the machine. If problem persists, contact support. |
| Machine falls off the wall. | Improper mounting or unsuitable wall surface. | Re-mount using appropriate method for your wall type. Ensure surface is clean and dry. Avoid violent strikes from strong persons as the machine is not designed for such impact. |
8 സ്പെസിഫിക്കേഷനുകൾ
| ഫീച്ചർ | വിശദാംശങ്ങൾ |
|---|---|
| മോഡലിൻ്റെ പേര് | adking-A |
| ബ്രാൻഡ് | ജനറിക് |
| നിറം | കറുപ്പ് |
| മെറ്റീരിയൽ | Plastic (Body), Rubber (Outer Material) |
| ഇനത്തിൻ്റെ ഭാരം | 9 പൗണ്ട് |
| അളവുകൾ (ഏകദേശം.) | 45 സെ.മീ (ഉയരം) x 41.5 സെ.മീ (വീതി) x 6.8 സെ.മീ (ആഴം) |
| കണക്റ്റിവിറ്റി | ബ്ലൂടൂത്ത് |
| പവർ ഉറവിടം | USB ചാർജിംഗ് |
| മോഡുകൾ | 9 |
| വേഗത | 10 |
| നിർമ്മാതാവ് | adking |
9. വാറൻ്റിയും പിന്തുണയും
Based on the product information, this item is വാറന്റിക്ക് കീഴിലല്ല.
For any questions or issues regarding your Music Boxing Machine, please refer to the seller or retailer from whom you purchased the product.
10. പ്രധാന കുറിപ്പുകൾ
- This manual does not include video demonstrations as no official product videos were available from the seller.
- The boxing game wall cannot withstand violent strikes from a strong person. It is designed for fitness and training, not heavy impact.


