
1. ആമുഖം
Welcome to the AUHIFVAX V88 Drone user manual. This guide provides essential information for the safe and effective operation of your new 8K 5G GPS professional HD aerial photography quadcopter. Please read this manual thoroughly before first use and retain it for future reference.
1.1 സുരക്ഷാ മാർഗ്ഗനിർദ്ദേശങ്ങൾ
- നിർദ്ദേശങ്ങൾ വായിക്കുക: Always read the entire manual before operating the drone.
- പ്രായ നിയന്ത്രണം: ഈ ഉൽപ്പന്നം മുതിർന്നവരുടെ ഉപയോഗത്തിനായി ഉദ്ദേശിച്ചുള്ളതാണ്.
- ഫ്ലൈറ്റ് പരിസ്ഥിതി: Operate in open, clear areas, away from people, animals, buildings, and power lines. Avoid flying in strong winds or adverse weather conditions.
- ബാറ്ററി സുരക്ഷ: Use only the provided charger and battery. Do not overcharge or puncture batteries.
- പ്രൊപ്പല്ലർ സുരക്ഷ: Keep hands and face clear of rotating propellers. Ensure propellers are correctly installed before flight.
- വീക്ഷണരേഖ: Maintain visual line of sight with the drone at all times during flight.
- പ്രാദേശിക നിയന്ത്രണങ്ങൾ: Adhere to all local laws and regulations regarding drone operation.
2. പാക്കേജ് ഉള്ളടക്കം
താഴെ ലിസ്റ്റ് ചെയ്തിരിക്കുന്ന എല്ലാ ഇനങ്ങളും നിങ്ങളുടെ പാക്കേജിൽ ഉൾപ്പെടുത്തിയിട്ടുണ്ടെന്ന് ഉറപ്പാക്കുക:
- 1 x AUHIFVAX V88 RC Quadcopter
- 1 x റിമോട്ട് കൺട്രോൾ
- 1 x 3.7V 2200mAh Li-polymer Battery
- 1 x USB ചാർജിംഗ് കേബിൾ
- 4 x സ്പെയർ പ്രൊപ്പല്ലറുകൾ
- 1 x സ്ക്രൂഡ്രൈവർ
- 2 x User Manual (this document and potentially a quick start guide)
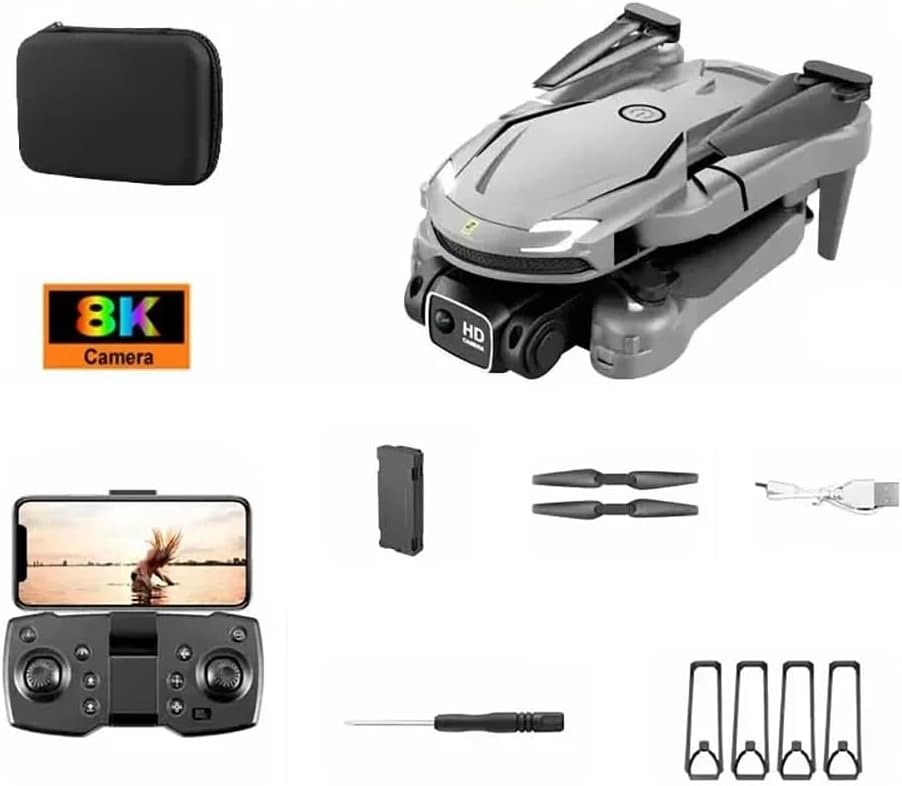
Image 2.1: Contents of the AUHIFVAX V88 Drone package, including the drone, remote control, battery, charging cable, spare propellers, and screwdriver.
3. ഉൽപ്പന്നം കഴിഞ്ഞുview
3.1 ഡ്രോൺ ഘടകങ്ങൾ
Familiarize yourself with the main components of your V88 Drone:
- മടക്കാവുന്ന കൈകൾ: For compact storage and transport.
- പ്രൊപ്പല്ലറുകൾ: Generate lift for flight.
- 8K HD Dual Camera: Captures high-resolution photos and videos.
- ബാറ്ററി കമ്പാർട്ട്മെൻ്റ്: Houses the drone's power source.
- LED ഇൻഡിക്കേറ്റർ ലൈറ്റുകൾ: Provide status information.
- ഒപ്റ്റിക്കൽ ഫ്ലോ സെൻസർ: സ്ഥിരതയുള്ള ഹോവറിങ്ങിന് സഹായിക്കുന്നു.

Image 3.1: The AUHIFVAX V88 Drone, highlighting its sleek design and dual camera system.
3.2 റിമോട്ട് കൺട്രോൾ ലേഔട്ട്
Understand the functions of each button and joystick on the remote control:

Image 3.2: Detailed diagram of the remote control, indicating functions such as speed switching, one-click takeoff/landing, throttle, direction lever, headless mode, power switch, and fine tuning.
- ഇടത് ജോയ്സ്റ്റിക്ക് (ത്രോട്ടിൽ/യാവ്): Controls altitude and rotation.
- വലത് ജോയ്സ്റ്റിക്ക് (ദിശ): മുന്നോട്ടും പിന്നോട്ടും ഇടത്തോട്ടും വലത്തോട്ടും ഉള്ള ചലനങ്ങളെ നിയന്ത്രിക്കുന്നു.
- One-Click Takeoff/Landing Button: ഓട്ടോമാറ്റിക് ടേക്ക് ഓഫ് അല്ലെങ്കിൽ ലാൻഡിംഗ് ആരംഭിക്കുന്നു.
- Speed Switching Button: വ്യത്യസ്ത ഫ്ലൈറ്റ് വേഗതകൾക്കിടയിൽ ടോഗിൾ ചെയ്യുന്നു.
- ഹെഡ്ലെസ്സ് മോഡ് ബട്ടൺ: ഫ്ലൈറ്റ് ഓറിയന്റേഷൻ ലളിതമാക്കുന്നു.
- 360° Roll Button: Executes a stunt roll.
- വൈദ്യുതി സ്വിച്ച്: റിമോട്ട് കൺട്രോൾ ഓൺ/ഓഫ് ചെയ്യുന്നു.
- ഫോൺ ഉടമ: Secures your smartphone for FPV (First Person View) and app control.
4. സജ്ജീകരണം
4.1 ബാറ്ററി ഇൻസ്റ്റാളേഷനും ചാർജിംഗും
- ഡ്റോൺ ബാറ്ററി: Insert the 3.7V 2200mAh Li-polymer battery into the drone's battery compartment until it clicks into place.
- ചാർജിംഗ്: Connect the drone battery to the USB charging cable, then plug the USB cable into a 5V/1A USB power adapter (not included). The indicator light on the cable will show charging status. Charging typically takes 60-90 minutes.
- റിമോട്ട് കൺട്രോൾ ബാറ്ററികൾ: Open the battery compartment on the back of the remote control and insert 3x AAA batteries (not included), ensuring correct polarity.
4.2 Propeller Attachment
Ensure propellers are securely attached. Match propellers marked 'A' with motor shafts marked 'A', and 'B' with 'B'. Use the provided screwdriver to fasten them.
4.3 ആപ്പ് ഡൗൺലോഡും കണക്ഷനും
- അപ്ലിക്കേഷൻ ഡൗൺലോഡുചെയ്യുക: Scan the QR code in the quick start guide or search for the designated app (e.g., 'V88 Drone' or similar) on your smartphone's app store.
- Wi-Fi ബന്ധിപ്പിക്കുക: Turn on the drone. On your smartphone, go to Wi-Fi settings and connect to the drone's Wi-Fi network (e.g., 'V88-XXXXXX').
- ആപ്പ് സമാരംഭിക്കുക: Open the drone app. You should see the camera's live feed, indicating a successful connection.
5. പ്രവർത്തന നിർദ്ദേശങ്ങൾ
5.1 പവർ ഓൺ/ഓഫ്
- ഡ്രോൺ: ഇൻഡിക്കേറ്റർ ലൈറ്റുകൾ ഓണാകുന്നതുവരെ ഡ്രോണിലെ പവർ ബട്ടൺ അമർത്തിപ്പിടിക്കുക.
- റിമോട്ട് കൺട്രോൾ: പവർ സ്വിച്ച് 'ഓൺ' സ്ഥാനത്തേക്ക് സ്ലൈഡ് ചെയ്യുക.
- പവർ ഓഫ്: Reverse the steps to power off both the drone and remote control after use.
5.2 Pairing and Calibration
- ജോടിയാക്കൽ: Turn on the drone, then the remote control. Push the left joystick (throttle) all the way up, then all the way down. The drone's lights will stop flashing, indicating successful pairing.
- ഗൈറോ കാലിബ്രേഷൻ: Place the drone on a flat surface. Push both joysticks down and to the right simultaneously. The drone's lights will flash rapidly and then become solid, indicating successful calibration.
5.3 ജിപിഎസ് പ്രവർത്തനം
The V88 Drone features integrated GPS for enhanced stability and intelligent flight modes. Ensure you have a clear view of the sky for optimal GPS signal acquisition before flight.
- GPS Lock: After powering on, place the drone outdoors. Wait for the GPS indicator (usually flashing slowly) to become solid, indicating a sufficient number of satellites have been acquired.
- Return-to-Home (RTH): In GPS mode, the drone can automatically return to its takeoff point with the press of a button on the remote control or via the app.
5.4 ഫ്ലൈറ്റ് നിയന്ത്രണങ്ങൾ
Refer to the remote control diagram (Image 3.2) for button locations.
- ഏറ്റെടുക്കുക: Press the One-Click Takeoff button or push both joysticks outwards and downwards to start the motors, then gently push the left joystick up.
- ലാൻഡിംഗ്: Press the One-Click Landing button or gently pull the left joystick down.
- ഉയരം: Left joystick up/down.
- മുന്നോട്ട്/പിന്നോട്ട്: വലത് ജോയിസ്റ്റിക്ക് മുകളിലേക്കും താഴേക്കും.
- Left/Right Sideways Flight: വലത് ജോയിസ്റ്റിക്ക് ഇടത്/വലത്.
- Rotation (Yaw): ഇടത് ജോയിസ്റ്റിക്ക് ഇടത്/വലത്.
- വേഗത ക്രമീകരണം: Use the Speed Switching button to cycle through low, medium, and high speeds.
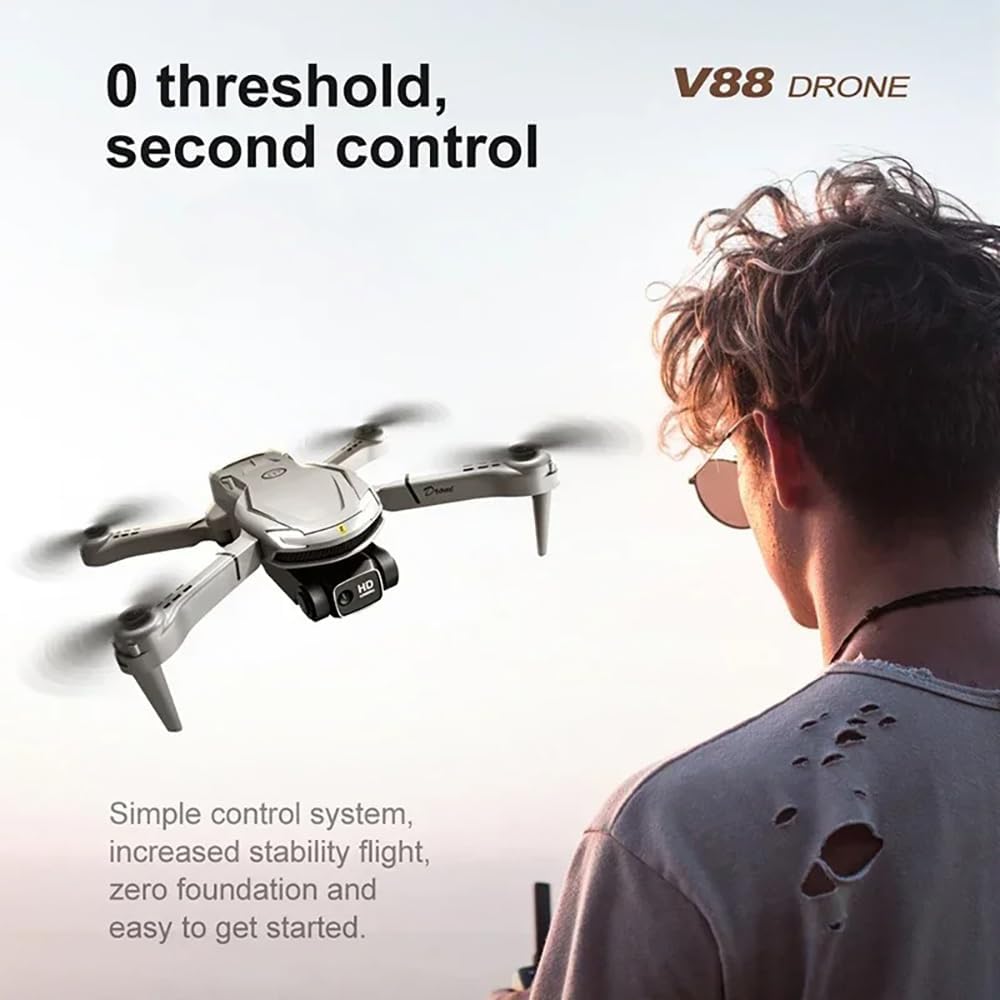
Image 5.1: A user operating the AUHIFVAX V88 Drone with the remote control, demonstrating the ease of control.
5.5 8K HD Camera Operation
The V88 Drone is equipped with an 8K ultra HD camera for capturing high-quality aerial footage.
- തത്സമയം View: Connect your smartphone to the drone's Wi-Fi and open the app to view ലൈവ് ക്യാമറ ഫീഡ്.
- ഫോട്ടോ/വീഡിയോ: Use the dedicated buttons on the remote control or the app interface to take photos or start/stop video recording.
- സംഭരണം: Photos and videos are typically saved to your smartphone's gallery or an inserted SD card (if supported by the drone).
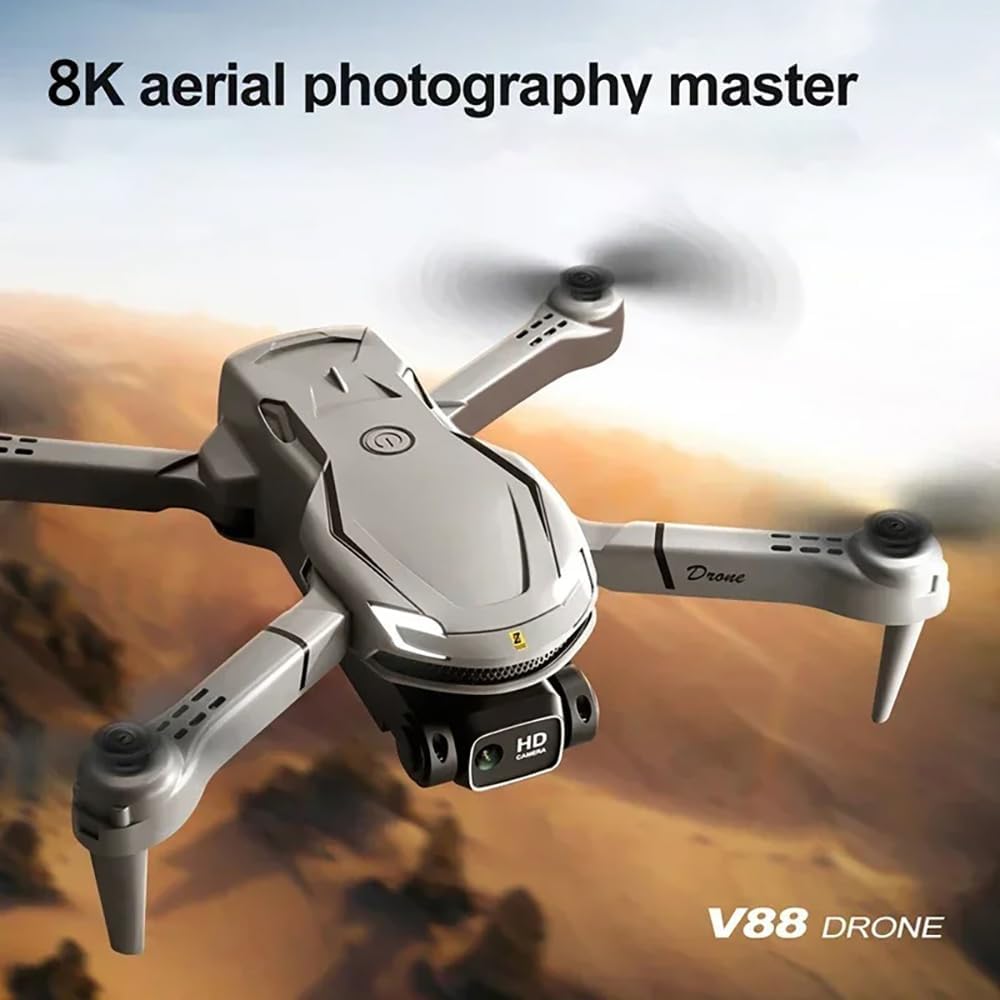
Image 5.2: The AUHIFVAX V88 Drone in flight, showcasing its capability as an 8K aerial photography master.
5.6 Special Flight Modes
- Intelligent Hovering: The drone uses air pressure calculation to maintain flight altitude in real-time, reducing the need for constant throttle adjustments. This feature enhances stability and ease of control.

Image 5.3: The AUHIFVAX V88 Drone demonstrating its intelligent hovering capability, maintaining a stable position without manual throttle input.
- 360° സ്റ്റണ്ട് റോൾ: Press the 360° Roll button on the remote control, then push the right joystick in any direction to perform an aerial flip. Ensure sufficient altitude and clear surroundings before attempting.

Image 5.4: The AUHIFVAX V88 Drone executing a 360-degree stunt roll during flight.
6. പരിപാലനം
6.1 വൃത്തിയാക്കൽ
- Wipe the drone and remote control with a soft, dry cloth after each use.
- Avoid using water or chemical cleaners, as they can damage electronic components.
- Regularly check propellers for dirt, debris, or damage. Clean or replace as necessary.
6.2 സംഭരണം
- Store the drone and its accessories in a cool, dry place, away from direct sunlight and extreme temperatures.
- Remove batteries from both the drone and remote control if storing for extended periods to prevent leakage.
- Fold the drone arms for compact storage.
7. പ്രശ്നപരിഹാരം
If you encounter issues with your V88 Drone, refer to the table below for common problems and solutions:
| പ്രശ്നം | സാധ്യമായ കാരണം | പരിഹാരം |
|---|---|---|
| ഡ്രോൺ പ്രവർത്തിക്കുന്നില്ല | ബാറ്ററി ചാർജ് കുറവാണ്; ബാറ്ററി ശരിയായി ഇൻസ്റ്റാൾ ചെയ്തിട്ടില്ല. | Charge drone battery; Reinstall battery securely |
| റിമോട്ട് കൺട്രോൾ പ്രതികരിക്കുന്നില്ല | Low remote control batteries; Not paired | Replace AAA batteries; Perform pairing procedure (Section 5.2) |
| പറക്കലിനിടെ ഡ്രോൺ തെന്നിമാറി | Gyro not calibrated; Uneven surface during takeoff | Perform gyro calibration (Section 5.2); Take off from a flat surface |
| Poor camera feed or no image | Wi-Fi not connected; App not open; Weak signal | Reconnect to drone's Wi-Fi; Relaunch app; Fly closer to drone |
| Drone loses GPS signal | Flying indoors; Obstructions; Bad weather | Fly outdoors in clear conditions; Avoid areas with tall buildings or interference |
| പ്രൊപ്പല്ലറുകൾ കറങ്ങുന്നില്ല | Obstruction; Propellers not installed correctly; Motor issue | Check for obstructions; Reinstall propellers; Contact support if motor is faulty |
8 സ്പെസിഫിക്കേഷനുകൾ
Technical details for the AUHIFVAX V88 Drone:
| ഫീച്ചർ | വിശദാംശങ്ങൾ |
|---|---|
| ബ്രാൻഡ് | AUHIFVAX |
| മോഡലിൻ്റെ പേര് | V88 |
| പ്രത്യേക സവിശേഷതകൾ | High Definition Camera, Integrated GPS |
| പ്രായപരിധി (വിവരണം) | മുതിർന്നവർ |
| നിറം | ചാരനിറം |
| വീഡിയോ ക്യാപ്ചർ റെസല്യൂഷൻ | 8K |
| കണക്റ്റിവിറ്റി ടെക്നോളജി | APP Controller, Remote Control, Wi-Fi Connection |
| നൈപുണ്യ നില | എല്ലാം |
| ഇനത്തിൻ്റെ ഭാരം | 550 ഗ്രാം |
| ബാറ്ററി | 3.7V 2200mAh Li-polymer |
9. വാറൻ്റിയും പിന്തുണയും
AUHIFVAX products are manufactured to high-quality standards. For information regarding warranty coverage, please refer to the warranty card included in your product packaging or contact your retailer. For technical support or inquiries, please reach out to the customer service department of your purchase point.