
ആമുഖം
വാങ്ങിയതിന് നന്ദി.asing the Andoer Digital Camera H12. This manual provides detailed instructions for the proper use and maintenance of your camera. Please read this manual thoroughly before using the camera to ensure optimal performance and longevity.
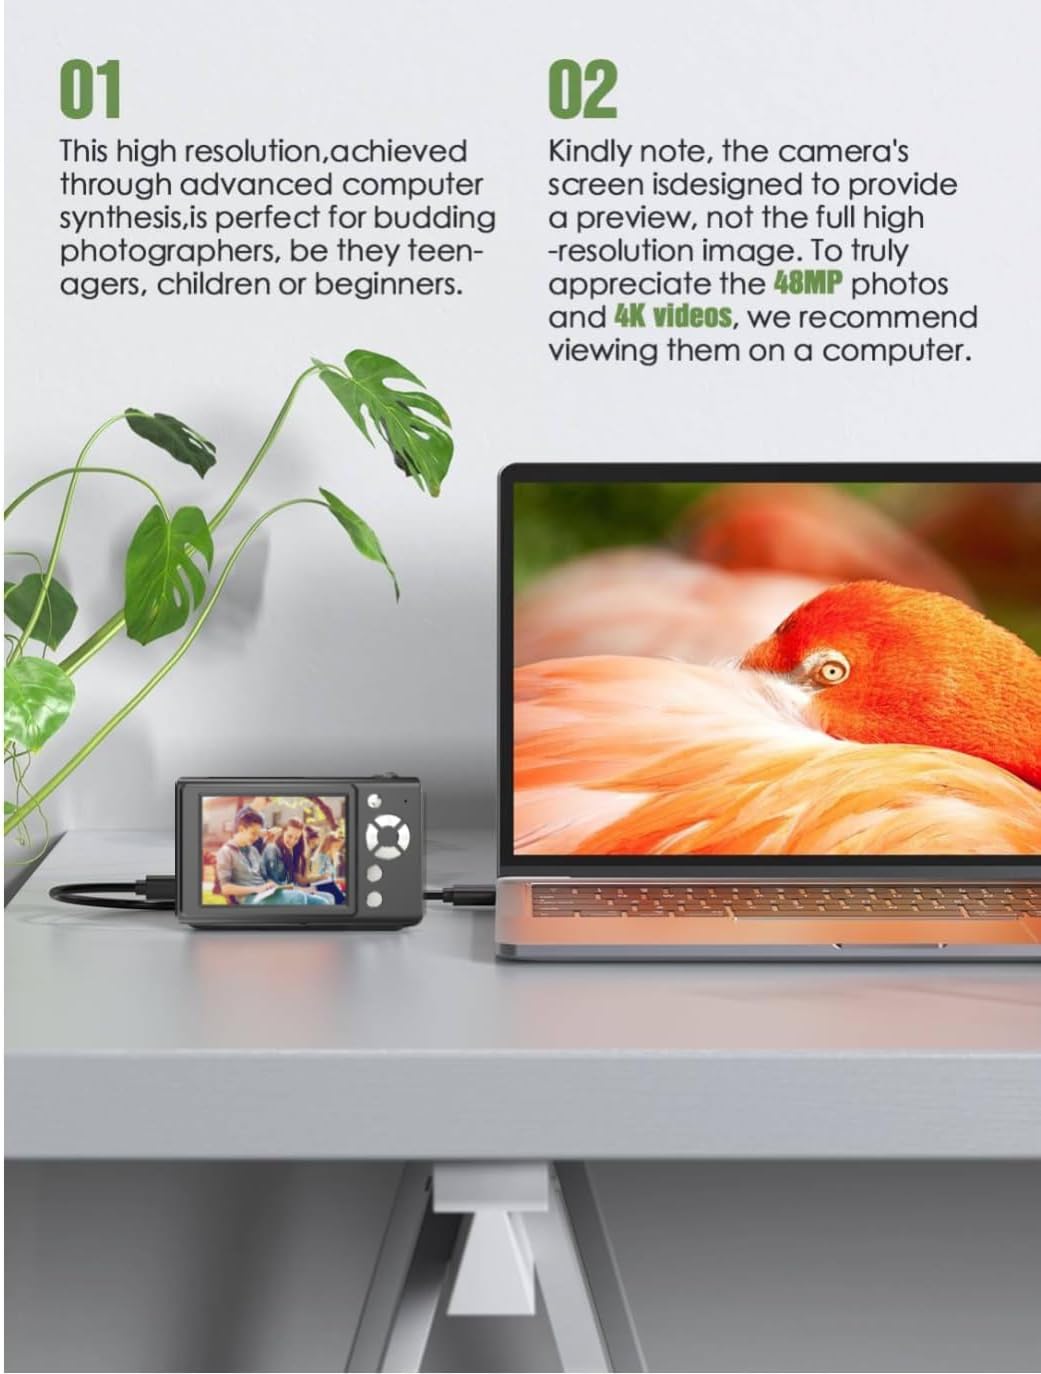
The Andoer H12 is a compact digital point-and-shoot camera featuring 1080P video recording, 48MP photo resolution, 16x digital zoom, autofocus, and an anti-shake function. It is designed for ease of use, making it suitable for various users.
പാക്കേജ് ഉള്ളടക്കം
അൺബോക്സിംഗ് ചെയ്യുമ്പോൾ എല്ലാ ഇനങ്ങളും ഉണ്ടെന്ന് ഉറപ്പാക്കാൻ പാക്കേജ് ഉള്ളടക്കങ്ങൾ പരിശോധിക്കുക:
- 1 x Andoer Digital Camera H12
- 1 x യുഎസ്ബി കേബിൾ (ടൈപ്പ്-സി)
- 1 x റിസ്റ്റ് സ്ട്രാപ്പ്
- 1 x 32GB മെമ്മറി കാർഡ്
- 1 X കാർഡ് റീഡർ
- 1 x ഉപയോക്തൃ മാനുവൽ
സജ്ജമാക്കുക
1 ബാറ്ററി ചാർജ് ചെയ്യുന്നു
The camera is equipped with a built-in 3.7V 700mAh lithium battery. Before first use, fully charge the battery.
- Connect the included Type-C USB cable to the camera's USB port.
- USB കേബിളിന്റെ മറ്റേ അറ്റം ഒരു USB പവർ അഡാപ്റ്ററുമായി (ഉൾപ്പെടുത്തിയിട്ടില്ല) അല്ലെങ്കിൽ ഒരു കമ്പ്യൂട്ടറിന്റെ USB പോർട്ടുമായി ബന്ധിപ്പിക്കുക.
- The charging indicator light will illuminate. Once charging is complete, the indicator light will change or turn off.
കുറിപ്പ്: A full charge typically takes approximately 2-3 hours. Do not use the camera while it is charging.
2. മെമ്മറി കാർഡ് ചേർക്കുന്നു
The camera supports TF (MicroSD) cards up to 128GB. A 32GB memory card is included in the package.
- ക്യാമറയുടെ വശത്ത് മെമ്മറി കാർഡ് സ്ലോട്ട് കണ്ടെത്തുക.
- Gently insert the TF card into the slot with the metal contacts facing the front of the camera until it clicks into place.
- To remove the card, gently push it in again until it springs out.

3. റിസ്റ്റ് സ്ട്രാപ്പ് ഘടിപ്പിക്കൽ
Attach the included wrist strap to the camera for added security and to prevent accidental drops.
- Thread the thin loop of the wrist strap through the strap eyelet on the camera body.
- Pass the larger end of the strap through the thin loop and pull tight to secure it.
പ്രവർത്തന നിർദ്ദേശങ്ങൾ
1. പവർ ഓൺ/ഓഫ്
- പവർ ഓൺ ചെയ്യാൻ, സ്ക്രീൻ പ്രകാശിക്കുന്നത് വരെ പവർ ബട്ടൺ അമർത്തിപ്പിടിക്കുക.
- പവർ ഓഫ് ചെയ്യാൻ, സ്ക്രീൻ ഓഫാകുന്നതുവരെ പവർ ബട്ടൺ വീണ്ടും അമർത്തിപ്പിടിക്കുക.
- The camera features an auto power-off function (off/3 mins/5 mins) which can be configured in the settings.
2. ഫോട്ടോ എടുക്കൽ
- Turn on the camera. The camera will typically start in photo mode.
- 2.8 ഇഞ്ച് IPS ഡിസ്പ്ലേ ഉപയോഗിച്ച് നിങ്ങളുടെ ഷോട്ട് ഫ്രെയിം ചെയ്യുക.
- Press the shutter button halfway down to activate autofocus. The camera will recognize and track subjects.
- ഫോക്കസ് നേടിക്കഴിഞ്ഞാൽ (ഒരു പച്ച ഫ്രെയിം കൊണ്ട് സൂചിപ്പിച്ചിരിക്കുന്നു), ചിത്രം എടുക്കാൻ ഷട്ടർ ബട്ടൺ പൂർണ്ണമായും അമർത്തുക.

3. വീഡിയോകൾ റെക്കോർഡുചെയ്യുന്നു
- Switch to video mode (refer to the camera's on-screen interface for the mode switch button).
- Press the shutter button to start recording. A red indicator or timer will appear on the screen.
- റെക്കോർഡിംഗ് നിർത്താൻ ഷട്ടർ ബട്ടൺ വീണ്ടും അമർത്തുക.
The camera supports 1080P and 720P video resolutions in AVI format. Loop recording can be set for 3, 5, or 10 minutes.
4. സൂം ഫംഗ്ഷൻ
Use the zoom buttons (usually marked 'W' for Wide and 'T' for Telephoto) to adjust the 16x digital zoom. This allows you to magnify distant subjects.

5. എൽഇഡി ഫിൽ ലൈറ്റ്
The camera features a built-in ring LED fill light with three lighting modes to assist in low-light conditions.
- വൈറ്റ് ലൈറ്റ്: Bright, even, and soft illumination.
- ചൂടുള്ള വെളുത്ത വെളിച്ചം: Pure natural light, soft and comfortable.
- മഞ്ഞ വെളിച്ചം: Warm color adjustment for a warm atmosphere.
Access and cycle through these modes via the camera's menu or a dedicated button (refer to the on-screen interface).

6. മറ്റ് പ്രവർത്തനങ്ങൾ
- സെൽഫി ടൈമർ: Options for off, 2s, 5s, or 10s delay before taking a photo.
- തുടർച്ചയായ ഷൂട്ടിംഗ്: Capture a series of photos rapidly.
- ആന്റി-ഷേക്ക്: Helps reduce blur caused by camera movement.
- ഫിൽട്ടർ ഇഫക്റ്റുകൾ: Various built-in filters to enhance your photos.
- ഗെയിമുകൾ: Includes 4 simple games for entertainment.
- MP3 പ്ലേബാക്ക്: Download MP3 music to the memory card and play it through the camera.

മെയിൻ്റനൻസ്
- ക്യാമറ ബോഡി വൃത്തിയാക്കൽ: ക്യാമറ ബോഡി തുടയ്ക്കാൻ മൃദുവായതും ഉണങ്ങിയതുമായ തുണി ഉപയോഗിക്കുക. കഠിനമായ അഴുക്കിന്, ചെറുതായി dampen the cloth with water and then wipe dry. Avoid using chemical cleaners.
- ലെൻസും സ്ക്രീനും വൃത്തിയാക്കൽ: Use a specialized lens cleaning cloth or brush to gently remove dust and smudges. Do not use abrasive materials or excessive force.
- സംഭരണം: When not in use for extended periods, store the camera in a cool, dry place away from direct sunlight and extreme temperatures. Remove the memory card if not in use.
- ബാറ്ററി കെയർ: Avoid fully discharging the battery frequently. Charge the battery regularly, even if the camera is not in use, to maintain battery health.
- ജല പ്രതിരോധം: ഈ ക്യാമറയാണ് വെള്ളത്തെ പ്രതിരോധിക്കുന്നില്ല. Avoid exposure to water, rain, or high humidity.
ട്രബിൾഷൂട്ടിംഗ്
| പ്രശ്നം | സാധ്യമായ കാരണം | പരിഹാരം |
|---|---|---|
| ക്യാമറ പവർ ഓൺ ചെയ്യുന്നില്ല. | ബാറ്ററി തീർന്നു അല്ലെങ്കിൽ ചാർജ് ചെയ്തിട്ടില്ല. | Charge the camera battery fully using the provided USB cable. |
| ഫോട്ടോകൾ എടുക്കാനോ വീഡിയോകൾ റെക്കോർഡ് ചെയ്യാനോ കഴിയില്ല. | Memory card is full, not inserted correctly, or corrupted. | Check if the memory card is inserted correctly. Delete unnecessary files or replace the memory card. Format the card if necessary (this will erase all data). |
| ചിത്രങ്ങൾ അവ്യക്തമാണ്. | Autofocus failed, camera shake, or dirty lens. | Ensure autofocus is engaged. Hold the camera steady or use the anti-shake function. Clean the lens with a soft cloth. |
| സ്ക്രീൻ ശൂന്യമാണ് അല്ലെങ്കിൽ നിശ്ചലമാണ്. | System error or temporary malfunction. | Press and hold the power button for 10 seconds to force a shutdown, then restart the camera. If the issue persists, contact customer support. |
| കൈമാറാൻ കഴിയില്ല fileകമ്പ്യൂട്ടറിലേക്ക്. | തെറ്റായ കേബിൾ കണക്ഷൻ അല്ലെങ്കിൽ ഡ്രൈവർ പ്രശ്നം. | Ensure the USB cable is securely connected. Try a different USB port or computer. Use the included card reader to transfer fileമെമ്മറി കാർഡിൽ നിന്ന് നേരിട്ട്. |
സ്പെസിഫിക്കേഷനുകൾ
| ഫീച്ചർ | വിശദാംശങ്ങൾ |
|---|---|
| മോഡലിൻ്റെ പേര് | H12 |
| പ്രദർശിപ്പിക്കുക | 2.8 ഇഞ്ച് ഐപിഎസ് എൽസിഡി |
| ഫോട്ടോ റെസല്യൂഷൻ | Up to 48MP (48M, 40M, 24M, 20M, 18M, 16M, 12M, 10M, 8M, 5M, 3M, 2M, 1M) |
| ഫോട്ടോ ഫോർമാറ്റ് | ജെ.പി.ജി |
| വീഡിയോ റെസല്യൂഷൻ | 1080P, 720P |
| വീഡിയോ ഫോർമാറ്റ് | എ.വി.ഐ |
| ഡിജിറ്റൽ സൂം | 16X |
| ഓട്ടോഫോക്കസ് | Yes (Contrast Detection, 9 points) |
| ഇമേജ് സ്റ്റെബിലൈസേഷൻ | ഒപ്റ്റിക്കൽ |
| സെൻസർ തരം | CMOS (1/4-inch) |
| സംഭരണം | TF card, max. 128GB (32GB included) |
| ബാറ്ററി | Built-in Lithium Battery (3.7V 700mAh) |
| ചാർജിംഗ് ഇൻ്റർഫേസ് | യുഎസ്ബി ടൈപ്പ്-സി |
| സെൽഫി ടൈമർ | Off/ 2s/ 5s/ 10s |
| ഓട്ടോ പവർ ഓഫ് | Off/ 3 mins/ 5 mins |
| ലൂപ്പ് റെക്കോർഡിംഗ് | 3 mins/ 5 mins/ 10 mins |
| അന്തർനിർമ്മിത സവിശേഷതകൾ | LED Fill Light (3 modes), Filter Effects, 4 Games, MP3 Playback |
| ഉൽപ്പന്ന വലുപ്പം | 103 x 31 x 65 മിമി |
| ഉൽപ്പന്ന ഭാരം | 149g (camera body) / 260g (item weight including packaging/accessories) |
| ജല പ്രതിരോധ നില | വാട്ടർ റെസിസ്റ്റൻ്റ് അല്ല |
വാറൻ്റി വിവരങ്ങൾ
The Andoer Digital Camera H12 comes with a 1 വർഷത്തെ വാറൻ്റി വാങ്ങിയ തീയതി മുതൽ. സാധാരണ ഉപയോഗത്തിലുള്ള നിർമ്മാണ വൈകല്യങ്ങളും തകരാറുകളും ഈ വാറന്റി ഉൾക്കൊള്ളുന്നു. ദുരുപയോഗം, അപകടങ്ങൾ, അനധികൃത അറ്റകുറ്റപ്പണികൾ അല്ലെങ്കിൽ പ്രകൃതി ദുരന്തങ്ങൾ എന്നിവ മൂലമുണ്ടാകുന്ന നാശനഷ്ടങ്ങൾക്ക് ഇത് പരിരക്ഷ നൽകുന്നില്ല.
വാറൻ്റി ക്ലെയിമുകൾക്കായി നിങ്ങളുടെ വാങ്ങിയതിൻ്റെ തെളിവ് സൂക്ഷിക്കുക.
ഉപഭോക്തൃ പിന്തുണ
If you encounter any issues or have questions not covered in this manual, please contact Andoer customer support. You can typically find support contact information on the official Andoer webസൈറ്റ് അല്ലെങ്കിൽ നിങ്ങളുടെ റീട്ടെയിലർ വഴി.
കൂടുതൽ സഹായത്തിന്, ദയവായി സന്ദർശിക്കുക Andoer Store on Amazon.