
Ollny NYD050A
Ollny 110FT Solar String Lights (Model NYD050A) Instruction Manual
സജ്ജീകരണം, പ്രവർത്തനം, പരിപാലനം എന്നിവയ്ക്കുള്ള സമഗ്രമായ ഗൈഡ്.
1. ആമുഖം
Thank you for choosing the Ollny 110FT Solar String Lights. This manual provides detailed instructions for the safe and efficient use of your new lighting system. Please read this manual thoroughly before installation and operation.
പാക്കേജ് ഉള്ളടക്കം:
- 1x 110FT Solar String Lights with 50 G40 LED Bulbs
- 2x Spare Shatterproof G40 LED Bulbs
- 1x Solar Panel with Ground Stake
- 1x Remote Control (2 AAA batteries included)
- Mounting Hardware (clips, screws, wall anchors)
- 1x യുഎസ്ബി ചാർജിംഗ് കേബിൾ
- 1x ഉപയോക്തൃ മാനുവൽ (ഈ പ്രമാണം)
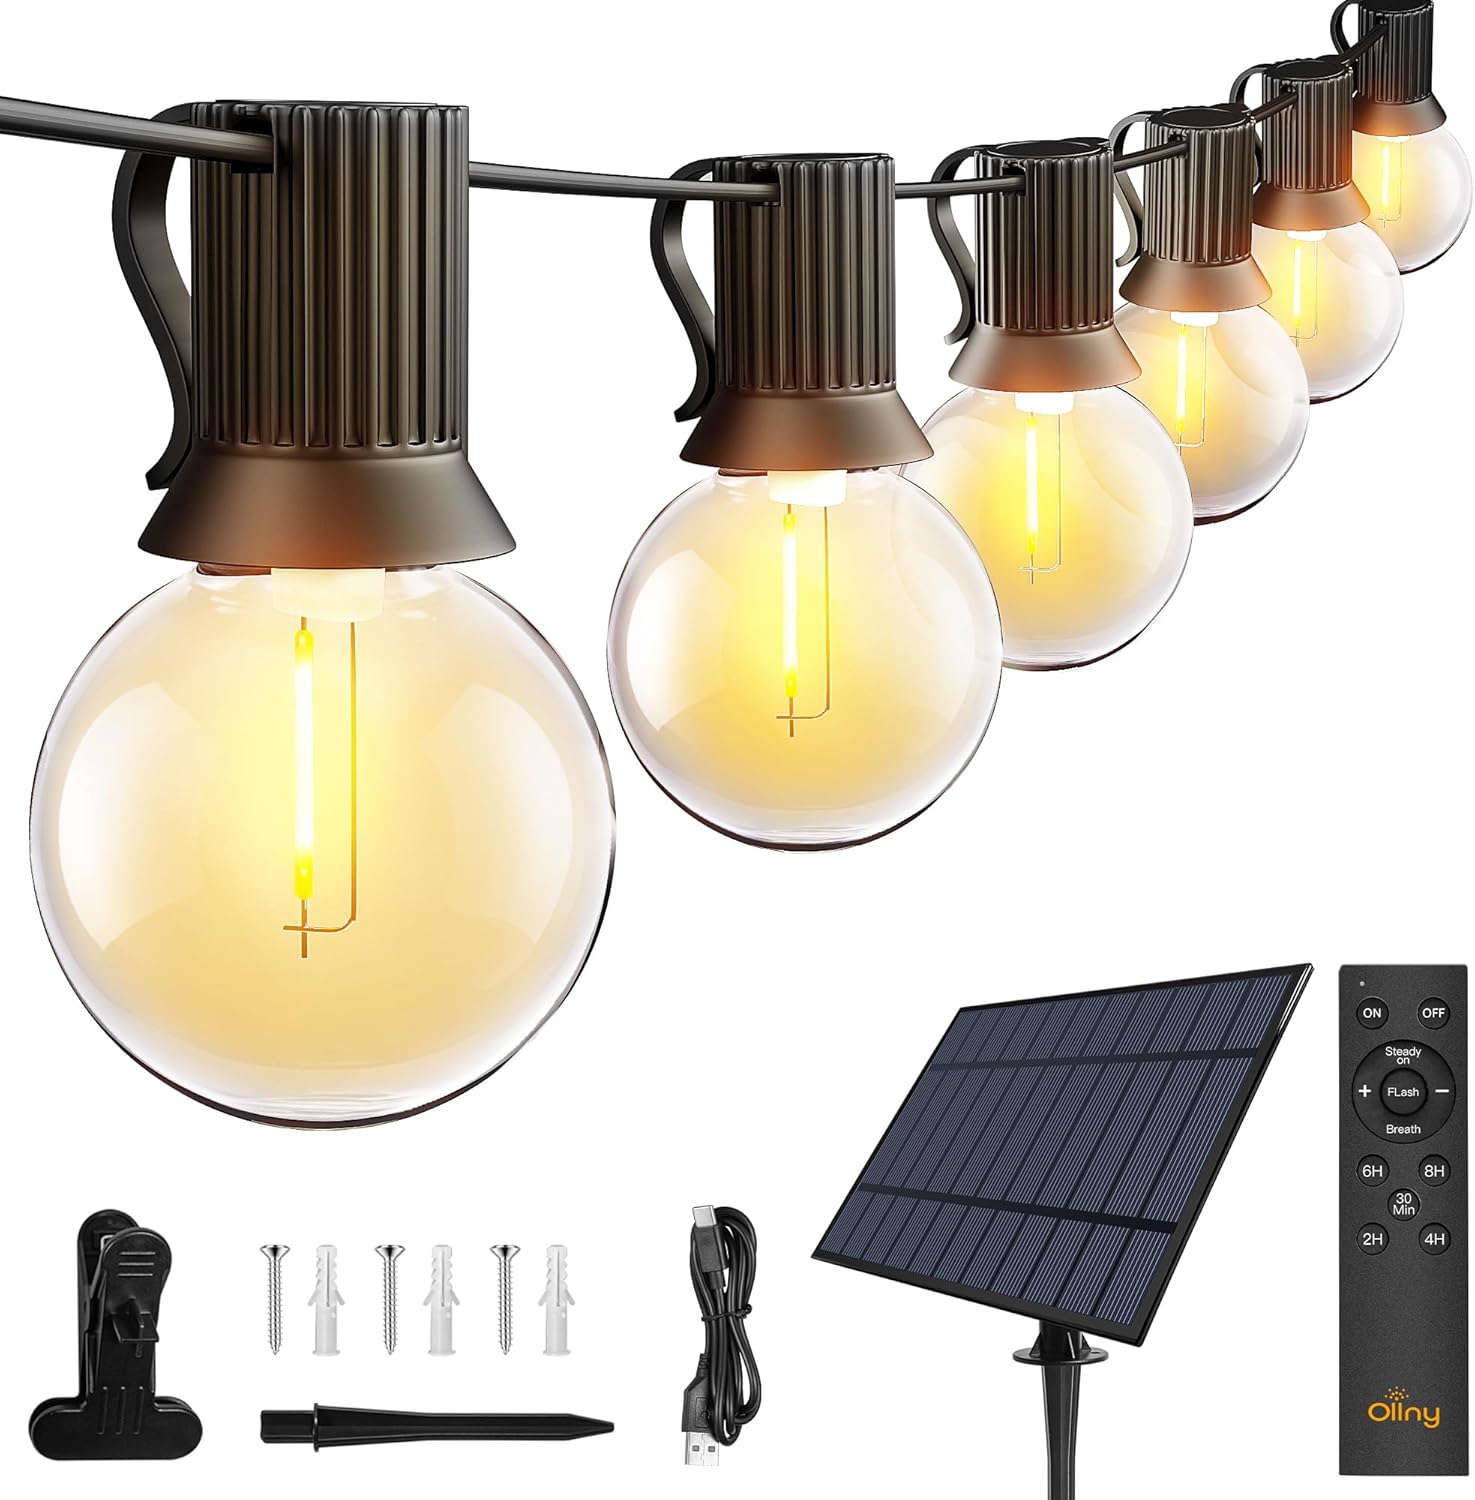
ചിത്രം: കഴിഞ്ഞുview of the Ollny 110FT Solar String Lights package contents, showing the string lights, solar panel, remote control, and various installation accessories.
2 സുരക്ഷാ വിവരങ്ങൾ
- ഉപയോഗിക്കുന്നതിന് മുമ്പ് എല്ലാ ഘടകങ്ങളും സുരക്ഷിതമായി ബന്ധിപ്പിച്ചിട്ടുണ്ടെന്ന് ഉറപ്പാക്കുക.
- ഉൽപ്പന്നം പരിഷ്ക്കരിക്കാനോ നന്നാക്കാനോ ശ്രമിക്കരുത്. സഹായത്തിനായി ഉപഭോക്തൃ പിന്തുണയുമായി ബന്ധപ്പെടുക.
- ചാർജിംഗ് കാര്യക്ഷമത ഉറപ്പാക്കാൻ സോളാർ പാനൽ വൃത്തിയായി സൂക്ഷിക്കുക.
- Avoid submerging the string lights or solar panel in water, despite their water-resistant rating (IP65 for solar panel, IP45 for bulbs).
- Shatterproof bulbs are designed for durability, but handle with care.
3. സജ്ജീകരണവും ഇൻസ്റ്റാളേഷനും
3.1 സോളാർ പാനൽ സ്ഥാപിക്കൽ
The solar panel is crucial for charging the lights. Choose a location that receives at least 6-8 hours of direct sunlight daily. Avoid shaded areas.

Image: Close-up of the solar panel, highlighting the USB charging port and the 'MODE' and 'ON/OFF' buttons. It also shows the 4000mAh battery capacity and 10 hours of light duration.
3.2 ഇൻസ്റ്റലേഷൻ രീതികൾ
The solar panel offers multiple installation options:
- ഗ്രൗണ്ട് സ്റ്റേക്ക്: Attach the stake to the solar panel and insert it firmly into the ground.
- വാൾ മൗണ്ട്: Use the provided screws and anchors to secure the panel to a wall or fence.
- ക്ലിപ്പ് മൗണ്ട്: Attach the clip to the panel and secure it to a suitable edge or railing.

Image: Depicts three ways to install the solar panel: inserting it into the ground with a stake, nailing it to a wall, or clamping it to a board.
3.3 String Light Placement
Uncoil the string lights carefully. Hang them using the integrated clips on each bulb socket or other suitable fasteners. Ensure the solar panel is connected to the string lights.

Image: A diagram illustrating the total length of the 110FT solar outdoor string lights, the 2-foot spacing between bulbs, and the 11.5-foot lead cable from the solar panel to the first bulb. It also notes that the lights are not connectable.
3.4 പ്രാരംഭ സജീവമാക്കൽ
Before first use, press the ON button located behind the solar panel. Allow the solar panel to charge in direct sunlight for 4-6 hours, or use the USB cable for faster charging (approximately 4 hours).

Image: Illustrates two charging methods for the solar panel: solar power (6 hours charging) and USB charging (4 hours charging).
4. പ്രവർത്തന നിർദ്ദേശങ്ങൾ
4.1 Automatic ON/OFF Function
The solar panel has a built-in light sensor. The lights will automatically turn on at dusk and turn off at dawn, provided the ON button on the solar panel is activated.
കുറിപ്പ്: If you wish to use the lights during daylight hours, ensure the solar panel is covered to simulate darkness.

Image: Demonstrates the light sensor function of the solar panel, with lights automatically turning on at night and off during the day. A note advises covering the solar panel for daytime use.
4.2 വിദൂര നിയന്ത്രണ പ്രവർത്തനങ്ങൾ
The included remote control allows for convenient adjustment of light settings from up to 33 feet away.

ചിത്രം: വിശദമായ ഒരു ചിത്രം view of the remote control, illustrating buttons for power (ON/OFF), brightness adjustment (+/-), three lighting modes (Steady ON, Flash, Breath), and timer settings (30 minutes, 2 hours, 4 hours, 6 hours, 8 hours).
- ഓൺ/ഓഫ്: ലൈറ്റുകൾ ഓണാക്കുക അല്ലെങ്കിൽ ഓഫാക്കുക.
- മങ്ങുന്നു: ഉപയോഗിക്കുക + ഒപ്പം - buttons to adjust brightness from 25% to 100% in Steady ON mode.
- മോഡുകൾ: Select from three lighting modes:
- സ്ഥിരതയുള്ളത്: തുടർച്ചയായ പ്രകാശം.
- ഫ്ലാഷ്: Flashing effect.
- ശ്വാസം: Gradual dimming and brightening effect.
- ടൈമറുകൾ: Set the lights to turn off automatically after a specified duration: 30 minutes, 2 hours, 4 hours, 6 hours, or 8 hours.
Video: An official product video demonstrating the Ollny G40 solar outdoor lights in various settings, showcasing their aesthetic appeal and functionality. This video is provided by the seller, Ollny Decor Lights.
5. പരിപാലനം
- വൃത്തിയാക്കൽ: ഇടയ്ക്കിടെ സോഫ്റ്റ്, ഡി-ടൈപ്പ് ഉപയോഗിച്ച് സോളാർ പാനൽ തുടയ്ക്കുക.amp cloth to remove dust and debris, ensuring maximum charging efficiency.
- ബൾബ് മാറ്റിസ്ഥാപിക്കൽ: The string lights include 2 spare bulbs. To replace a bulb, gently unscrew the old bulb and screw in a new one. Ensure the power is off before replacing bulbs.
- സംഭരണം: If storing the lights for an extended period, ensure the solar panel is fully charged. Store in a cool, dry place.

ചിത്രം: വിശദമായ ഒരു ചിത്രം view of one of the G40 LED bulbs, showing its clear shatterproof casing and the E12 screw base.
6. പ്രശ്നപരിഹാരം
| പ്രശ്നം | സാധ്യമായ കാരണം | പരിഹാരം |
|---|---|---|
| രാത്രിയിൽ വിളക്കുകൾ കത്തുന്നില്ല. |
|
|
| ലൈറ്റുകൾ മങ്ങുകയോ മിന്നിമറയുകയോ ചെയ്യുന്നു. |
|
|
| റിമോട്ട് കൺട്രോൾ പ്രവർത്തിക്കുന്നില്ല. |
|
|
7. ഉൽപ്പന്ന സവിശേഷതകൾ
| ഫീച്ചർ | വിശദാംശങ്ങൾ |
|---|---|
| മോഡൽ നമ്പർ | NYD050A |
| ആകെ നീളം | 110 അടി |
| ബൾബുകളുടെ എണ്ണം | 50 LED + 2 Spare |
| ബൾബ് തരം | G40 Shatterproof LED |
| ബൾബ് ബേസ് | E12 |
| ഇളം നിറം | വാം വൈറ്റ് (2700 കെൽവിൻ) |
| പവർ ഉറവിടം | Solar Powered (with USB charging option) |
| സോളാർ പാനൽ ബാറ്ററി | 4000mAh |
| സോളാർ പാനൽ ചാർജിംഗ് സമയം | 4-6 മണിക്കൂർ (നേരിട്ടുള്ള സൂര്യപ്രകാശം) |
| USB ചാർജിംഗ് സമയം | ഏകദേശം 4 മണിക്കൂർ |
| പ്രവർത്തന സമയം | 10 മണിക്കൂർ വരെ (പൂർണ്ണമായി ചാർജ് ചെയ്തത്) |
| വാട്ടർപ്രൂഫ് റേറ്റിംഗ് | Solar Panel: IP65, Bulbs: IP45 |
| നിയന്ത്രണ രീതി | Remote Control (RF, 33ft range) |
| റിമോട്ട് കൺട്രോൾ ബാറ്ററികൾ | 2 AAA (ഉൾപ്പെടുത്തിയിരിക്കുന്നു) |
| പ്രത്യേക സവിശേഷതകൾ | Dimmable (25%-100%), 3 Lighting Modes (Steady, Flash, Breath), Timers (30min/2H/4H/6H/8H), Auto ON/OFF Light Sensor |
| മെറ്റീരിയൽ | പ്ലാസ്റ്റിക് |
| ഇനത്തിൻ്റെ ഭാരം | 3.85 പൗണ്ട് (1.75 കിലോഗ്രാം) |
8. വാറൻ്റിയും പിന്തുണയും
Ollny products are designed for quality and durability. For any questions, concerns, or technical support, please contact Ollny customer service via Amazon. Our support team is available to assist you within 24 hours.
നിർദ്ദിഷ്ട വാറന്റി വിശദാംശങ്ങൾക്ക് നിങ്ങളുടെ വാങ്ങൽ ഡോക്യുമെന്റേഷൻ പരിശോധിക്കുക.
Ask a question about this manual
Ask about setup, troubleshooting, compatibility, parts, safety, or missing instructions. Manuals+ will review the question and use this page’s manual context to help answer it.