
ആമുഖം
This manual provides essential information for the proper installation, operation, and maintenance of your JR Module Adapter. This adapter is designed to allow the use of various JR Type TX modules, such as TBS Crossfire, iRangeX IRX4, and Jumper JP4IN1, with compatible FrSky X-LITE transmitters.
ഉൽപ്പന്നം കഴിഞ്ഞുview
The JR Module Adapter facilitates the connection of external JR-style transmitter modules to FrSky X-LITE series radios. It provides the necessary physical and electrical interface for these modules to function correctly with your transmitter.
പാക്കേജ് ഉള്ളടക്കം:
- 1 x JR Module Adapter
- 1 x കണക്ഷൻ കേബിൾ
ഉൽപ്പന്ന ചിത്രങ്ങൾ:

Figure 1: JR Module Adapter installed on a FrSky X-LITE transmitter, with a TBS Crossfire module attached. This illustrates the adapter's function in integrating external modules.
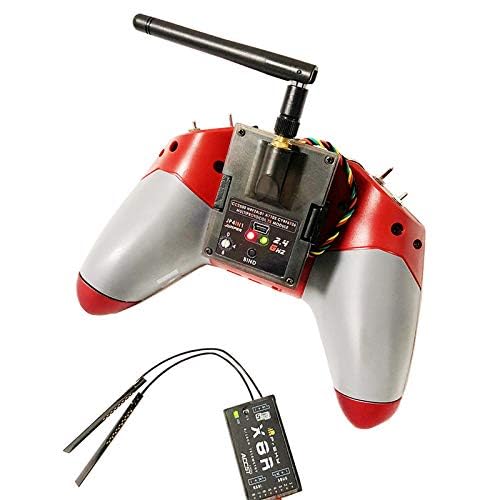
Figure 2: Rear perspective of the FrSky X-LITE transmitter showing the JR Module Adapter and a Jumper JP4IN1 module. Note the antenna of the module extending upwards.
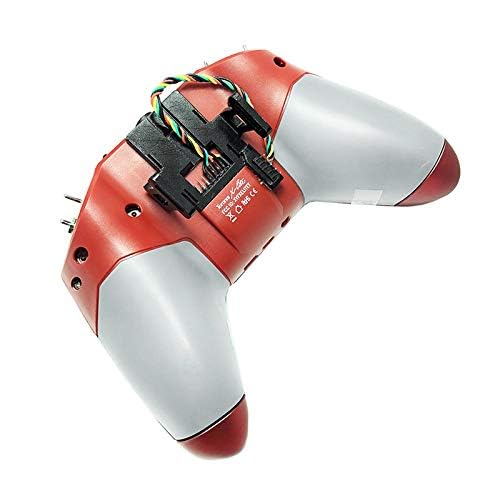
ചിത്രം 3: View of the FrSky X-LITE transmitter's module bay from the underside, highlighting the mounting points for the JR Module Adapter.
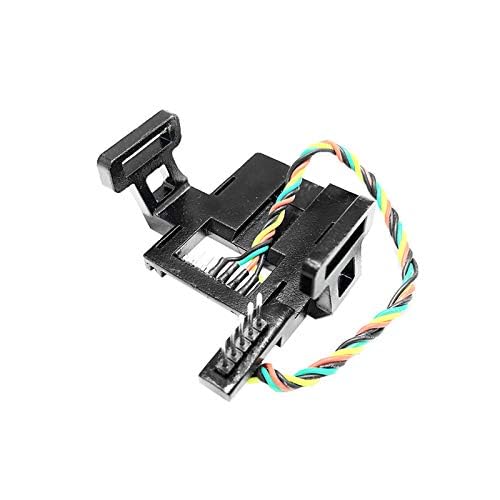
ചിത്രം 4: വിശദമായി view of the JR Module Adapter, showing the adapter body and the attached multi-pin connection cable.
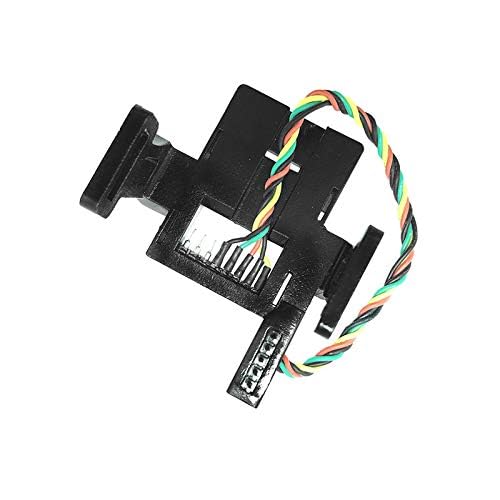
Figure 5: Alternative close-up of the JR Module Adapter, providing a different angle of its structure and connection points.
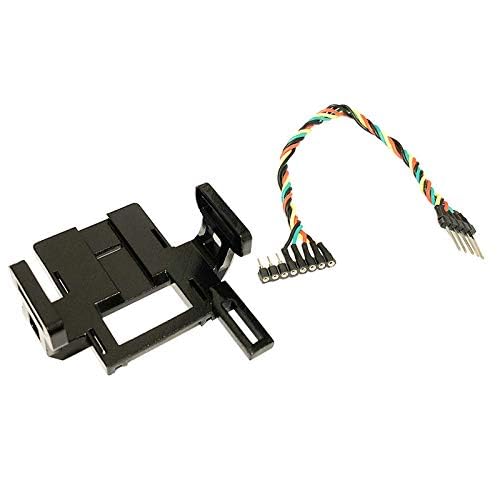
Figure 6: The JR Module Adapter and its accompanying connection cable displayed separately, illustrating the two main components of the product.
സജ്ജീകരണ നിർദ്ദേശങ്ങൾ
- Prepare Transmitter: Ensure your FrSky X-LITE transmitter is powered off.
- Access Module Bay: Locate the external module bay on the back of your FrSky X-LITE transmitter. This may require removing a cover or existing module.
- Connect Adapter Cable: Carefully connect the multi-pin cable from the JR Module Adapter to the corresponding internal pins within the transmitter's module bay. Ensure the orientation is correct to avoid bending pins.
- മൗണ്ട് അഡാപ്റ്റർ: Securely mount the JR Module Adapter into the module bay. The adapter is designed to fit snugly.
- Attach External Module: Once the JR Module Adapter is installed, you can now attach your desired JR Type TX module (e.g., TBS Crossfire, iRangeX IRX4, Jumper JP4IN1) to the adapter. Ensure it clicks into place or is otherwise securely fastened.
- പവർ ഓണും ടെസ്റ്റും: Power on your FrSky X-LITE transmitter. Verify that the external module is recognized by the transmitter's firmware. Refer to your transmitter's manual for specific steps on external module setup and binding.
കുറിപ്പ്: Always ensure proper pin alignment and secure connections to prevent damage to the adapter or your transmitter.
പ്രവർത്തന നിർദ്ദേശങ്ങൾ
The JR Module Adapter itself does not require specific operational steps beyond proper installation. Its function is to provide a physical and electrical interface for external JR Type TX modules.
- Module Recognition: After installation, ensure your transmitter's firmware recognizes the connected external module. This is typically indicated on the transmitter's display or through LED indicators on the module itself.
- മൊഡ്യൂൾ കോൺഫിഗറേഷൻ: All operational settings, such as binding, power output, and protocol selection, are managed through the external JR Type TX module and your transmitter's operating system (e.g., OpenTX, EdgeTX). Refer to the specific manual for your external module for detailed operating instructions.
- സുരക്ഷിത കണക്ഷൻ: Before each use, verify that the external module is securely seated in the JR Module Adapter and that the adapter itself is firmly installed in the transmitter's module bay.
മെയിൻ്റനൻസ്
The JR Module Adapter is a passive component and requires minimal maintenance.
- വൃത്തിയാക്കൽ: Use a soft, dry cloth to gently wipe the adapter to remove dust or debris. Do not use liquid cleaners or solvents.
- പരിശോധന: Periodically inspect the connection pins on both the adapter and its cable for any signs of bending, corrosion, or damage.
- സംഭരണം: When not in use, store the adapter in a clean, dry environment, away from extreme temperatures and direct sunlight.
ട്രബിൾഷൂട്ടിംഗ്
| പ്രശ്നം | സാധ്യമായ കാരണം | പരിഹാരം |
|---|---|---|
| External module not recognized by transmitter. |
|
|
| Module LEDs not illuminating. |
|
|
സ്പെസിഫിക്കേഷനുകൾ
| ആട്രിബ്യൂട്ട് | മൂല്യം |
|---|---|
| ഇനത്തിൻ്റെ പേര് | JR Module Adapter |
| നിറം | കറുപ്പ് |
| അളവുകൾ (L*W*H) | 5.0 സെ.മീ * 5.8 സെ.മീ * 2.6 സെ.മീ |
| ഭാരം | 14 ഗ്രാം |
| ഉപയോഗം | For TBS Crossfire, iRangeX IRX4 Multiprotocol TX Module, Jumper JP4IN1 Multiprotocol TX Module etc. JR Type TX module. |
| മോഡൽ നമ്പർ | ABLFY_DUD_21265 |
വാറൻ്റിയും പിന്തുണയും
Specific warranty information for this product is not provided in the available documentation. For any support inquiries, technical assistance, or warranty claims, please contact the seller or manufacturer directly through the platform where the product was purchased.
It is recommended to retain your proof of purchase for any potential warranty claims.