
ആമുഖം
This manual provides essential information for the setup, operation, and maintenance of your PowerA Enhanced Wireless Controller, featuring the unique Pikachu vs. Gengar design. This officially licensed controller is designed to enhance your gaming experience on Nintendo Switch, Nintendo Switch Lite, and Nintendo Switch (OLED Model) consoles.
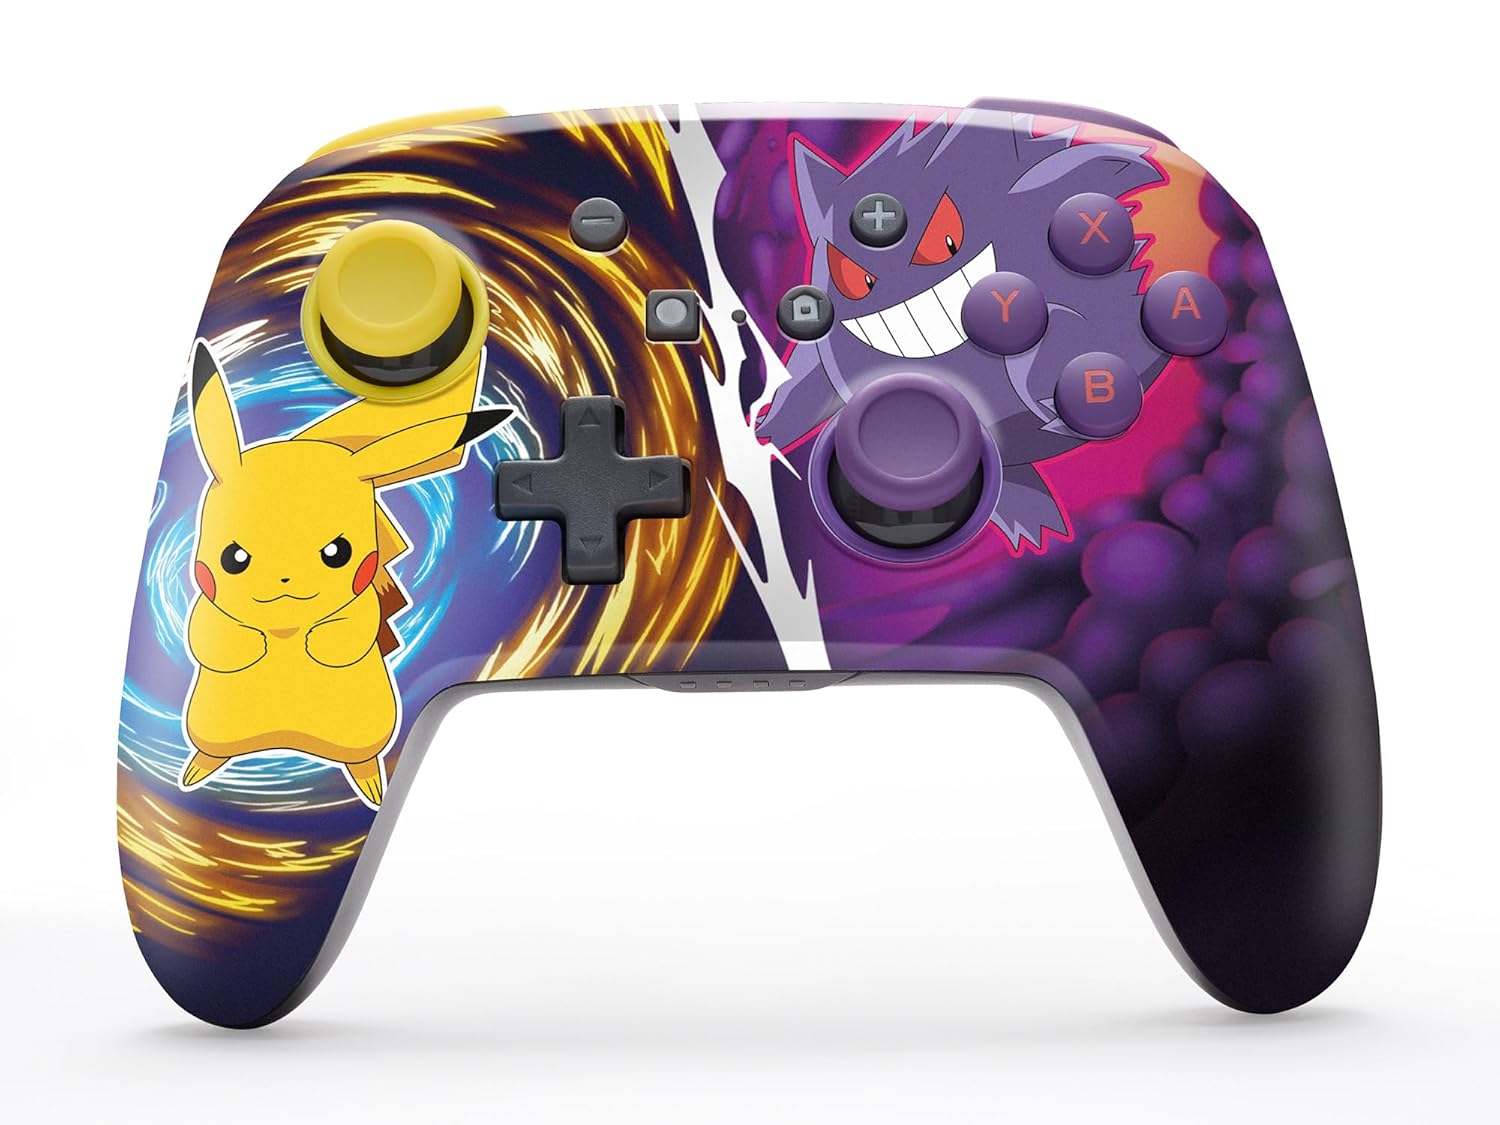
The PowerA Enhanced Wireless Controller with Pikachu vs. Gengar artwork.
പ്രധാന സവിശേഷതകൾ
- വയർലെസ് കണക്റ്റിവിറ്റി: Utilizes Bluetooth 5.0 technology for a stable connection.
- റീചാർജ് ചെയ്യാവുന്ന ബാറ്ററി: Integrated lithium-ion battery provides up to 30 hours of gameplay per charge.
- Mappable Advanced Gaming Buttons: Two programmable buttons on the back for custom control.
- എർഗണോമിക് ഡിസൈൻ: ദീർഘനേരം സുഖകരമായ ഗെയിമിംഗ് സെഷനുകൾക്കായി മികച്ച എർഗണോമിക്സ്.
- Smooth Thumbstick Control: Embedded anti-friction rings ensure precise and fluid movement.
- ചലന നിയന്ത്രണങ്ങൾ: Supports intuitive motion controls for compatible games.

സുഖകരമായ ഗെയിംപ്ലേയ്ക്കായി എർഗണോമിക് ഡിസൈൻ.
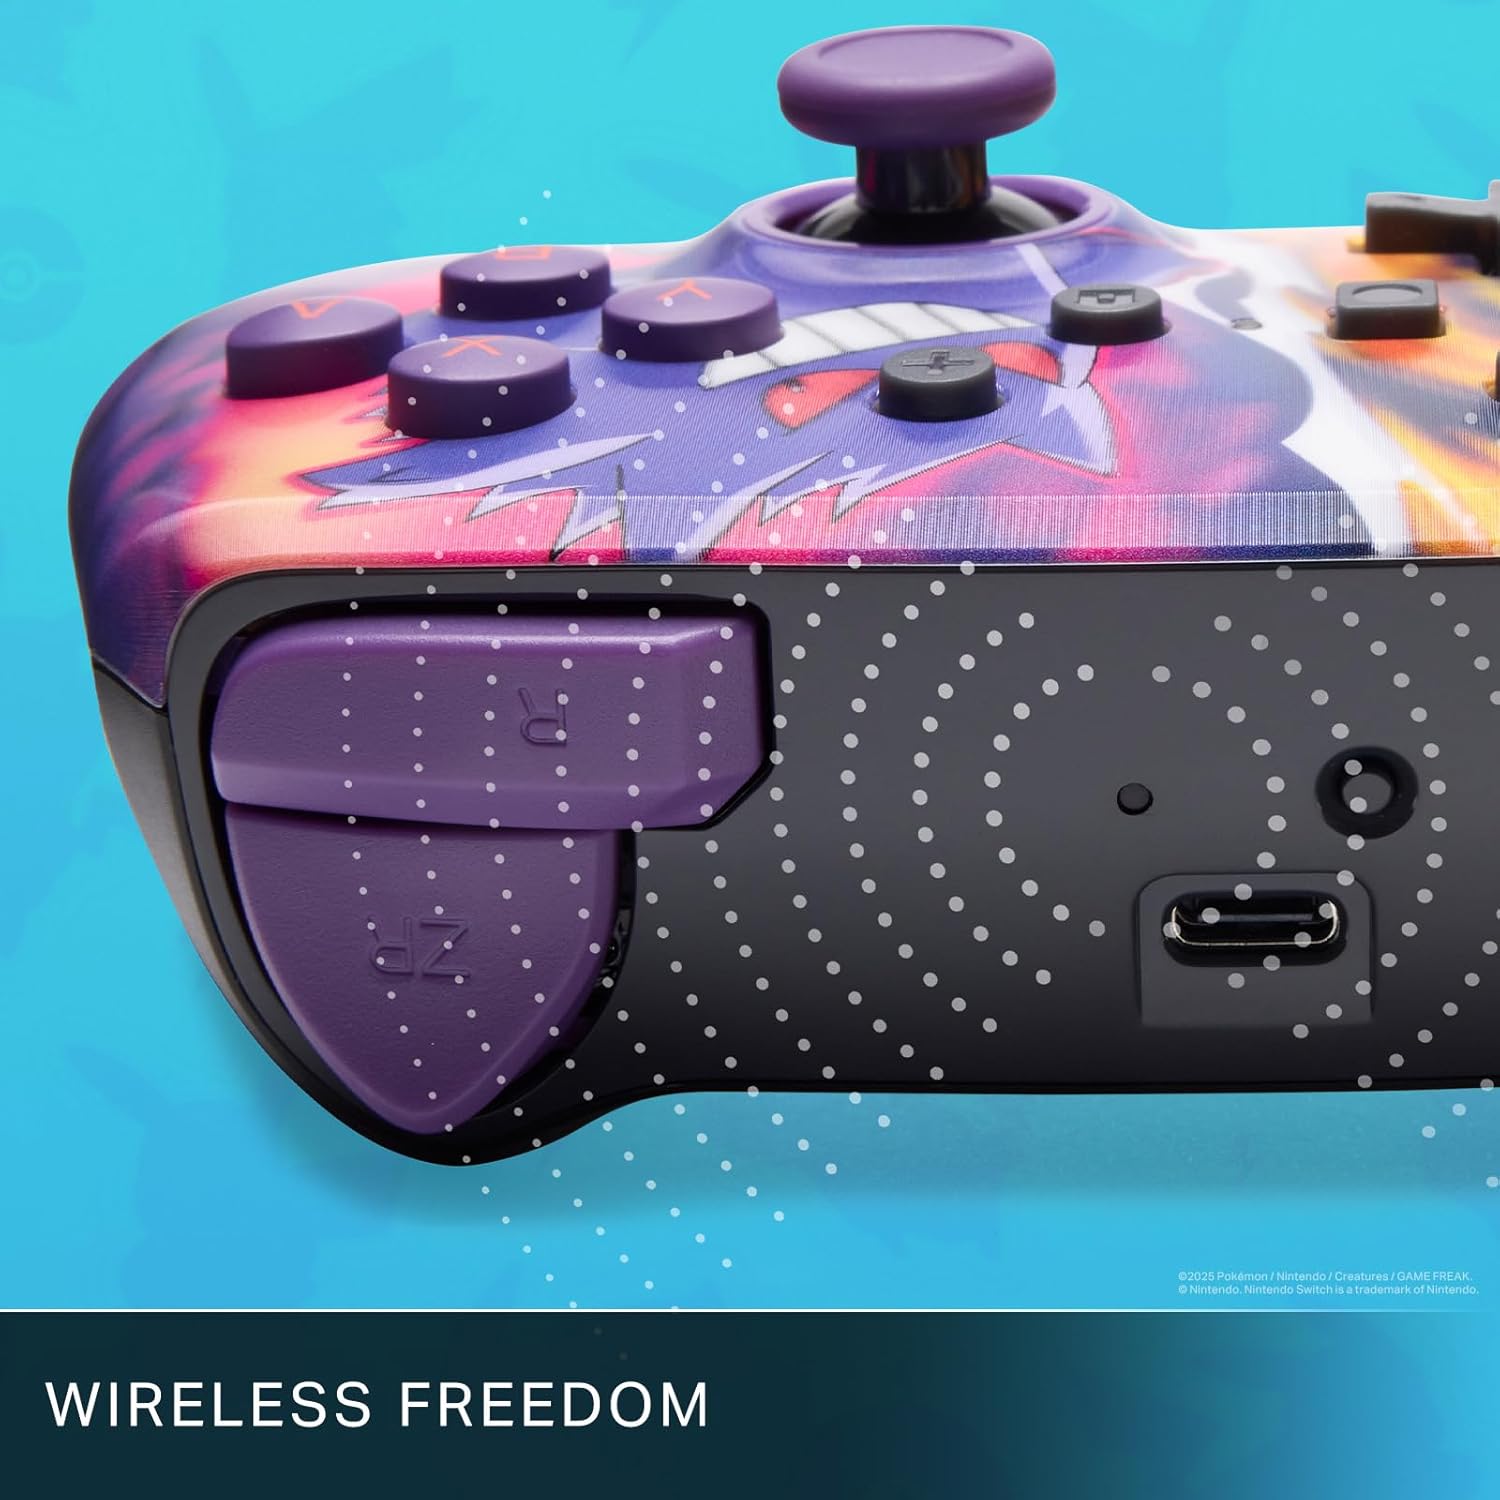
Enjoy wireless freedom with Bluetooth 5.0 technology.
സജ്ജീകരണവും ജോടിയാക്കലും
- നിങ്ങളുടെ Nintendo Switch കൺസോൾ ഓണാക്കിയിട്ടുണ്ടെന്നും ഏറ്റവും പുതിയ സിസ്റ്റം സോഫ്റ്റ്വെയറിലേക്ക് അപ്ഡേറ്റ് ചെയ്തിട്ടുണ്ടെന്നും ഉറപ്പാക്കുക.
- ഹോം മെനുവിൽ നിന്ന് തിരഞ്ഞെടുക്കുക കൺട്രോളറുകൾ, പിന്നെ ഗ്രിപ്പ്/ഓർഡർ മാറ്റുക.
- അമർത്തിപ്പിടിക്കുക SYNC ബട്ടൺ on the top edge of your PowerA Enhanced Wireless Controller for at least one second. The Player LED(s) will flash.
- Once paired, the Player LED(s) corresponding to the controller number will remain lit.
- അമർത്തുക ഒരു ബട്ടൺ to confirm and exit the menu. Your controller is now ready for use.
കൺട്രോളർ ചാർജ് ചെയ്യുന്നു
The controller features an internal 900mAh lithium-ion rechargeable battery, providing up to 30 hours of gameplay on a single charge. To charge your controller:
- Connect the included 10ft (3m) USB-C charge cable to the USB-C port on the top of the controller.
- Connect the other end of the USB-C cable to a USB power source (e.g., Nintendo Switch dock, USB wall adapter, or computer USB port).
- The LED indicator on the controller will show charging status. It will typically turn off or change color when fully charged.

Connect the USB-C cable to charge your controller.
Advanced Gaming Buttons
Your PowerA Enhanced Wireless Controller includes two mappable Advanced Gaming Buttons (AGBs) on the back, allowing you to assign specific button functions for quick access during gameplay.
Programming AGBs:
- അമർത്തുക പ്രോഗ്രാം ബട്ടൺ on the back of the controller. The Program LED will flash, indicating programming mode.
- Press the button you wish to map (A/B/X/Y/L/R/ZL/ZR/Left Stick Click/Right Stick Click/D-Pad). The Program LED will flash rapidly.
- Press the Advanced Gaming Button (AGB L or AGB R) you want to assign the function to. The Program LED will stop flashing, indicating the AGB is now programmed.
Resetting AGBs:
To reset all Advanced Gaming Buttons to their default (no function) state, press and hold the പ്രോഗ്രാം ബട്ടൺ for five seconds. The Program LED will flash slowly, then turn off, confirming the reset.
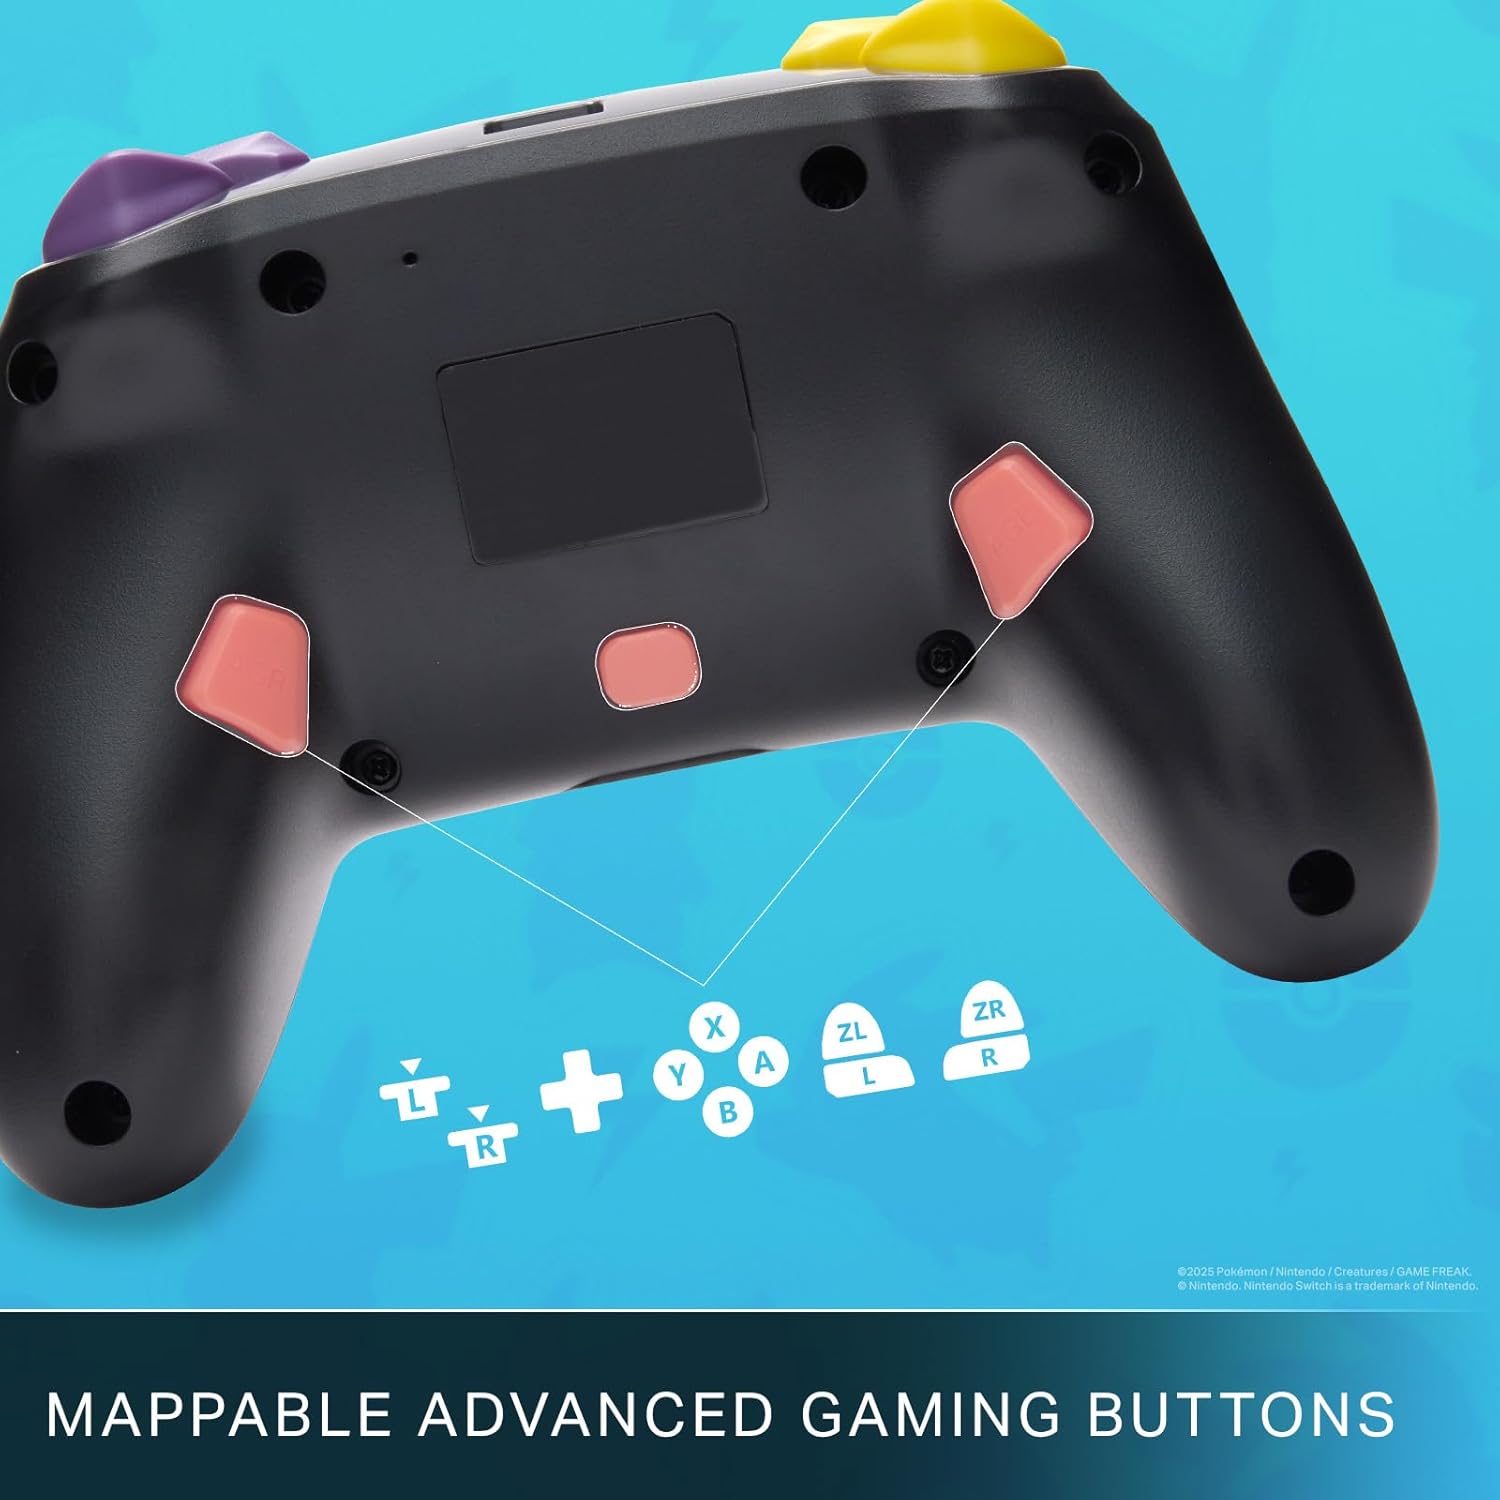
Mappable Advanced Gaming Buttons for personalized control.
അനുയോജ്യത
This PowerA Enhanced Wireless Controller is compatible with the following Nintendo consoles:
- നിൻ്റെൻഡോ സ്വിച്ച്
- നിൻ്റെൻഡോ സ്വിച്ച് ലൈറ്റ്
- Nintendo Switch (OLED Model)
- Nintendo Switch 2 (Note: C button not available)

The controller is compatible with Nintendo Switch 2, though the C button functionality is not available.
സ്പെസിഫിക്കേഷനുകൾ
| ഫീച്ചർ | വിശദാംശങ്ങൾ |
|---|---|
| അനുയോജ്യമായ ഉപകരണങ്ങൾ | നിൻ്റെൻഡോ സ്വിച്ച് |
| കൺട്രോളർ തരം | ഗെയിംപാഡ് |
| കണക്റ്റിവിറ്റി ടെക്നോളജി | ബ്ലൂടൂത്ത്, യുഎസ്ബി |
| അധിക സവിശേഷതകൾ | എർഗണോമിക്, വയർലെസ് |
| ബട്ടൺ അളവ് | 12 |
| ഹാർഡ്വെയർ പ്ലാറ്റ്ഫോം | ഗെയിമിംഗ് കൺസോൾ |
| പവർ ഉറവിടം | ബാറ്ററി പവർ (റീചാർജ് ചെയ്യാവുന്ന ലിഥിയം-അയോൺ) |
| അനുയോജ്യമായ വീഡിയോ ഗെയിം കൺസോൾ മോഡലുകൾ | നിന്റെൻഡോ സ്വിച്ച്, നിന്റെൻഡോ സ്വിച്ച് ലൈറ്റ് |
| ഇനത്തിൻ്റെ ഭാരം | 0.68 പൗണ്ട് |
| ഇനത്തിൻ്റെ അളവുകൾ | 6.02 x 4.41 x 2.48 ഇഞ്ച് |
| നിറം | Pikachu vs Gengar |
| മോഡലിൻ്റെ പേര് | Pikachu vs. Gengar |
| മോഡൽ നമ്പർ | NSGP0420-01R |
പരിചരണവും പരിപാലനവും
- Keep the controller dry. Avoid exposure to moisture or extreme temperatures.
- മൃദുവായതും ഉണങ്ങിയതുമായ തുണി ഉപയോഗിച്ച് കൺട്രോളർ വൃത്തിയാക്കുക. കഠിനമായ രാസവസ്തുക്കളോ ഉരച്ചിലുകളോ ഉള്ള വസ്തുക്കൾ ഉപയോഗിക്കരുത്.
- കേടുപാടുകൾ തടയാൻ ഉപയോഗത്തിലില്ലാത്തപ്പോൾ കൺട്രോളർ സുരക്ഷിതമായ സ്ഥലത്ത് സൂക്ഷിക്കുക.
ട്രബിൾഷൂട്ടിംഗ്
കൺട്രോളർ കണക്റ്റുചെയ്യുന്നില്ല:
- കൺട്രോളർ പൂർണ്ണമായും ചാർജ്ജ് ചെയ്തിട്ടുണ്ടെന്ന് ഉറപ്പാക്കുക.
- Verify the controller is within the Bluetooth range of your Nintendo Switch console.
- Attempt to re-pair the controller following the "Setup and Pairing" instructions.
Unresponsive Buttons/Joysticks:
- ബട്ടണുകൾക്കോ ജോയ്സ്റ്റിക്കുകൾക്കോ ചുറ്റും എന്തെങ്കിലും തടസ്സങ്ങളോ അവശിഷ്ടങ്ങളോ ഉണ്ടോ എന്ന് പരിശോധിക്കുക.
- Perform a hard reset by holding the SYNC button for 10 seconds, then attempt to re-pair.
- Ensure the controller's firmware is up to date (check PowerA's official webഅപ്ഡേറ്റുകൾക്കായി സൈറ്റ്).
വാറൻ്റിയും പിന്തുണയും
This PowerA Enhanced Wireless Controller comes with a രണ്ട് വർഷത്തെ പരിമിതമായ വാറന്റി. For detailed warranty information, product support, and troubleshooting assistance, please visit the official PowerA support webസൈറ്റ്: