VILTROX XH-DC-X3
VILTROX DC-X3 Camera Video Field Monitor User Manual
Model: XH-DC-X3
1. ആമുഖം
This manual provides comprehensive instructions for the VILTROX DC-X3 6-inch Camera Video Field Monitor. It covers product features, setup procedures, operational guidelines, maintenance tips, and troubleshooting steps to ensure safe and efficient use of your device. Please read this manual thoroughly before operating the monitor.
ഉൽപ്പന്നം കഴിഞ്ഞുview
The VILTROX DC-X3 is a professional 6-inch Full HD 1920x1080 touch screen monitor designed for camera and video applications. It features a high brightness of 2000 Nits for clear visibility in various lighting conditions, 4K HDMI and 3G-SDI loop in/out ports, and advanced monitoring tools such as 3D LUT, RGB Parade, Focus Peaking, and Full Waveform.

Figure 1.1: VILTROX DC-X3 Monitor with included accessories including sun hood, battery, mount, and cables.
2. സുരക്ഷാ മുൻകരുതലുകൾ
- തീപിടുത്തമോ വൈദ്യുതാഘാതമോ ഒഴിവാക്കാൻ മോണിറ്ററിനെ മഴയിലോ ഈർപ്പത്തിലോ തുറന്നുവെക്കരുത്.
- നേരിട്ടുള്ള സൂര്യപ്രകാശത്തിലോ താപ സ്രോതസ്സുകൾക്ക് സമീപമോ മോണിറ്റർ സ്ഥാപിക്കുന്നത് ഒഴിവാക്കുക.
- Use only the specified power adapter and accessories.
- മോണിറ്റർ ഡിസ്അസംബ്ലിംഗ് ചെയ്യുകയോ പരിഷ്കരിക്കുകയോ ചെയ്യരുത്. എല്ലാ സേവനങ്ങളും യോഗ്യതയുള്ള ഉദ്യോഗസ്ഥരെ ഏൽപ്പിക്കുക.
- Clean the screen with a soft, dry cloth. Avoid using liquid cleaners.
3. ഉൽപ്പന്ന ഘടകങ്ങളും സവിശേഷതകളും
പാക്കേജ് ഉള്ളടക്കം
- VILTROX DC-X3 Monitor
- സൺ ഹുഡ്
- Battery (NP-F series compatible)
- ഹോട്ട് ഷൂ മൗണ്ട്
- HDMI കേബിൾ
- യുഎസ്ബി-സി കേബിൾ
- ഉപയോക്തൃ മാനുവൽ

ചിത്രം 3.1: പിൻഭാഗം view of the DC-X3, highlighting the NP-F battery plate and SDI input/output ports.
പ്രധാന സവിശേഷതകൾ
- Ultra-Bright Display: 2000 Nits brightness for clear visibility in strong light.
- Full HD IPS Screen: 6-inch FHD 1080P IPS display with true-to-life colors and wide viewകോണുകൾ.
- Peak Focus Accuracy: Assists in achieving sharp, high-quality images.
- Comprehensive Monitoring Tools: Includes Waveform, 3D LUT, RGB Parade, Focus Peaking, Zebras, Vectorscope, Brightness Histogram, Mirror Image, Image Freeze, Pixel to Pixel, Monochrome, Safe Mark, Volume Bar, False Colors, Exposure, Zoom, Scanning Mode, Custom 3D LUT, and Mark Ratio.
- 4K HDMI / 3G-SDI Loop In & Out: Supports 4K 30Hz HDMI signals and 1080p 60Hz 3G-SDI signals.
- ഓഡിയോ മോണിറ്ററിംഗ്: 3.5mm headphone jack for simultaneous audio monitoring.
- ഒന്നിലധികം പവർ ഓപ്ഷനുകൾ: Supports DC IN (12-18V/2A), Type-C (≥9V/3A), and NP-F series lithium batteries.
- കാര്യക്ഷമമായ തണുപ്പിക്കൽ സംവിധാനം: Integrated fan for heat dissipation.
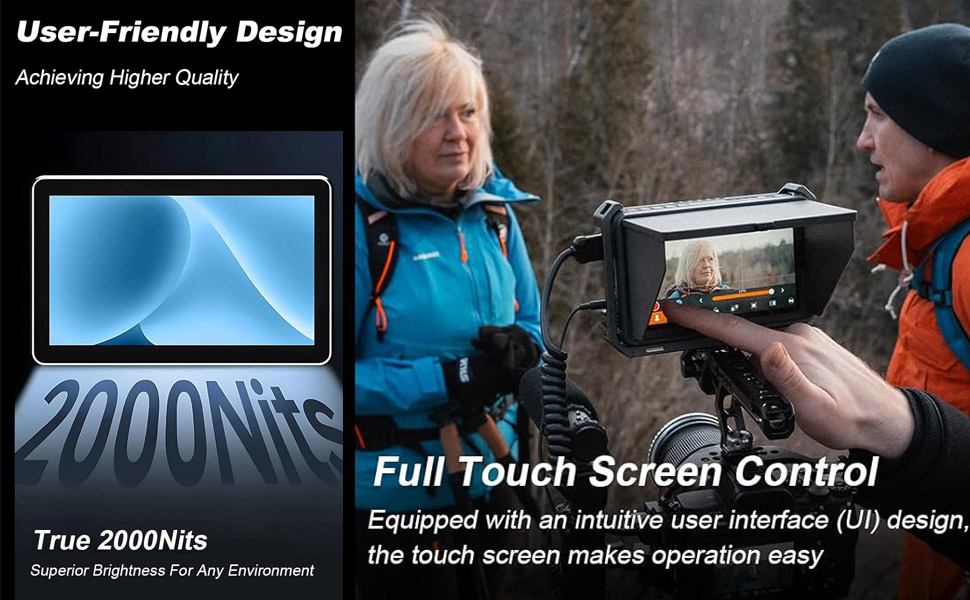
Figure 3.2: Display of various professional auxiliary tools available on the DC-X3 monitor, including focus peaking, waveform, and 3D LUT.
4. സജ്ജീകരണ ഗൈഡ്
4.1 മോണിറ്റർ പവർ ചെയ്യുന്നു
The DC-X3 monitor can be powered by three methods:
- NP-F ബാറ്ററി: Insert a fully charged NP-F series lithium battery into the battery plate on the rear of the monitor. Ensure it clicks into place securely.
- ഡിസി പവർ അഡാപ്റ്റർ: Connect a 12-18V/2A DC power adapter to the DC IN port on the side of the monitor.
- USB-C പവർ: Connect a USB-C power source (≥9V/3A) to the Type-C port.

Figure 4.1: Illustration of the DC-X3's multiple power supply options (DC IN, Type-C, NP-F battery) and its efficient cooling system.
4.2 മോണിറ്റർ മൌണ്ട് ചെയ്യൽ
Attach the included hot shoe mount to the 1/4"-20 screw hole on the bottom or side of the monitor. Secure the mount to your camera's hot shoe or a compatible rig.

Figure 4.2: The DC-X3 monitor mounted on a camera setup, demonstrating its integration and the attached sun hood.
4.3 വീഡിയോ ഉറവിടങ്ങൾ ബന്ധിപ്പിക്കൽ
The DC-X3 supports both HDMI and SDI video inputs.
- HDMI കണക്ഷൻ: Connect an HDMI cable from your camera's HDMI OUT port to the HDMI IN port on the monitor. For looping out, connect another HDMI cable from the HDMI OUT port to an external display.
- SDI കണക്ഷൻ: Connect an SDI cable from your camera's SDI OUT port to the SDI IN port on the monitor. For looping out, connect another SDI cable from the SDI OUT port to an external display.

ചിത്രം 4.3: ക്ലോസപ്പ് view of the HDMI and SDI input/output interfaces on the DC-X3 monitor, illustrating connectivity options.
4.4 Attaching the Sun Hood
Slide the sun hood onto the monitor's frame until it securely fits. This helps reduce glare in bright outdoor conditions.

ചിത്രം 4.4: വശം view of the DC-X3 monitor with the sun hood attached, demonstrating its protective function against glare.
5. പ്രവർത്തന നിർദ്ദേശങ്ങൾ
5.1 പവർ ഓൺ/ഓഫ്
മോണിറ്റർ ഓൺ അല്ലെങ്കിൽ ഓഫ് ചെയ്യുന്നതിന് അതിന്റെ വശത്തുള്ള പവർ ബട്ടൺ അമർത്തിപ്പിടിക്കുക.
5.2 ടച്ച് സ്ക്രീൻ പ്രവർത്തനം
The DC-X3 features a full touch screen for intuitive control. Tap icons to select functions, swipe to navigate menus, and pinch-to-zoom for image inspection.
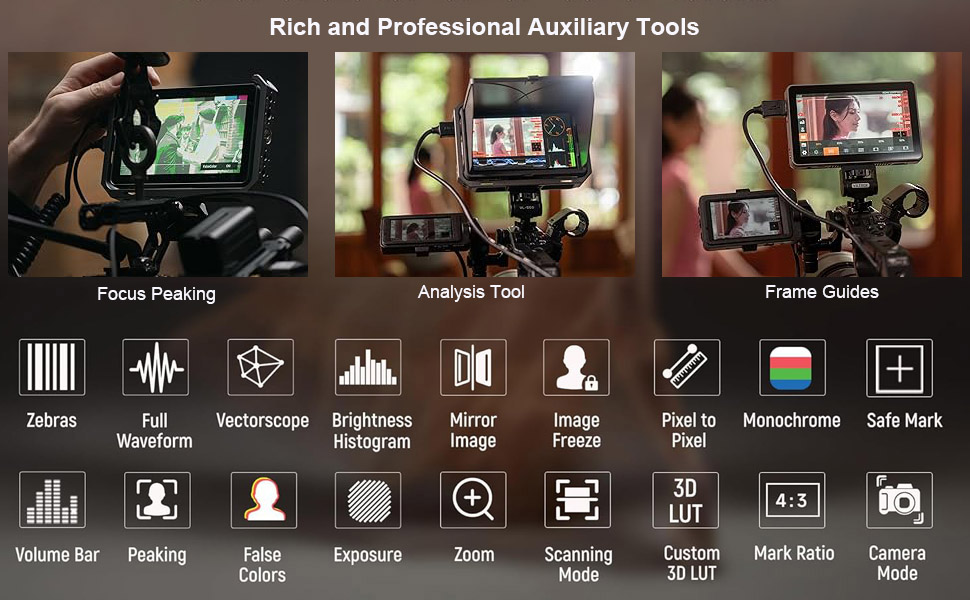
Figure 5.1: The DC-X3's user-friendly design and full touch screen control, illustrating ease of operation.
5.3 മെനു നാവിഗേഷൻ
Access the main menu by tapping the screen. Navigate through settings such as display, audio, and auxiliary functions. Use the function buttons (F1-F4) on the top of the monitor for quick access to frequently used features, which can be customized in the settings.
5.4 മോണിറ്ററിംഗ് ഉപകരണങ്ങൾ ഉപയോഗിക്കുന്നത്
The DC-X3 offers a variety of professional monitoring tools:
- ഫോക്കസ് പീക്കിംഗ്: Highlights in-focus areas with a selectable color.
- തരംഗരൂപം: Displays the luminance and chrominance levels of your video signal.
- 3D ലട്ട്: Apply custom or pre-loaded Look-Up Tables for real-time color grading.
- RGB പരേഡ്: Shows the individual red, green, and blue channel levels.
- Zebras: അമിതമായി തുറന്നുകിടക്കുന്ന പ്രദേശങ്ങളെ സൂചിപ്പിക്കുന്നു.
- വെക്റ്റർസ്കോപ്പ്: Displays color saturation and hue.
- ബ്രൈറ്റ്നസ് ഹിസ്റ്റോഗ്രാം: Shows the distribution of brightness levels.
5.5 ഓഡിയോ മോണിറ്ററിംഗ്
Connect headphones to the 3.5mm audio jack to monitor the embedded audio from your HDMI or SDI input.
6. പരിപാലനം
6.1 മോണിറ്റർ വൃത്തിയാക്കുന്നു
- സ്ക്രീൻ: Use a soft, lint-free cloth specifically designed for electronics screens. Gently wipe the screen to remove dust and fingerprints. Do not use liquid cleaners, alcohol, or abrasive materials.
- ശരീരം: Wipe the monitor body with a soft, dry cloth.
6.2 സംഭരണം
When not in use, store the monitor in a cool, dry place, away from direct sunlight and extreme temperatures. Use the provided carrying case for protection during transport.

Figure 6.1: The VILTROX DC-X3 monitor and its accessories, including the carrying case, as packaged.
7. പ്രശ്നപരിഹാരം
| പ്രശ്നം | സാധ്യമായ കാരണം | പരിഹാരം |
|---|---|---|
| മോണിറ്റർ പവർ ഓണാക്കുന്നില്ല. | Low or dead battery; power cable not connected; power button not held long enough. | Charge or replace battery; ensure power cable is securely connected; press and hold power button for 3 seconds. |
| വീഡിയോ സിഗ്നൽ ഇല്ല. | Incorrect input selected; cable loose or damaged; camera output settings incorrect. | Check input source (HDMI/SDI) in menu; ensure cables are securely connected; verify camera's video output settings (resolution, frame rate). |
| Screen is too dim or too bright. | Brightness settings incorrect. | Adjust brightness in the display settings menu. |
| ടച്ച് സ്ക്രീൻ പ്രതികരിക്കുന്നില്ല. | താൽക്കാലിക സോഫ്റ്റ്വെയർ തകരാർ; സ്ക്രീൻ വൃത്തികേടായി. | Restart the monitor; clean the screen with a soft cloth. |
| No audio from headphone jack. | Volume too low; audio source not enabled on camera; headphone issue. | Increase volume in monitor settings; ensure camera is outputting audio via HDMI/SDI; test with different headphones. |
8 സ്പെസിഫിക്കേഷനുകൾ
| ഫീച്ചർ | വിശദാംശങ്ങൾ |
|---|---|
| മോഡൽ | XH-DC-X3 |
| ഡിസ്പ്ലേ വലിപ്പം | 6 ഇഞ്ച് |
| റെസലൂഷൻ | 1920x1080 (പൂർണ്ണ എച്ച്ഡി) |
| തെളിച്ചം | 2000 നിറ്റുകൾ |
| കോൺട്രാസ്റ്റ് റേഷ്യോ | 1000:1 |
| Viewing ആംഗിൾ | 160° (ഐപിഎസ്) |
| ഇൻപുട്ട് പോർട്ടുകൾ | HDMI IN (4K 30Hz), SDI IN (3G-SDI 1080p 60Hz) |
| ഔട്ട്പുട്ട് പോർട്ടുകൾ | HDMI OUT, SDI OUT |
| ഓഡിയോ ഔട്ട്പുട്ട് | 3.5 എംഎം ഹെഡ്ഫോൺ ജാക്ക് |
| വൈദ്യുതി വിതരണം | DC 12-18V/2A, Type-C ≥9V/3A, NP-F Battery |
| ഉൽപ്പന്ന അളവുകൾ | 2 x 10 x 6 ഇഞ്ച് |
| ഇനത്തിൻ്റെ ഭാരം | 2.5 പൗണ്ട് |
9. വാറൻ്റിയും പിന്തുണയും
VILTROX products typically come with a limited warranty. Please refer to the warranty card included in your product packaging for specific terms and conditions, including warranty period and coverage details. For technical support, service, or warranty claims, please contact VILTROX customer service through their official webസൈറ്റ് അല്ലെങ്കിൽ നിങ്ങളുടെ ഉൽപ്പന്ന ഡോക്യുമെന്റേഷനിൽ നൽകിയിരിക്കുന്ന ബന്ധപ്പെടാനുള്ള വിവരങ്ങൾ.
നിർമ്മാതാവ്: വിൽട്രോക്സ്
Webസൈറ്റ്: www.viltrox.com (കുറിപ്പ്: ഇതൊരു പ്ലെയ്സ്ഹോൾഡറാണ് URL, please refer to your product's official documentation for the correct support contact.)
Ask a question about this manual
Ask about setup, troubleshooting, compatibility, parts, safety, or missing instructions. Manuals+ will review the question and use this page’s manual context to help answer it.