
Mpu9250
MPU9250 9-Axis Sensor Instruction Manual
മോഡൽ: MPU9250
1. ആമുഖം
The MPU9250 is a high-performance 9-axis motion tracking device that combines a 3-axis gyroscope, a 3-axis accelerometer, and a 3-axis magnetometer. It is designed for a wide range of applications requiring precise motion sensing, such as robotics, drones, and wearable devices. This sensor module provides digital output of 9-axis motion data, making it suitable for integration with microcontrollers like Arduino.
2 പ്രധാന സവിശേഷതകൾ
- Integrated 9-axis motion tracking: 3-axis gyroscope, 3-axis accelerometer, and 3-axis magnetometer.
- Primary communication interface: I2C (Inter-Integrated Circuit).
- Secondary communication interface: Serial communication for third-party sensors.
- വൈഡ് പവർ സപ്ലൈ വോള്യംtage range: 3V to 5V, ensuring compatibility with various development boards.
- Compact and robust design for easy integration.
3. സജ്ജീകരണ ഗൈഡ്
This section outlines the basic steps for connecting and preparing your MPU9250 sensor for use.
3.1 പിൻഔട്ട് വിവരണം
| പിൻ | വിവരണം |
|---|---|
| വി.സി.സി | Power Supply (3V-5V) |
| ജിഎൻഡി | ഗ്രൗണ്ട് |
| SCL | I2C Serial Clock Line |
| എസ്.ഡി.എ | I2C Serial Data Line |
| എ.ഡി.ഒ | I2C Slave Address Pin (connect to GND for 0x68, VCC for 0x69) |
| INT | പിൻ തടസ്സപ്പെടുത്തുക |
| FSYNC | Frame Synchronization Pin |
| എസിഎൽ | Auxiliary I2C Clock Line |
| എ.ഡി.എ | Auxiliary I2C Data Line |
3.2 Wiring Instructions (Example for Arduino)
- ബന്ധിപ്പിക്കുക വി.സി.സി pin of the MPU9250 to the 5V or 3.3V pin on your Arduino board.
- ബന്ധിപ്പിക്കുക ജിഎൻഡി pin of the MPU9250 to the ജിഎൻഡി pin on your Arduino board.
- ബന്ധിപ്പിക്കുക SCL pin of the MPU9250 to the A5 (SCL) pin on Arduino Uno/Nano or 21 (SCL) on Arduino Mega.
- ബന്ധിപ്പിക്കുക എസ്.ഡി.എ pin of the MPU9250 to the A4 (SDA) pin on Arduino Uno/Nano or 20 (SDA) on Arduino Mega.
- വേണ്ടി എ.ഡി.ഒ pin, connect it to ജിഎൻഡി for the default I2C address (0x68). If you need to change the address, connect it to VCC.
- Other pins (INT, FSYNC, ACL, ADA) can be connected as required by your specific application or left unconnected if not used.
4. പ്രവർത്തന നിർദ്ദേശങ്ങൾ
Once wired, the MPU9250 communicates via I2C. You will need to use a microcontroller and appropriate libraries to read data from the sensor.
4.1 സോഫ്റ്റ്വെയർ സജ്ജീകരണം
- Install the necessary libraries for MPU9250 (e.g., 'MPU9250' or 'Adafruit MPU9250' library) in your Arduino IDE or preferred development environment.
- Include the Wire.h library for I2C communication.
4.2 Reading Sensor Data
The sensor provides raw data for acceleration, angular velocity, and magnetic field strength. These raw values typically need to be converted to meaningful units (g, deg/s, microTesla) and often filtered or processed using algorithms like a Kalman filter or Mahony filter for accurate attitude estimation.
- ആക്സിലറോമീറ്റർ: Measures linear acceleration along X, Y, and Z axes. Useful for detecting tilt and motion.
- ഗൈറോസ്കോപ്പ്: Measures angular velocity (rate of rotation) around X, Y, and Z axes. Essential for tracking orientation changes.
- മാഗ്നെറ്റോമീറ്റർ: Measures magnetic field strength along X, Y, and Z axes. Used for heading and orientation relative to magnetic north.
5. പരിപാലനം
The MPU9250 sensor module is a robust electronic component that requires minimal maintenance. Follow these guidelines to ensure its longevity:
- മൊഡ്യൂൾ വൃത്തിയായും പൊടിയും അവശിഷ്ടങ്ങളും ഇല്ലാതെ സൂക്ഷിക്കുക. വൃത്തിയാക്കാൻ മൃദുവായതും ഉണങ്ങിയതുമായ തുണി ഉപയോഗിക്കുക.
- തീവ്രമായ താപനിലയിലോ ഈർപ്പത്തിലോ മൊഡ്യൂളിനെ തുറന്നുകാട്ടുന്നത് ഒഴിവാക്കുക.
- Ensure proper ventilation if used in an enclosed space to prevent overheating.
- Handle the module by its edges to avoid touching the sensitive electronic components.
- Regularly check connections for looseness or corrosion.
6. പ്രശ്നപരിഹാരം
If you encounter issues with your MPU9250 sensor, consider the following troubleshooting steps:
- No Data/Incorrect Readings:
- Verify all wiring connections are secure and correct (VCC, GND, SDA, SCL).
- പവർ സപ്ലൈ വോള്യം പരിശോധിക്കുകtage to ensure it is within the 3V-5V range.
- Confirm the I2C address (0x68 or 0x69) matches what is configured in your code and the ADO pin connection.
- Ensure the correct library is installed and initialized in your code.
- Try running an I2C scanner sketch to confirm the sensor is detected on the bus.
- അസ്ഥിരമായ വായനകൾ:
- Ensure the sensor is mounted securely and not subject to vibrations.
- Implement digital filtering or sensor fusion algorithms (e.g., Kalman filter) in your code to smooth out readings.
- Calibrate the accelerometer, gyroscope, and magnetometer as per the library's instructions.
- ആശയവിനിമയ പിശകുകൾ:
- Check for short circuits or damaged traces on the module or connecting wires.
- Ensure your microcontroller's I2C pins are correctly configured and not being used by other devices.
7 സ്പെസിഫിക്കേഷനുകൾ
| ഫീച്ചർ | വിശദാംശങ്ങൾ |
|---|---|
| മോഡൽ | Mpu9250 |
| അക്ഷങ്ങൾ | 9-Axis (3-axis Gyroscope, 3-axis Accelerometer, 3-axis Magnetometer) |
| ആശയവിനിമയ ഇൻ്റർഫേസ് | I2C (Primary), Serial (Secondary) |
| പവർ സപ്ലൈ വോളിയംtage | 3വി - 5വി |
| നിർമ്മാതാവ് | ജനറിക് |
| ആദ്യം ലഭ്യമായ തീയതി | ഫെബ്രുവരി 16, 2025 |
8. ഉൽപ്പന്ന ചിത്രങ്ങൾ
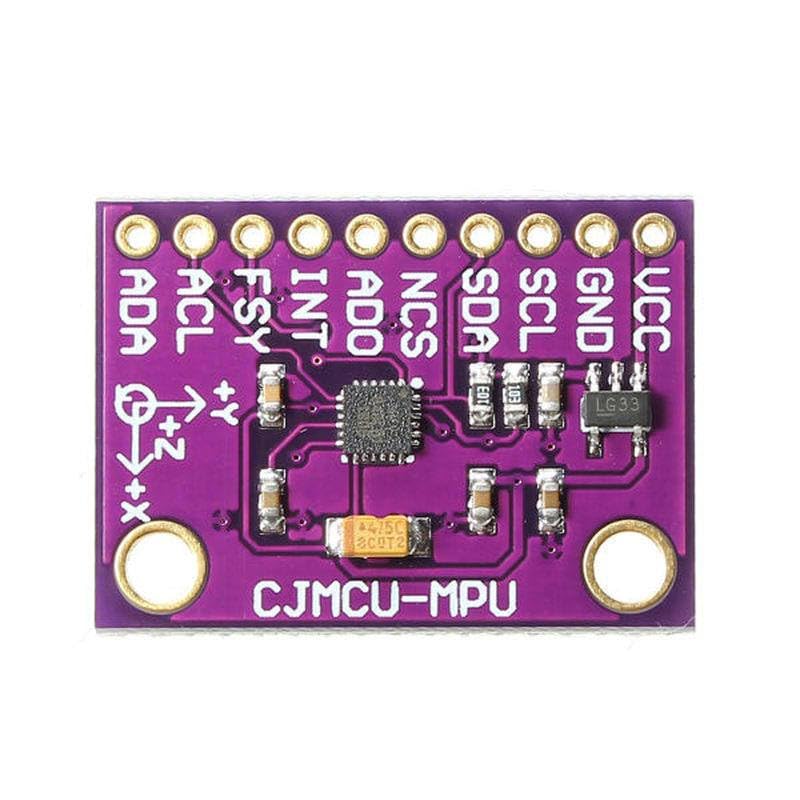
ചിത്രം 1: മുകളിൽ view of the MPU9250 sensor module, showing the main chip and pin labels for VCC, GND, SCL, SDA, ADO, INT, FSY, ACL, and ADA.
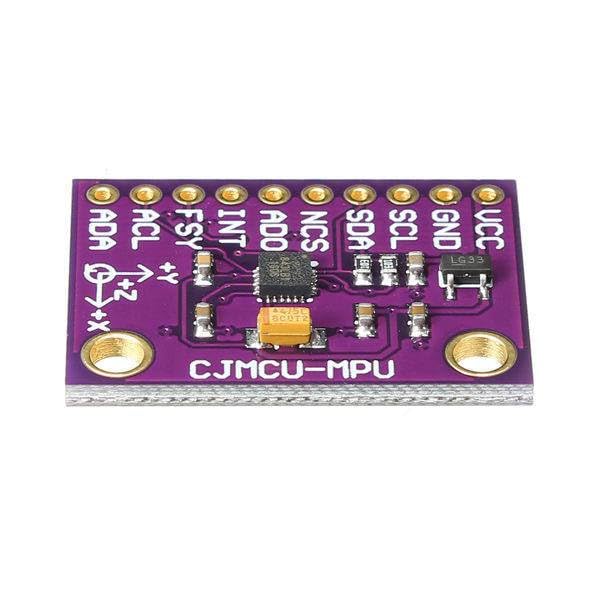
ചിത്രം 2: കോണാകൃതിയിലുള്ളത് view of the MPU9250 sensor module, highlighting the compact size and the arrangement of the header pins.
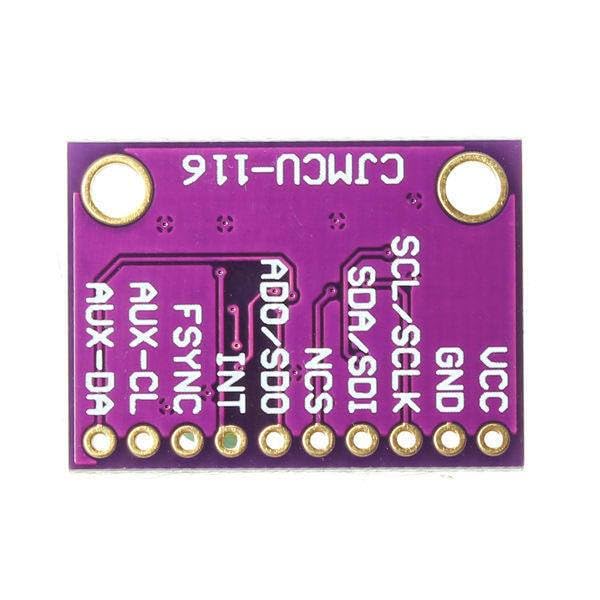
ചിത്രം 3: A slightly different top-down perspective of the MPU9250 module, providing a clear view of the integrated components and pin labels.
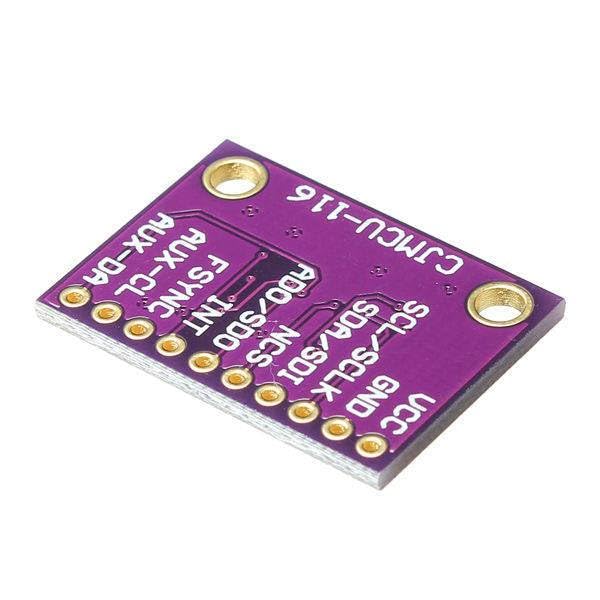
ചിത്രം 4: താഴെ view of the MPU9250 sensor module, showing the reverse side of the PCB and the 'CJMCU-116' marking.
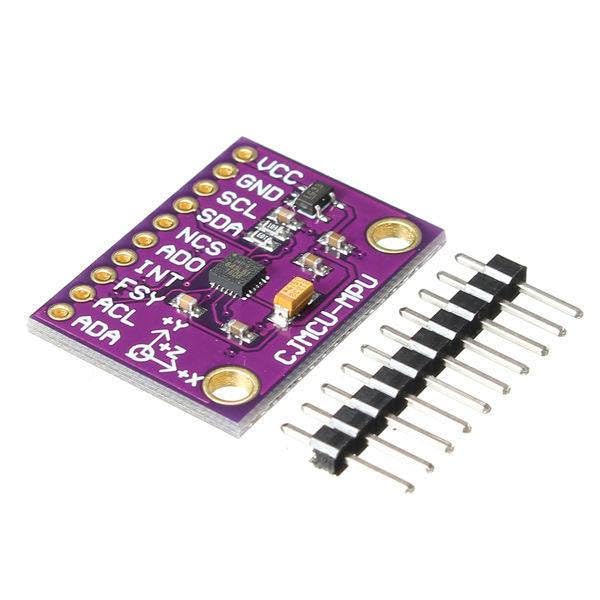
ചിത്രം 5: The MPU9250 sensor module displayed alongside a set of pin headers, indicating its readiness for breadboard or PCB mounting.
9. വാറൻ്റിയും പിന്തുണയും
Information regarding specific warranty terms or dedicated support channels for this Generic brand product is not available in the provided data. Please refer to the seller or retailer from whom the product was purchased for any warranty claims or technical assistance.
Ask a question about this manual
Ask about setup, troubleshooting, compatibility, parts, safety, or missing instructions. Manuals+ will review the question and use this page’s manual context to help answer it.