
1. ആമുഖം
This manual provides essential instructions for the installation, operation, and maintenance of your Renogy Rover 20A MPPT Charge Controller. Please read this manual thoroughly before installation and use to ensure optimal performance and safety. Keep this manual for future reference.

Figure 1.1: Renogy Rover 20A MPPT Charge Controller
The Renogy Rover 20A MPPT Charge Controller is designed to optimize the charging process from your solar panels to your battery bank. It features Maximum Power Point Tracking (MPPT) technology, ensuring high efficiency even under varying light conditions. This controller is compatible with 12V and 24V battery systems and supports various battery types, including Gel, Sealed, Flooded, and Lithium.
2 സുരക്ഷാ വിവരങ്ങൾ
ഇൻസ്റ്റാളേഷനും പ്രവർത്തനവും നടത്തുമ്പോൾ ഇനിപ്പറയുന്ന സുരക്ഷാ മുൻകരുതലുകൾ പാലിക്കുക:
- Always connect the battery to the charge controller first, then the solar panel, and finally the load. Disconnect in the reverse order.
- Ensure all wiring is correctly sized and connections are secure to prevent loose connections that can cause excessive heating.
- Install the charge controller in a well-ventilated area, away from flammable materials and direct sunlight.
- Do not disassemble or attempt to repair the charge controller. Contact Renogy support for assistance.
- Wear appropriate personal protective equipment, including eye protection, when working with batteries and electrical systems.
- സിസ്റ്റം വോള്യം ഉറപ്പാക്കുകtage does not exceed the maximum input voltage of the controller (100V).
3. പാക്കേജ് ഉള്ളടക്കം
എല്ലാ ഇനങ്ങളും നിങ്ങളുടെ പാക്കേജിൽ ഉൾപ്പെടുത്തിയിട്ടുണ്ടെന്ന് ഉറപ്പാക്കുക:
- Renogy Rover 20A MPPT Solar Charge Controller
- താപനില സെൻസർ കേബിൾ
- ഉപയോക്തൃ മാനുവൽ (ഈ പ്രമാണം)
4. ഉൽപ്പന്ന സവിശേഷതകൾ
The Renogy Rover 20A MPPT Charge Controller offers advanced features for efficient solar power management:
- Dual-Peak MPPT Technology: Achieves up to 99.9% tracking efficiency and 98% conversion efficiency, optimizing solar harvest even in partial shading or cloudy conditions.
- വൈഡ് ബാറ്ററി അനുയോജ്യത: Supports Gel, Sealed, Flooded, and Lithium battery types.
- താപനില നഷ്ടപരിഹാരം: Operates effectively across a wide temperature range (-40°F to 149°F) with automatic charging adjustments to protect batteries.
- സമഗ്രമായ സംരക്ഷണങ്ങൾ: Includes TVS surge protection against lightning strikes, reverse polarity, overcharging, over-discharging, overload, and short-circuit protection.
- 4-എസ്tagഇ ചാർജിംഗ്: Provides precise Bulk, Absorption, Float, and Equalization charging for lead-acid batteries, extending their lifespan.
- Lithium Battery Reactivation: Safely revives deeply discharged lithium batteries.
- LCD Display & Data Logging: Backlit LCD displays real-time voltage, current, and error information. Stores up to one year of performance data.
- Modbus Support: Integrates Modbus protocol for smart home solar kits and remote monitoring.
- Direct DC Load Output: Can directly power DC appliances and handle capacitive load surges. Features load scheduling via timer.
- App Monitoring (Optional): Compatible with the BT-2 module (sold separately) for monitoring via the Renogy DC Home App.
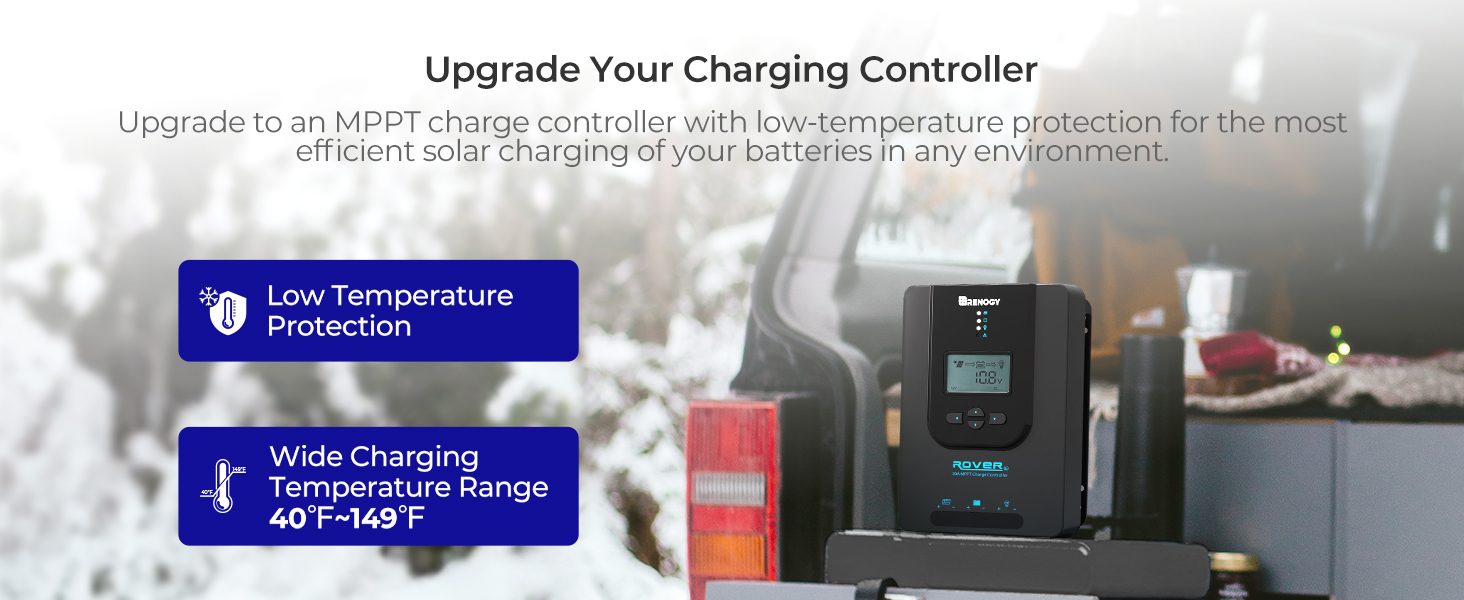
Figure 4.1: Maximizing Solar Harvest with 99% Tracking Efficiency

Figure 4.2: Charge Controller with Wide Temperature Adaptability (-40°F to 149°F)
5. സജ്ജീകരണവും ഇൻസ്റ്റാളേഷനും
Follow these steps for proper installation of your charge controller:
- മൗണ്ടിംഗ്: Choose a dry, well-ventilated location for mounting the controller. Ensure there is sufficient clearance around the unit for heat dissipation. Mount vertically on a non-flammable surface.
- വയറിംഗ് ക്രമം:
- Connect the battery cables to the battery terminals on the charge controller. Ensure correct polarity (+ to + and - to -).
- Connect the solar panel cables to the PV terminals on the charge controller. Ensure correct polarity.
- Connect the load cables to the load terminals on the charge controller (optional). Ensure correct polarity.
- താപനില സെൻസർ: Connect the included temperature sensor cable to the designated port on the controller. Place the sensor near the battery to enable accurate temperature compensation for charging.
- പ്രാരംഭ പവർ-അപ്പ്: Once all connections are secure, the controller will power on and display system information on the LCD.
പ്രധാനം: കൺട്രോളറിന് കേടുപാടുകൾ സംഭവിക്കാതിരിക്കാൻ എല്ലായ്പ്പോഴും ആദ്യം ബാറ്ററി കണക്റ്റ് ചെയ്യുകയും അവസാനത്തേത് വിച്ഛേദിക്കുകയും ചെയ്യുക.
6. പ്രവർത്തന നിർദ്ദേശങ്ങൾ
The LCD display and buttons allow you to monitor and configure the charge controller.
6.1. LCD Display Navigation
Use the buttons on the front panel to navigate through the display screens and adjust settings. Refer to the on-screen prompts for specific actions like 'Select' or 'Enter'.
6.2. ബാറ്ററി തരം തിരഞ്ഞെടുക്കൽ
The controller automatically detects 12V/24V system voltages for non-lithium batteries. For lithium batteries, you must manually adjust the battery voltage setting through the controller's menu to ensure proper charging parameters.
6.3. Lithium Battery Activation
The controller includes a lithium battery activation function. This feature allows charging of deeply discharged lithium batteries that might otherwise be unresponsive.

Figure 6.1: Lithium Activation ON
To prevent over-activation and unnecessary activation, you can turn OFF the lithium activation function. This helps avoid potential damage to the battery if it is not intended for activation.

Figure 6.2: Lithium Activation OFF
6.4. Monitoring and Load Control
The LCD provides real-time data on solar input, battery status, and load output. You can also configure load settings, including timers for scheduled operation of connected DC appliances.
7. പരിപാലനം
Regular maintenance ensures the longevity and optimal performance of your charge controller:
- കണക്ഷനുകൾ പരിശോധിക്കുക: Periodically check all wiring connections for tightness and corrosion. Ensure no wires are frayed or damaged.
- Clean the Controller: Keep the controller clean and free from dust and debris. Use a dry cloth to wipe the surface. Do not use liquids or solvents.
- വെൻ്റിലേഷൻ: Ensure the installation area remains well-ventilated to prevent overheating.
- ബാറ്ററി പരിശോധന: Regularly inspect your batteries for any signs of damage, swelling, or leaks.
8. പ്രശ്നപരിഹാരം
If you encounter issues with your charge controller, refer to the following common problems and solutions:
| പ്രശ്നം | സാധ്യമായ കാരണം | പരിഹാരം |
|---|---|---|
| കൺട്രോളർ പവർ ഓണാക്കുന്നില്ല | Loose battery connection, battery voltagഇ വളരെ കുറവാണ് | Check battery wiring and voltage. Ensure battery is connected first. |
| സോളാർ ചാർജിംഗ് ഇല്ല | Solar panel not connected, insufficient sunlight, incorrect polarity | Verify solar panel connections and polarity. Check for shading. |
| ലോഡ് പ്രവർത്തിക്കുന്നില്ല. | Load disconnected, overload, load timer active | Check load connections. Reduce load. Adjust load timer settings. |
| തെറ്റായ വോളിയംtagഇ വായനകൾ | Loose connections, faulty sensor | Check all wiring. Ensure temperature sensor is properly connected. |
For persistent issues or error codes not listed, please contact Renogy customer support.
9 സ്പെസിഫിക്കേഷനുകൾ
| സ്പെസിഫിക്കേഷൻ | മൂല്യം |
|---|---|
| ബ്രാൻഡ് | റെനോജി |
| മോഡൽ | Rover 20A MPPT |
| പരമാവധി ചാർജ് കറൻ്റ് | 20എ |
| സിസ്റ്റം വോളിയംtage | 12V/24V Auto-Detect (DC) |
| പരമാവധി പിവി ഇൻപുട്ട് വോളിയംtage | 100V |
| ട്രാക്കിംഗ് കാര്യക്ഷമത | 99.9% |
| പരിവർത്തന കാര്യക്ഷമത | 98% |
| ഡിസ്പ്ലേ തരം | എൽസിഡി |
| പ്രവർത്തന താപനില പരിധി | -40°F മുതൽ 149°F വരെ (-40°C മുതൽ 65°C വരെ) |
| മെറ്റീരിയൽ | അക്രിലോണിട്രൈൽ ബ്യൂട്ടാഡീൻ സ്റ്റൈറീൻ (എബിഎസ്), പ്ലാസ്റ്റിക് |
| ഇനത്തിൻ്റെ ഭാരം | 1.59 കിലോഗ്രാം |
| യുപിസി / ജിടിഐഎൻ | 840315237445 |
10. വാറൻ്റിയും പിന്തുണയും
The Renogy Rover 20A MPPT Charge Controller comes with a 3 വർഷത്തെ മെറ്റീരിയലും വർക്ക്മാൻഷിപ്പും വാറന്റി. This warranty covers defects in materials and manufacturing under normal use.

Figure 10.1: 3-Year Material and Workmanship Warranty
For warranty claims, technical assistance, or any questions regarding your product, please contact Renogy customer support. Keep your purchase receipt as proof of purchase for warranty services.
You can find more information and contact details on the official Renogy webസൈറ്റ്: www.renogy.com