
Oasser AK2-2
Oasser Airbrush Kit User Manual
മോഡൽ: AK2-2
1. ആമുഖം
This user manual provides essential information for the safe and effective operation, maintenance, and troubleshooting of your Oasser Airbrush Kit with Air Compressor. Please read this manual thoroughly before first use and retain it for future reference.
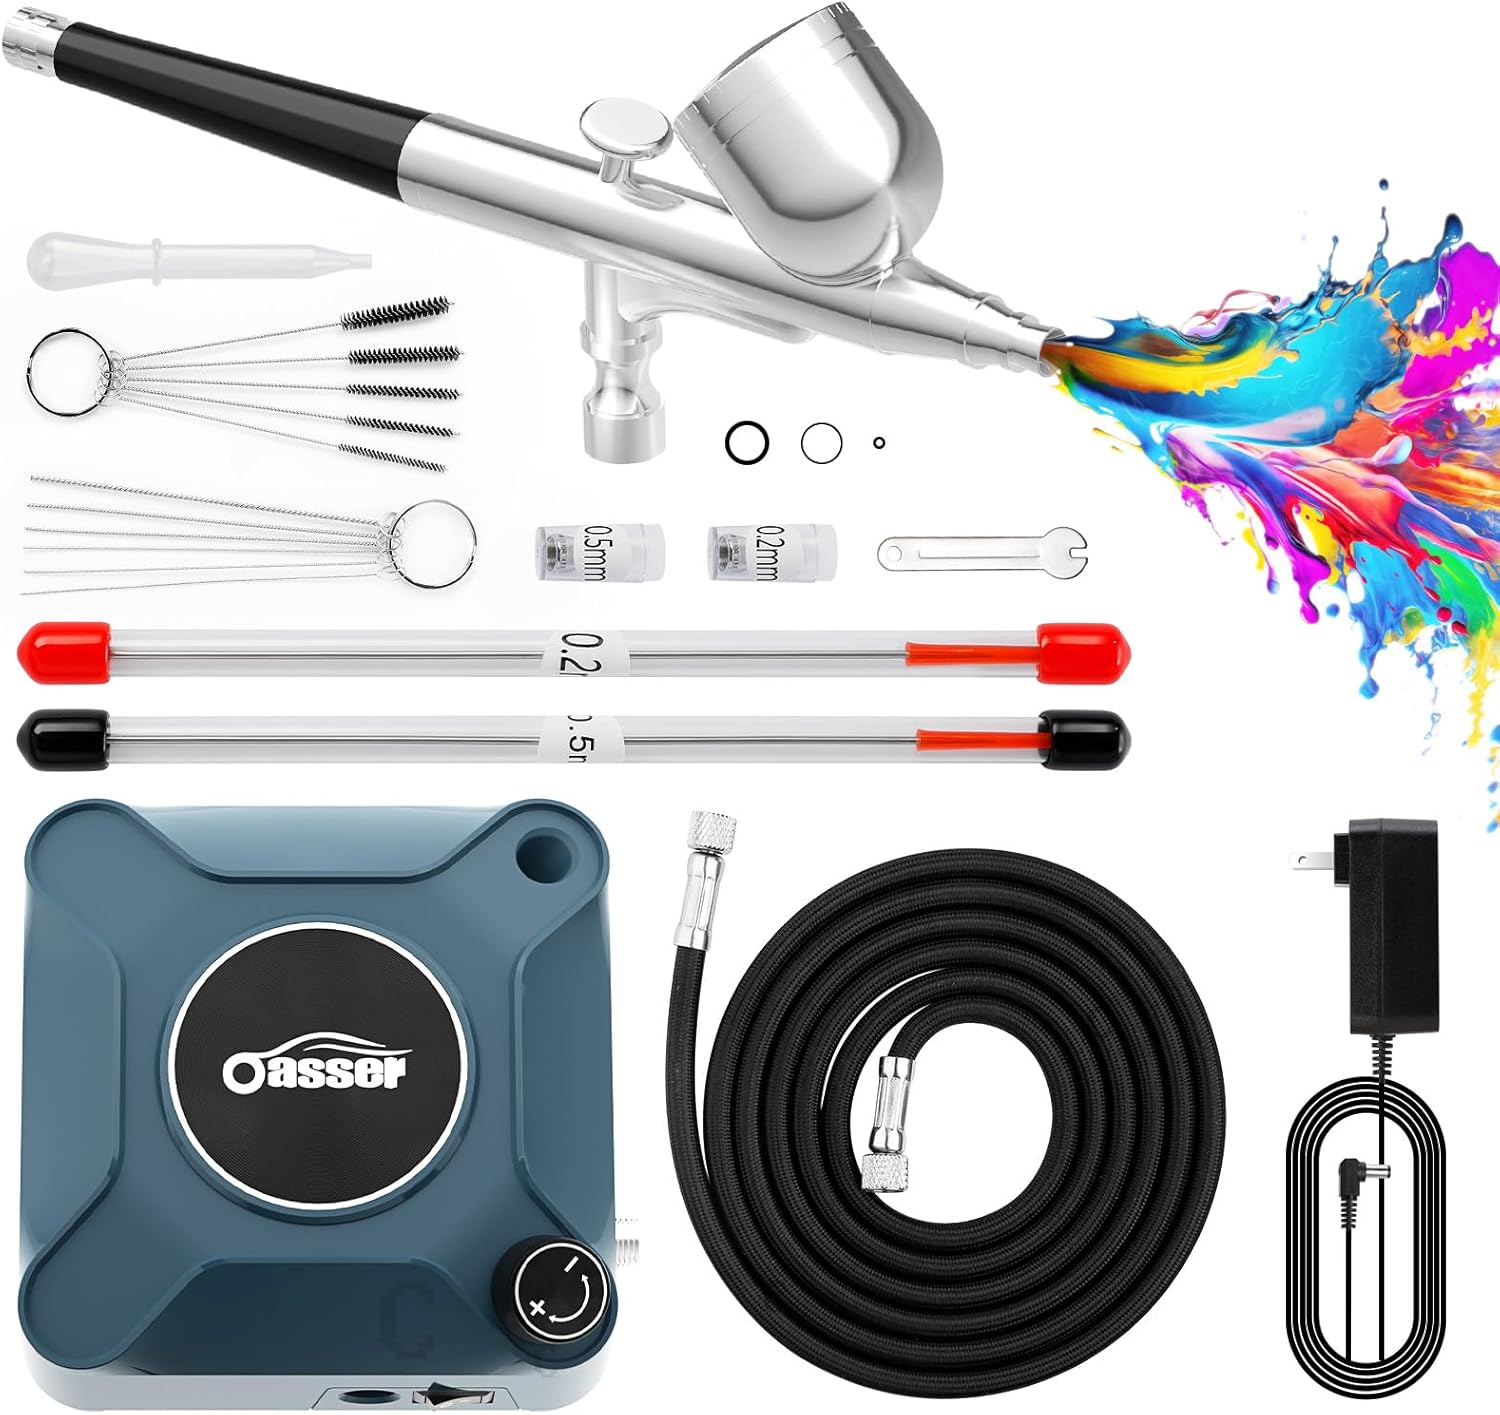
Figure 1: Complete Oasser Airbrush Kit components.

ചിത്രം 2: വിശദമായി view of the Oasser Airbrush Kit contents.
2. സുരക്ഷാ നിർദ്ദേശങ്ങൾ
- Always operate the airbrush in a well-ventilated area to avoid inhaling paint fumes.
- Wear appropriate personal protective equipment (PPE), including a respirator, safety glasses, and gloves.
- Keep the air compressor away from water or other liquids to prevent electric shock.
- Ensure the power supply matches the specifications of the air compressor.
- Do not use the airbrush for food-related purposes if it has been used for chemical spraying.
- കുട്ടികൾക്ക് ലഭ്യമാകാതെ സൂക്ഷിക്കുക.
- വൃത്തിയാക്കുന്നതിനോ അറ്റകുറ്റപ്പണികൾ നടത്തുന്നതിനോ മുമ്പ് എല്ലായ്പ്പോഴും വൈദ്യുതി വിച്ഛേദിക്കുക.
3. സജ്ജീകരണം
Follow these steps to set up your Oasser Airbrush Kit:
- എയർ ഹോസ് ബന്ധിപ്പിക്കുക: Securely connect one end of the air hose to the air outlet on the compressor and the other end to the air inlet on the airbrush gun. Ensure connections are tight to prevent air leaks.

Figure 3: Air hose connection to the compressor and airbrush.
- പവർ ബന്ധിപ്പിക്കുക: Plug the 12V DC adapter into the compressor's power input, then plug the adapter into a suitable electrical outlet.
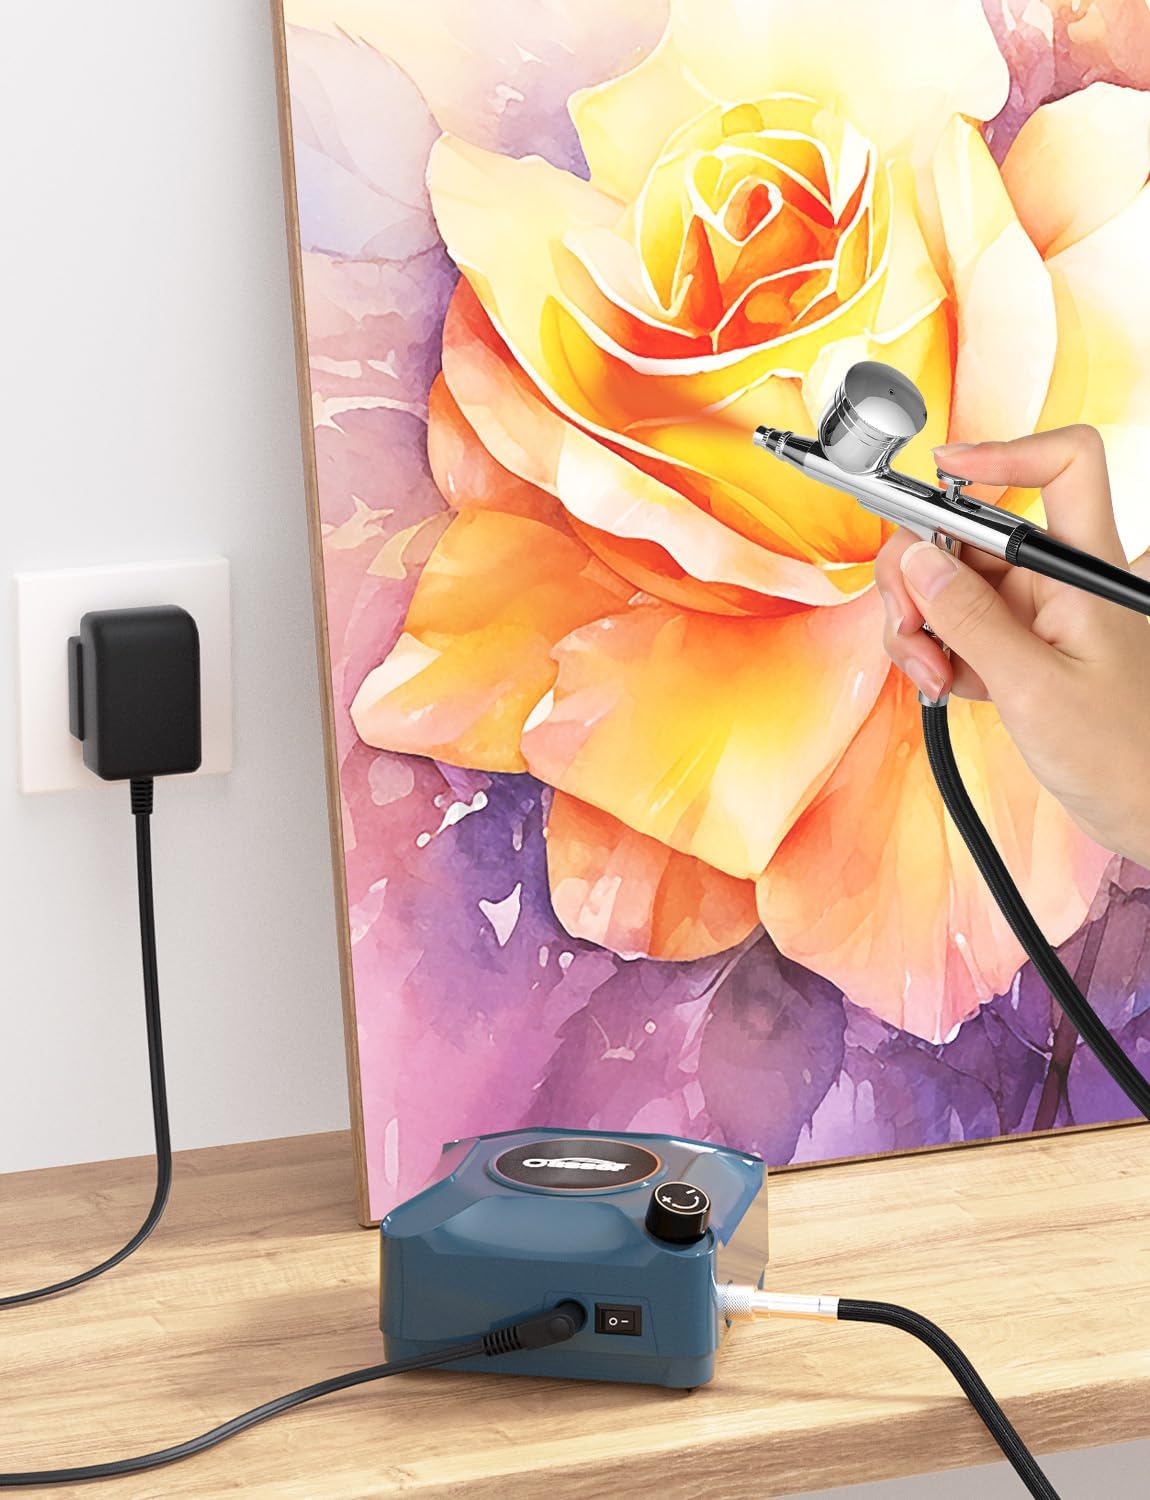
Figure 4: Compressor connected to power.
- Turn On Compressor: Flip the power switch on the compressor to the "ON" position. The compressor will start operating.
- Fill Paint Cup: Open the lid of the airbrush paint cup and carefully pour your diluted paint into the cup. Do not overfill.
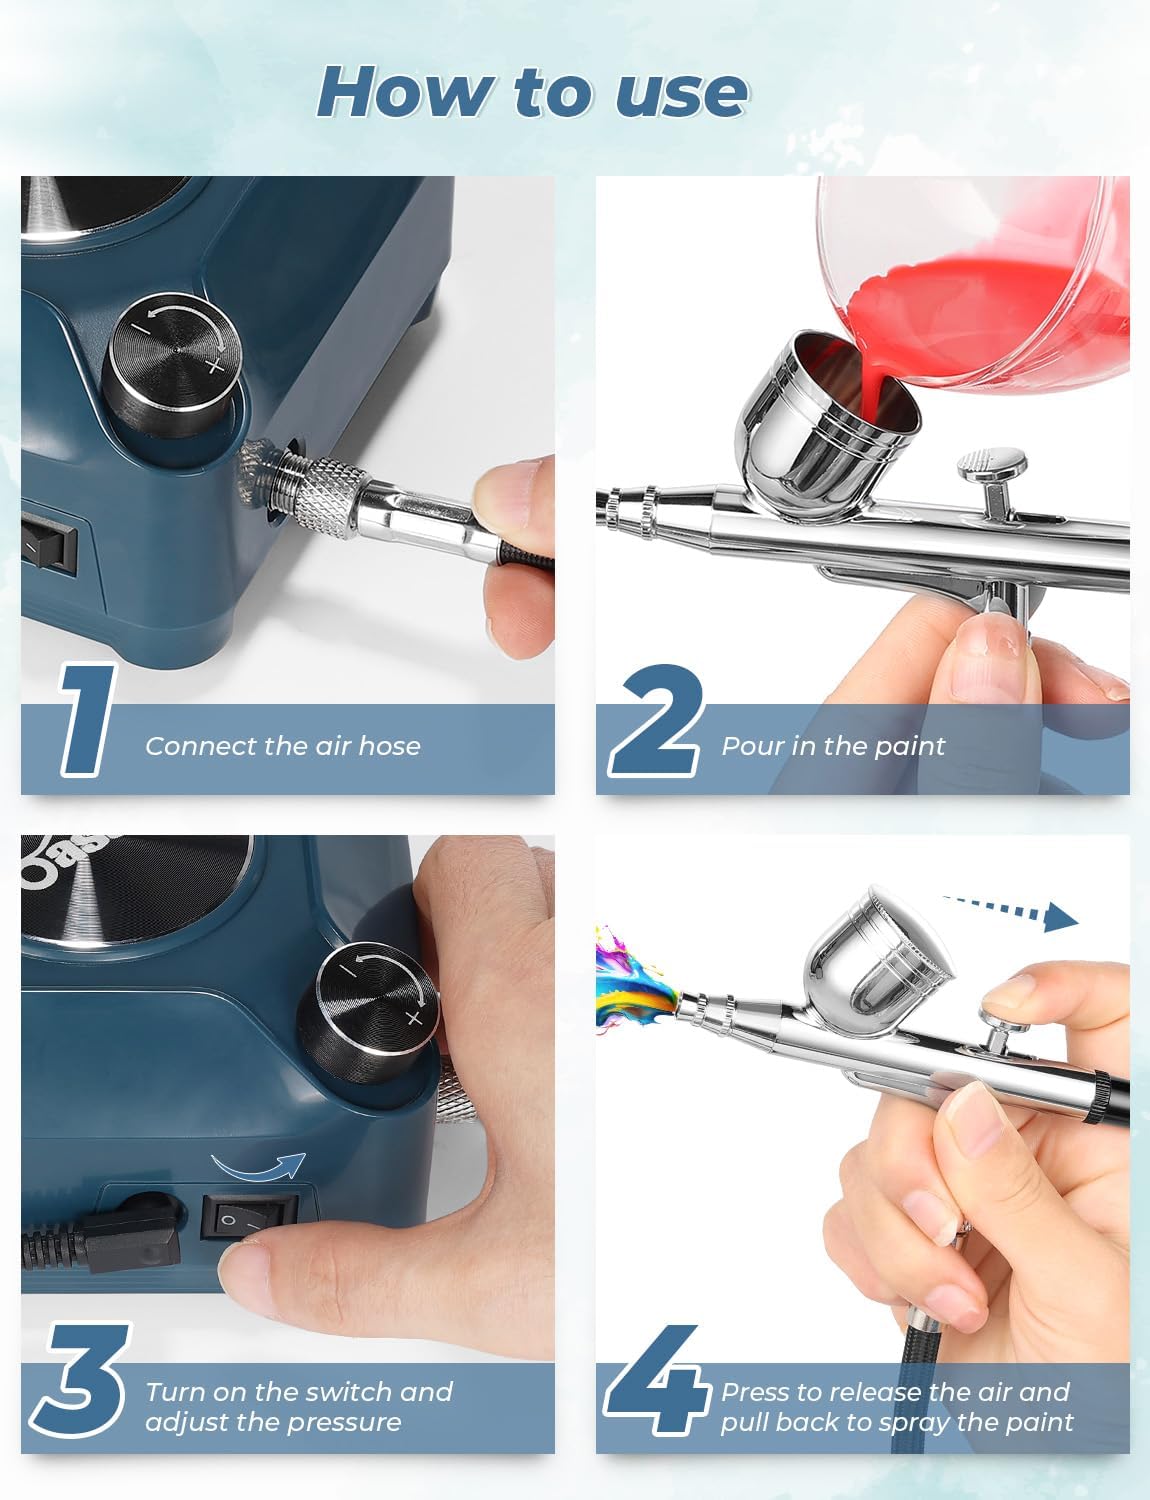
Figure 5: Steps for connecting and filling the airbrush.
Video Guide: Installation Steps
Video 1: Visual guide demonstrating the installation steps for the Oasser Airbrush Kit.
4. പ്രവർത്തന നിർദ്ദേശങ്ങൾ
Dual-Action Operation
The Oasser Airbrush features a dual-action trigger for precise control over both air and paint flow:
- To release air only, press the trigger vertically downwards.
- To spray paint, press the trigger vertically downwards and then pull it back. Pulling the trigger further back increases the paint flow.

Figure 6: Dual-action airbrush operation.
പ്രഷർ അഡ്ജസ്റ്റ്മെന്റ്
The compressor features a stepless pressure adjustment knob, allowing you to fine-tune the airflow from 2 PSI to 40 PSI. Rotate the knob to achieve the desired pressure for your specific application.

Figure 7: Stepless pressure regulation from 2-40 PSI.
Nozzle and Needle Selection
The kit includes multiple nozzles and needles (0.2mm, 0.3mm, 0.5mm) to accommodate various spraying needs:
- 0.2mm Nozzle/Needle: Ideal for very fine details and delicate work, such as nail art or intricate model painting.
- 0.3mm Nozzle/Needle: A versatile size suitable for general purpose airbrushing, including makeup, crafts, and medium-sized models.
- 0.5mm Nozzle/Needle: Best for larger areas, base coats, or when using thicker paints, providing broader coverage.
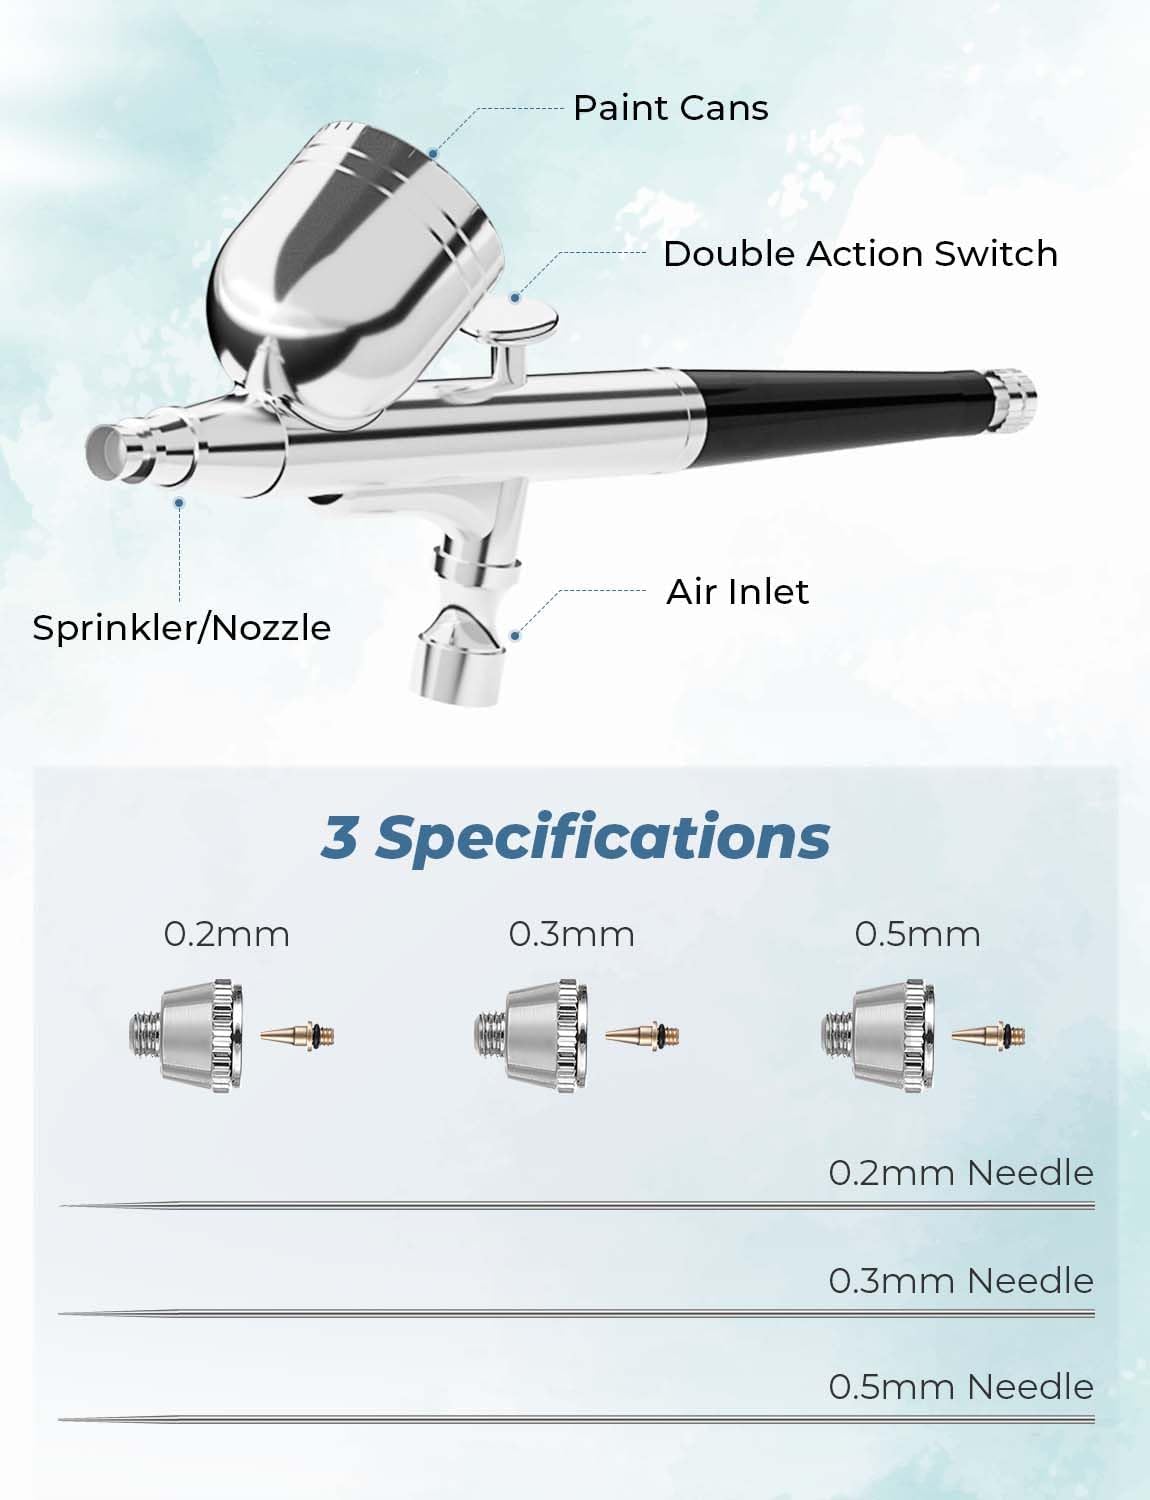
Figure 8: Airbrush components and available nozzle sizes.
Paint Dilution: Always dilute your paint to a milk-like consistency for optimal flow and to prevent clogging. Different paint types may require different thinning ratios.

Figure 9: Airbrush in use for makeup application.
5. പരിപാലനം
Proper cleaning and maintenance are crucial for the longevity and performance of your airbrush kit. Always clean the airbrush immediately after each use, especially when changing colors or finishing a session.
ക്ലീനിംഗ് നടപടിക്രമം
- Empty Paint Cup: Discard any remaining paint from the cup.
- Add Cleaning Agent: Pour a small amount of appropriate airbrush cleaner or water (depending on paint type) into the paint cup.
- Back-Flush: Cover the nozzle with your finger or a cap and gently pull back the trigger. This will force air back into the paint cup, creating bubbles that help clean the inside.
- Spray Through: Spray the cleaning solution through the airbrush onto a paper towel or into a waste container until the spray runs clear.
- ആവർത്തിക്കുക: Repeat steps 2-4 until no paint residue is visible.
- സമഗ്രമായ വൃത്തിയാക്കൽ: For a more thorough cleaning, especially after using thicker paints or if clogging occurs, disassemble the airbrush components (nozzle, needle, cap) and clean them individually using the provided cleaning brushes and needles.
- ലൂബ്രിക്കേഷൻ: Occasionally apply a small amount of airbrush lubricant to the needle packing and trigger mechanism to ensure smooth operation.
പ്രധാനപ്പെട്ടത്: Never force the needle into the airbrush. If resistance is felt, re-check for blockages or misalignment.
6. പ്രശ്നപരിഹാരം
| പ്രശ്നം | സാധ്യമായ കാരണം | പരിഹാരം |
|---|---|---|
| No air from nozzle | Compressor off, hose disconnected, nozzle clogged. | Check power, reconnect hose, clean nozzle. |
| No paint flow / Splattering | Paint too thick, nozzle clogged, needle bent, air pressure too low. | Dilute paint, clean nozzle/needle, replace bent needle, increase air pressure. |
| Air bubbles in paint cup | Nozzle cap loose, nozzle clogged, bent nozzle. | Tighten nozzle cap, clean nozzle, replace nozzle. |
| കംപ്രസർ ഓണാക്കുന്നില്ല | Power adapter disconnected, power switch off, faulty adapter/compressor. | Check power connections, ensure switch is ON, contact support if issue persists. |
7 സ്പെസിഫിക്കേഷനുകൾ
- ഉൽപ്പന്ന അളവുകൾ: 4.9 x 4.9 x 2.9 ഇഞ്ച്
- ഇനം മോഡൽ നമ്പർ: എകെ 2-2
- ഇനത്തിൻ്റെ ഭാരം: 2.09 പൗണ്ട്
- നിർമ്മാതാവ്: ഒസ്സർ
- മാതൃരാജ്യം: ചൈന
- പരമാവധി മർദ്ദം: 40 പി.എസ്.ഐ
- പരമാവധി വായുപ്രവാഹം: 10.5 എൽ/മിനിറ്റ്
- Nozzle Sizes Included: 0.2 എംഎം, 0.3 എംഎം, 0.5 എംഎം
8. വാറൻ്റിയും പിന്തുണയും
For warranty information, technical support, or any inquiries regarding your Oasser Airbrush Kit, please contact Oasser customer service through the retailer where the product was purchased or visit the official Oasser webബന്ധപ്പെടാനുള്ള വിശദാംശങ്ങൾക്കുള്ള സൈറ്റ്.
Ask a question about this manual
Ask about setup, troubleshooting, compatibility, parts, safety, or missing instructions. Manuals+ will review the question and use this page’s manual context to help answer it.