ആമുഖം
This manual provides essential information for the safe installation, operation, and maintenance of your RL LIVE YOUR LIGHT Dimmable LED Ceiling Light, Model R67873180. Please read these instructions carefully before installation and retain them for future reference.
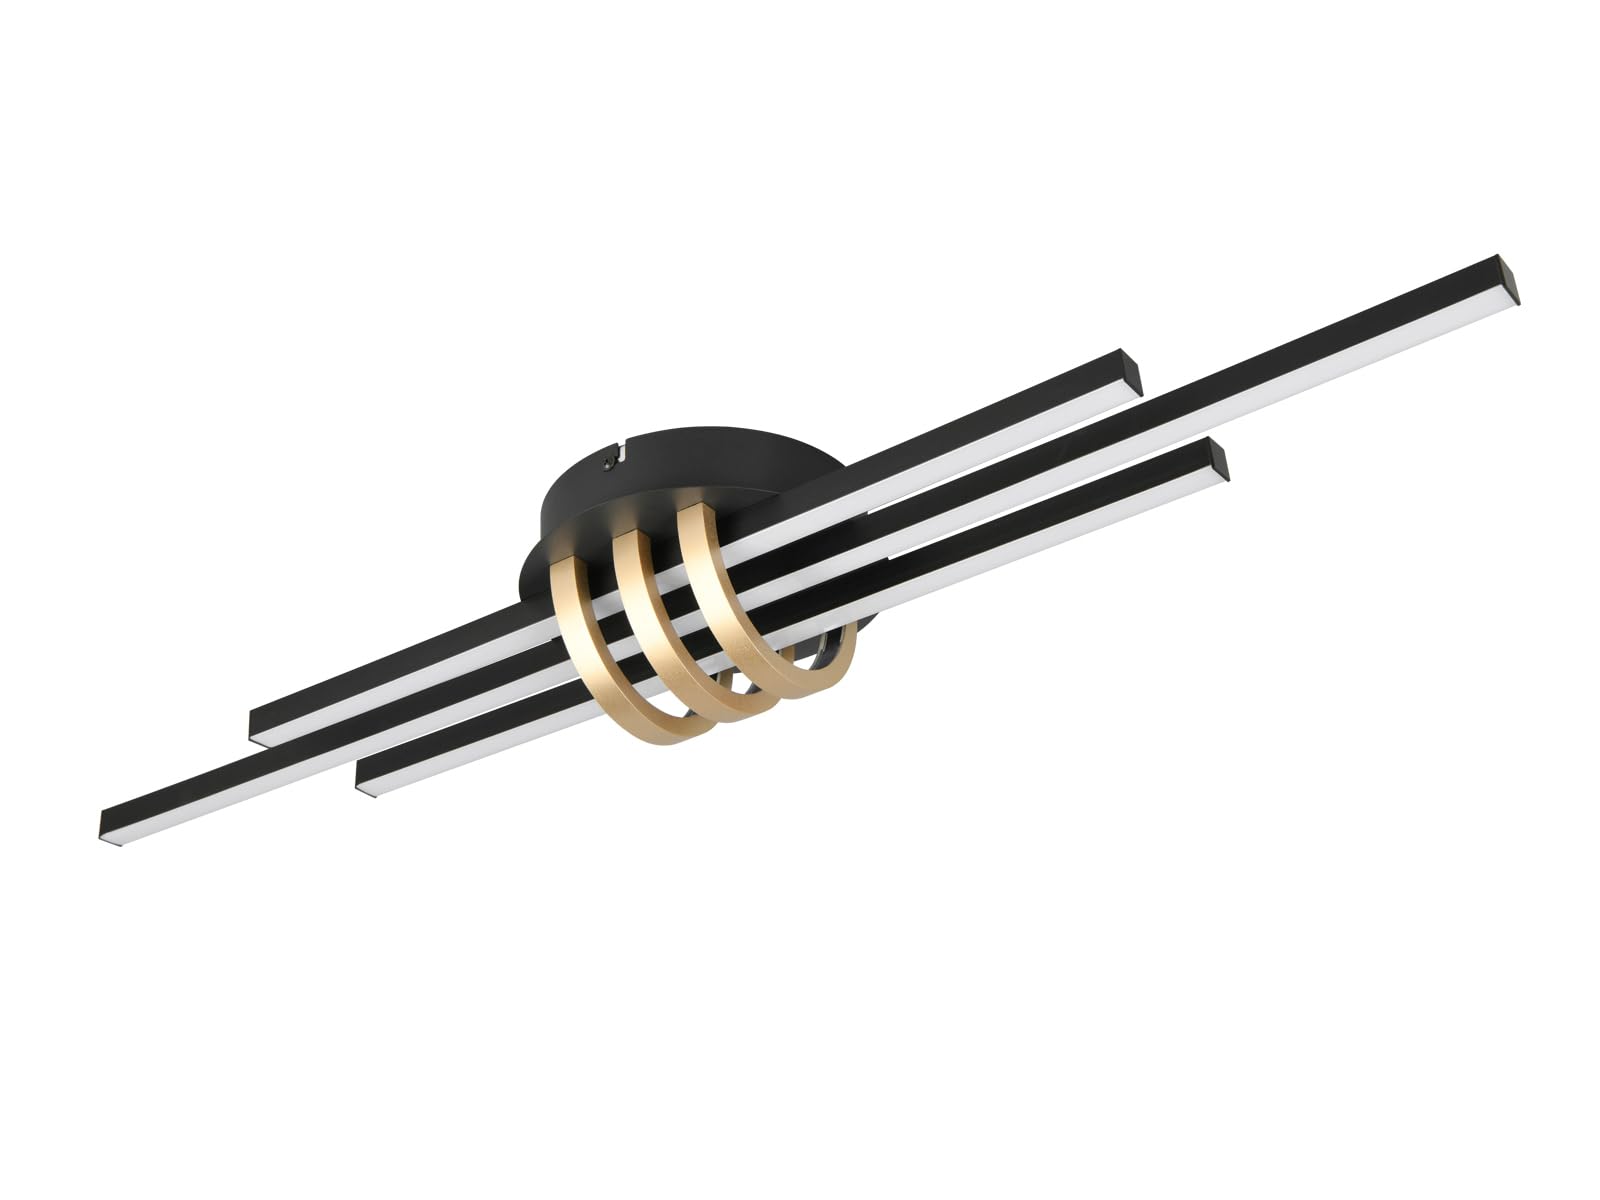
Image: The RL LIVE YOUR LIGHT Dimmable LED Ceiling Light, featuring a sleek black base with three horizontal LED bars and decorative gold rings, mounted on a ceiling.
സുരക്ഷാ നിർദ്ദേശങ്ങൾ
- Always disconnect power at the main fuse or circuit breaker before installation or maintenance.
- പ്രാദേശിക ഇലക്ട്രിക്കൽ കോഡുകൾക്ക് അനുസൃതമായി യോഗ്യതയുള്ള ഒരു ഇലക്ട്രീഷ്യനാണ് ഇൻസ്റ്റാളേഷൻ നടത്തേണ്ടത്.
- ഫിക്സ്ചറിൽ മാറ്റങ്ങൾ വരുത്തരുത്. ഏതെങ്കിലും മാറ്റങ്ങൾ വാറന്റി അസാധുവാക്കുകയും സുരക്ഷാ അപകടങ്ങൾ സൃഷ്ടിക്കുകയും ചെയ്തേക്കാം.
- മൗണ്ടിംഗ് ഉപരിതലത്തിന് ഫിക്ചറിന്റെ ഭാരം താങ്ങാൻ കഴിയുമെന്ന് ഉറപ്പാക്കുക.
- പ്രകാശിക്കുമ്പോൾ LED പ്രകാശ സ്രോതസ്സിലേക്ക് നേരിട്ട് നോക്കരുത്.
- പാക്കേജിംഗ് സാമഗ്രികൾ കുട്ടികൾക്ക് ലഭ്യമാകാതെ സൂക്ഷിക്കുക.
പാക്കേജ് ഉള്ളടക്കം
ഇൻസ്റ്റാളേഷൻ ആരംഭിക്കുന്നതിന് മുമ്പ് എല്ലാ ഘടകങ്ങളും നിലവിലുണ്ടെന്ന് ഉറപ്പാക്കുക:
- 1x RL LIVE YOUR LIGHT LED Ceiling Light (Model R67873180)
- മൗണ്ടിംഗ് ഹാർഡ്വെയർ (സ്ക്രൂകൾ, വാൾ ആങ്കറുകൾ)
- ഇൻസ്ട്രക്ഷൻ മാനുവൽ
സജ്ജീകരണവും ഇൻസ്റ്റാളേഷനും
ആവശ്യമായ ഉപകരണങ്ങൾ (ഉൾപ്പെടുത്തിയിട്ടില്ല):
- സ്ക്രൂഡ്രൈവർ (ഫിലിപ്സ് ഹെഡ്)
- ഡ്രിൽ
- വയർ സ്ട്രിപ്പറുകൾ
- വാല്യംtagഇ ടെസ്റ്റർ
- പെൻസിൽ
- അളക്കുന്ന ടേപ്പ്
ഇൻസ്റ്റലേഷൻ ഘട്ടങ്ങൾ:
- പവർ ഓഫ് ചെയ്യുക: ആരംഭിക്കുന്നതിന് മുമ്പ്, സർക്യൂട്ട് ബ്രേക്കറിലോ ഫ്യൂസ് ബോക്സിലോ ഇൻസ്റ്റലേഷൻ ഏരിയയിലേക്കുള്ള വൈദ്യുതി വിതരണം പൂർണ്ണമായും വിച്ഛേദിക്കപ്പെട്ടിട്ടുണ്ടെന്ന് ഉറപ്പാക്കുക.
- മൗണ്ടിംഗ് ഉപരിതലം തയ്യാറാക്കുക: Mark the desired location for the ceiling light. Use the mounting bracket (if separate) as a template to mark drill holes.
- തുളകൾ: Drill pilot holes at the marked locations. Insert wall anchors if necessary.
- മൗണ്ടിംഗ് ബ്രാക്കറ്റ് ഘടിപ്പിക്കുക: നൽകിയിരിക്കുന്ന സ്ക്രൂകൾ ഉപയോഗിച്ച് സീലിംഗിലേക്ക് മൗണ്ടിംഗ് ബ്രാക്കറ്റ് സുരക്ഷിതമാക്കുക.
- വയർ കണക്ഷനുകൾ: Connect the household electrical wires to the fixture's wires. Typically, connect live (black/brown) to live, neutral (white/blue) to neutral, and ground (green/yellow) to ground. Ensure all connections are secure using wire nuts.
- മൗണ്ട് ഫിക്ചർ: Carefully align the ceiling light with the mounting bracket and secure it in place with the provided screws. Ensure no wires are pinched.
- പവർ പുന ore സ്ഥാപിക്കുക: ഫിക്സ്ചർ സുരക്ഷിതമായി ഇൻസ്റ്റാൾ ചെയ്തുകഴിഞ്ഞാൽ, സർക്യൂട്ട് ബ്രേക്കറിൽ പവർ പുനഃസ്ഥാപിക്കുക.

ചിത്രം: മുകളിൽ നിന്ന് താഴേക്ക് view of the ceiling light, illustrating its overall dimensions of 81 cm in width and 18 cm in depth.

Image: Detailed technical drawing showing various dimensions of the ceiling light in millimeters, including overall length, width, and height of components.
പ്രവർത്തന നിർദ്ദേശങ്ങൾ
This LED ceiling light is designed for simple operation via a standard wall switch.
- ഓൺ/ഓഫ് ചെയ്യുന്നു: Flip the wall switch connected to the fixture to turn the light on or off.
- മങ്ങിക്കൽ പ്രവർത്തനം: This fixture features dimmable LEDs controlled via a standard wall switch. Rapidly toggling the switch (off-on-off-on) will cycle through different brightness levels. Consult your switch's manual for specific dimming instructions if it's a dedicated dimmer switch.

Image: The RL LIVE YOUR LIGHT LED Ceiling Light fully illuminated, showcasing its bright, warm white light output.
മെയിൻ്റനൻസ്
- വൃത്തിയാക്കൽ: Ensure the power is off before cleaning. Wipe the fixture with a soft, dry cloth. Do not use abrasive cleaners or solvents, as they may damage the finish.
- LED- കൾ: The integrated LEDs are designed for long life and are not user-replaceable. Do not attempt to replace them.
- പരിശോധന: Periodically check for any loose connections or damage to the wiring. If any damage is found, consult a qualified electrician.
ട്രബിൾഷൂട്ടിംഗ്
| പ്രശ്നം | സാധ്യമായ കാരണം | പരിഹാരം |
|---|---|---|
| ലൈറ്റ് ഓണാക്കില്ല. | വൈദ്യുതി വിതരണം ഇല്ല. അയഞ്ഞ വയറിംഗ് കണക്ഷൻ. തെറ്റായ സ്വിച്ച്. | സർക്യൂട്ട് ബ്രേക്കർ/ഫ്യൂസ് പരിശോധിക്കുക. എല്ലാ വയർ കണക്ഷനുകളും സുരക്ഷിതമാണെന്ന് ഉറപ്പാക്കുക (ആദ്യം പവർ ഓഫ് ചെയ്യുക). വാൾ സ്വിച്ച് പരിശോധിക്കുകയോ മാറ്റിസ്ഥാപിക്കുകയോ ചെയ്യുക. |
| അപ്രതീക്ഷിതമായി വെളിച്ചം മിന്നിമറയുകയോ മങ്ങുകയോ ചെയ്യുന്നു. | അയഞ്ഞ വയറിംഗ്. അനുയോജ്യമല്ലാത്ത ഡിമ്മർ സ്വിച്ച് (ബാധകമെങ്കിൽ). ശക്തി ഏറ്റക്കുറച്ചിലുകൾ. | Check all wire connections (power off first). Ensure your dimmer switch is compatible with LED fixtures. Consult an electrician if power fluctuations are suspected. |
| Light is not dimming. | Incorrect operation of the switch. Standard on/off switch, not a dimmable one. | Ensure you are rapidly toggling the switch for dimming. Confirm that the wall switch is designed for dimming LED lights. |
സ്പെസിഫിക്കേഷനുകൾ
| ഫീച്ചർ | വിശദാംശങ്ങൾ |
|---|---|
| ബ്രാൻഡ് | ആർഎൽ ലൈവ് യുവർ ലൈറ്റ് |
| മോഡൽ നമ്പർ | R67873180 |
| ഉൽപ്പന്ന അളവുകൾ (L x W x H) | 81 x 18 x 10.5 സെ.മീ |
| മെറ്റീരിയൽ | ലോഹം |
| നിറം | കറുപ്പ് |
| ഫിനിഷ് തരം | മാറ്റ് |
| ശൈലി | ഗ്ലാം |
| ലൈറ്റുകളുടെ എണ്ണം | 1 (integrated LED unit) |
| പ്രത്യേക ഉപയോഗങ്ങൾ | Apartment, Home, Office, Store |
| ഷേഡ് മെറ്റീരിയൽ | ലോഹം |
| പ്രകാശ സ്രോതസ്സ് തരം | എൽഇഡി |
| പവർ ഉറവിടം | കോർഡഡ് ഇലക്ട്രിക് |
| സ്റ്റൈൽ സ്വിച്ചുചെയ്യുക | Switch (Dimmable via switch) |
| ഇൻസ്റ്റലേഷൻ തരം | Wall Mount (Ceiling Mount) |
| തിളങ്ങുന്ന ഫ്ലക്സ് | 2380 ല്യൂമെൻ |
| വാട്ട്tage | 20 വാട്ട്സ് |
| വർണ്ണ താപനില | 3000 കെൽവിൻ (വാം വൈറ്റ്) |
വാറൻ്റിയും പിന്തുണയും
For warranty information or technical support, please refer to the documentation provided with your purchase or contact your retailer. Keep your proof of purchase for warranty claims.
Manufacturer: RL LIVE YOUR LIGHT