
1. ആമുഖം
This manual provides detailed instructions for the safe installation, operation, and maintenance of your NARVI JAMAICA 8941 Ceiling Fan. Please read this manual thoroughly before installation and retain it for future reference. This ceiling fan features an efficient DC motor, adjustable LED lighting, and a convenient remote control for year-round comfort.
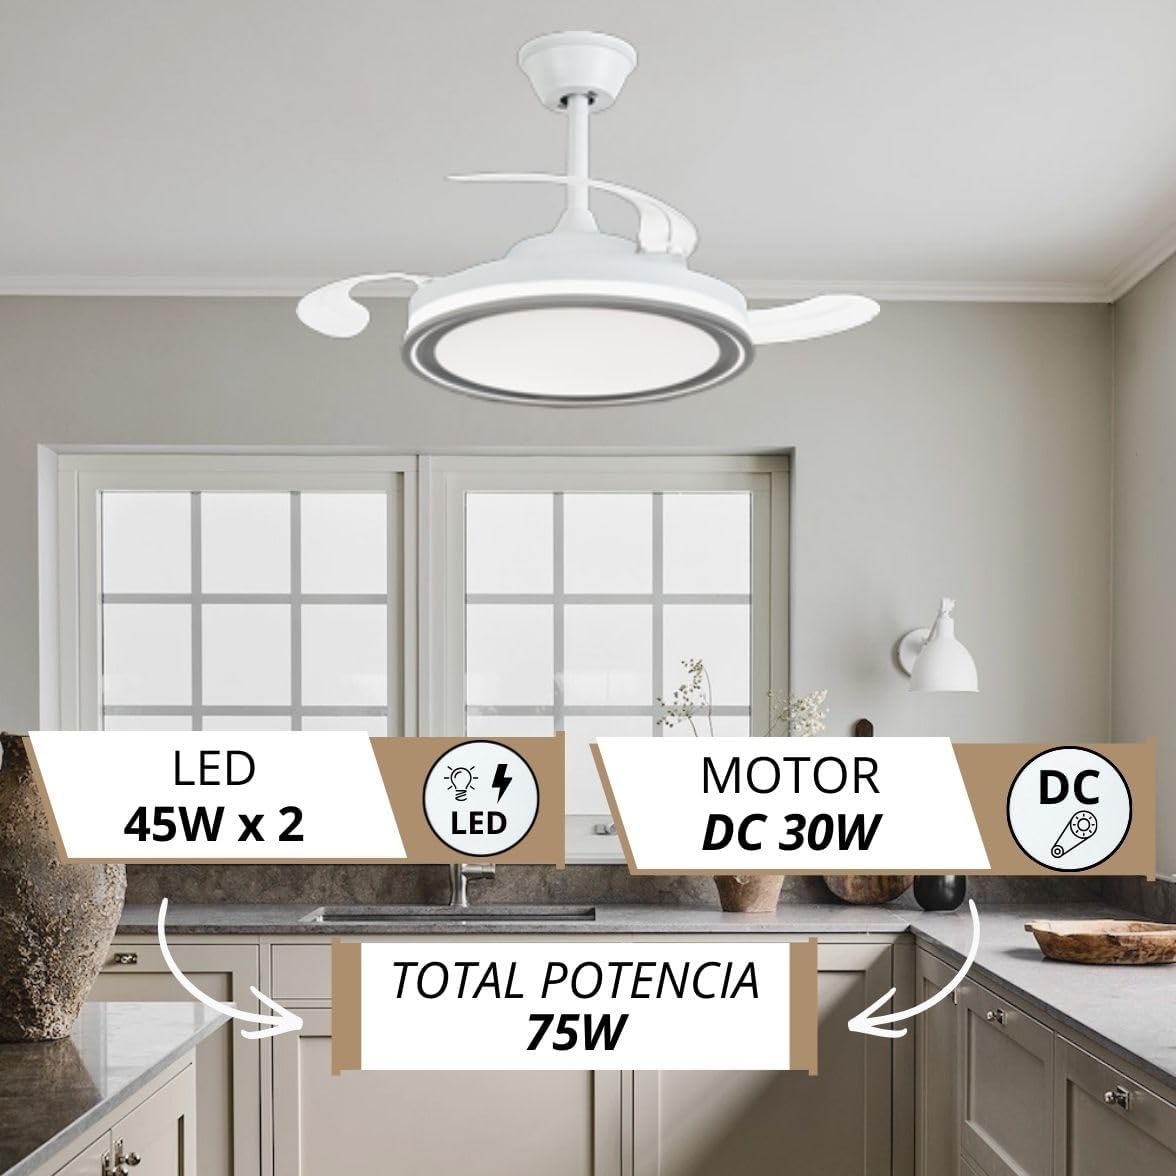
Image: The NARVI JAMAICA 8941 ceiling fan installed in a modern kitchen, highlighting its design and integrated LED light.
2. സുരക്ഷാ നിർദ്ദേശങ്ങൾ
- ഇൻസ്റ്റാളേഷൻ അല്ലെങ്കിൽ അറ്റകുറ്റപ്പണികൾക്ക് മുമ്പ് പ്രധാന സർക്യൂട്ട് ബ്രേക്കറിലെ വൈദ്യുതി ബന്ധം എല്ലായ്പ്പോഴും വിച്ഛേദിക്കുക.
- പ്രാദേശിക ഇലക്ട്രിക്കൽ കോഡുകൾക്ക് അനുസൃതമായി യോഗ്യതയുള്ള ഒരു ഇലക്ട്രീഷ്യനാണ് ഇൻസ്റ്റാളേഷൻ നടത്തേണ്ടത്.
- ഫാനിന്റെ ഭാരം (ഏകദേശം 7 കിലോഗ്രാം) മൗണ്ടിംഗ് ഘടനയ്ക്ക് താങ്ങാൻ കഴിയുമെന്ന് ഉറപ്പാക്കുക.
- Do not connect the fan to a dimmer switch; use only the provided remote control.
- ജോലി ചെയ്യുമ്പോൾ കൈകളും വസ്തുക്കളും ഫാൻ ബ്ലേഡുകളിൽ നിന്ന് അകറ്റി നിർത്തുക.
- ഈ ഫാൻ ഇൻഡോർ ഉപയോഗത്തിനായി മാത്രം രൂപകൽപ്പന ചെയ്തിട്ടുള്ളതാണ്.
3. പാക്കേജ് ഉള്ളടക്കം
Carefully unpack all components and check against the list below. If any items are missing or damaged, contact NARVI customer support.
- Ceiling Fan Motor Assembly with Retractable Blades
- എൽഇഡി ലൈറ്റ് കിറ്റ്
- റിമോട്ട് കൺട്രോൾ
- റിമോട്ട് കൺട്രോളിനുള്ള റിസീവർ
- മൌണ്ടിംഗ് ബ്രാക്കറ്റ്
- Downrods (10cm and 20cm)
- Canopy and Coupling Cover
- ഹാർഡ്വെയർ പായ്ക്ക് (സ്ക്രൂകൾ, വാഷറുകൾ, വയർ നട്ടുകൾ)
- ഇൻസ്ട്രക്ഷൻ മാനുവൽ
4 സ്പെസിഫിക്കേഷനുകൾ
| ഫീച്ചർ | വിശദാംശങ്ങൾ |
|---|---|
| ബ്രാൻഡ് | നർവി |
| മോഡലിൻ്റെ പേര് | JAMAICA 8941 |
| മോട്ടോർ തരം | ഡിസി മോട്ടോർ |
| മോട്ടോർ പവർ | 30W |
| LED ലൈറ്റ് പവർ | 45W x 2 (Adjustable) |
| വർണ്ണ താപനില | 3000K-6500K (ക്രമീകരിക്കാവുന്നത്) |
| വേഗതകളുടെ എണ്ണം | 6 |
| ശബ്ദ നില | 45 ഡെസിബെൽ |
| പരമാവധി ആർപിഎം | 253 ആർപിഎം |
| മെറ്റീരിയൽ | Acrylic, Polycarbonate, Metallic Frame |
| അളവുകൾ (D x W x H) | 107 cm (diameter with blades extended) x 50 cm (width) x 37 cm (height) |
| Downrod Lengths | 10 സെ.മീ, 20 സെ.മീ |
| സംരക്ഷണ റേറ്റിംഗ് | IP20 |
| നിയന്ത്രണ രീതി | റിമോട്ട് കൺട്രോൾ |
| പ്രത്യേക സവിശേഷതകൾ | Memory function, Timer, Winter/Summer mode |
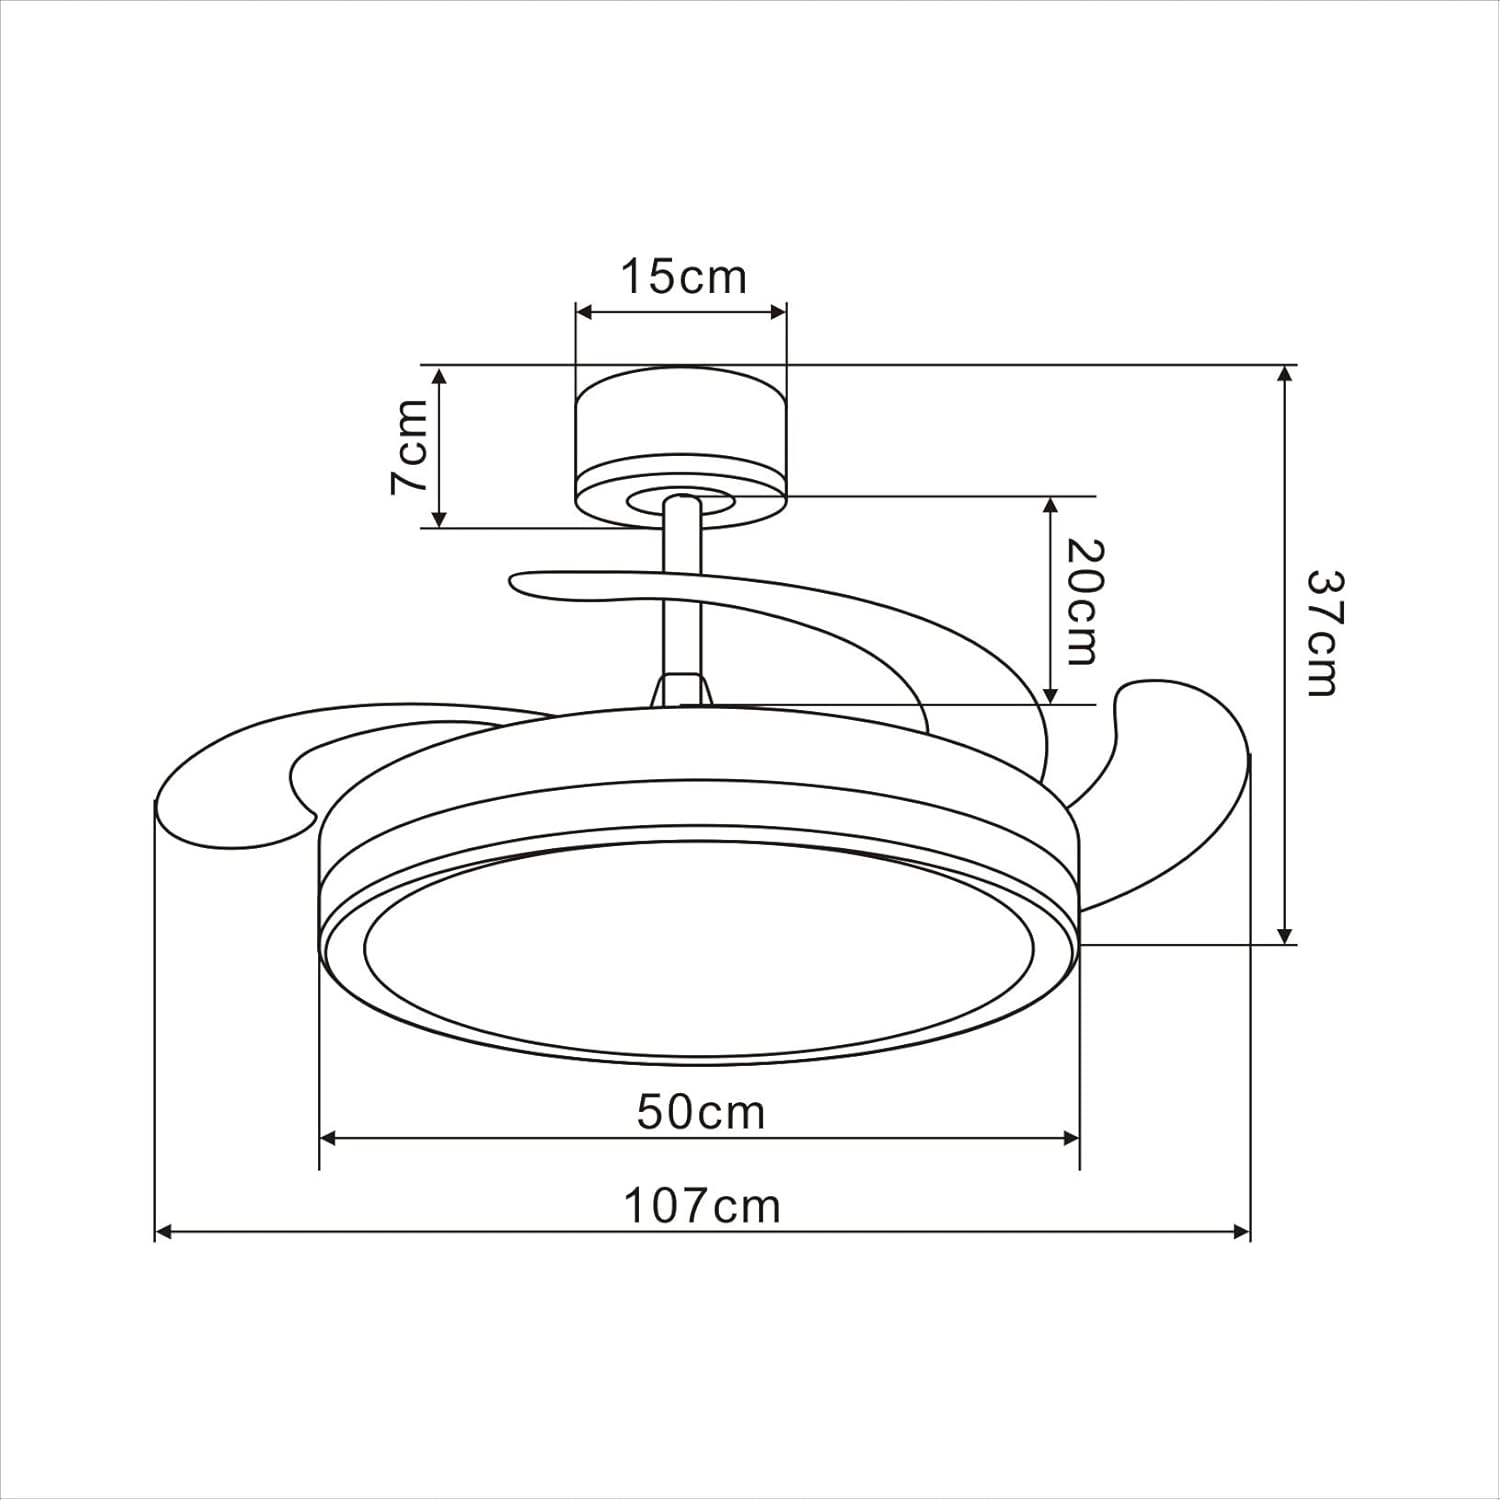
Image: Technical drawing illustrating the dimensions of the ceiling fan.
5. ഇൻസ്റ്റാളേഷൻ ഗൈഡ്
Follow these steps for proper installation. It is recommended to watch the installation video for visual guidance.
Video: Unboxing and initial assembly steps for the NARVI JAMAICA 8941 ceiling fan.
ഘട്ടം ഘട്ടമായുള്ള ഇൻസ്റ്റാളേഷൻ:
- Unboxing and Component Identification: Carefully open the packaging and lay out all components. Identify the main fan body, downrods, mounting bracket, canopy, remote control, and hardware. Refer to the 'Package Contents' section to ensure all parts are present.
- Prepare the Downrod: Thread the electrical wires from the fan motor through the chosen downrod (10cm or 20cm). Secure the downrod to the fan motor assembly using the provided pin and screw. Ensure the pin is fully inserted and the screw is tightened to prevent movement.
- മേലാപ്പ് അറ്റാച്ചുചെയ്യുക: Slide the canopy and coupling cover over the downrod. These will conceal the wiring and mounting bracket once the fan is installed on the ceiling.
- മൗണ്ടിംഗ് ബ്രാക്കറ്റ് ഇൻസ്റ്റാൾ ചെയ്യുക: Secure the mounting bracket to a ceiling joist or a suitable electrical junction box capable of supporting the fan's weight. Use appropriate screws and anchors (not included) for your ceiling type.
- ഫാൻ തൂക്കിയിടുക: Carefully lift the fan assembly and hang it onto the mounting bracket. Ensure the ball joint of the downrod is properly seated in the bracket.
- ഇലക്ട്രിക്കൽ കണക്ഷനുകൾ: Connect the fan's electrical wires to your household wiring. Typically, this involves connecting live (L), neutral (N), and ground (G) wires. Ensure all connections are secure using wire nuts.
- റിമോട്ട് റിസീവർ ഇൻസ്റ്റാൾ ചെയ്യുക: Insert the remote control receiver into the canopy. Connect the receiver's wires to the fan's wires and the household wiring as per the wiring diagram in the full manual.
- മേലാപ്പ് സുരക്ഷിതമാക്കുക: Slide the canopy up to the ceiling and secure it to the mounting bracket with the provided screws. Ensure all wires are tucked neatly inside the canopy.
- LED ലൈറ്റ് കിറ്റ് ഇൻസ്റ്റാൾ ചെയ്യുക: Connect the LED light kit wires to the corresponding wires on the fan motor assembly. Secure the LED light panel to the bottom of the fan.
- അന്തിമ പരിശോധനകൾ: Ensure all connections are tight and secure. Restore power at the circuit breaker and test the fan and light functions using the remote control.
6. പ്രവർത്തന നിർദ്ദേശങ്ങൾ
വിദൂര നിയന്ത്രണ പ്രവർത്തനങ്ങൾ:

Image: The remote control for the NARVI ceiling fan, displaying its various function buttons.
- പവർ ബട്ടൺ: Turns the fan and light ON/OFF.
- ഫാൻ സ്പീഡ് ബട്ടണുകൾ (1-6): ഫാൻ വേഗത 1 (ഏറ്റവും താഴ്ന്നത്) മുതൽ 6 (ഏറ്റവും ഉയർന്നത്) വരെ ക്രമീകരിക്കുന്നു.
- ലൈറ്റ് ഓൺ/ഓഫ് ബട്ടൺ: LED ലൈറ്റ് ഓൺ അല്ലെങ്കിൽ ഓഫ് ടോഗിൾ ചെയ്യുന്നു.
- വർണ്ണ താപനില ക്രമീകരണം: Changes the light color from warm white (3000K) to cool white (6500K). The fan remembers your last setting.
- പ്രകാശ തെളിച്ച ക്രമീകരണം: LED ലൈറ്റ് മങ്ങിക്കുകയോ പ്രകാശിപ്പിക്കുകയോ ചെയ്യുന്നു.
- Timer Function (2H/4H/8H): 2, 4, അല്ലെങ്കിൽ 8 മണിക്കൂറിനു ശേഷം ഫാൻ യാന്ത്രികമായി ഓഫാകാൻ സജ്ജമാക്കുന്നു.
ശൈത്യകാല/വേനൽക്കാല പ്രവർത്തനം:
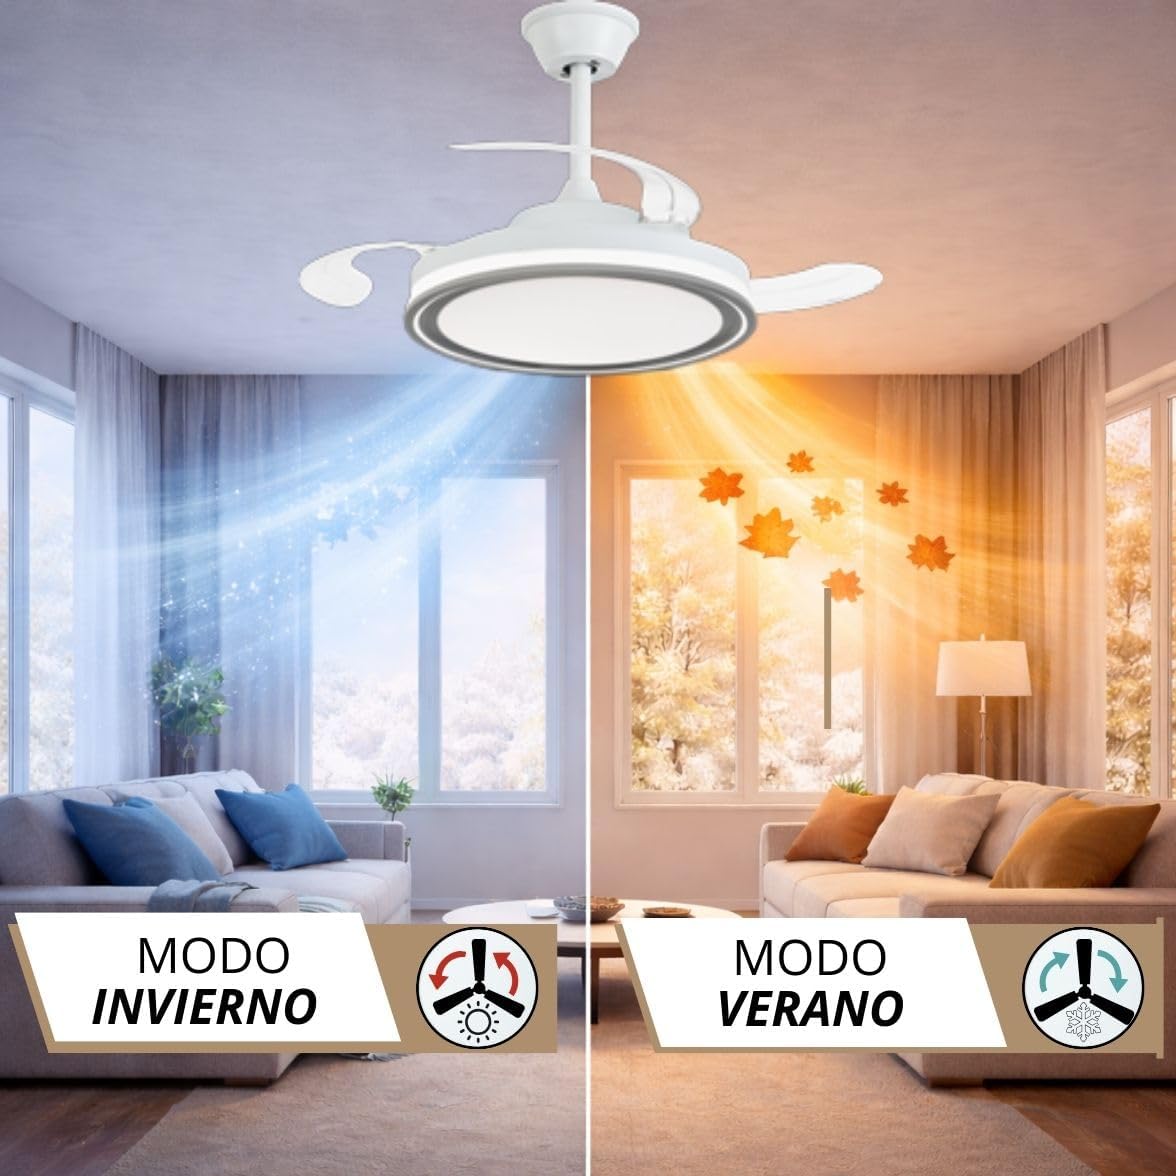
Image: Visual representation of the fan's winter and summer modes, showing air circulation patterns.
The fan features a reversible motor for year-round use. Use the dedicated button on the remote control to switch between modes:
- സമ്മർ മോഡ് (എതിർ ഘടികാരദിശയിൽ ഭ്രമണം): താഴേക്ക് വായുപ്രവാഹം സൃഷ്ടിക്കുന്നതിലൂടെ ഒരു തണുപ്പിക്കൽ പ്രഭാവം സൃഷ്ടിക്കുന്നു.
- വിന്റർ മോഡ് (ഘടികാരദിശയിൽ ഭ്രമണം): Creates an upward airflow, circulating warm air trapped near the ceiling, helping to distribute heat more evenly.
7. പരിപാലനം
- വൃത്തിയാക്കൽ: ഫാൻ വൃത്തിയാക്കാൻ, മൃദുവായ, ഡി തുണി ഉപയോഗിച്ച് തുടയ്ക്കുക.amp cloth. Do not use abrasive cleaners or solvents. Ensure power is disconnected before cleaning.
- ബ്ലേഡ് കെയർ: The transparent blades are designed to retract. Avoid applying excessive force to them.
- ലൂബ്രിക്കേഷൻ: ഡിസി മോട്ടോർ സ്ഥിരമായി ലൂബ്രിക്കേറ്റ് ചെയ്തിരിക്കുന്നതിനാൽ അധിക ഓയിലിംഗ് ആവശ്യമില്ല.
- മുറുക്കുക: Periodically check all screws and connections for tightness.
8. പ്രശ്നപരിഹാരം
| പ്രശ്നം | സാധ്യമായ കാരണം | പരിഹാരം |
|---|---|---|
| ഫാൻ ആരംഭിക്കുന്നില്ല | വൈദ്യുതി ഇല്ല; വയറിംഗ് അയഞ്ഞിരിക്കുന്നു; റിമോട്ട് കൺട്രോൾ ബാറ്ററി തീർന്നു. | സർക്യൂട്ട് ബ്രേക്കർ പരിശോധിക്കുക; വയറിംഗ് കണക്ഷനുകൾ പരിശോധിക്കുക; റിമോട്ട് കൺട്രോൾ ബാറ്ററി മാറ്റിസ്ഥാപിക്കുക. |
| വെളിച്ചം പ്രവർത്തിക്കുന്നില്ല | Loose wiring; LED driver issue. | ലൈറ്റ് കിറ്റ് വയറിംഗ് പരിശോധിക്കുക; LED ഡ്രൈവർ സംശയിക്കുന്നുവെങ്കിൽ ഉപഭോക്തൃ പിന്തുണയുമായി ബന്ധപ്പെടുക. |
| ഫാൻ കുലുങ്ങുന്നു | Loose mounting screws; Unbalanced blades. | Tighten all mounting screws; Ensure blades are securely attached and balanced. |
| റിമോട്ട് കൺട്രോൾ പ്രവർത്തിക്കുന്നില്ല | Battery dead; Receiver not paired. | ബാറ്ററി മാറ്റിസ്ഥാപിക്കുക; റിമോട്ട് ജോടിയാക്കൽ നിർദ്ദേശങ്ങൾക്ക് പൂർണ്ണ മാനുവൽ കാണുക. |
9. വാറൻ്റിയും പിന്തുണയും
Your NARVI ceiling fan comes with a manufacturer's warranty. Please refer to the warranty card included in your package for specific terms and conditions. For technical assistance, replacement parts, or any other inquiries, please contact NARVI customer support through the retailer where you purchased the product or visit the official NARVI webസൈറ്റ്.