
1. ആമുഖം
This manual provides detailed instructions for the setup, operation, and maintenance of your ATTACK SHARK G3PRO Wireless Gaming Mouse. Please read this manual thoroughly to ensure proper use and to maximize the performance of your device.
2. ഉൽപ്പന്ന സവിശേഷതകൾ
- Pro-Grade Precision & Speed: Equipped with PixArt PAW3311 gaming sensor and Broadcom BK52820 custom MCU for zero latency and pixel-perfect tracking. Adjustable DPI from 100 to 25000, polling rate up to 1000Hz, tracking speed 300IPS, and acceleration 40G.
- Legendary Durability & Tactile Clicks: Features genuine mechanical switches rated for 100 million clicks, providing crisp, responsive, and reliable feedback. The unique F-Switch encoder ensures precise scrolling.
- Ultra-Light Agility & Effortless Glide: Weighs only 59±3 grams, reducing wrist fatigue during extended use. Ergonomic design supports palm, claw, and finger grip styles. Double-layer premium mouse feet offer smooth, consistent glide.
- Seamless Tri-Mode Connectivity: Supports stable 2.4GHz wireless, low-latency Bluetooth, and reliable wired USB-C connections. Quickly switch between modes using the button at the bottom of the mouse. Compatible with desktops, laptops, smartphones, and tablets.
- AI Designed Driver: Utilizes an innovative cloud-driven webpage for customization, eliminating the need for traditional software installation. Allows for DPI adjustment, polling rate, competitive mode, customized buttons, macro recording, and personalized key mapping.
- RGB Backlight Charging Base: The included charging dock features cool RGB backlighting and allows for quick recharging. It also serves as a convenient passthrough for the 2.4GHz USB receiver, optimizing wireless signal reception.
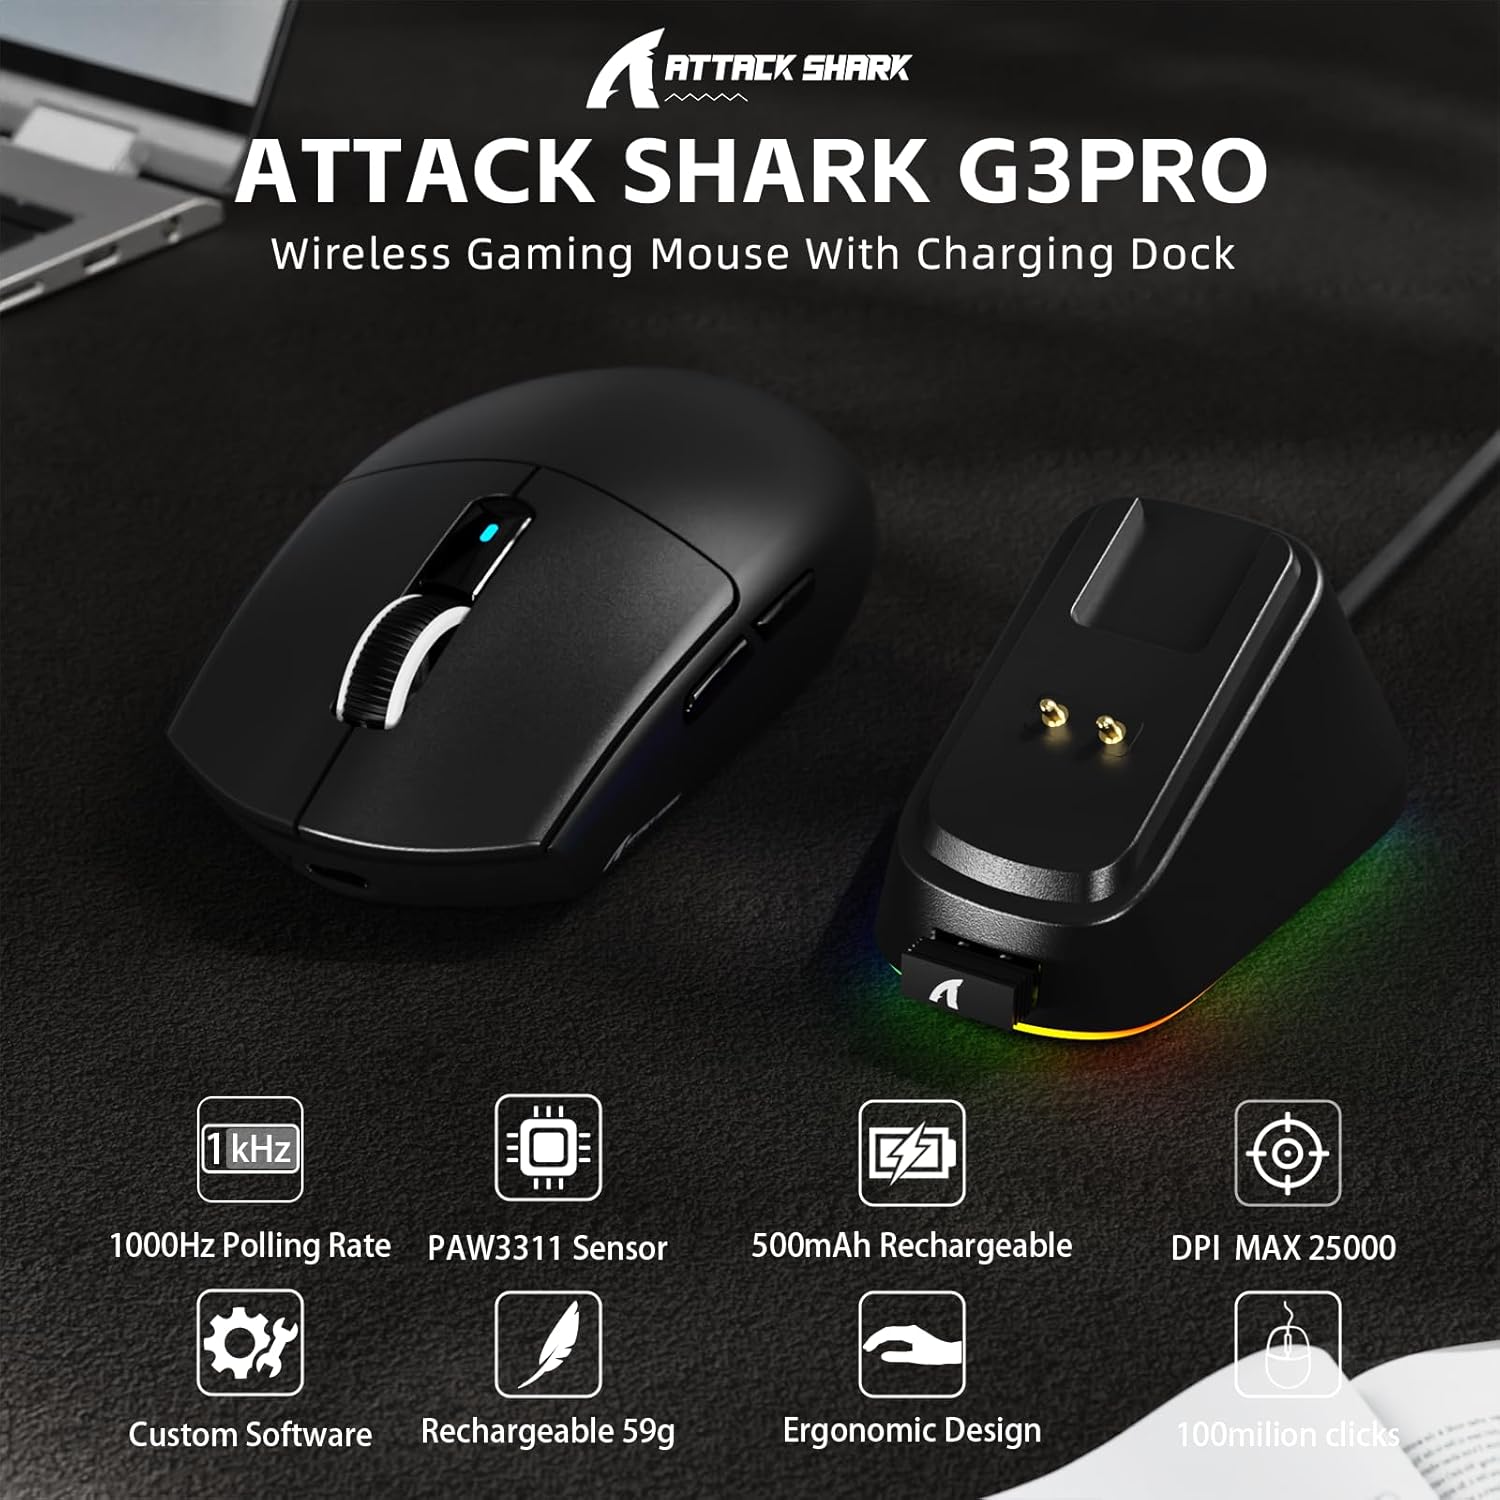
ചിത്രം: കഴിഞ്ഞുview of the ATTACK SHARK G3PRO mouse and its charging dock, highlighting key features such as 1000Hz polling rate, PAW3311 sensor, 500mAh rechargeable battery, 25K DPI, custom software, lightweight design, ergonomic shape, and 100 million click lifespan.

Image: A composite image detailing the internal components and features of the G3PRO mouse, including the 1K polling rate, PixArt PAW3311 sensor, Omron microswitches, 500mAh battery, BK52820 MCU, and the web driver interface.
3. പാക്കേജ് ഉള്ളടക്കം
നിങ്ങളുടെ പാക്കേജിൽ എല്ലാ ഇനങ്ങളും ഉണ്ടെന്ന് ദയവായി പരിശോധിക്കുക:
- ATTACK SHARK G3PRO Wireless Gaming Mouse
- RGB Backlight Charging Dock
- USB-C മുതൽ USB-A കേബിൾ വരെ
- USB 2.4GHz Wireless Receiver (often stored inside the mouse or dock)
- ഉപയോക്തൃ മാനുവൽ
- സ്റ്റിക്കറുകൾ (വ്യത്യാസപ്പെട്ടേക്കാം)
- Grip Tape (if included with your specific bundle)
4. സജ്ജീകരണം
4.1 മൗസ് ചാർജ് ചെയ്യുന്നു
Before first use, it is recommended to fully charge the mouse. Connect the USB-C cable to the charging dock and then to a power source (e.g., computer USB port, USB wall adapter). Place the mouse onto the charging dock. The RGB lighting on the dock will indicate charging status.

Image: The ATTACK SHARK G3PRO Wireless Gaming Mouse resting on its RGB backlight charging dock, connected via a USB-C cable. This illustrates the primary charging method.
4.2 മൗസ് ബന്ധിപ്പിക്കൽ
The G3PRO mouse offers three connectivity modes: 2.4GHz Wireless, Bluetooth, and USB-C Wired.

Image: A visual representation of the three connectivity options for the G3PRO mouse: USB-C Wired, 2.4G Wireless, and Bluetooth, showing the mouse interacting with a charging dock and a laptop.
4.2.1 2.4GHz വയർലെസ് കണക്ഷൻ
- Locate the USB 2.4GHz receiver. It may be stored in a compartment on the underside of the mouse or within the charging dock.
- Plug the receiver into an available USB port on your computer. For optimal signal, you can plug the receiver into the USB port on the charging dock, then connect the dock to your computer.
- Switch the mode selector switch on the bottom of the mouse to the '2.4G' position.
- The mouse should automatically connect. If not, press and hold the 'Left/Center/Right' buttons simultaneously for 3 seconds to force pairing.
4.2.2 ബ്ലൂടൂത്ത് കണക്ഷൻ
- Switch the mode selector switch on the bottom of the mouse to the 'BT' position.
- നിങ്ങളുടെ കമ്പ്യൂട്ടറിലോ ഉപകരണത്തിലോ, Bluetooth ക്രമീകരണങ്ങളിലേക്ക് പോയി Bluetooth പ്രവർത്തനക്ഷമമാക്കുക.
- ഇതിനായി തിരയുക new devices. The mouse should appear as 'ATTACK SHARK G3PRO' or similar.
- Select the mouse to pair. If prompted, press and hold the 'Left/Center/Right' buttons simultaneously for 3 seconds to force pairing.
4.2.3 USB-C വയർഡ് കണക്ഷൻ
- കേബിളിന്റെ USB-C അറ്റം മൗസുമായും USB-A അറ്റം നിങ്ങളുടെ കമ്പ്യൂട്ടറുമായും ബന്ധിപ്പിക്കുക.
- Switch the mode selector switch on the bottom of the mouse to the 'OFF' position (or ensure it's not in 2.4G/BT mode). The mouse will operate in wired mode.
5. പ്രവർത്തന നിർദ്ദേശങ്ങൾ
The ATTACK SHARK G3PRO mouse features multiple programmable buttons and adjustable settings for enhanced gaming and productivity.

Image: A detailed diagram illustrating the multi-functional buttons on the G3PRO mouse (Left Key, Right Key, Center Key, Backward Button, Forward Button, DPI Switch) and the components of the charging dock (Type C Port, Charging Thimble, Receiver Interface, RGB Light Switch, Receiver Organizer).
5.1 ബട്ടൺ പ്രവർത്തനങ്ങൾ
- ഇടത് കീ: പ്രാഥമിക ക്ലിക്ക് പ്രവർത്തനം.
- വലത് കീ: സെക്കൻഡറി ക്ലിക്ക് ഫംഗ്ഷൻ.
- Center Key (Scroll Wheel Click): Middle click function.
- ഫോർവേഡ് ബട്ടൺ: മുന്നോട്ട് നാവിഗേറ്റ് ചെയ്യുന്നു web ബ്രൗസറുകൾ അല്ലെങ്കിൽ ആപ്ലിക്കേഷനുകൾ.
- ബാക്ക്വേർഡ് ബട്ടൺ: പിന്നിലേക്ക് നാവിഗേറ്റ് ചെയ്യുന്നു web ബ്രൗസറുകൾ അല്ലെങ്കിൽ ആപ്ലിക്കേഷനുകൾ.
- DPI സ്വിച്ച്: പ്രീസെറ്റ് DPI ലെവലുകളിലൂടെ കടന്നുപോകുന്നു.
5.2 ഡിപിഐ അഡ്ജസ്റ്റ്മെന്റ്
Press the DPI switch button (located on the top of the mouse, usually behind the scroll wheel) to cycle through different DPI sensitivity levels. The default DPI settings can be customized using the AI Designed Driver.
5.3 RGB ലൈറ്റിംഗ് നിയന്ത്രണം
The RGB lighting on the charging dock can be controlled via a switch on the dock itself. The mouse's internal lighting (if any) and effects can be customized through the AI Designed Driver.
6. Customization (AI Designed Driver)
The ATTACK SHARK G3PRO features an innovative cloud-driven web driver for advanced customization. This eliminates the need for software installation.

Image: A screenshot of the web-based driver interface for the ATTACK SHARK G3PRO mouse, showing options for button settings, DPI settings, parameter settings, macro editing, and a personal center for customization.
6.1 ആക്സസ് ചെയ്യുന്നു Web ഡ്രൈവർ
To access the customization options, open a web ബ്രൗസറിലേയ്ക്ക് നാവിഗേറ്റ് ചെയ്യുക URL provided in the product documentation or on the official ATTACK SHARK website. The driver is designed to automatically identify your computer system.
6.2 ഇഷ്ടാനുസൃതമാക്കൽ ഓപ്ഷനുകൾ
വഴി web driver, you can:
- Adjust DPI levels and create custom profiles.
- Modify polling rate.
- Program individual buttons for various functions (e.g., multimedia controls, keyboard shortcuts, macros).
- Record and assign complex macros.
- Personalize key mapping.
- Configure competitive modes and other advanced functions.
7. ചാർജിംഗും ബാറ്ററിയും
The G3PRO mouse is equipped with a 500mAh built-in battery for extended playtime.
7.1 ചാർജിംഗ് രീതികൾ
- Via Charging Dock: Simply place the mouse onto the RGB backlight charging dock. The magnetic connection will ensure proper alignment and charging.
- USB-C കേബിൾ വഴി: Connect the mouse directly to your computer or a USB power adapter using the provided USB-C cable.
7.2 ബാറ്ററി നില
Battery status can typically be monitored through the AI Designed Driver interface or your operating system's Bluetooth device settings.
8. പരിപാലനം
To ensure the longevity and optimal performance of your ATTACK SHARK G3PRO mouse, follow these maintenance guidelines:
- വൃത്തിയാക്കൽ: Use a soft, dry cloth to wipe the mouse and charging dock. For stubborn dirt, a slightly damp cloth can be used, but ensure no moisture enters the device. Avoid harsh chemicals or abrasive materials.
- സെൻസർ പരിചരണം: മൗസിന്റെ അടിവശത്തുള്ള ഒപ്റ്റിക്കൽ സെൻസർ വൃത്തിയായും പൊടിയോ അവശിഷ്ടങ്ങളോ ഇല്ലാതെയും സൂക്ഷിക്കുക. ആവശ്യമെങ്കിൽ ഒരു കോട്ടൺ സ്വാബ് അല്ലെങ്കിൽ കംപ്രസ് ചെയ്ത വായു ഉപയോഗിക്കുക.
- സംഭരണം: ദീർഘനേരം ഉപയോഗിക്കാത്തപ്പോൾ, മൗസ് തണുത്തതും വരണ്ടതുമായ സ്ഥലത്ത് സൂക്ഷിക്കുക.
- തീവ്രമായ അവസ്ഥകൾ ഒഴിവാക്കുക: മൗസിനെ തീവ്രമായ താപനിലയിലോ, നേരിട്ടുള്ള സൂര്യപ്രകാശത്തിലോ, ഉയർന്ന ആർദ്രതയിലോ തുറന്നുകാട്ടരുത്.
9. പ്രശ്നപരിഹാരം
If you encounter issues with your ATTACK SHARK G3PRO mouse, please refer to the following common solutions:
| പ്രശ്നം | സാധ്യമായ കാരണം / പരിഹാരം |
|---|---|
| മൗസ് പ്രതികരിക്കുന്നില്ല (വയർലെസ്) |
|
| മൗസ് പ്രതികരിക്കുന്നില്ല (വയേർഡ്) |
|
| DPI ക്രമീകരണം പ്രവർത്തിക്കുന്നില്ല |
|
| ചാർജിംഗ് ഡോക്ക് RGB പ്രകാശിക്കുന്നില്ല |
|
| Mouse tracking issues / erratic movement |
|
10 സ്പെസിഫിക്കേഷനുകൾ
- ബ്രാൻഡ്: അറ്റാക്ക് സ്രാവ്
- മോഡൽ: G3PRO
- നിറം: കറുപ്പ്
- കണക്റ്റിവിറ്റി ടെക്നോളജി: 2.4Ghz വയർലെസ്, ബ്ലൂടൂത്ത്, USB-C വയേർഡ്
- ചലനം കണ്ടെത്തൽ സാങ്കേതികവിദ്യ: Optical (PixArt PAW3311 Sensor)
- DPI ശ്രേണി: 100 - 25000 DPI (ക്രമീകരിക്കാവുന്നത്)
- പോളിംഗ് നിരക്ക്: 1000Hz വരെ
- ട്രാക്കിംഗ് വേഗത: 300 ഐ.പി.എസ്
- ത്വരണം: 40G
- സ്വിച്ചുകൾ: Mechanical (100 million click lifespan)
- ബാറ്ററി ശേഷി: 500mAh
- ഭാരം: 59 ± 3 ഗ്രാം
- പ്രത്യേക സവിശേഷതകൾ: Ergonomic Design, Lightweight, Programmable Buttons, Rechargeable, Wireless, RGB Charging Dock
- പാക്കേജ് അളവുകൾ: 6.57 x 4.37 x 1.93 ഇഞ്ച്
- ഇനത്തിൻ്റെ ഭാരം: 8.1 ഔൺസ്
11. ഉൽപ്പന്ന വീഡിയോ
വീഡിയോ: ഒരു ഔദ്യോഗിക ഉൽപ്പന്ന വീഡിയോ പ്രദർശനംasing the ATTACK SHARK G3PRO Wireless Gaming Mouse, highlighting its design, features, and various color options. This video provides a dynamic view of the mouse and its charging dock.
12. വാറൻ്റിയും പിന്തുണയും
വാറന്റി വിവരങ്ങൾക്കും സാങ്കേതിക പിന്തുണയ്ക്കും, ദയവായി ഔദ്യോഗിക ATTACK SHARK കാണുക. webഉൽപ്പന്നം വാങ്ങിയ സ്ഥലത്ത് നിന്ന് വാങ്ങുകയോ റീട്ടെയിലറെ ബന്ധപ്പെടുകയോ ചെയ്യുക. വാറന്റി ക്ലെയിമുകൾക്കായി നിങ്ങളുടെ വാങ്ങിയതിന്റെ തെളിവ് സൂക്ഷിക്കുക.