
1. ഉൽപ്പന്നം കഴിഞ്ഞുview
The XDeer Biometric Smart Safe Model WX001 offers advanced security features combined with modern convenience. It provides multiple quick access methods, including biometric fingerprint, PIN code, and traditional key. Designed for discreet placement, it also integrates wireless charging for compatible devices and a clear LED display for time, temperature, and humidity.
പ്രധാന സവിശേഷതകൾ:
- Biometric Fingerprint Access: Rapid firearm access in less than 0.5 seconds.
- ഡിജിറ്റൽ കീപാഡ്: Secure PIN code entry (3 to 6 digits).
- Emergency Key Access: Traditional key override for backup.
- വയർലെസ് ചാർജിംഗ്: Integrated pad for phones and watches.
- സ്മാർട്ട് ഡിസ്പ്ലേ: 24/7 LED display showing time, temperature, and humidity.
- Auto-Open Drawer: Silent deployment in less than 0.5 seconds with internal illumination.
- സൈനിക-ഗ്രേഡ് നിർമ്മാണം: Durable build to resist prying.
- ബാറ്ററി ബാക്കപ്പ്: Ensures access during power outages.
- നിശ്ശബ്ദമായ മോഡ്: For discreet operation.
2. സജ്ജീകരണ ഗൈഡ്
2.1 അൺബോക്സിംഗും പ്രാരംഭ പരിശോധനയും
Upon receiving your XDeer Smart Safe, carefully remove all components from the packaging. Verify that all included items are present:
- Biometric Smart Safe (1)
- കീകൾ (2)
- ഉപയോക്തൃ മാനുവൽ (1)
- പവർ അഡാപ്റ്റർ (1)
- Data Line (1)
- Security Cable (1)
- വിപുലീകരണ സ്ക്രൂകൾ (2)
- Hexagonal Screwdriver (1)

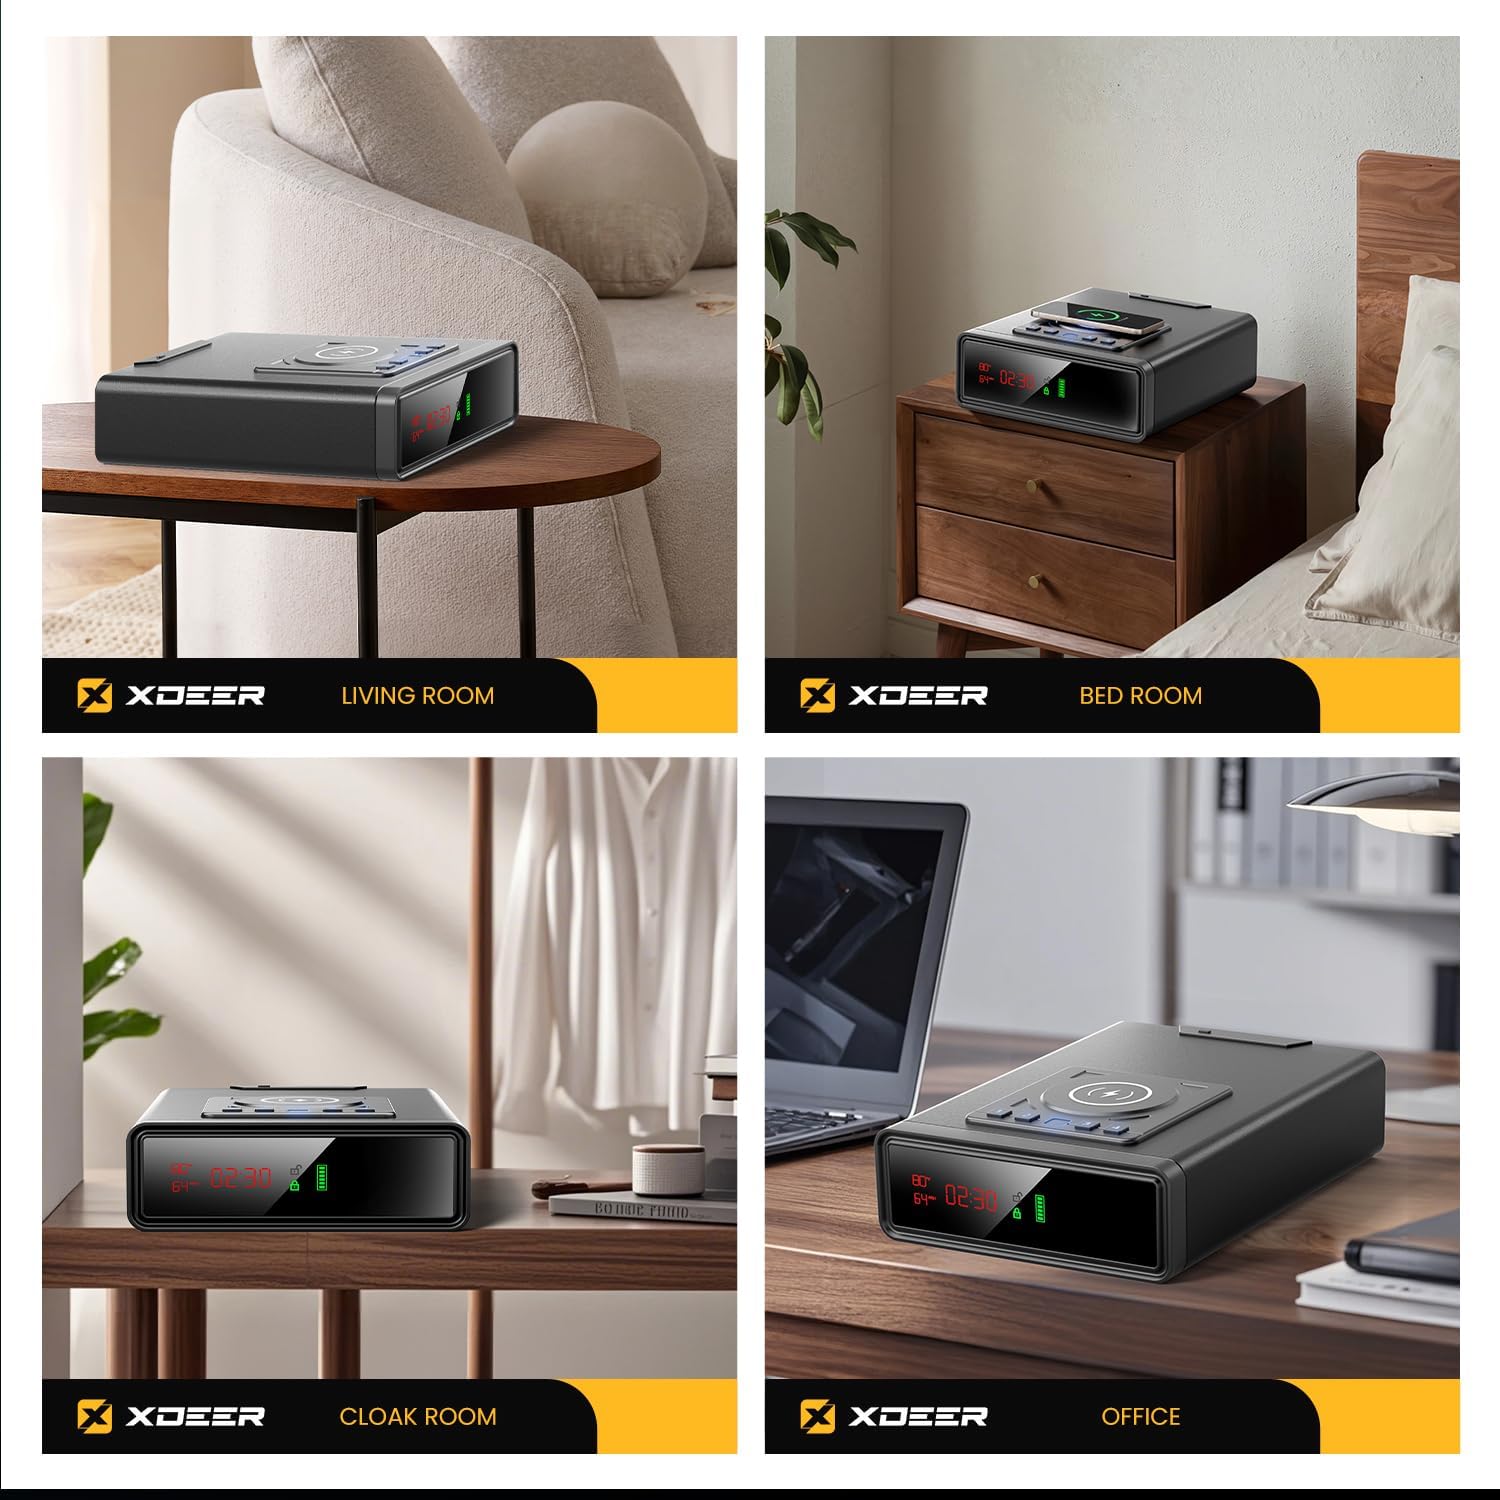
2.2 Powering the Safe
The safe can be powered via the included power adapter or with AAA batteries for backup.
- എസി പവർ: Connect the power adapter to the designated port at the back of the safe and plug it into a wall outlet.
- ബാറ്ററി ഇൻസ്റ്റാളേഷൻ: The safe requires four AAA batteries for operation without AC power and as a backup. Locate the battery compartment on the underside/back of the safe, open it, insert the batteries according to polarity markings, and close the compartment.

കുറിപ്പ്: The wireless charging function requires the safe to be connected to AC power. The battery power primarily supports the locking mechanism and LED display.
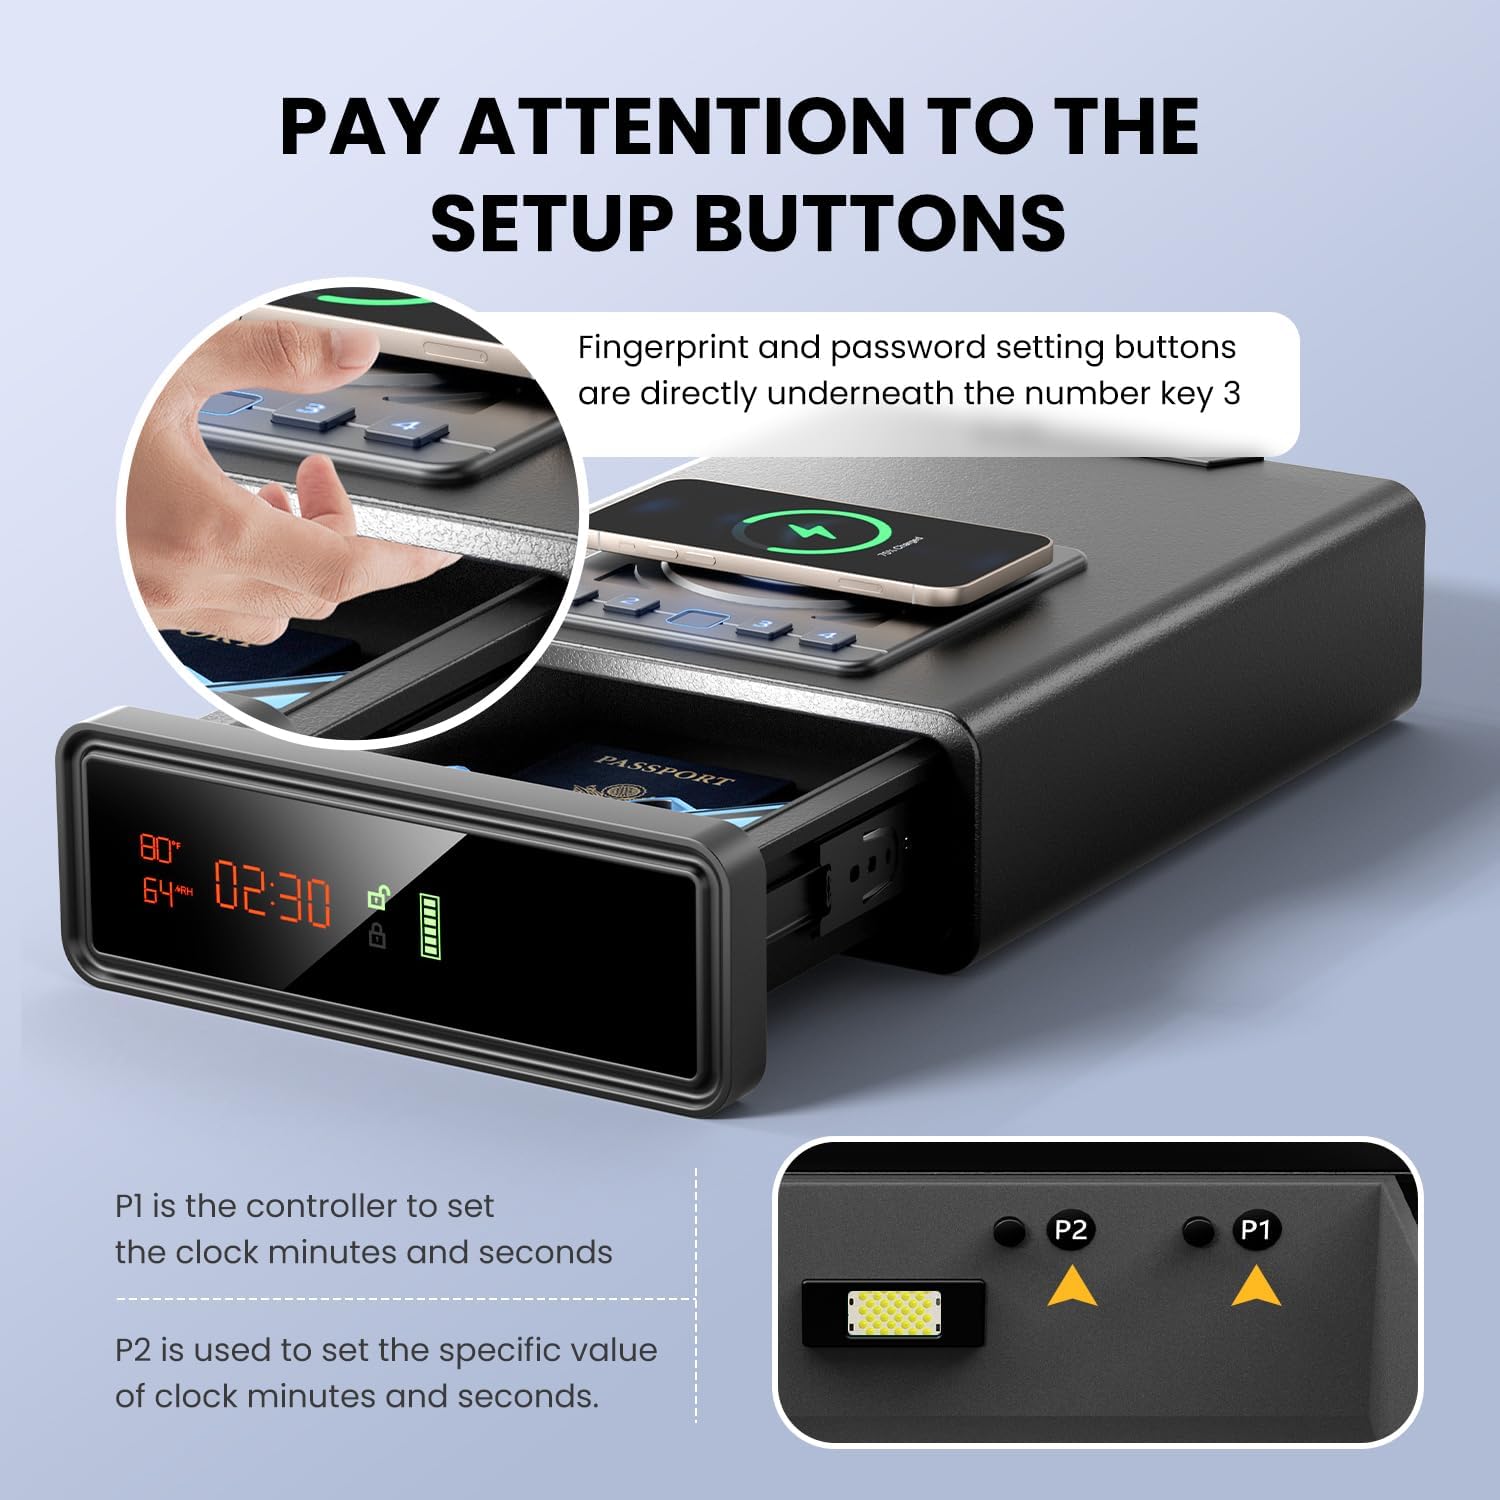
2.3 Setting the Clock and Environmental Display
The safe features an LED display that shows time, temperature, and humidity. To set the clock:
- Open the safe's drawer.
- Locate the P1 and P2 buttons inside the drawer, typically near the number 3 button on the keypad.
- Press and hold the P1 button until the time display starts flashing.
- Use the P2 button to adjust the minutes. Press P1 again to switch to adjusting the hours.
- Once the desired time is set, press and hold P1 again to save the settings and exit the clock setting mode.

The temperature and humidity readings are automatically displayed.
Video: This video demonstrates how to set the clock and adjust time settings using the P1 and P2 buttons located inside the safe drawer. It also shows the display of temperature and humidity.
3. പ്രവർത്തന നിർദ്ദേശങ്ങൾ
3.1 Setting a PIN Code
To set your personal PIN code (3 to 6 digits):
- Open the safe's drawer.
- Press and hold the button located directly underneath the number 4 on the keypad until the keypad lights start flashing.
- Enter your desired 3 to 6 digit PIN code using the number buttons (1-4).
- Press the button underneath number 4 again to confirm and save your PIN.
കുറിപ്പ്: The default PIN code is 1234. It is highly recommended to change this immediately after initial setup.
3.2 Registering a Fingerprint
The safe can store up to 30 fingerprints for quick biometric access.
- Open the safe's drawer.
- Press and hold the button located directly underneath the number 4 on the keypad for approximately 2 seconds until the fingerprint sensor light starts flashing.
- Place your finger on the fingerprint sensor. Lift and reposition your finger slightly, pressing it down firmly multiple times (typically 4 times) until the sensor indicates successful registration (e.g., a green light or a specific sound).
- ആവശ്യമെങ്കിൽ അധിക വിരലുകൾക്കായി പ്രക്രിയ ആവർത്തിക്കുക.
3.3 സേഫ് അൺലോക്ക് ചെയ്യുന്നു
You have three methods to unlock your safe:
- ഫിംഗർപ്രിന്റ്: Place your registered finger on the biometric sensor. The drawer will automatically open if the fingerprint is recognized.
- പിൻ കോഡ്: Enter your programmed PIN code using the keypad. The drawer will open automatically upon correct entry.
- എമർജൻസി കീ: In case of battery depletion or forgotten codes, insert one of the provided keys into the keyhole on the back of the safe and turn it to unlock.
Video: This video demonstrates the quick access features of the safe, including unlocking with a fingerprint and PIN code. It also shows the smooth auto-open drawer mechanism and the internal LED light.
3.4 വയർലെസ് ചാർജിംഗ്
The top surface of the safe features a wireless charging pad. Simply place your Qi-compatible smartphone or smartwatch on the charging pad to initiate charging. Ensure the safe is connected to AC power for this function to work.

4. പരിപാലനം
- വൃത്തിയാക്കൽ: സേഫിന്റെ പുറംഭാഗം മൃദുവായ, ഡി-ടച്ച് ഉപയോഗിച്ച് തുടയ്ക്കുക.amp തുണി. ഉരച്ചിലുകൾ ഉണ്ടാക്കുന്ന ക്ലീനറുകളോ ലായകങ്ങളോ ഒഴിവാക്കുക.
- ബാറ്ററി മാറ്റിസ്ഥാപിക്കൽ: Replace AAA batteries when the battery indicator on the LED display shows low power to ensure continuous operation of the lock mechanism and display.
- ഫിംഗർപ്രിന്റ് സെൻസർ: മികച്ച പ്രകടനത്തിനായി ഫിംഗർപ്രിന്റ് സെൻസർ വൃത്തിയായും വരണ്ടതുമായി സൂക്ഷിക്കുക.
5. പ്രശ്നപരിഹാരം
5.1 Safe Not Opening
- ബാറ്ററികൾ പരിശോധിക്കുക: Ensure the AAA batteries are correctly installed and not depleted. Replace if necessary.
- പവർ കണക്ഷൻ: Verify the AC adapter is securely plugged into both the safe and a working power outlet.
- Correct Fingerprint/PIN: Ensure you are using a registered fingerprint or the correct PIN code.
- എമർജൻസി കീ: Use the physical keys as a backup to open the safe.
5.2 വയർലെസ് ചാർജിംഗ് പ്രവർത്തിക്കുന്നില്ല
- എസി പവർ ആവശ്യമാണ്: Confirm the safe is connected to AC power. Wireless charging does not operate on battery power alone.
- ഉപകരണ അനുയോജ്യത: Ensure your device is Qi-compatible for wireless charging.
- ശരിയായ സ്ഥാനം: Position your device centrally on the charging pad.
- തടസ്സങ്ങൾ: Remove any thick cases or metal objects between your device and the charging pad.
5.3 Lockout Mode
If an incorrect PIN or fingerprint is entered multiple times, the safe may enter a lockout mode, preventing further attempts for a short period. During this time, the keypad may be unresponsive or flash a warning.
- കാത്തിരിക്കുക: Allow the lockout period to expire (typically 1 minute).
- പവർ സൈക്കിൾ: Disconnect and reconnect the power adapter, or remove and reinsert the batteries, to reset the system and exit lockout mode.
- എമർജൻസി കീ: Use the physical key to open the safe if immediate access is required during lockout.
Video: This video demonstrates how to set the PIN code and fingerprint, and how the safe responds to incorrect entries, including entering lockout mode. It also shows how to recover from lockout mode by power cycling or using the emergency key.
6. ഉൽപ്പന്ന സവിശേഷതകൾ
| ബ്രാൻഡ് | എക്സ്ഡീർ |
| മോഡൽ നമ്പർ | WX001 |
| ഉൽപ്പന്ന അളവുകൾ | 12.8"D x 9.5"W x 3.4"H |
| ശേഷി | 0.86 ക്യുബിക് അടി |
| ലോക്ക് തരം | Biometric, Combination Lock, Key |
| നിറം | കറുപ്പ് |
| മെറ്റീരിയൽ | #1 Top Safe (Steel) |
| പ്രത്യേക സവിശേഷതകൾ | Alarm System, Biometric Fingerprint, Combination Lock, Scratch Resistant, Sensor Light, Wireless Charging, Digital Clock, Humidity/Temperature Display |
| മൗണ്ടിംഗ് തരം | Under Counter Mount (with included expansion screws) |
7. വാറണ്ടിയും പിന്തുണയും
For warranty information and customer support, please refer to the official XDeer website or contact their customer service. If you lose your keys, visit www.xdeersafe.com and find the "Replace Keys" click portal for assistance.
XDeer is committed to providing reliable property protection solutions. Each XDeer safe undergoes strict quality control to ensure advanced encryption locks, fire-resistant structures, and waterproof design protection.